How to Create Whimsical Watercolour Creatures — Easy Step-by-Step Guide
Dive into the magical world of watercolour painting and bring your own unique creatures to life! This fun and accessible activity is perfect for family bonding.

Quick answer
To make whimsical watercolour creatures, you need watercolour paints, brushes, paper, and water, taking about 45 minutes. Start by sketching your creature's basic shape. This beginner-friendly activity has 10 steps and is perfect for families with children aged 6 and up.
What you need
Shop on Amazon · As an Amazon Associate we earn from qualifying purchases. Links above are affiliate links — we may earn a commission at no extra cost to you.
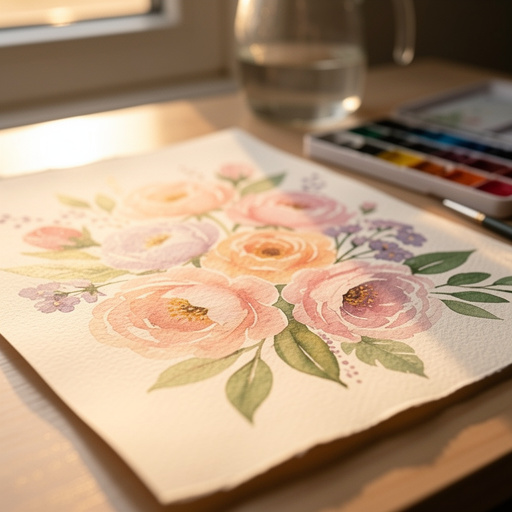
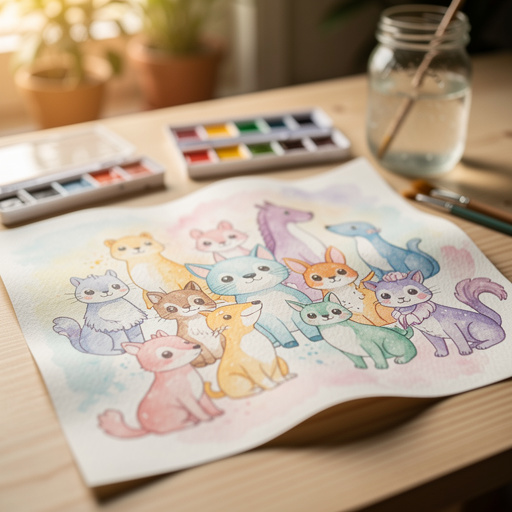
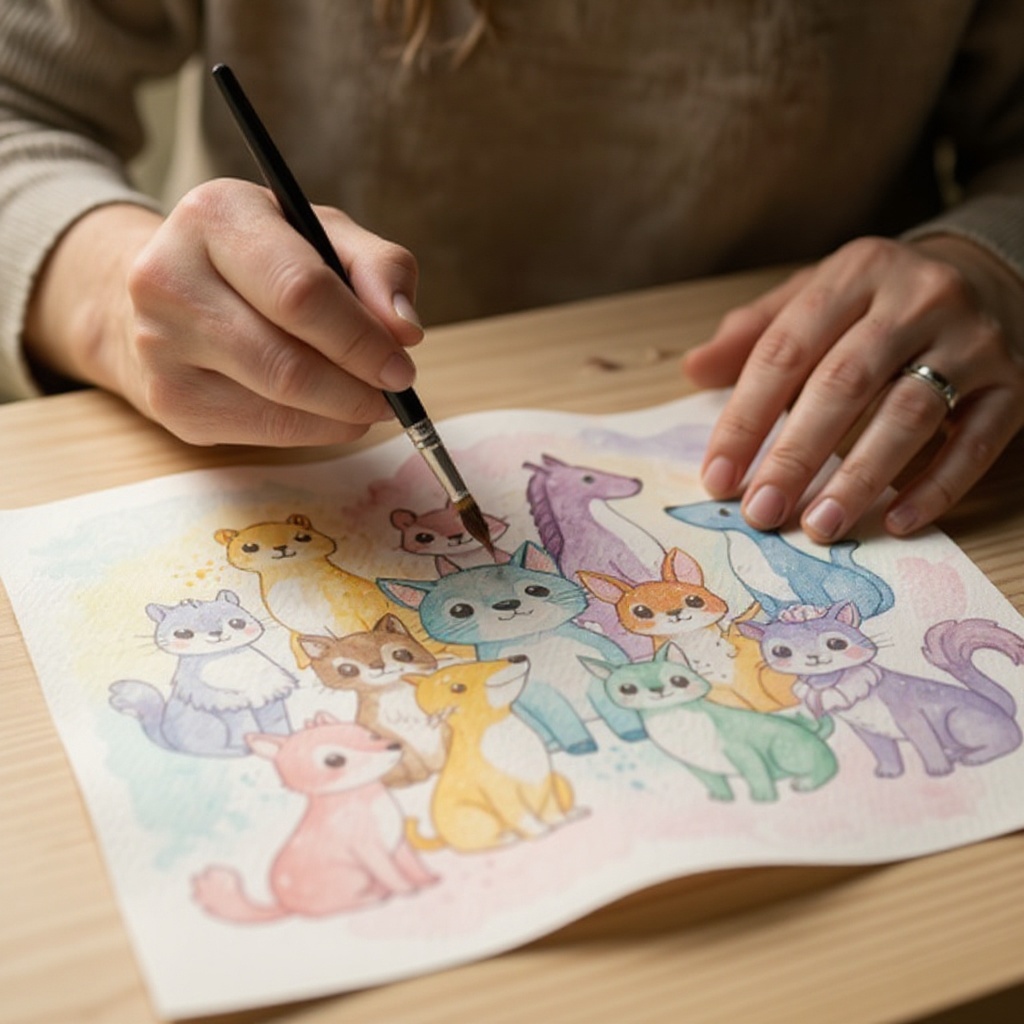
Embark on a delightful artistic journey with our Whimsical Watercolour Creatures tutorial! This project is a fantastic way to unleash your imagination and create charming, one-of-a-kind characters that leap right off the page. It's incredibly accessible, making it an ideal activity for families looking to bond over creativity, or for anyone seeking a relaxing and rewarding artistic escape. No prior painting experience is needed; just a willingness to play with color and form. Get ready to discover the joy of bringing your fantastical friends to life with the beautiful, flowing medium of watercolors.
On this page
Step-by-Step Instructions
- 1
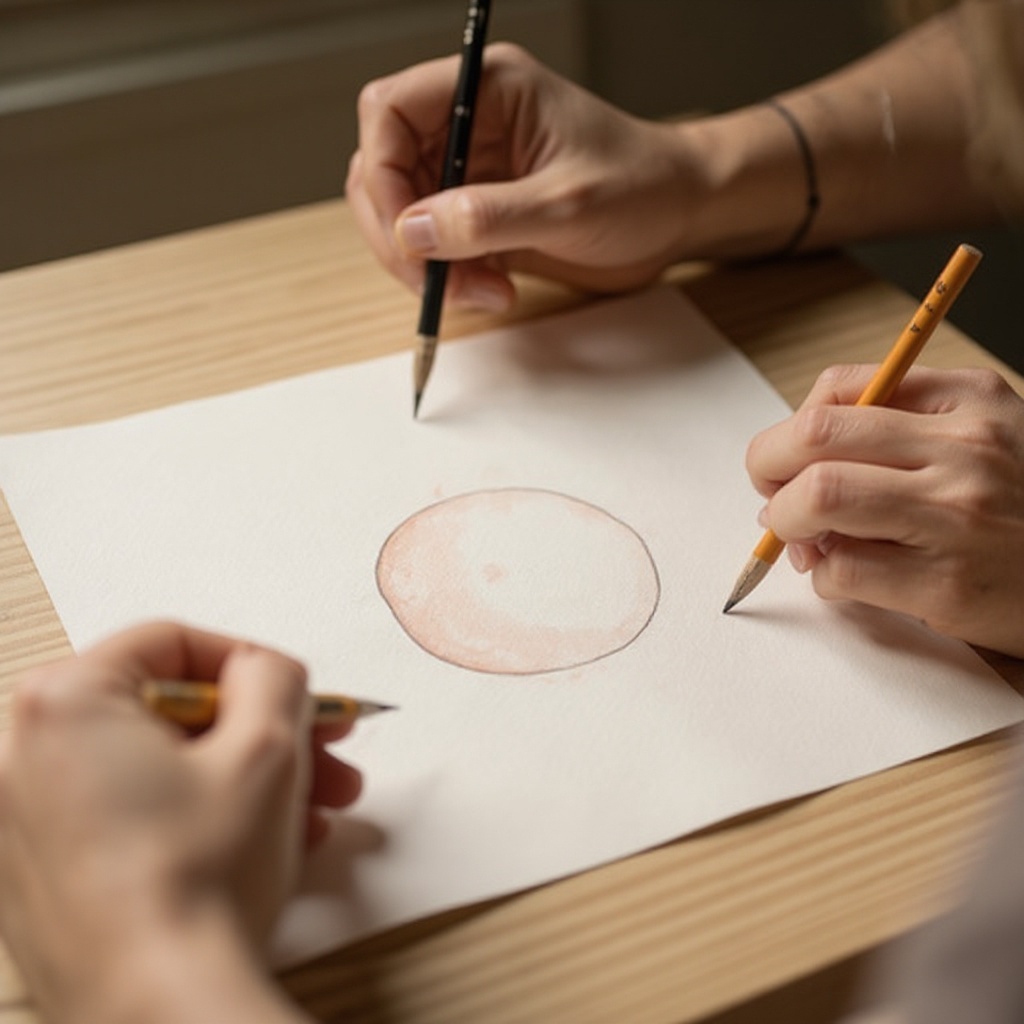
Lightly sketch the basic shape of your creature on the watercolor paper with a pencil. Think about simple, rounded forms for a whimsical feel. Avoid pressing too hard, as heavy pencil lines can be difficult to erase or may show through the watercolor. Consider abstract shapes that suggest a body, head, and perhaps some limbs, allowing your imagination to guide you towards something unique and playful.
- 2
Prepare your workspace by laying out your materials. Ensure you have your watercolor paints, brushes, water containers, paper towels, and paper readily accessible. If using a palette, add a few dollops of the colors you anticipate using, or have your pan paints open and ready. This organization will help maintain a smooth workflow as you paint.
- 3
Dip your largest brush (size 12) into the clean water and pick up a light wash of your desired base color for the creature's body. Load your brush with enough paint to create a fluid stroke, but not so much that it becomes overly saturated and drips uncontrollably. A good wash should be transparent and allow the paper's texture to show through.
- 4
Gently apply the color to the main body of your creature, leaving some white space for highlights. Work in smooth, sweeping motions, allowing the watercolor to flow naturally across the paper. Don't aim for perfect coverage; the beauty of watercolor often lies in its translucency and the areas where the white of the paper peeks through, suggesting light and form.
- 5
While the first layer is still damp, add a second, slightly darker color to areas like the head or limbs to create depth. This technique, known as 'wet-on-wet,' allows the colors to blend softly and organically into the first layer, creating beautiful gradients and subtle transitions. Observe how the colors mingle and decide if you want more or less blending.
- 6
Rinse your brush thoroughly in your rinsing water container until the water runs clear, then gently blot it on a paper towel. This is crucial for preventing color contamination and ensuring your next colors remain pure. Now, pick up a new color for details like eyes, spots, or stripes, using your clean water to create a manageable wash.
- 7
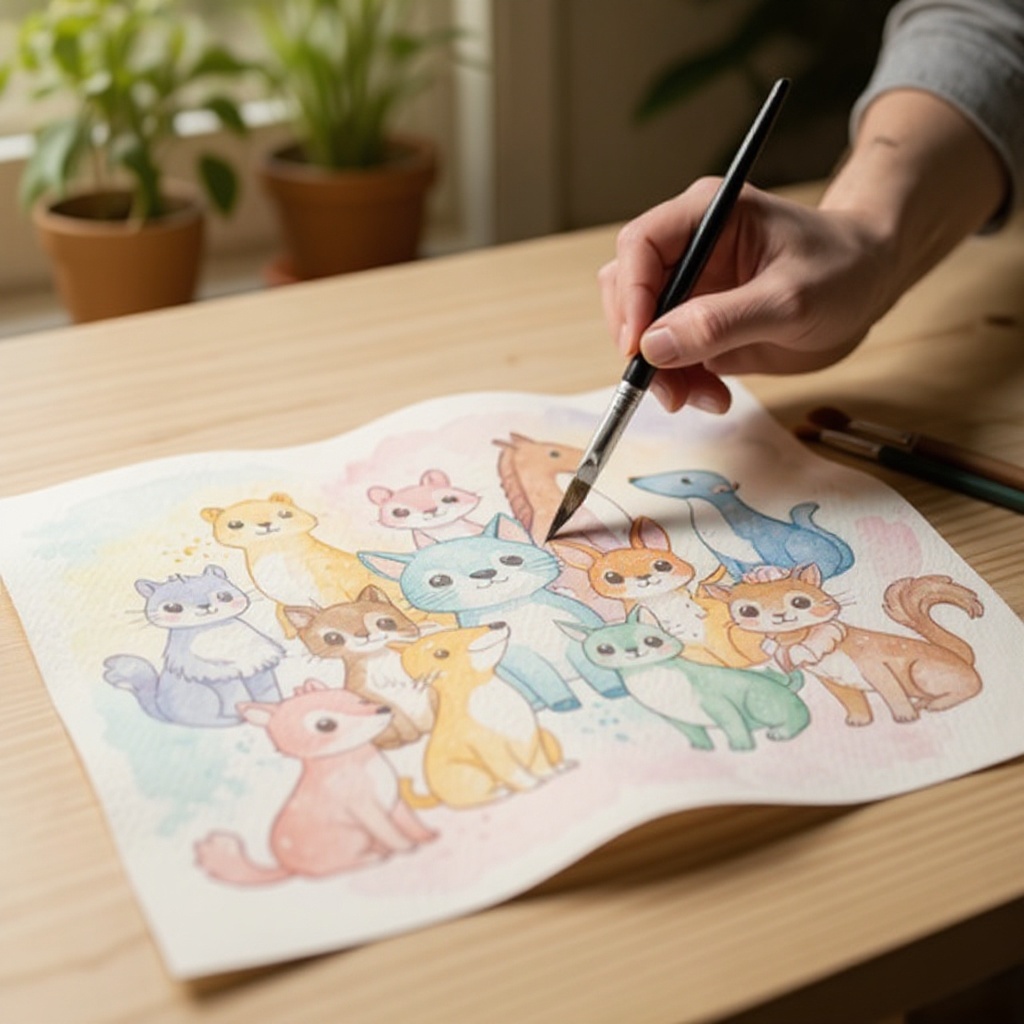
Use a smaller brush (size 8) to carefully add these details, allowing some colors to bleed slightly into the wet paint for a soft effect. For instance, if you're adding spots to a damp body, the edges of the spots will soften and feather out beautifully. If the paint is too dry, the details will appear sharper and more defined, so gauge the dampness of your paper accordingly.
- 8
If you want to add wings, fins, or extra limbs, sketch them lightly and paint them in a contrasting or complementary color. Consider how these elements will interact with the main body. You can paint them while the body is still slightly damp for a softer integration, or wait until it's drier for a more distinct separation of form.
- 9
Allow the main body of the creature to dry completely before adding any sharp outlines or very fine details. This is a critical step to prevent smudging and to ensure that your subsequent layers of paint or ink have a stable surface to adhere to. You can speed up drying with a hairdryer on a cool setting, but be careful not to blow the paint around.
- 10
Once dry, you can use a fine-tip black marker to add simple outlines to features like eyes or to define edges, if desired. This step is optional but can help your creature pop and give it a more graphic, illustrative feel. Keep the lines light and intentional, following the contours of your painted shapes. Alternatively, you could use a dark watercolor wash with a fine brush for a softer outline.
- 11
Consider adding highlights or small, bright accents to bring your creature to life. You can achieve this by using a clean, damp brush to lift some of the dried watercolor, or by applying a touch of white gouache or masking fluid to specific areas like the eyes or the tips of antennae. These small touches can make a big difference in the overall vibrancy and personality of your creature.
- 12
Let your whimsical watercolour creature dry completely, then admire your unique creation! Take a moment to appreciate the colors, the textures, and the character you've brought into existence. Each creature will be a testament to your individual artistic expression and a delightful reminder of the creative process.
- 13
Evaluate the overall composition and add any final touches. This might include a subtle shadow beneath your creature to ground it on the page, or a few stray dots of color to suggest a magical aura. Step back and look at your artwork from a distance to identify any areas that might benefit from a small enhancement.
- 14
Clean your brushes and workspace thoroughly. Proper cleanup ensures your tools are ready for your next creative endeavor and helps preserve their longevity. Rinse your brushes until all pigment is gone, reshape them, and allow them to dry completely before storing them.
Tips & Troubleshooting
- 1Don't be afraid to mix colors directly on the paper while the paint is wet. This creates beautiful, soft transitions and unexpected color blends that are characteristic of watercolor. Experiment with placing a wet color next to another wet color and observe how they interact, allowing for organic and ethereal effects.
- 2If you make a mistake, you can often lift some of the wet paint with a clean, damp brush or a paper towel. Gently dab the area where you want to remove paint; the amount you can lift will depend on the pigment's intensity and how long it's been on the paper. This technique is great for correcting errors or creating softer edges.
- 3Experiment with different creature shapes – think fluffy monsters, friendly aliens, or magical sea creatures! Let your imagination run wild and don't feel constrained by realistic forms. Combining elements from different animals or even inanimate objects can lead to truly unique and whimsical designs.
- 4For a more textured look, try dabbing the wet paint with a crumpled paper towel or a sponge. This technique can create interesting patterns and surfaces, mimicking fur, scales, or even rocky textures. Different types of paper towels and sponges will yield varied results, so feel free to explore.
- 5Consider using masking fluid to preserve white areas for highlights or intricate details before you start painting. Apply it with a brush or a dedicated applicator, let it dry completely, and then paint over it. Once your painting is dry, you can gently rub off the masking fluid to reveal the untouched white paper underneath.
- 6Layering colors is key to building depth and richness in watercolor. Apply light washes first and allow them to dry before adding darker or more opaque colors on top. This gradual build-up creates luminous effects and prevents your colors from becoming muddy.
- 7Don't be afraid to use a salt technique for interesting textures. Sprinkle coarse salt onto a wet wash of watercolor paint. As the paint dries, the salt crystals will absorb the moisture and pigment, creating starburst or crystalline patterns. Once completely dry, brush off the salt.
- 8If you're aiming for a specific look, like a smooth gradient, practice on a scrap piece of watercolor paper first. Understanding how your paints and brushes behave on the paper will give you more confidence when working on your final piece.
Related Activities You Might Enjoy
Frequently Asked Questions
What is the best paper for watercolor painting?
For watercolor painting, it's best to use paper specifically designed for watercolors, often called 'watercolor paper.' Look for a weight of at least 140lb (300gsm) as it can handle water without buckling or tearing easily. Watercolor paper comes in different textures: hot press is smooth, cold press has a medium texture (ideal for most beginners and this project), and rough paper has a pronounced texture. The weight and texture of the paper significantly impact how the paint behaves, allowing for better control over washes, blending, and preventing the paper from becoming waterlogged and distorted.
How do I prevent watercolor paint from looking muddy?
To avoid muddy colors, rinse your brush thoroughly between colors. Also, try not to overwork the paint by mixing too many colors together on the paper, especially when wet. Use a clean water container for rinsing and a separate one for clean water to dip your brush into when mixing colors. If colors start to look dull, it often means too many pigments have been combined or the paper has become oversaturated. Try lifting some color with a damp brush or starting a new layer with fresh, vibrant hues.
Can I use regular paper for watercolor painting?
While you can technically use regular paper, it's not ideal. Standard printer paper is thin and will likely warp, tear, or bleed through when wet, making it difficult to achieve good results. The water in watercolor paints will cause regular paper to buckle and pill, and the colors may not spread or blend as intended. For the best experience and results, investing in proper watercolor paper, even a small pad, is highly recommended for any watercolor project.
How long does watercolor paint take to dry?
Watercolor paint dries relatively quickly, usually within 5-15 minutes depending on the amount of water used and the humidity. Thicker applications or very wet washes may take longer. Factors like the type of paper, the amount of pigment and water in your mix, and the ambient temperature and humidity of your workspace all play a role. You can speed up the drying process using a hairdryer on a cool setting, but be cautious not to blow the wet paint around the paper.
What are the basic colors I should have in a watercolor set?
For a beginner's watercolor set, a basic assortment of 12-24 colors is usually sufficient to create a wide range of hues. Essential colors typically include primary colors (red, yellow, blue), secondary colors (orange, green, violet), earth tones (ochre, sienna, umber), black, and white (though white is often used as the absence of color on the paper). Having a good range of blues, reds, and yellows will allow you to mix almost any color you can imagine, giving you immense flexibility for your whimsical creatures.
How do I create soft, blended edges in watercolor?
To achieve soft, blended edges, paint 'wet-on-wet.' This means applying a wet wash of color onto an area of the paper that is already damp or onto another wet wash of paint. The colors will naturally bleed and merge into each other, creating a soft, diffused effect perfect for the bodies of whimsical creatures or for creating atmospheric backgrounds. Ensure your brush is loaded with enough water and paint for the colors to flow freely into one another.
What Next?
Congratulations on creating your very own whimsical watercolour creatures! The beauty of this project lies in its endless possibilities. Don't stop here; try creating a whole menagerie of fantastical beings, perhaps a family of your creatures, or even a scene for them to inhabit. You can experiment with different color palettes, add textures with salt or masking fluid, or even combine your watercolour paintings with other mediums like colored pencils for added detail. Once dry, these charming artworks can be proudly displayed in frames, used to embellish handmade cards, or gifted to loved ones, spreading a little bit of your unique magic wherever they go.
Free: 10 Paper Crafts Anyone Can Make in 5 Minutes
Get our beginner guide + new craft ideas weekly.
No spam. Unsubscribe anytime.
Did you complete this activity?