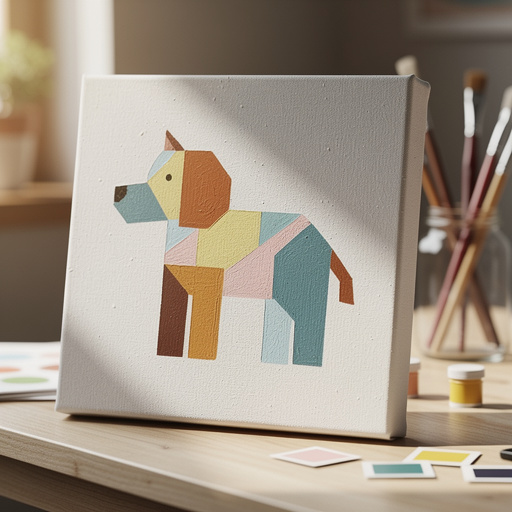
How to Create Canvas Color Block Animals — Easy Step-by-Step Guide
Discover how to bring your favorite animals to life with bold color blocks on canvas. A fun and engaging acrylic painting project for the whole family, perfect for beginners and kids aged 6 and up. This guide breaks down the process into simple, manageable steps, ensuring a beautiful and rewarding outcome.
Quick answer
To make Canvas Color Block Animals, you need acrylic paints, canvas, brushes, and masking tape, taking about 60 minutes for the painting process itself, plus drying time. Start by sketching your animal outline. This beginner-friendly activity has 12 detailed steps and is perfect for families with kids aged 6+. The result is a modern, eye-catching piece of art.
What you need
Shop on Amazon · As an Amazon Associate we earn from qualifying purchases. Links above are affiliate links — we may earn a commission at no extra cost to you.
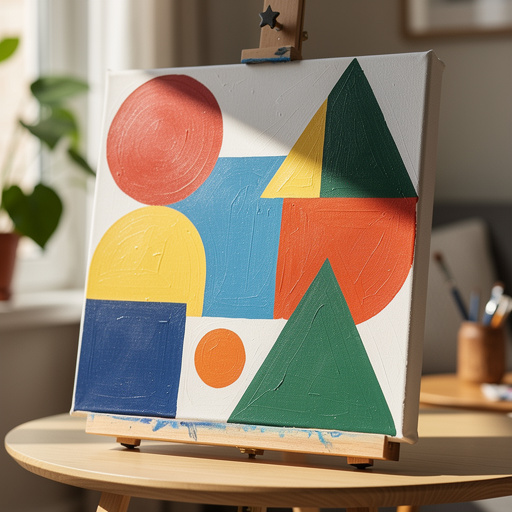
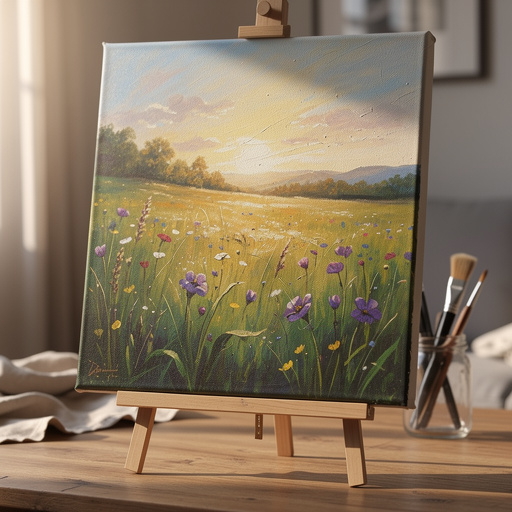
Unleash your inner artist and dive into the vibrant world of color blocking with this delightful Canvas Color Block Animals project! This technique is incredibly accessible, making it a fantastic choice for anyone looking to create striking artwork without needing advanced painting skills. The beauty of color blocking lies in its simplicity and the bold, graphic impact it creates, transforming a basic animal silhouette into a modern masterpiece. It's an ideal activity for families, art classes, or even a solo creative escape, offering a rewarding experience with stunning results that will brighten any space.
On this page
Step-by-Step Instructions
- 1
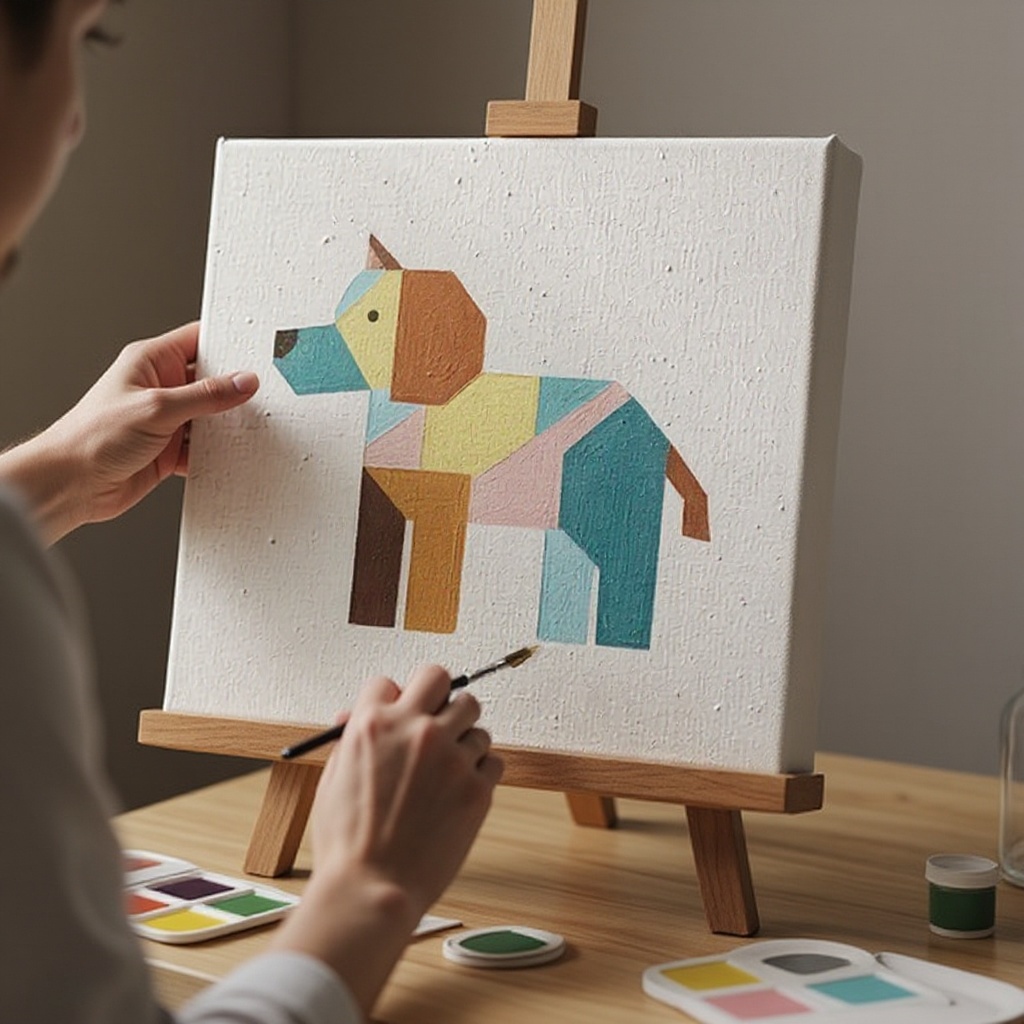
Lightly sketch a simple, bold animal outline on your canvas with a pencil. Think about iconic shapes that are easily recognizable, such as a cat's silhouette, a bird in flight, or a playful dog. Avoid intricate details at this stage; focus on clear, strong lines that will serve as your boundaries for color blocking.

- 2
Carefully outline your pencil sketch with masking tape, ensuring the tape adheres firmly to the canvas surface. Press down along the edges with your fingernail or a ruler to create a tight seal, which is crucial for preventing paint from seeping underneath and ensuring crisp, clean lines.
- 3
Select your first vibrant acrylic color and begin painting one distinct section of the animal. Use smooth, even strokes, and be mindful not to paint over the edges of the masking tape, as this can lead to bleeding and compromise the sharp definition of your color blocks.
- 4
While the first color is still wet or slightly tacky, choose a contrasting color and paint another section of the animal. This immediate application can sometimes help create a softer transition if desired, but for true color blocking, it's often best to let the first color dry slightly before applying the next adjacent color.
- 5
Continue this process, painting different sections of the animal with various colors. You can choose to leave some areas unpainted for now, allowing them to be filled in later with a background color or a final detail, which adds depth and planning to your composition.
- 6
Allow the applied paint to dry completely before proceeding to the next step. This drying period is absolutely crucial for achieving clean lines when removing the tape; rushing this step is a common mistake that leads to fuzzy edges and a less professional finish.
- 7
Once all painted sections are thoroughly dry to the touch, carefully and slowly peel off the masking tape. Pull the tape away at a 45-degree angle to minimize the risk of lifting any dried paint. You should now see crisp, defined lines separating your beautifully blocked colors.

- 8
Inspect your color-blocked animal for any areas where paint may have bled under the tape. If you find any imperfections, use a small, fine-tipped brush and a matching or slightly darker color to carefully touch up these areas for a polished look.
- 9
Use a small, detail brush to paint any remaining unpainted sections of the animal itself, or to add essential details like eyes, noses, or whiskers. These smaller elements can bring your color block animal to life and add personality.
- 10
If desired, now is the time to paint a simple background color behind your animal. This can be a solid contrasting color, a gradient, or even a subtle texture. Ensure this background paint also dries completely before adding any final touches.
- 11
Add any final touches, such as highlights on the animal's form to give it dimension, or subtle shading if you're aiming for a slightly more realistic feel within the color block style. These small additions can significantly enhance the overall impact of your artwork.
- 12
Step back and admire your completed Canvas Color Block Animal! You've successfully transformed a simple outline into a striking piece of modern art using bold colors and clean lines.
Tips & Troubleshooting
- 1For the sharpest possible lines, ensure your masking tape is pressed down extremely firmly before you begin painting. A good seal is paramount. If you're particularly concerned about paint bleeding, a pro tip is to 'seal' the edge of the tape first by painting a very thin layer of the background color (or white) along the tape line. Let this seal coat dry completely, then proceed with your main colors; this creates a barrier that prevents the bolder colors from seeping underneath.
- 2Don't be afraid to experiment with a wide array of animal shapes and color combinations. You can create abstract interpretations of animals by using unexpected color pairings or geometric shapes within the animal's form. Alternatively, for a more cohesive and sophisticated look, try limiting yourself to a specific color palette, such as analogous colors or a monochromatic scheme.
- 3While the goal of color blocking is distinct sections, don't be overly stressed if a tiny bit of color overlaps slightly, especially if you're aiming for a slightly more blended or organic feel. However, for true, crisp color blocking, it's essential to ensure adjacent sections are fully dry before painting them to prevent colors from mixing unintentionally.
- 4Clean up your brushes, palette, and workspace immediately after you finish painting. Acrylic paint dries very quickly and can become incredibly difficult to remove once hardened, potentially ruining your brushes and making your workspace a sticky mess. A quick rinse and wipe-down will save you a lot of trouble later.
- 5Consider the size and type of canvas you are using. Smaller canvas panels are excellent for practicing or for creating a series of smaller pieces, while larger stretched canvases can make a bolder statement. The texture of the canvas can also influence how the paint applies and looks.
- 6When choosing your colors, think about the mood you want to evoke. Bright, saturated colors will create a lively and energetic piece, while more muted or pastel tones can result in a softer, more serene artwork. Contrasting colors will make your animal pop, while analogous colors will create a harmonious feel.
- 7If you're painting with younger children, simplify the animal shapes even further and focus on the fun of applying paint. Pre-applying the tape for them can also make the process smoother and more enjoyable, allowing them to concentrate on the coloring aspect.
- 8Once your artwork is completely dry, consider applying a layer of acrylic varnish or sealant. This will protect the paint from dust and UV damage, and can also enhance the vibrancy of the colors, giving your finished piece a professional sheen.
Related Activities You Might Enjoy
Frequently Asked Questions
What are the best acrylic painting ideas for beginners on canvas?
For beginners exploring acrylics on canvas, simple color blocking, abstract shapes, dot art, and easy animal outlines are excellent starting points. Focusing on bold shapes and a limited, manageable color palette can make the process less intimidating and more enjoyable. Projects like this Canvas Color Block Animal guide are perfect because they break down complex ideas into simple, achievable steps. Another great beginner idea is creating a simple landscape with distinct areas of color, like a sky, mountains, and a foreground, using tape to define these sections. The key is to choose subjects that allow for clear separation of colors and forms, building confidence with each brushstroke.
How can I make my acrylic paintings look more professional?
To elevate your acrylic paintings and give them a more professional appearance, focus on several key elements. Firstly, ensure you have clean, crisp lines, which can be achieved through careful taping or precise brushwork. Secondly, pay attention to your color choices; understanding color theory and creating harmonious or impactful palettes makes a significant difference. Consistent and controlled brushwork, whether smooth or textured, also contributes to a polished look. Using quality materials, practicing blending techniques effectively, and adding finishing touches like a well-applied varnish can further enhance the professionalism of your artwork, giving it depth and longevity.
What are some easy acrylic painting ideas for kids?
Acrylic painting offers a wealth of easy and engaging ideas for children. Fingerprint art, where kids use their fingers as stamps to create patterns or figures, is always a hit. Splatter painting, where paint is flicked or dripped onto the canvas, allows for spontaneous and exciting abstract results. Simple landscapes using bold colors, like a bright sun, blue sky, and green grass, are also very accessible. Creating abstract designs with sponges, cardboard edges, or even salt for texture can be incredibly fun. The most important aspect for kids' art is to focus on the enjoyment of the process and the freedom of expression over achieving perfection.
Can I use masking tape for acrylic painting on canvas?
Yes, masking tape, also commonly known as painter's tape, is an excellent tool for creating crisp lines and defined shapes in acrylic painting on canvas. Its adhesive properties allow it to stick securely to the canvas surface, acting as a barrier to prevent paint from bleeding into adjacent areas. For the best results, ensure the tape is pressed down firmly along all edges before you start painting. This creates a tight seal that minimizes the chances of paint seeping underneath, leading to sharp, clean divisions between your colors and a more professional-looking finish.
How long does it take to complete a Canvas Color Block Animal painting?
The actual painting time for a Canvas Color Block Animal can be surprisingly quick, often around 60 minutes for the core application of colors. However, this doesn't include the crucial drying time between layers and before tape removal. Depending on the humidity and thickness of the paint, drying can take anywhere from 30 minutes to a few hours per layer. If you're adding a background and multiple color blocks, you might spend an hour painting, but the entire project, including drying and final touches, could span several hours spread over a day or two. It's a project that rewards patience.
What kind of canvas is best for this project?
For this Canvas Color Block Animal project, both canvas panels and stretched canvases work wonderfully. Canvas panels are typically more affordable and easier to store, making them ideal for beginners, practice sessions, or when creating multiple pieces. Stretched canvases offer a more traditional art presentation and can provide a slightly more robust surface. For this technique, a smooth to medium-textured canvas is generally preferred, as it allows the tape to adhere well and the paint to be applied evenly. Avoid heavily textured canvases, as they can make it difficult to achieve clean lines with the tape.
What Next?
Congratulations on creating your vibrant Canvas Color Block Animal! This project is wonderfully versatile; consider exploring different animal species, experimenting with gradients within your color blocks, or even adding subtle textures with a palette knife. For a cohesive gallery wall, try painting a series of animals in complementary color schemes. Once dry, your artwork can be displayed using command strips for a damage-free option, or you can add a sawtooth hanger for a more traditional approach. Store finished pieces carefully to avoid smudging or damage, and get ready to embark on your next colorful creation!
Free: 10 Paper Crafts Anyone Can Make in 5 Minutes
Get our beginner guide + new craft ideas weekly.
No spam. Unsubscribe anytime.
Did you complete this activity?