How to Make Valentine's Day Cards with Heart String Art — Easy Step-by-Step Guide
Surprise your loved ones with handmade Valentine's Day cards featuring beautiful heart string art. This engaging craft is perfect for 10-year-olds looking for a creative, screen-free activity. Learn how to create stunning, personalized cards that are sure to be cherished.
Quick answer
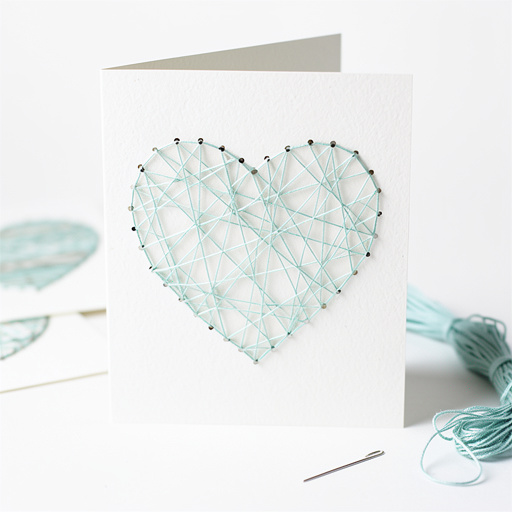
To make Valentine's Day cards with heart string art, you need cardstock, embroidery floss, a needle, and about 30 minutes. Start by drawing a heart outline on your cardstock. This beginner-friendly activity has 10 steps and is perfect for 10-year-olds.
What you need
Shop on Amazon · As an Amazon Associate we earn from qualifying purchases. Links above are affiliate links — we may earn a commission at no extra cost to you.
Valentine's Day is the perfect occasion to show the people in your life how much you care, and what better way to do that than with a handmade gift? These heart string art cards offer a unique and beautiful way to express your affection. This project is wonderfully engaging for creative minds, especially those around 10 years old, providing a delightful screen-free activity that results in a truly special keepsake. The tactile nature of string art combined with the personal touch of a handwritten message makes these cards stand out from the crowd, offering a rewarding crafting experience for both the maker and the recipient.
On this page
Step-by-Step Instructions
- 1
Begin by preparing your card base. Take each sheet of 5x7 inch cardstock and fold it precisely in half, ensuring the fold is at the top to create a standard greeting card format. Gently crease the fold with your fingernail or a ruler to make it sharp and neat.
- 2
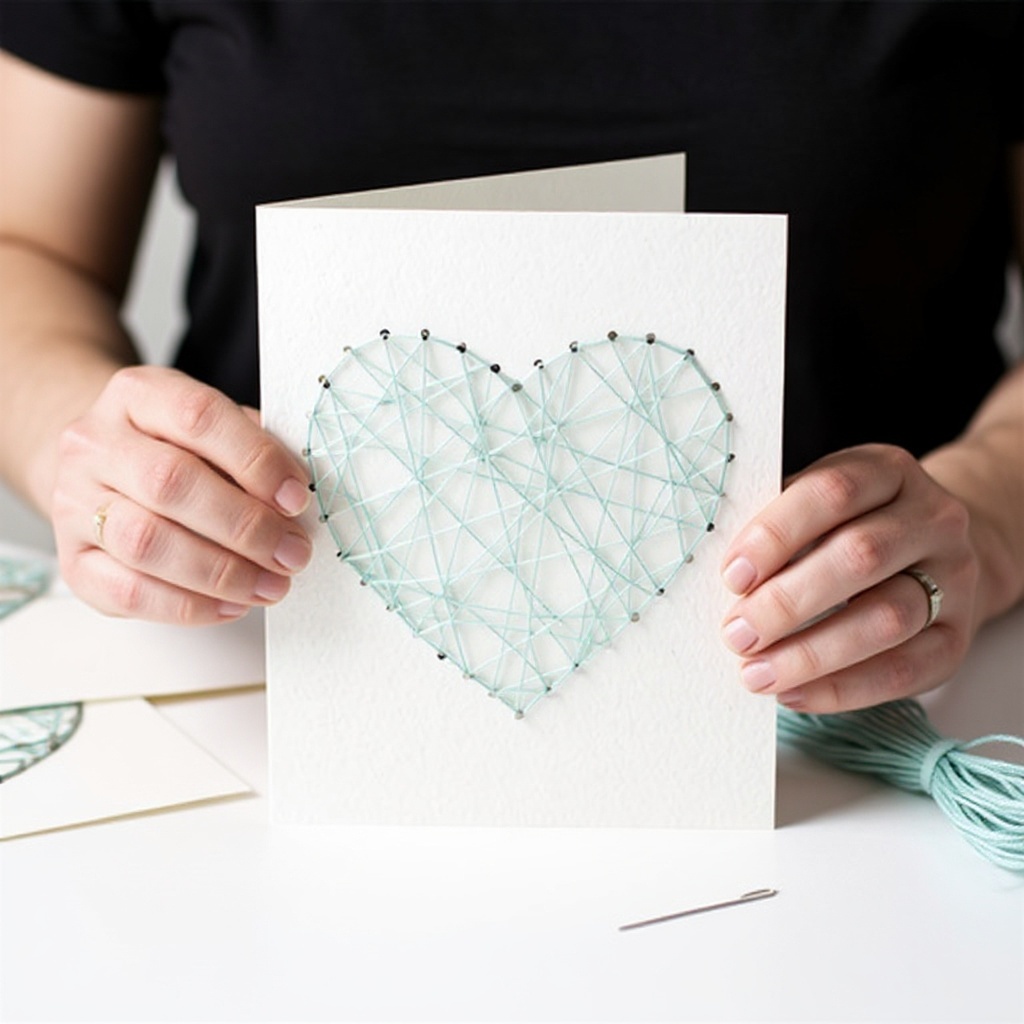
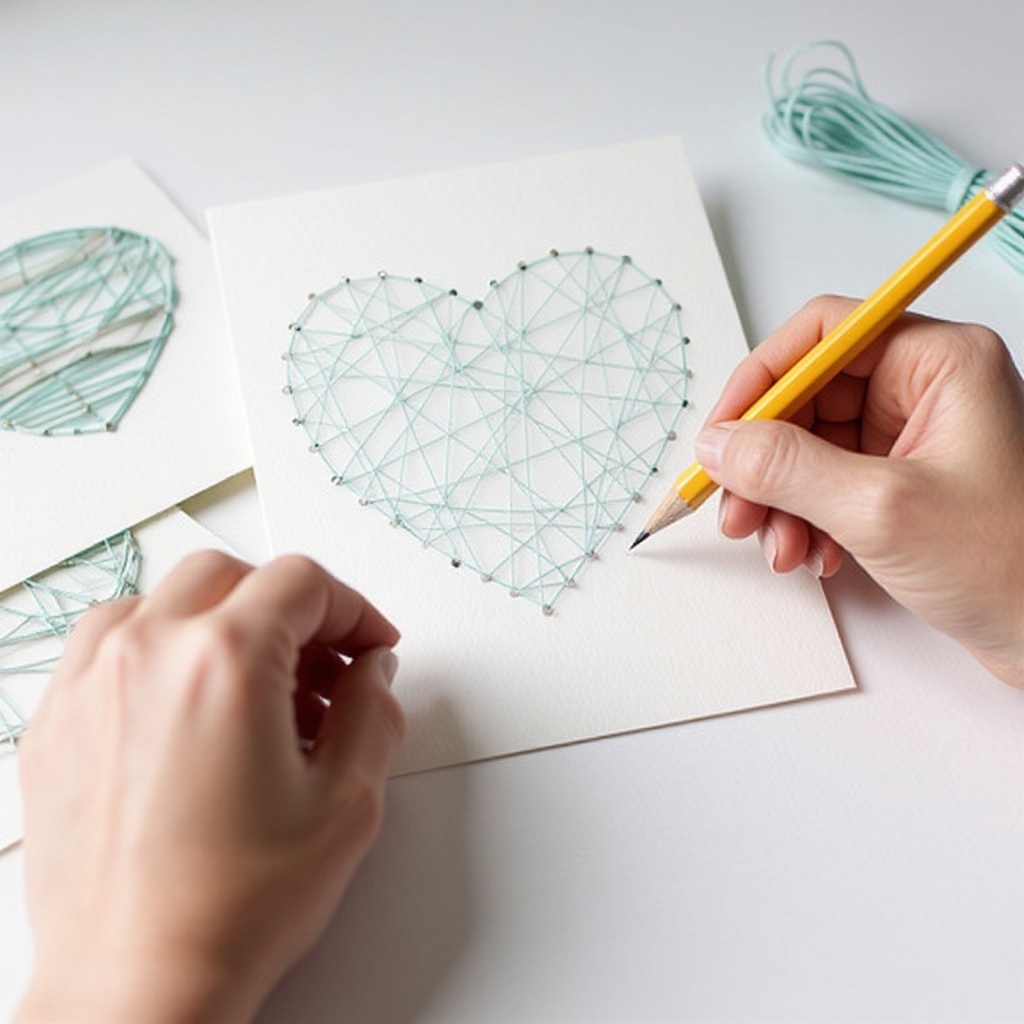
On the front of each card, use your pencil to lightly draw a heart shape. Aim for a heart that is approximately 3 inches wide, leaving ample space around the edges for your string art. You can freehand this or use a template for consistency.
- 3
Now, it's time to prepare for the string art. Using your ruler, carefully mark small dots evenly spaced around the *inside* edge of the drawn heart outline. These dots will serve as your anchor points for the embroidery floss, so aim for them to be about 1/4 inch apart for a dense and beautiful pattern.
- 4
Select your first color of embroidery floss. Cut a piece approximately 2 feet long; this length is manageable and usually sufficient for a good portion of the design without tangling too easily. Thread one end of the floss through the eye of your embroidery needle and tie a secure knot at the other end to prevent it from slipping through the cardstock.
- 5
To begin the string art, carefully poke the needle through the cardstock from the *back* of the card to the *front*, starting at one of the marked dots along your drawn heart outline. Ensure the knot is on the back and won't be visible from the front.
- 6
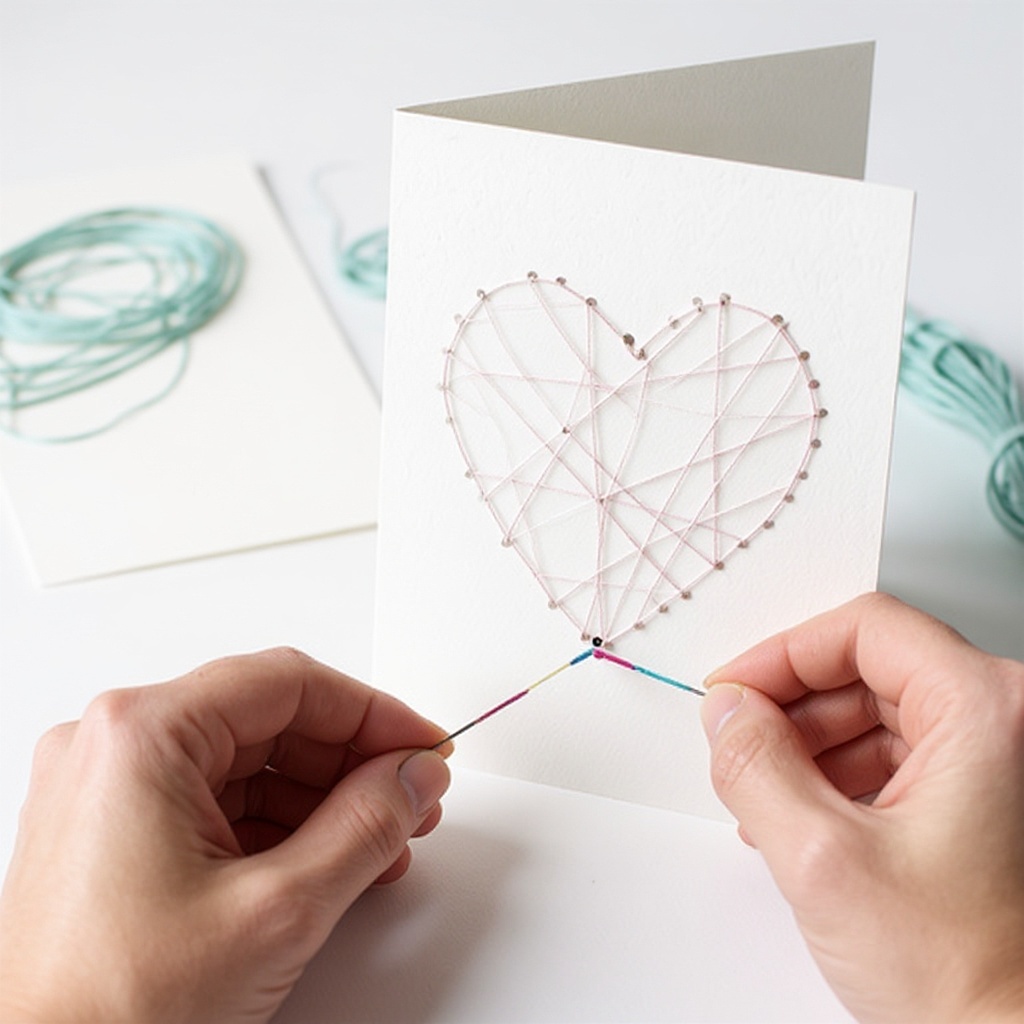
Bring the needle across the front of the card to another marked dot on the opposite side of the heart. Then, carefully poke the needle through the cardstock from the front to the back at this new dot. This creates your first connecting line of floss.
- 7
Continue to build your string art pattern by bringing the needle from the back to the front at different marked dots and then back through to another dot on the back. Experiment with different connections – you can go directly across, diagonally, or even create smaller loops within the main heart shape.
- 8
As you work, it's crucial to maintain a consistent tension on the embroidery floss. Keep it relatively taut so that the pattern looks neat and defined, but be careful not to pull too hard, as this can cause the cardstock to rip or the needle to tear through the paper.
- 9
When you reach a point where the floss is too short to comfortably connect to another dot, or you wish to change colors, it's time to secure the current thread. Carefully tie off the floss on the *back* of the card with a secure knot, ensuring it's snug against the cardstock without causing damage.
- 10
After tying off the floss, trim any excess thread close to the knot using your scissors. If you are changing colors, thread your needle with the new color and start from the same or a nearby dot to continue your design. Repeat this process with different colors of floss to create a variety of unique and vibrant heart designs on each of your cards.
- 11
Once all your heart string art designs are complete on the front of the cards, take a moment to admire your handiwork. Inside each card, use a pen to write a heartfelt 'Happy Valentine's Day' message, or any other personal sentiment you wish to share. Ensure your writing is neat and legible.
- 12
Finally, carefully place each finished heart string art card into a matching envelope, ready to be delivered to your special someone. The combination of the intricate string art and your personal message will make this a truly memorable Valentine's Day gift.
Tips & Troubleshooting
- 1If you notice the cardstock starting to tear or feel fragile around the poked holes, it's a sign you might be pulling the floss too tightly. Try to be more gentle when pulling the floss through, or consider using a slightly smaller needle if the holes are becoming too enlarged. Alternatively, you can reinforce the back of the cardstock with a small piece of tape behind each hole before you start.
- 2Don't be afraid to get creative with your string art patterns! Instead of just simple criss-crossing, try creating concentric hearts by connecting dots in smaller, inner loops, or experiment with starburst patterns radiating from the center. You can also create a layered effect by using multiple colors within the same heart outline.
- 3Using lighter colored cardstock, such as white, cream, or pale pastels, will make the colors of your embroidery floss pop and be much more visible. This contrast helps to highlight the intricate details of your string art design, making it more impactful.
- 4If you find yourself running out of embroidery floss mid-design, don't panic! Simply tie off the current thread securely on the back of the card with a knot, trim the excess, and then start a new piece of floss from the same dot or a very nearby one. This seamless transition will ensure your pattern remains uninterrupted.
- 5For a more professional and polished look, consider using a hole punch to create your anchor points instead of poking with a needle. This will ensure all your holes are perfectly uniform in size and spacing, making the string art process smoother and the final result cleaner. Just be sure to punch from the front to the back.
- 6When choosing your embroidery floss colors, think about color combinations that complement each other. You can go for a classic Valentine's palette of reds, pinks, and whites, or experiment with more modern and unexpected pairings like teal and coral, or gold and deep purple for a sophisticated touch.
- 7To add an extra layer of dimension and visual interest, consider layering your string art. You could create a smaller, solid heart in the center using a different color floss, or add delicate outlines around the main heart shape. This technique can elevate your cards from simple to stunning.
- 8If you're working with younger crafters or find the needle threading challenging, consider using a needle threader tool. These inexpensive tools can make a world of difference, saving frustration and allowing the crafter to focus on the creative aspect of the string art design.
Related Activities You Might Enjoy
Frequently Asked Questions
What are some easy Valentine's crafts for 10-year-olds?
For 10-year-olds, there are many engaging and easy Valentine's crafts that encourage creativity and fine motor skills. Heart string art cards are a fantastic option, offering a unique tactile experience. Other great choices include decorating paper heart garlands by cutting out hearts from colorful paper and stringing them together, creating DIY Valentine's Day scratch art by drawing on black paper with white crayons and then covering it with a layer of melted crayon and black paint, or personalizing plain ceramic mugs with permanent markers for a functional and heartfelt gift. These activities provide a wonderful opportunity for kids to express their artistic talents and create meaningful presents for their loved ones.
Can a 10-year-old do string art independently?
Yes, a 10-year-old can certainly do string art with some supervision, especially for their first few attempts. They are typically adept at threading a needle with a large eye and can handle the process of poking the needle through the cardstock. However, an adult might need to provide initial assistance with tying secure knots at the beginning and end of the floss, or if the cardstock is particularly thick and difficult to pierce. As they gain confidence and practice, they will likely be able to complete the entire project with minimal help, fostering a sense of accomplishment and independence.
What materials are needed for heart string art cards?
To create these charming heart string art cards, you'll need a few key supplies that are commonly found in craft stashes. Essential items include cardstock for the card base, embroidery floss in a variety of colors to create the beautiful string art patterns, and an embroidery needle with a large eye that makes threading the floss easier. You'll also need a pencil for drawing the heart outline and marking dots, a ruler for precise measurements, and scissors for cutting the floss. Clear tape is useful for securing the floss ends on the back of the card. These materials are readily available and make this project accessible for most crafters.
How long does it take to make one heart string art card?
The time it takes to make one heart string art card can vary depending on the complexity of the design and the individual's crafting speed, but typically it takes about 20 to 30 minutes. This timeframe includes drawing the heart, marking the dots, threading the needle, and creating the string art pattern. For younger crafters or those new to string art, it might take a little longer as they get accustomed to the technique. This makes it an ideal activity for an afternoon craft session, allowing for the creation of several cards without feeling rushed, perfect for making multiple gifts.
What are some alternative heart shapes or patterns I can create with string art?
Beyond a basic heart outline, the possibilities for string art patterns are vast! You can create a more intricate heart by drawing a smaller heart inside the larger one and filling the space between them with criss-crossing threads, creating a layered effect. Another popular technique is to create a 'starburst' pattern by connecting dots from the center outwards to the edge of the heart, or vice versa. You could also try filling the heart shape with a series of parallel lines, or even attempt to create a more abstract, geometric interpretation of a heart. Experimenting with different color combinations and thread densities will lead to unique and stunning results.
How can I make the string art more durable or prevent the floss from unraveling?
To ensure your string art is durable and the floss stays put, proper securing techniques are key. When you finish a section of floss or change colors, tie a secure knot on the *back* of the cardstock, making sure it's snug against the paper. You can even add a tiny dab of clear craft glue or fabric glue over the knot for extra security, though this is usually not necessary if the knot is tied well. Trim excess floss close to the knot to prevent it from snagging. For added stability, especially if the cardstock is thin, you can reinforce the back of the poked holes with small pieces of clear tape before you begin stringing.
What Next?
Once your heart string art cards are complete, they are ready to be shared with your loved ones. You can further personalize them by adding glitter, small stickers, or even a pressed flower inside. For a truly impressive presentation, consider creating a set of matching cards and envelopes. These cards can be displayed on a mantelpiece or a special shelf, serving as a constant reminder of your thoughtful gesture. For future projects, explore other string art shapes like stars, flowers, or even initials, and consider using different types of string or yarn for varied textures and effects.
Free: 10 Paper Crafts Anyone Can Make in 5 Minutes
Get our beginner guide + new craft ideas weekly.
No spam. Unsubscribe anytime.
Did you complete this activity?
Related