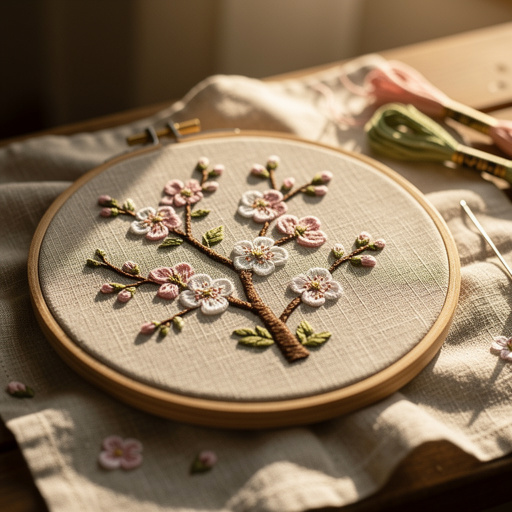
How to Create Embroidered Spring Blossom Branches — Easy Step-by-Step Guide
Add a touch of spring to your home with these beautiful embroidered blossom branches. A relaxing and rewarding DIY project for adults.
Quick answer
To create embroidered spring blossom branches, you'll need embroidery hoops, fabric, embroidery floss, and needles, taking about 90 minutes. Start by preparing your fabric and drawing your branch design. This intermediate activity has 10 steps and is perfect for adults.
What you need
Shop on Amazon · As an Amazon Associate we earn from qualifying purchases. Links above are affiliate links — we may earn a commission at no extra cost to you.
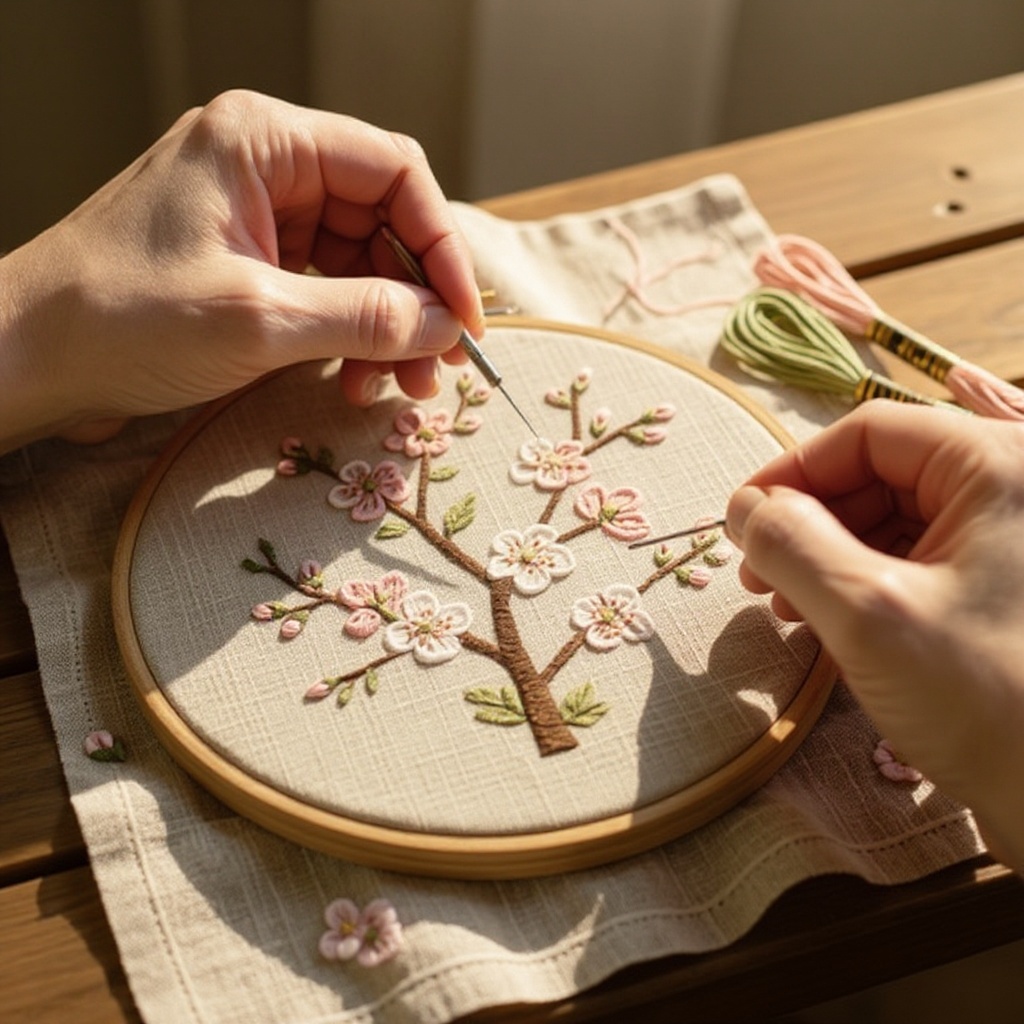
As winter's chill recedes, our thoughts naturally turn to the vibrant rebirth of spring. What better way to capture this essence than through the delicate art of embroidery? These embroidered spring blossom branches offer a beautiful and accessible way to bring the outdoors in, infusing your living space with a sense of renewal and tranquility. This project is perfect for anyone seeking a mindful and creative outlet, whether you're a seasoned stitcher looking for a seasonal project or a beginner eager to explore the joys of needlework. The gentle process of bringing these blossoms to life is as therapeutic as it is visually rewarding.
On this page
Step-by-Step Instructions
- 1
Begin by preparing your linen fabric. Wash it gently in cool water and iron it on a medium setting to remove any wrinkles, ensuring a smooth surface for your embroidery. This step is crucial for achieving clean stitches and a professional finish.
- 2
Select one of your 6-inch embroidery hoops. Loosen the screw on the outer ring, place the inner ring onto your fabric where you intend to stitch, and then position the outer ring over the inner ring. Gently pull the fabric taut around the inner hoop and tighten the screw to secure it firmly in place, ensuring the fabric is drum-tight.
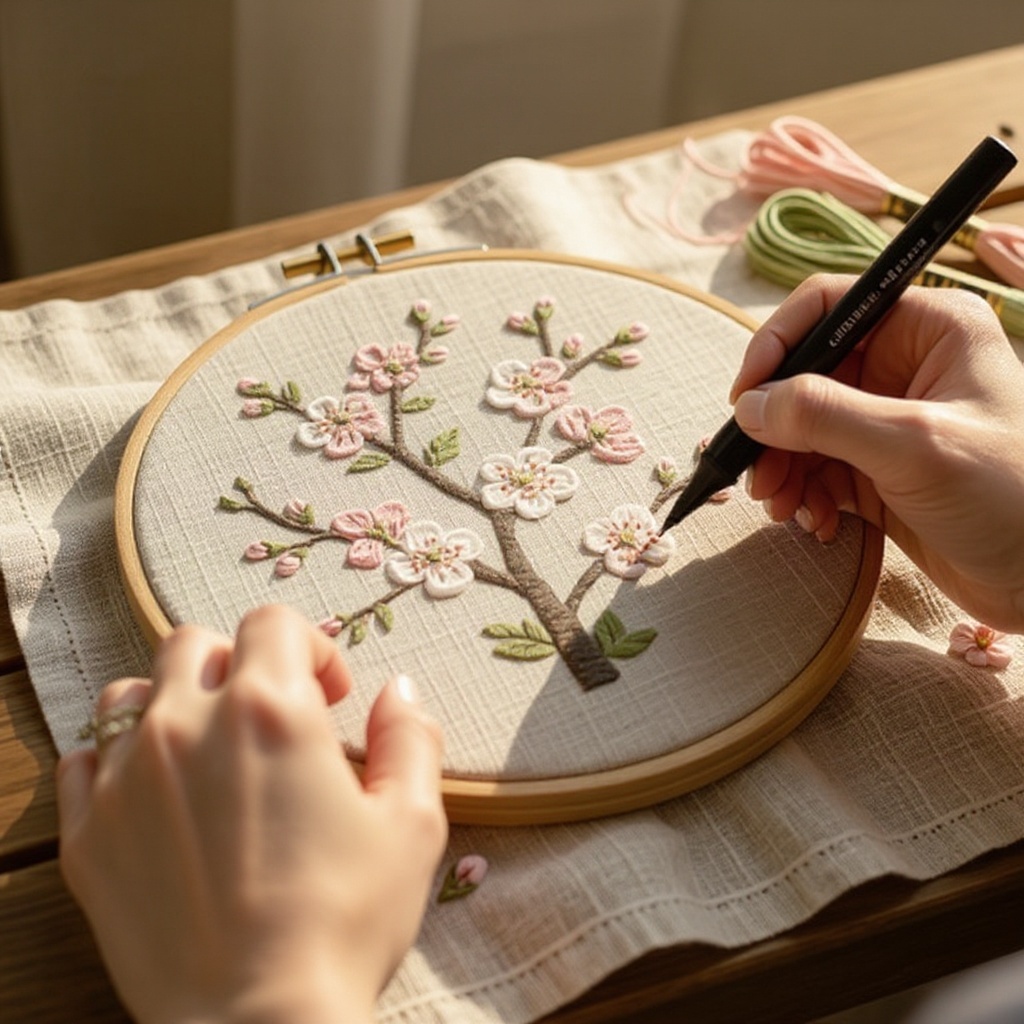
- 3
Using your fabric marker or pencil, lightly sketch a simple, elegant branch design onto the fabric within the hoop. Aim for a flowing, organic line that suggests the natural curve of a tree branch. Don't worry about perfection; a slightly imperfect line can add to the charm.
- 4
Thread a strand of light brown embroidery floss onto your embroidery needle. For a subtle texture, you can use 2-3 strands of floss, depending on the thickness you desire for your branch. Knot the end of the floss securely.
- 5
Begin embroidering the main branch line using a backstitch or stem stitch. Follow your sketched line, keeping your stitches consistent in length and tension. A backstitch creates a solid, continuous line, while a stem stitch offers a slightly more textured, rope-like appearance. Ensure your stitches are close enough to form a cohesive branch.
- 6
Once the main branch is complete, thread a white embroidery floss onto your needle. Again, consider using 2-3 strands for a fuller look. Knot the end of the floss.
- 7
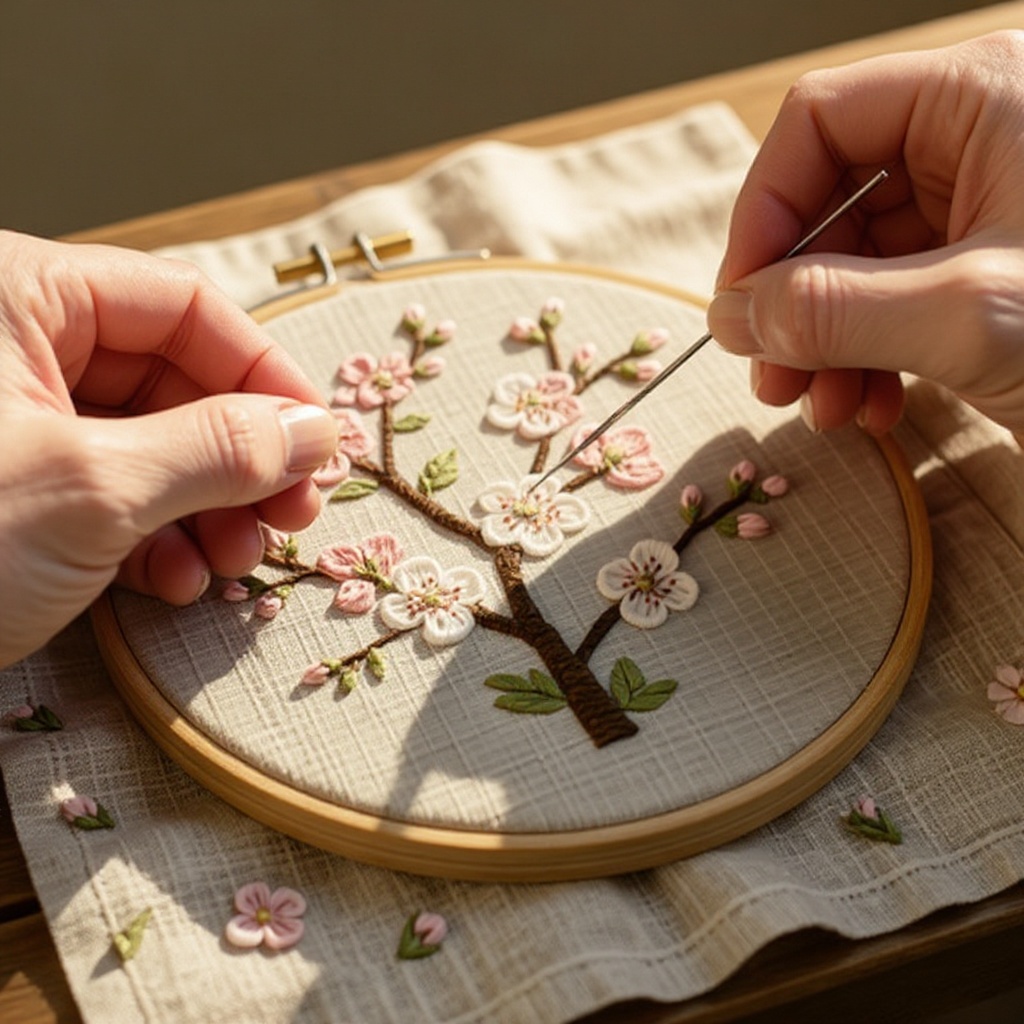
Using small French knots or colonial knots, begin creating tiny white blossom buds along the branch. These knots represent the initial stages of the blossoms. Aim for a consistent size for these initial buds, placing them strategically to suggest future blooms.
- 8
Now, thread a pink embroidery floss onto your needle. You can use a single shade of pink or mix in a lighter or darker shade for added dimension and realism. Knot the end of the floss.
- 9
Continue adding French knots or colonial knots in pink to create clusters of blossoms. Vary the density of your knots, making some areas more concentrated to represent full blooms and others sparser to suggest buds or developing flowers. Experiment with slightly different knot sizes to add organic variation.
- 10
As you add the pink blossoms, strategically place them around the white buds, some overlapping, to create a sense of depth and natural growth. Think about how real blossoms appear on a branch – not perfectly uniform, but in charming clusters.
- 11
Once you are satisfied with the density and placement of your blossoms, carefully inspect your work for any loose threads or uneven stitches. Trim any excess threads from the back of the fabric using your sharp embroidery scissors.
- 12
Gently remove the fabric from the embroidery hoop, or if you plan to frame it in the hoop, leave it secured. If you removed it, you can re-hoop it in the second hoop for display or trim the fabric leaving a small border for mounting.
- 13
For a more advanced technique, consider adding a few satin stitches or lazy daisy stitches in white or a very pale pink to create the illusion of petals on some of the larger blossoms. This adds another layer of detail and visual interest.
- 14
If your branch design is more intricate, you might want to sketch it on paper first and then transfer it to the fabric. You can use carbon paper placed between your sketch and the fabric, then trace over the design with a pencil or stylus.
- 15
To achieve a truly organic look, don't be afraid to let your knots vary slightly in size. Some blossoms can be a little larger or smaller than others, mimicking the natural imperfections of flowers.
- 16
When working with the pink floss, consider using a variegated embroidery floss. This type of floss has multiple colors blended together, which can create a beautiful, subtle color shift within each knot, adding depth without needing to change threads.
- 17
If you're using a hoop stand, it can free up your hands, allowing for more precise stitching and making it easier to maintain consistent tension throughout your work.
- 18
After completing the embroidery, you can gently press the fabric from the back on a low heat setting to ensure a crisp finish. Be careful not to flatten the texture of the knots.
- 19
For a unique 3D effect, you can carefully attach thin, dried twigs or branches to the back of your embroidered fabric using fabric glue or by stitching them on. This can create a beautiful mixed-media piece.
- 20
If you find yourself running low on a specific floss color, don't hesitate to substitute with a similar shade from your stash. You can also try blending two different shades of floss together to create a custom color that adds unique depth to your blossoms.
Tips & Troubleshooting
- 1If your branch design is complex, consider sketching it on paper first and then transferring to fabric using carbon paper. This allows for easier corrections and ensures a cleaner transfer onto your linen.
- 2Experiment with different stitch lengths and knot sizes for a more organic blossom appearance. Varying the size and density of your French knots will make the blossoms look more natural and less uniform.
- 3For a 3D effect, gently bend and attach real thin twigs or branches to the back of your embroidered fabric before framing or hanging. This creates a beautiful mixed-media piece that truly brings the outdoors in.
- 4If you run out of a specific floss color, you can substitute with a similar shade or use a blend of two colors for added depth. Variegated floss can also be a wonderful option for creating subtle color transitions within the blossoms.
- 5To ensure your stitches are neat and even, try to maintain consistent tension on your fabric and floss. Avoid pulling too tightly, which can pucker the fabric, or too loosely, which can result in a messy appearance.
- 6When creating French knots, wrap the floss around your needle the desired number of times (usually 1-3) and then pull the needle through the fabric smoothly. Holding the floss taut as you pull through can help create a neater knot.
- 7Consider using a light-colored fabric that will make your spring colors pop. Natural linen or a soft cotton provides a beautiful texture that complements the delicate embroidery.
- 8Don't be afraid to add a few extra touches, like a tiny embroidered ladybug or a small leaf, to your branch design to further enhance the spring theme and add a personal touch to your creation.
Related Activities You Might Enjoy
Frequently Asked Questions
What are some easy Easter crafts for adults?
Easy Easter crafts for adults offer a wonderful way to embrace the season with creativity and relaxation. Beyond these embroidered blossom branches, consider decorating Easter eggs with intricate patterns using dyes, paints, or even embroidery floss for a unique textured look. Floral wreaths are another popular choice, using faux flowers, pastel ribbons, and natural elements like twigs or moss. Bunny-themed decor is always a hit, from simple felt cutouts to more elaborate stuffed creations. Simple embroidery projects, like this one, or cross-stitch patterns featuring Easter motifs are also excellent choices. Many of these crafts can be completed with minimal materials and time, making them perfect for a weekend project or an afternoon of mindful crafting.
What materials do I need for DIY Easter crafts?
The materials needed for DIY Easter crafts can vary widely depending on the project, but there are some common staples. For decorating eggs, you'll typically need eggs (real or faux), dyes, paints, brushes, and perhaps stencils or markers. Felt, yarn, and fabric scraps are excellent for creating soft decorations, bunnies, or appliqués. Paper crafting enthusiasts might use cardstock, scissors, glue, and decorative papers for cards or banners. Floral supplies like faux flowers, wire, ribbon, and greenery are essential for wreaths and arrangements. For this specific craft, the core materials are embroidery hoops, fabric (like linen or cotton), embroidery floss in spring colors, and embroidery needles. Having a good pair of sharp scissors and a fabric marker or pencil is also highly recommended for precise work.
How can I make my DIY Easter crafts look professional?
Achieving a professional look in your DIY Easter crafts comes down to attention to detail and thoughtful execution. Start with quality materials; using good fabric, vibrant floss, and sharp tools can make a significant difference. Practice your techniques before committing to the final piece – whether it's mastering French knots or achieving clean lines with paint. Pay close attention to neat stitches, ensuring they are consistent in size and tension, and that any visible threads are trimmed. Thoughtful color choices and balanced composition are also key; consider color palettes that evoke the feeling of spring and arrange elements harmoniously. Finally, a clean finish, such as a well-pressed fabric or a neatly framed piece, elevates the overall presentation and makes your craft look polished and intentional.
Are there any screen-free Easter craft ideas for adults?
Absolutely! Embracing screen-free Easter craft ideas for adults is a wonderful way to disconnect and engage in a more tactile and mindful creative process. Many traditional crafts lend themselves beautifully to an unplugged experience. Consider the meditative practice of painting, whether it's on eggs, canvas, or wood. Knitting and crochet offer repetitive, soothing motions and result in cozy, handmade items. Paper crafting, including card making, scrapbooking, or creating intricate paper flowers, is entirely screen-free. Floral arranging, working with natural or artificial elements to create beautiful displays, is another tactile and rewarding option. And of course, embroidery, like these spring blossom branches, provides a focused and calming activity that results in a beautiful piece of textile art. These activities encourage presence and allow for a deeper connection with the creative process.
What is the best type of fabric for embroidery?
The best type of fabric for embroidery often depends on the stitch technique and the desired outcome, but for projects like these spring blossom branches, natural fibers are highly recommended. Linen and cotton are excellent choices due to their stable weave and pleasant texture. Linen, in particular, offers a beautiful, slightly slubby texture that complements the organic feel of embroidery and provides a good surface for stitches to glide through. Cotton, especially quilting cotton or even a fine weave like voile, is also a great option, offering a smooth surface and good durability. Avoid stretchy fabrics like jersey knit unless you are using a stabilizer, as they can distort your stitches. For beginners, a medium-weight cotton or linen with a visible, even weave is ideal as it makes it easier to count threads and maintain consistent stitch placement.
How long does it typically take to complete an embroidered spring blossom branch?
The time it takes to complete an embroidered spring blossom branch can vary based on your individual stitching speed, the complexity of your design, and the amount of detail you choose to incorporate. For a relatively simple branch with a moderate number of blossoms, as outlined in this guide, you can expect it to take approximately 90 minutes to 2 hours. This timeframe allows for careful stitching, knotting, and a bit of artistic decision-making. If you are new to embroidery, it might take a little longer as you get accustomed to handling the needle and floss, and mastering techniques like French knots. Conversely, an experienced embroiderer might complete a similar design in under an hour. The beauty of this project lies in its flexibility; you can spend more time adding intricate details or keep it simple for a quicker, yet equally beautiful, result.
What Next?
Once your embroidered spring blossom branches are complete, you have a versatile piece of art ready to be displayed. Consider framing it in a complementary hoop for a minimalist look, or mount it on a larger piece of fabric or canvas for a more elaborate presentation. For an extra touch of nature, you could even attach a real, dried twig behind the embroidery. Store your finished piece in a cool, dry place away from direct sunlight to preserve its vibrant colors. This project is a wonderful stepping stone to exploring other floral embroidery designs or even tackling larger nature-inspired textile art pieces.
Free: 10 Paper Crafts Anyone Can Make in 5 Minutes
Get our beginner guide + new craft ideas weekly.
No spam. Unsubscribe anytime.
Did you complete this activity?
Related