How to Make Bunny Ear Paper Lanterns — Easy Step-by-Step Guide
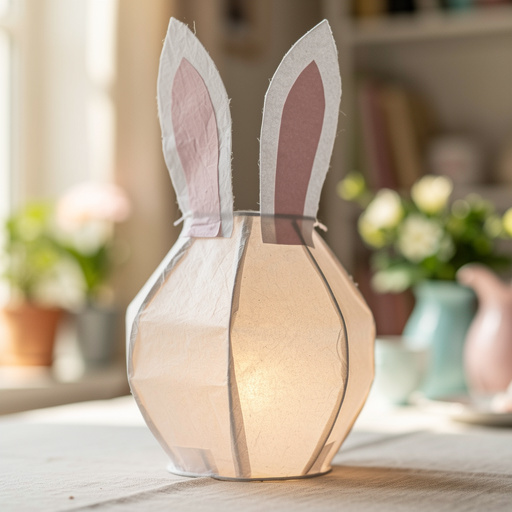
Bring a touch of Easter magic to your home with these charming DIY bunny ear paper lanterns. A simple and delightful screen-free craft for the whole family. These adorable lanterns are perfect for adding a festive glow to your Easter celebrations, and they're incredibly easy to make, even for beginners. Get ready to craft some springtime cheer!

Quick answer
To make bunny ear paper lanterns, you need paper, scissors, glue, and about 30 minutes. Start by cutting out lantern shapes and bunny ears. This beginner-friendly activity has 10 steps and is perfect for families with kids aged 6+. You'll need cardstock, scissors, glue, a pencil, and a ruler. For extra flair, a black marker can be used to draw faces.
What you need
Shop on Amazon · As an Amazon Associate we earn from qualifying purchases. Links above are affiliate links — we may earn a commission at no extra cost to you.
Easter is a wonderful time for family bonding and creative expression, and what better way to celebrate than with a delightful DIY project? These Bunny Ear Paper Lanterns are more than just a craft; they're a gateway to imagination and a screen-free adventure for all ages. Perfect for little hands and seasoned crafters alike, this project transforms simple materials into whimsical decorations that embody the spirit of spring and the joy of Easter. Gather your loved ones, put away the devices, and let the crafting magic begin!
On this page
Step-by-Step Instructions
- 1
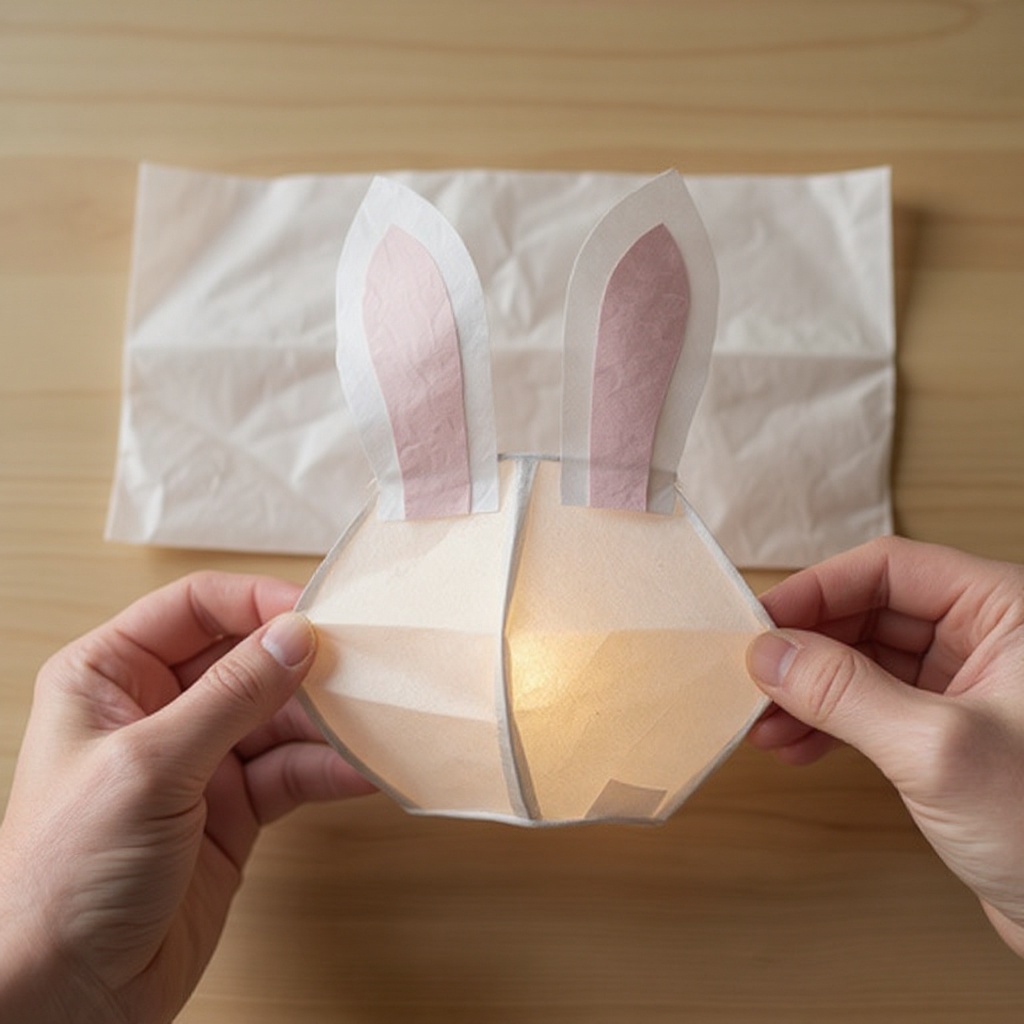
Begin by taking one sheet of white cardstock and folding it in half lengthwise. Ensure the edges align perfectly for a symmetrical lantern.
- 2
Using your ruler and pencil, draw a line 1 inch from the folded edge, stretching across the entire width of the cardstock. This line will serve as your cutting guide.
- 3
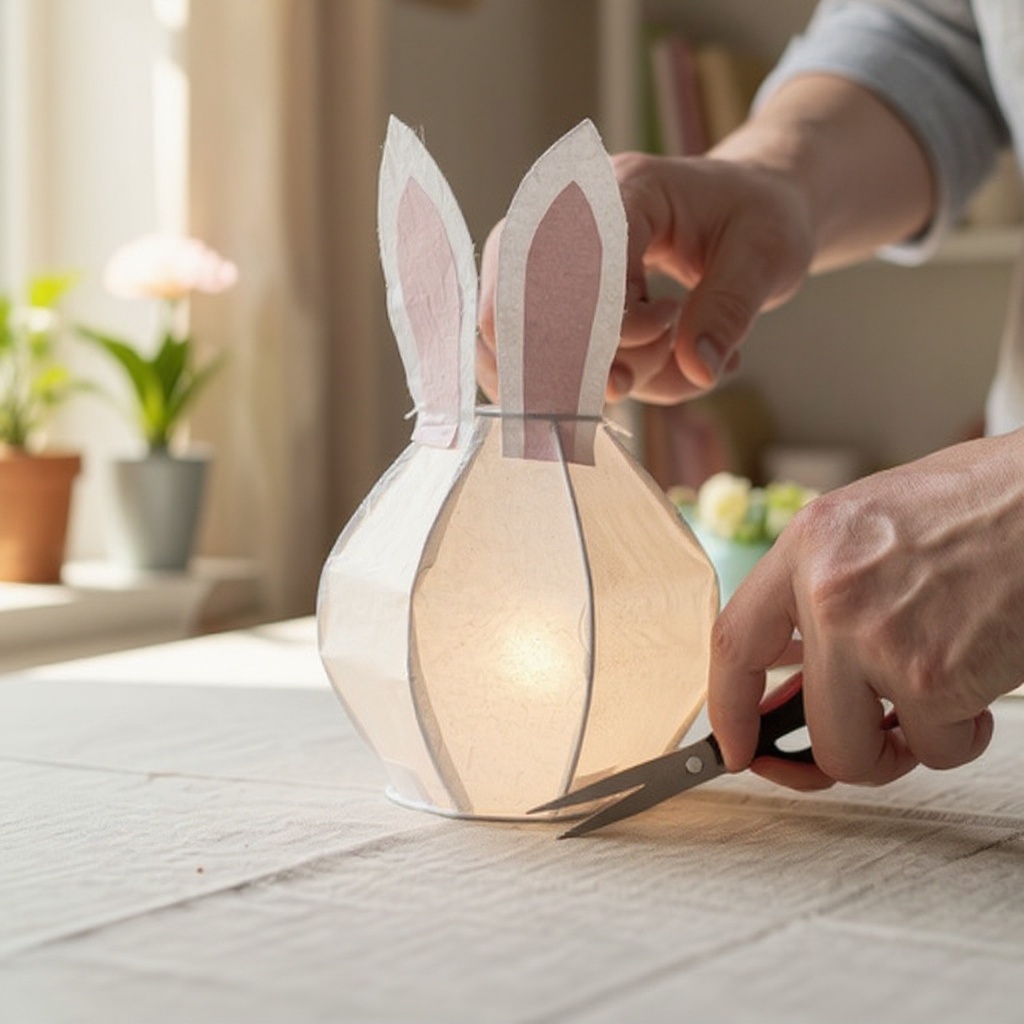
Now, carefully cut along the opposite edge of the cardstock (the open edge, not the folded one). Make your cuts approximately 1 inch apart, stopping precisely at the pencil line you drew in the previous step. Avoid cutting past the line, as this will compromise the lantern's structure.
- 4
Gently unfold the cardstock. You should now have a series of parallel slits running down the sheet, creating a fringed effect.
- 5
Take the second sheet of white cardstock and fold it in half lengthwise. This will form the main cylindrical body of your lantern.
- 6
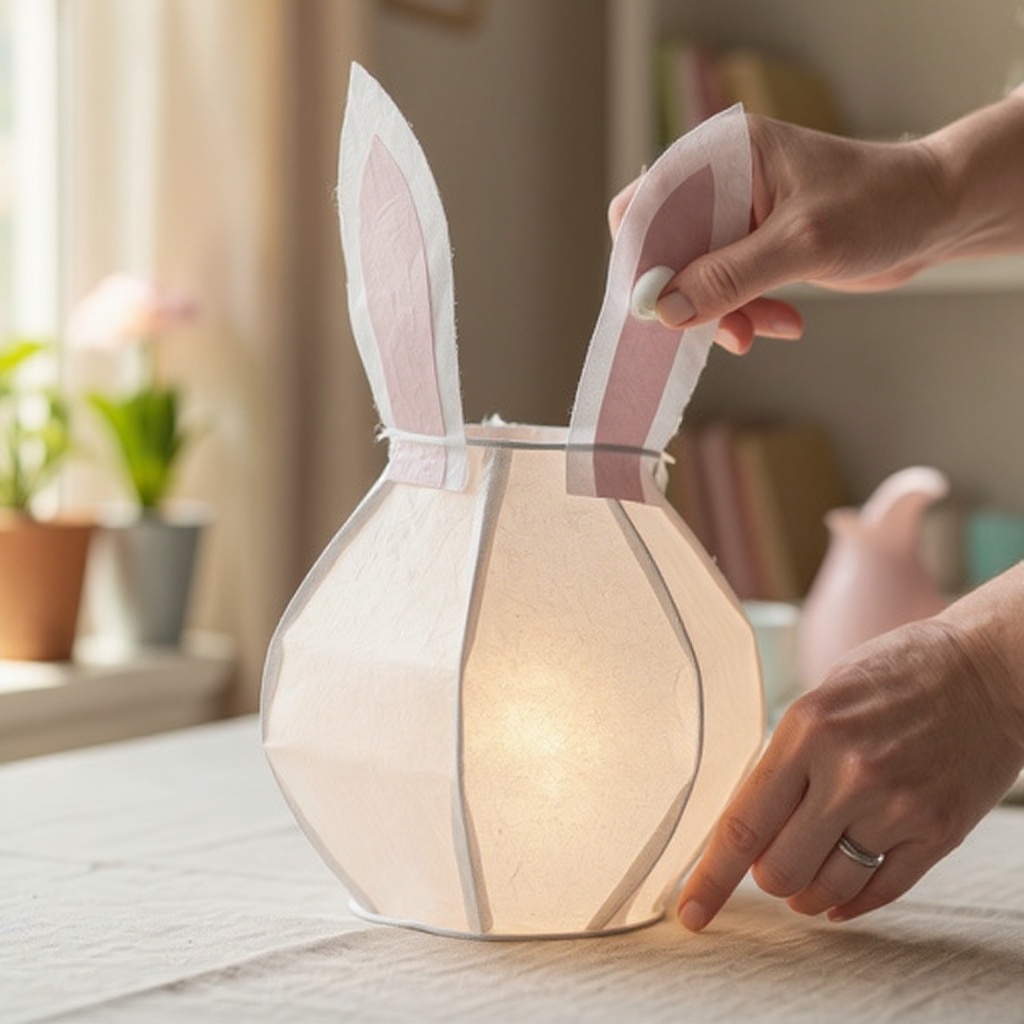
Apply a generous line of glue along one of the short, uncut edges of the first cardstock sheet (the one with the slits).
- 7
Carefully curl the first cardstock sheet into a cylinder, overlapping the glued short edge by about 1 inch. Press firmly to ensure a secure bond.
- 8
Hold the glued seam in place until the glue begins to set. This creates the basic lantern shape with its decorative fringe.
- 9
Now, take the second sheet of white cardstock (the one folded in half) and apply glue along the top edge of the first lantern cylinder. This will be the top rim of your lantern.
- 10
Place the folded second sheet of cardstock onto the glued top edge of the lantern cylinder, aligning the folded edge with the top of the lantern. This forms the solid top of your lantern.
- 11
On the pink cardstock, use your pencil to draw two bunny ear shapes. Aim for a classic bunny ear silhouette, making them approximately 3 inches tall and about 1.5 inches wide at the base. You can make them slightly asymmetrical for a more natural look.
- 12
Carefully cut out the two pink bunny ear shapes with your scissors. Ensure the edges are clean and smooth.
- 13
Take one of the pink bunny ears and apply a thin line of glue along its bottom edge. This is the part that will attach to the lantern.
- 14
Gently press the glued edge of the first pink bunny ear onto the top of the lantern, on one side, ensuring it stands upright. Position it so it looks like it's emerging from the top of the lantern.
- 15
Repeat the gluing and attaching process for the second pink bunny ear on the opposite side of the lantern. Make sure both ears are securely attached and stand up straight.
- 16
Allow all the glue to dry thoroughly. This is crucial for ensuring the ears stay in place and the lantern holds its shape.
- 17
Once the glue is completely dry, you can add the finishing touches. Use a black marker to draw cute bunny faces on the front of the lanterns. You can create simple eyes, a nose, and whiskers for a classic look.
- 18
If you wish to hang your lanterns, use a hole punch to create two holes on opposite sides of the top rim of the lantern. Thread string or ribbon through these holes to create a hanger.
Tips & Troubleshooting
- 1If your lantern doesn't stand perfectly upright on its own, you can gently flatten the bottom edge slightly to create a more stable base. This subtle adjustment will help it sit evenly on any surface.
- 2For a unique and personalized look, experiment with different types of paper. Consider using patterned paper for the lantern body, or even wrapping it in decorative tissue paper for a softer texture and diffused light.
- 3To add a touch of whimsy and texture, you can glue small pom-poms to the bottom of the lantern to represent a fluffy bunny tail. This is an easy way to add an extra dimension to your creation.
- 4These lanterns are designed for decorative purposes only and should never be used with real candles due to fire hazards. For a safe and enchanting glow, place battery-operated LED tea lights inside the lanterns.
- 5If you find that cardstock is too stiff or unavailable, thicker construction paper can be a suitable alternative. However, be aware that it might be less sturdy and could require extra glue or reinforcement.
- 6To create a more intricate bunny ear design, you can cut out a second, slightly smaller ear shape from white cardstock and glue it onto the pink ear, creating a layered effect. This adds depth and visual interest.
- 7For a truly magical effect, especially in dimly lit rooms, consider using lanterns with translucent paper. This allows the light from the battery-operated tea light to shine through the slits, creating beautiful patterns.
- 8When drawing faces, don't be afraid to get creative! You can draw different expressions, add rosy cheeks with a pink marker, or even give your bunnies little buck teeth for an extra dose of cuteness.
Related Activities You Might Enjoy
Frequently Asked Questions
What are the best materials for DIY Easter crafts?
For DIY Easter crafts like these bunny lanterns, simple materials like cardstock, construction paper, scissors, and glue are excellent choices. They are readily available, affordable, and easy for most age groups to work with. Natural elements such as twigs, leaves, or dried flowers can also be incorporated to add a rustic and organic feel to your creations. For decorating eggs, consider washable paints, food coloring, stickers, or even natural dyes like onion skins or beet juice. Remember to always use non-toxic materials, especially when crafting with young children.
How can I make Easter crafts with young children?
Involving young children in Easter crafts is a wonderful way to foster creativity and create lasting memories. For projects like these bunny lanterns, let them help with simpler tasks such as drawing basic shapes, coloring sections of the paper, or applying glue to larger areas. Always supervise closely when scissors are involved, and consider pre-cutting some elements for very young children. Ensure all materials used are non-toxic and age-appropriate, and focus on the process rather than a perfect outcome. Celebrate their efforts and encourage their imagination throughout the crafting session.
What are some easy screen-free Easter activities for families?
Easy screen-free Easter activities offer a fantastic opportunity for families to connect and enjoy quality time together. Beyond crafting these delightful bunny lanterns, consider decorating Easter eggs using various techniques, creating an engaging Easter-themed scavenger hunt around the house or garden, or baking and decorating Easter cookies. Going on a nature walk to spot signs of spring, such as blooming flowers and returning birds, is also a refreshing activity. Other ideas include reading Easter-themed stories, putting on a family play, or building a fort and having a cozy indoor picnic.
Can I use these bunny lanterns for Easter decorations?
Absolutely! These bunny ear paper lanterns are perfectly suited for Easter decorations and will add a charming, festive touch to your home. They can be hung around the house, placed on tables as centerpieces, or incorporated into a larger Easter display. Imagine lining your mantelpiece with a row of these adorable lanterns, or hanging them from tree branches in your garden for an outdoor Easter gathering. Their simple yet effective design makes them versatile for various decorative settings, bringing a warm and whimsical ambiance to your Easter celebrations.
How long does it take to make one bunny ear paper lantern?
The beauty of these bunny ear paper lanterns lies in their simplicity and speed. On average, it takes approximately 30 minutes to create one lantern from start to finish, assuming you have all your materials readily available. This includes the time for cutting, folding, gluing, and allowing for some initial drying. For younger children who might need a bit more assistance or time, the process could extend slightly, but it remains a manageable and enjoyable activity for an afternoon. The quick turnaround makes it ideal for a last-minute decoration or a fun craft session.
Can I make these lanterns in different sizes?
Yes, you can absolutely make these bunny ear paper lanterns in different sizes! The size of your lantern is determined by the size of the cardstock you use for the main body. For larger lanterns, simply use a larger sheet of cardstock or paper, adjusting the proportions of the cuts and the size of the bunny ears accordingly. For smaller, more delicate lanterns, you can use half sheets of cardstock or even smaller paper. Experimenting with different sizes can create a charming collection of bunny lanterns for a more dynamic and visually interesting display.
What Next?
Once your adorable bunny ear paper lanterns are complete, the fun doesn't have to stop! Consider creating a whole family of bunnies in different sizes or colors for a truly enchanting display. You can string them together to create a festive garland, hang them from branches for an outdoor Easter brunch, or place them on windowsills to catch the light. For storage, gently flatten them and keep them in a dry place until next year. This project is a fantastic springboard for other Easter crafts, like painted eggs or DIY Easter baskets, ensuring a season filled with creativity and cherished memories.
Free: 10 Paper Crafts Anyone Can Make in 5 Minutes
Get our beginner guide + new craft ideas weekly.
No spam. Unsubscribe anytime.
Did you complete this activity?
Related