How to Make Diagonal Stripe Friendship Bracelets — Easy Step-by-Step Guide
Master the art of creating classic diagonal stripe friendship bracelets with our simple, step-by-step guide. A timeless craft for all ages!

Quick answer
To make diagonal stripe friendship bracelets, you need embroidery floss and scissors, taking about 30-60 minutes per bracelet. Start by cutting and knotting your threads. This beginner-friendly activity has 10 steps and is perfect for families and kids aged 8+.
What you need
Shop on Amazon · As an Amazon Associate we earn from qualifying purchases. Links above are affiliate links — we may earn a commission at no extra cost to you.
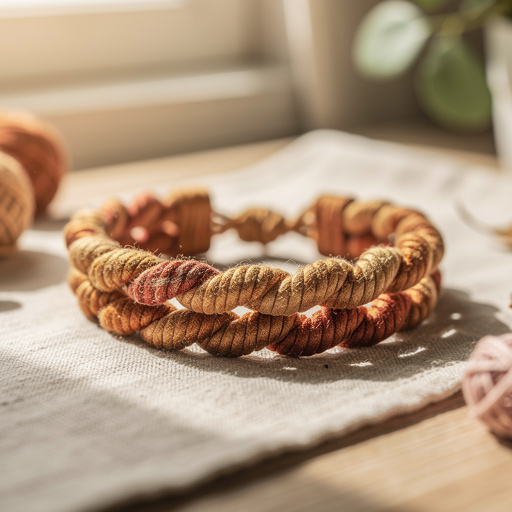
Embark on a journey into the nostalgic and rewarding world of friendship bracelets with this easy-to-follow guide to creating classic diagonal stripes. More than just a craft, these bracelets are tangible symbols of connection and shared memories, perfect for gifting to friends, family, or even yourself. The beauty of the diagonal stripe lies in its simplicity and satisfying visual progression, making it an ideal starting point for anyone new to fiber arts or looking for a relaxing, screen-free activity. Gather your colorful threads and prepare to weave a little magic!
On this page
Step-by-Step Instructions
- 1
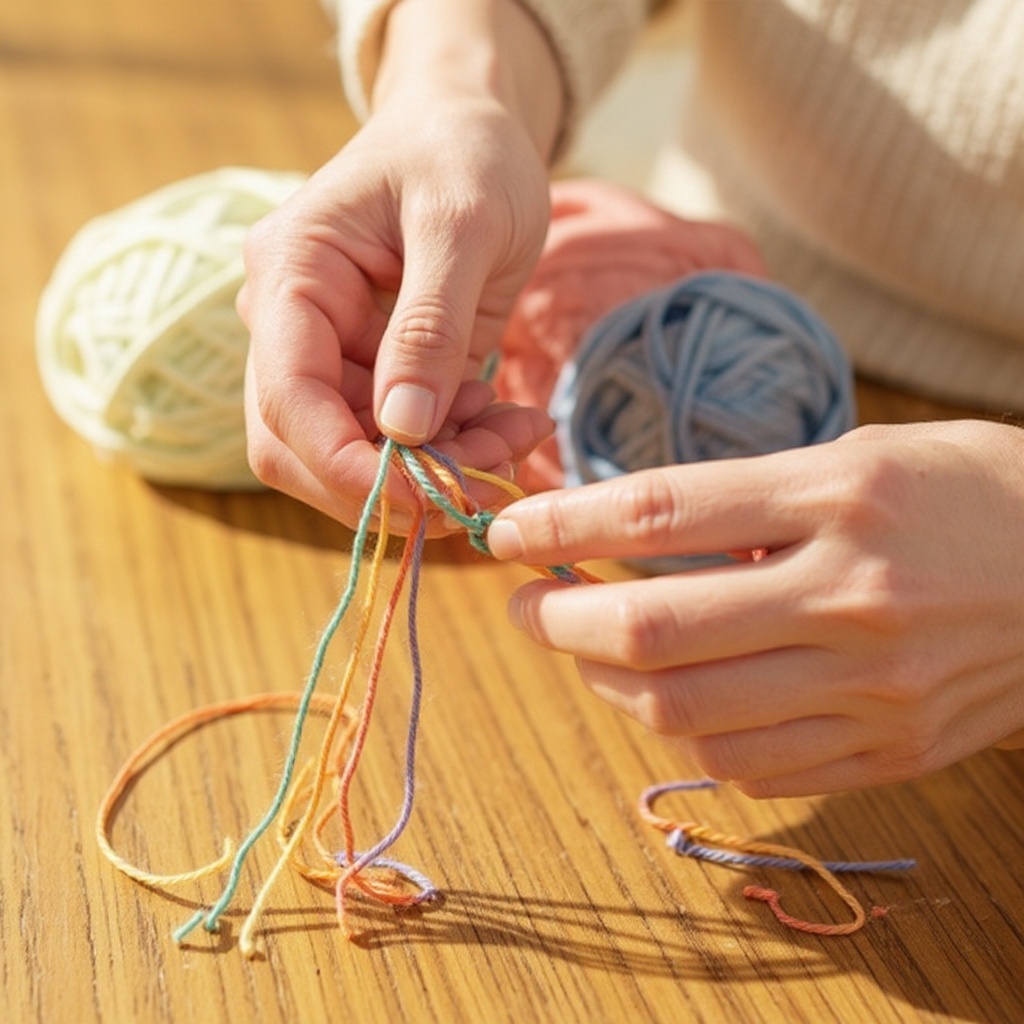
Cut 6 strands of embroidery floss, each about 30 inches long. It's crucial to cut them all to the same length to ensure even knotting and a consistent bracelet width. Choose at least 3 different colors to create distinct stripes; using more colors will result in more intricate stripe patterns.
- 2
Gather all 6 strands of embroidery floss together, aligning the ends neatly. Tie a secure knot about 3 inches from one end of the gathered strands. This initial knot will form a loop that you can later use to tie the bracelet onto a wrist, so make sure it's firm and not too close to the very end.
- 3
Separate the gathered strands into two equal groups of three. For the very first row of knots, select the leftmost strand from the left group. This will be your 'working' strand for this row. Lay this working strand (let's call it Color A) diagonally over the strand immediately to its right (let's call it Color B). Ensure Color A is on top of Color B.
- 4
Create your first forward knot by taking the end of Color A, bringing it under Color B, and then up through the small loop that has formed between the two strands. Pull the knot upwards and towards the main knot at the top of your bracelet. This action secures Color A onto Color B.
- 5
To ensure a strong and visible knot, you will repeat the forward knot with Color A on the same Color B strand. Perform the exact same motion: lay Color A over Color B, bring Color A under Color B, and pull it up through the loop. You should now have two distinct knots of Color A secured onto Color B, creating a solid colored segment.
- 6
Now, take that same working strand, Color A, and move it to the next strand to its right, which we'll call Color C. Repeat the process of making two forward knots: lay Color A over Color C, bring Color A under Color C, and pull it up through the loop. This ensures each strand receives two knots from your working strand.
- 7
Continue this methodical process, using your original Color A working strand to make two forward knots on each subsequent strand to its right. You will work your way across the entire set of strands. As you knot Color A onto each new strand, Color A will gradually shift its position, moving from the leftmost spot towards the right.
- 8
Once Color A has been knotted twice onto every other strand and has reached the far right position, it has completed its journey across the row. The strand that was originally Color B is now the new leftmost strand in your working group. This strand will now become your new working strand for the next row.
- 9
Take this new leftmost strand (which was originally Color B) and repeat the entire process from step 3. Lay this strand over the strand immediately to its right, and make two forward knots. Continue making two forward knots on each subsequent strand to its right, working your way across until this strand becomes the rightmost strand.
- 10
You will continue this pattern row after row. Always identify the new leftmost strand and use it as your working strand to make two forward knots on each strand to its right, until it becomes the rightmost strand. This consistent movement and knotting create the characteristic diagonal stripe effect.
- 11
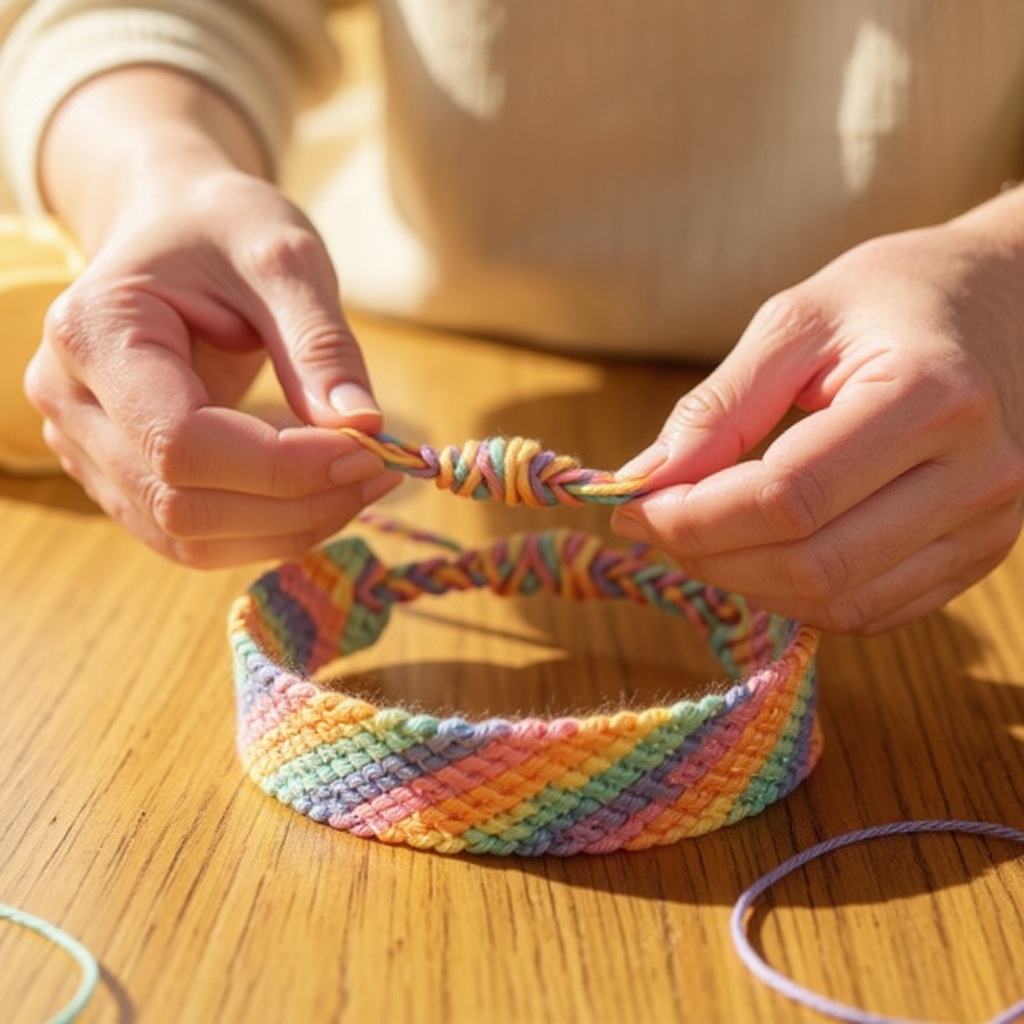
As you continue knotting, you will notice the diagonal stripes beginning to form. Each time a new color becomes the leftmost strand and works its way across, it creates a new diagonal line of that color. Keep your tension consistent for the neatest results.
- 12
Periodically check the length of your bracelet against your wrist or the intended recipient's wrist. You want to ensure you have enough length for the knotted section to comfortably wrap around, leaving enough tail for tying.
- 13
Once the knotted section of the bracelet is long enough to fit around a wrist, it's time to finish the bracelet. Gather all the strands together at the end of your knotting.
- 14
Tie a final, secure knot with all the strands together, about 3 inches from the end of your last row of knots. This knot will secure the entire knotted section and provide a tail for tying the bracelet on. Ensure this knot is as tight as your initial starting knot.
Tips & Troubleshooting
- 1If your knots appear loose or are not holding their shape well, try pulling them tighter with more consistent pressure. Sometimes, a third knot on a particularly stubborn strand can help secure it, but always aim for two knots per strand for the standard pattern. Consistent tension is key to a professional-looking bracelet.
- 2To create wider, more prominent stripes, you can start a row with multiple strands of the same color. For example, instead of starting with one strand of Color A, use two strands of Color A followed by one strand of Color B. This will make the Color A stripes appear thicker and more dominant in the final design.
- 3Don't be afraid to experiment with different color combinations! The beauty of friendship bracelets lies in their personalization. You can use as few as 3 colors for a simple look or incorporate as many colors as you have strands for to create a vibrant, multi-hued masterpiece. Consider color theory or simply choose colors that evoke a specific feeling or memory.
- 4To make the knotting process easier and more comfortable, secure your bracelet while you work. You can use a safety pin to attach the starting knot to a pillow, your jeans, or a piece of fabric. Alternatively, taping the starting knot securely to a table or a clipboard can provide a stable anchor point, freeing up both your hands for knotting.
- 5Maintain consistent tension throughout your knotting process. Uneven tension can lead to a bracelet that is lumpy or uneven in width. Try to pull each knot with roughly the same amount of force to achieve a smooth, professional finish. This takes practice, so don't get discouraged if your first few attempts aren't perfect.
- 6When cutting your embroidery floss, err on the side of caution and cut them slightly longer than 30 inches if you're unsure. It's much easier to trim excess length at the end than to deal with strands that are too short to knot properly. This is especially important for beginners who might use more floss than anticipated.
- 7Consider the material of your embroidery floss. Standard cotton embroidery floss is the most common and works beautifully for this pattern. However, you can also experiment with variegated floss for a unique, blended stripe effect, or even silk threads for a luxurious feel. Each material will give your bracelet a different texture and sheen.
- 8Before you begin knotting, lay out your chosen colors in the order you want them to appear. This visual planning helps you anticipate the stripe sequence and ensures you're happy with the color arrangement before you commit to knotting. You can even sketch out your desired pattern on paper to visualize the final outcome.
Related Activities You Might Enjoy
Frequently Asked Questions
What are the best friendship bracelet patterns for beginners?
The diagonal stripe pattern, often referred to as the candy stripe, is widely considered the best friendship bracelet pattern for beginners. Its simplicity lies in the consistent use of a single type of knot – the forward knot – repeated across all the strands in a systematic way. This makes it incredibly easy to learn and master, providing a satisfying sense of accomplishment as you watch the stripes emerge. The predictable nature of the pattern allows beginners to focus on developing consistent knotting tension and technique without the complexity of multiple knot types or intricate color changes. It's a foundational pattern that builds confidence and prepares crafters for more advanced designs.
How many strings do I need for friendship bracelet patterns?
For the basic diagonal stripe friendship bracelet pattern as described in this guide, you typically need 6 strands of embroidery floss. This number allows for a good balance of colors and a bracelet of a comfortable width. However, the number of strings can be adjusted for various reasons. Using more strands (e.g., 8, 10, or 12) will result in a wider bracelet and potentially more intricate stripe patterns if you use a variety of colors. Conversely, using fewer strands will create a narrower bracelet. For patterns that involve more complex knotting or different stitch types, the required number of strings can vary significantly, so always check the specific pattern instructions.
How long should the strings be for friendship bracelets?
For most adult-sized friendship bracelets, cutting your strings to approximately 30 inches (about 75 cm) long is a good starting point. This length provides ample material for creating the knotted section of the bracelet, even with the consistent knotting required for the diagonal stripe pattern. It also leaves enough extra length at both ends to form the initial loop and the final tying knot, as well as a tail for securing the bracelet onto a wrist. For children's bracelets, you might shorten this length slightly to around 24-28 inches. It's always better to cut your strings a little longer than you think you'll need, as it's easier to trim excess floss at the end than to deal with strands that are too short.
What is the easiest friendship bracelet pattern?
The diagonal stripe or candy stripe friendship bracelet pattern is overwhelmingly considered the easiest pattern for beginners. Its ease stems from the fact that it primarily utilizes a single type of knot: the forward knot. The process involves taking the leftmost strand and making two forward knots on each subsequent strand to its right, systematically moving across the entire set of threads. This repetition makes it very straightforward to learn and execute. Once you've mastered the forward knot and the basic movement across the strands, you can create beautiful, classic diagonal stripes with minimal frustration, making it an ideal introduction to the world of friendship bracelet making.
Can I use different types of thread for friendship bracelets?
Absolutely! While standard cotton embroidery floss is the most common and recommended material for its ease of use and vibrant color selection, you can certainly experiment with other types of thread. Variegated embroidery floss, which features gradual color changes within a single strand, can create stunning, blended diagonal stripes for a unique look. Silk threads offer a luxurious sheen and a smoother feel, though they can be more slippery to work with. Craft threads, yarn, or even thin cord can also be used, but be aware that their thickness and texture will affect the final appearance and the number of strands you might need. Always consider how the material will hold knots and its overall durability.
How do I make the stripes thicker or thinner?
To make the diagonal stripes thicker, you can start a row with multiple strands of the same color. For instance, if you want a wider blue stripe, begin your row with two or even three blue strands placed next to each other at the leftmost position. When you make your forward knots with these blue strands, they will collectively create a broader stripe. To make stripes thinner, you would simply use fewer strands of a particular color, or ensure your colors are distributed more evenly. The key is to control the number of consecutive strands of the same color that initiate a row, as this directly influences the width of the resulting stripe.
What Next?
Congratulations on creating your beautiful diagonal stripe friendship bracelet! This foundational skill opens the door to countless creative possibilities. Consider experimenting with different color palettes, adding beads for extra sparkle, or even combining diagonal stripes with other patterns for more complex designs. Once finished, these bracelets can be worn proudly, gifted with love, or even displayed as a testament to your crafting journey. Store them carefully to prevent tangling, perhaps in a small jewelry box or a dedicated craft drawer, ready for your next creative endeavor.
Free: 10 Paper Crafts Anyone Can Make in 5 Minutes
Get our beginner guide + new craft ideas weekly.
No spam. Unsubscribe anytime.
Did you complete this activity?
Related