How to Make Toilet Paper Roll Rocket Ships — Easy Step-by-Step Guide
Create your own fleet of out-of-this-world rocket ships using simple toilet paper rolls and craft supplies. A fun, screen-free activity for aspiring astronauts!
Quick answer
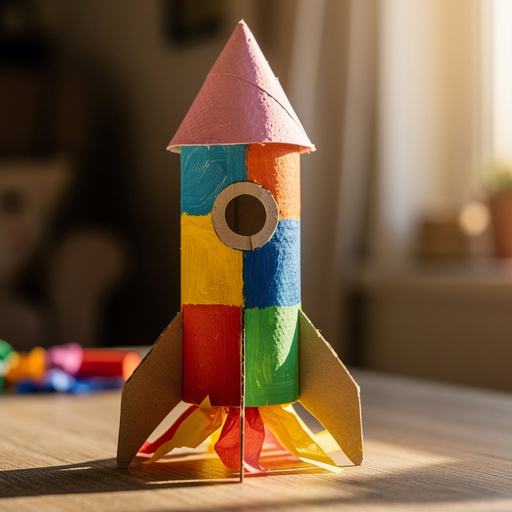
To make toilet paper roll rocket ships, you need toilet paper rolls, construction paper, scissors, glue, and markers, taking about 30 minutes. Start by cutting and attaching cone shapes for the nose. This beginner-friendly activity has 10 steps and is perfect for kids aged 5+.
What you need
Shop on Amazon · As an Amazon Associate we earn from qualifying purchases. Links above are affiliate links — we may earn a commission at no extra cost to you.
Embark on an interstellar crafting adventure with this incredibly fun and easy toilet paper roll rocket ship project! Perfect for sparking imagination and encouraging hands-on creativity, this activity transforms everyday household items into magnificent spacecraft ready for imaginary voyages. It’s a fantastic screen-free way to engage young minds, develop fine motor skills, and celebrate a love for space exploration. Gather your little astronauts and prepare for liftoff – this project is guaranteed to be a blast for everyone involved!
On this page
Step-by-Step Instructions
- 1
Gather all your materials. Ensure you have a clean workspace, as glue and markers can sometimes make a mess; laying down some newspaper or a craft mat is a good idea.
- 2
For each rocket, cut a circle from construction paper that is roughly 3 inches in diameter. You can trace around a small bowl or use a compass for a perfect circle, but freehand is also fine for a more rustic look.
- 3
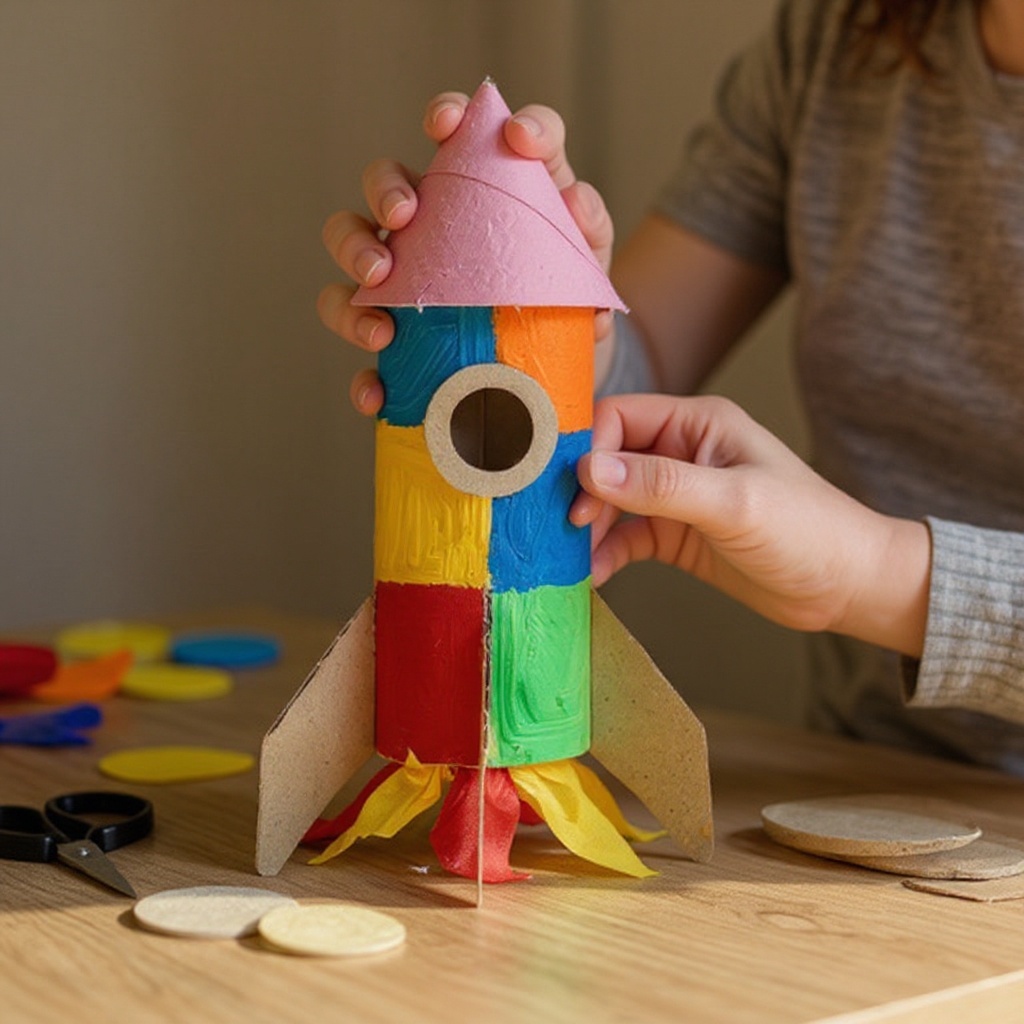
Cut a slit from the edge of the circle to the center to create a cone shape. This slit allows you to overlap the paper and form the cone, so make sure it’s a straight cut from the outer edge directly to the middle point.
- 4
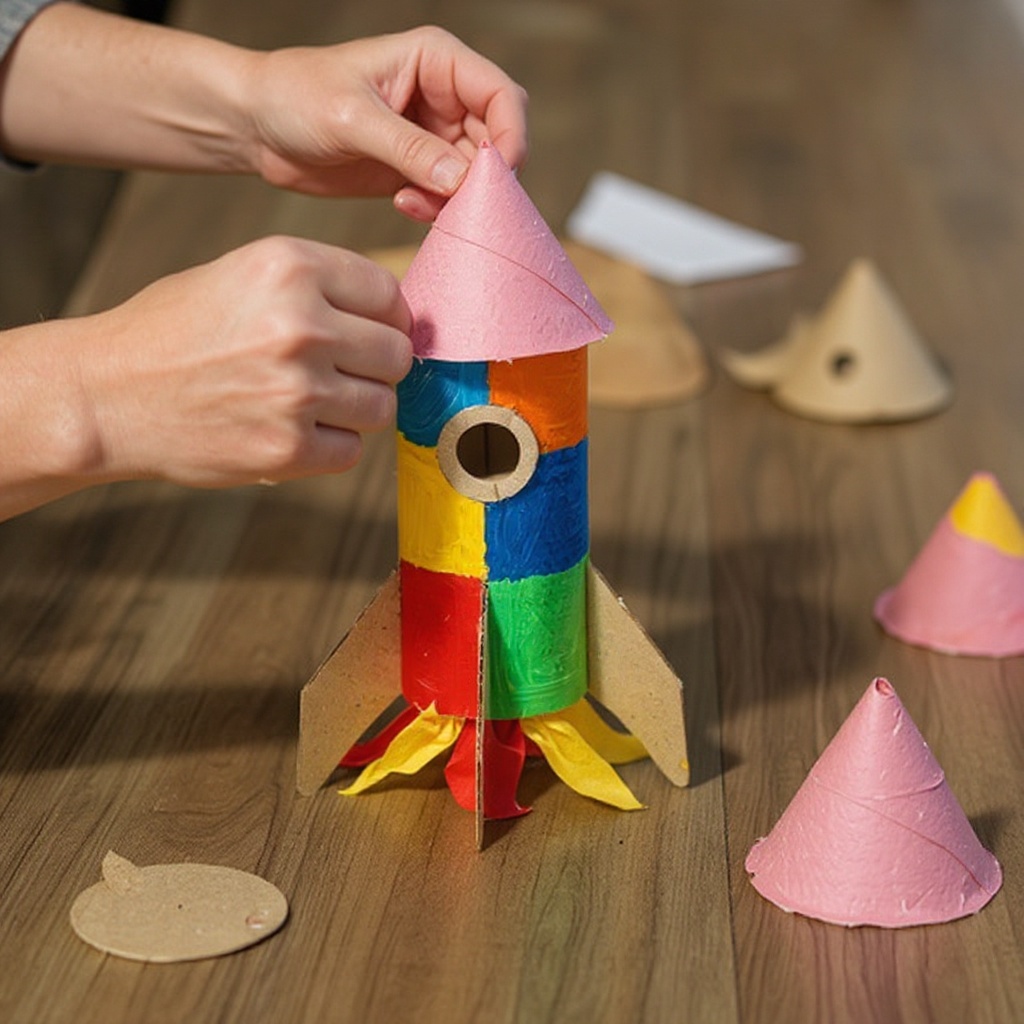
Overlap the cut edges and glue them together to form a cone for the rocket's nose. Hold the edges firmly in place until the glue begins to adhere; a glue stick works well for this, but liquid glue offers a stronger bond if applied sparingly.
- 5
Repeat steps 2-4 to make three nose cones, ensuring each cone is securely glued and holds its shape. If the cones feel flimsy, you can reinforce the seam with a tiny piece of tape on the inside before they are fully dry.
- 6
Apply glue around one end of a toilet paper roll. Distribute the glue evenly around the entire circumference of the opening, ensuring there's enough to create a good bond with the paper cone.
- 7
Press a nose cone onto the glued end of the toilet paper roll, holding it in place until the glue begins to set. Gently twist the cone as you press it down to ensure it adheres securely and sits straight on top of the roll.
- 8
Repeat steps 6-7 for the other two rocket ships, attaching a nose cone to each one. Make sure each cone is centered and firmly attached before moving on to the next stage of decoration.
- 9
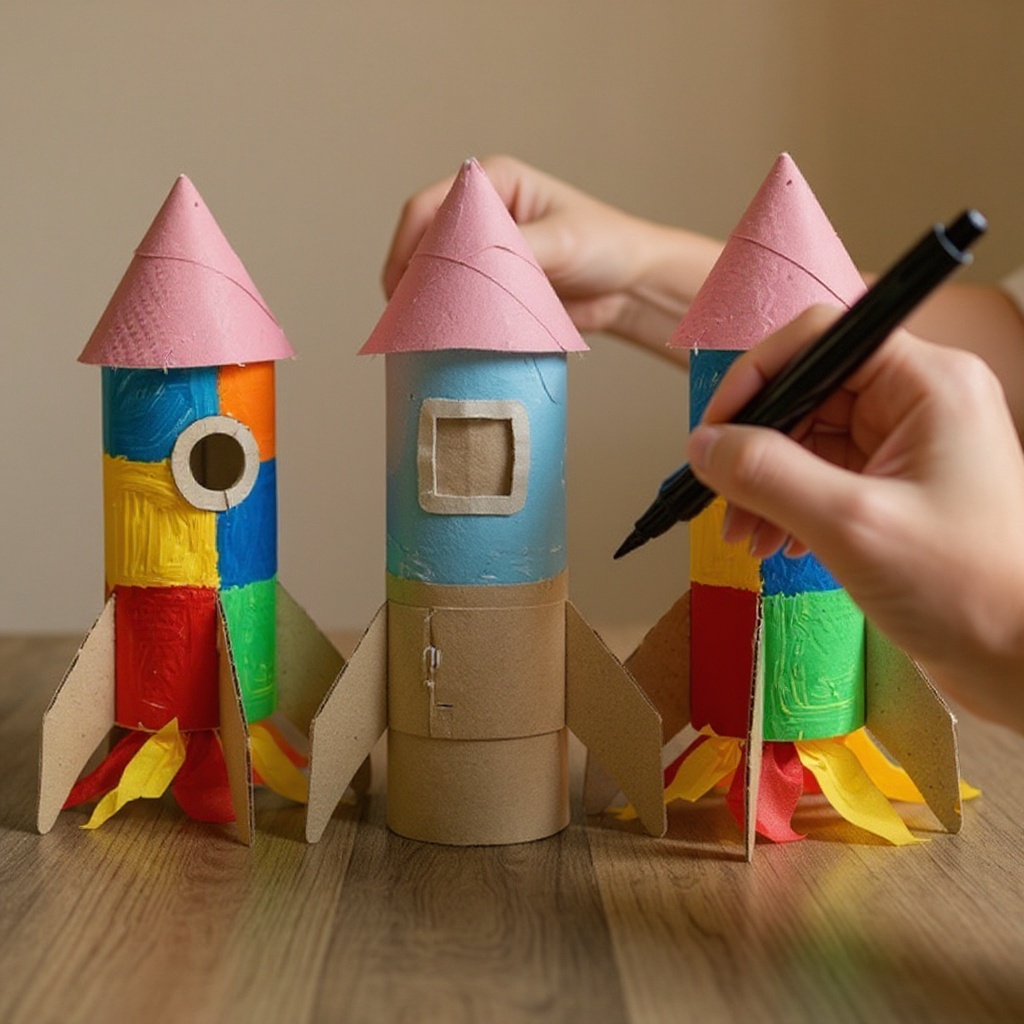
Now, let's add some cosmic flair! Use the black permanent marker to draw windows, doors, or control panels on the body of each rocket ship. You can draw simple circles for windows or more elaborate designs for a control panel.
- 10
For added stability and visual appeal, cut out small triangles from contrasting colored paper to create fins for the sides of your rockets. Aim for 3-4 fins per rocket, spaced evenly around the base.
- 11
Apply glue to the flat edge of each fin and press them firmly onto the sides of the toilet paper roll, near the bottom. Hold them in place for a few moments until the glue starts to grip, ensuring they are attached securely.
- 12
Repeat step 11 for all the fins on all your rocket ships. Make sure the fins are aligned symmetrically on each rocket for a balanced and aerodynamic look.
- 13
If you're using optional embellishments, now is the time to add them. Apply glitter glue flames at the bottom of the rockets for a fiery launch effect, or add star and planet stickers to the body for extra cosmic detail.
- 14
Consider adding a layer of paint to the toilet paper rolls before decorating if you want a solid base color. Acrylic or tempera paints work best, and allow them to dry completely before proceeding with other steps to avoid smudging.
- 15
For a metallic look, you can wrap sections of the toilet paper roll in aluminum foil, securing it with glue or tape. This adds a futuristic and shiny element to your rocket ships.
- 16
Let the glue dry completely before playing with your rocket ships to ensure they are sturdy and ready for their imaginary space missions. This might take a few hours depending on the type of glue used and the humidity.
- 17
Experiment with different colored construction paper for the nose cones and body of your rockets. You can even cover the entire roll with colored paper before adding details for a completely different look.
- 18
Once your rockets are fully dry and decorated, they are ready for launch! Imagine them soaring through the galaxy, exploring new planets, and embarking on exciting space adventures.
Tips & Troubleshooting
- 1If the cones don't stay put, you can secure them with a small piece of tape on the inside while the glue dries. This is especially helpful if you're using a glue stick, which might not provide as strong an initial bond as liquid glue.
- 2Experiment with different colored construction paper for the nose cones and body of your rockets. Mixing and matching colors can create a vibrant and unique fleet, making each rocket distinct and special.
- 3Cut out small triangles from contrasting colored paper to create fins for the sides of your rockets. These fins not only add visual appeal but also give the rockets a more realistic and aerodynamic appearance.
- 4Let the glue dry completely before playing with your rocket ships to ensure they are sturdy and ready for launch. Rushing the drying process can lead to parts falling off during play, which can be disappointing.
- 5For a more professional finish, consider covering the entire toilet paper roll with a solid color of construction paper or even wrapping paper before adding details. This provides a clean canvas for your decorations.
- 6Don't be afraid to get creative with the decorations! Use markers to draw intricate control panels, add foil accents for a metallic sheen, or even glue on small pom-poms for thrusters.
- 7If you want to make larger rockets, you can use paper towel rolls and cut them to your desired size. Just remember to adjust the size of your construction paper circles for the nose cones accordingly.
- 8Involve the children in every step of the process, from cutting the paper to drawing the details. This not only makes it a more engaging activity but also helps them develop their fine motor skills and creativity.
Related Activities You Might Enjoy
Frequently Asked Questions
What are the best materials for a toilet paper roll craft?
For toilet paper roll crafts, the best materials are versatile and readily available, allowing for endless creative possibilities. Essential items include empty toilet paper rolls, construction paper in various colors, child-safe scissors, and adhesive like white craft glue or glue sticks. Markers, crayons, or paint are excellent for adding color and details, while optional embellishments such as glitter, stickers, googly eyes, yarn, or fabric scraps can elevate the project. For more durable crafts, consider using acrylic paints or a hot glue gun (with adult supervision). The key is to have a good base of core supplies and then let your imagination guide the addition of decorative elements.
How do you make a toilet paper roll rocket?
To make a toilet paper roll rocket, you typically start by preparing the body of the rocket, which is the toilet paper roll itself. You can cover it with colored paper, paint it, or leave it as is. Next, create a nose cone by cutting a circle from construction paper, making a slit to the center, and forming it into a cone shape, then gluing it to one end of the roll. For stability and aesthetics, cut out small triangle or trapezoid shapes for fins from construction paper and glue them around the base of the roll. Finally, decorate your rocket with markers, crayons, or stickers to add windows, doors, flames, or other space-themed details. This simple process allows for a lot of personalization.
Can you paint toilet paper rolls for crafts?
Yes, you can absolutely paint toilet paper rolls for crafts! It's a fantastic way to create a solid, vibrant base color for your projects before adding other decorative elements. Acrylic paints and tempera paints are excellent choices as they adhere well to the cardboard and dry relatively quickly. For best results, apply a thin, even coat and allow it to dry completely before applying a second coat or moving on to gluing or drawing. You might find that a single coat is sufficient, especially if you're using a bright color. Ensure the painted rolls are thoroughly dry to prevent smudging when you add other craft supplies.
What age is a toilet paper roll rocket craft suitable for?
A toilet paper roll rocket craft is generally suitable for children aged 5 and up. At this age, children typically have developed enough fine motor skills to handle scissors (with supervision), glue, and markers with reasonable dexterity. Younger children, around ages 3-4, can certainly participate with significant adult assistance, focusing on simpler tasks like gluing pre-cut shapes or applying stickers. Older children, from 6 years and up, can take on more complex designs, experiment with different materials, and even help younger siblings with their rockets. It's a versatile craft that can be adapted to various skill levels.
How can I make my toilet paper roll rocket more durable for play?
To make your toilet paper roll rocket more durable for play, consider using stronger adhesives like white craft glue or even a hot glue gun (with adult supervision) for attaching the nose cone and fins, as these provide a more robust bond than glue sticks. Reinforcing the seams of the nose cone with a small piece of tape on the inside before gluing can also add strength. Painting the rolls with acrylic paint can seal the cardboard slightly, making it less prone to damage. Additionally, avoid overly delicate decorations that could easily detach; opt for sturdy elements like painted details or well-adhered stickers. Allowing all glue and paint to dry completely is crucial for maximum durability.
What other space-themed crafts can I make with toilet paper rolls?
Toilet paper rolls are incredibly versatile for space-themed crafts! Beyond rockets, you can create astronauts by covering the roll with white paper, adding a foil helmet, and drawing a face. Planets can be made by painting the rolls in swirly colors and adding glitter for stars. You could also construct alien figures with pipe cleaners for arms and googly eyes. Another idea is to make a telescope by joining two rolls together or a satellite by attaching foil-covered shapes. Combining these with your rocket ships can create a whole solar system diorama, offering hours of imaginative play and display potential.
What Next?
Congratulations, you've successfully built your own fleet of amazing toilet paper roll rocket ships! These creations are not just fun to make but also provide endless opportunities for imaginative play. Consider adding more decorative elements like foil accents for a metallic sheen, or even small battery-operated LED lights for a truly glowing effect. Once your rockets are complete and dry, they make fantastic decorations for a space-themed bedroom or a party. Store them carefully to preserve their cosmic glory, and perhaps plan your next mission: building alien planets or lunar landscapes to accompany your fleet!
Free: 10 Paper Crafts Anyone Can Make in 5 Minutes
Get our beginner guide + new craft ideas weekly.
No spam. Unsubscribe anytime.
Did you complete this activity?
Related