How to Create Bubble Print Art — Easy Step-by-Step Guide
Explore a unique and colorful printmaking technique using simple household items to create stunning bubble prints. A fun, screen-free activity for the whole family!
Quick answer
To make bubble print art, you need dish soap, tempera paint, water, and paper, taking about 30 minutes. Start by mixing paint and soap solution. Blow bubbles and press paper onto them. This easy activity has 7 steps and is perfect for kids aged 6+.
What you need
Shop on Amazon · As an Amazon Associate we earn from qualifying purchases. Links above are affiliate links — we may earn a commission at no extra cost to you.
Unleash your inner artist with the enchanting technique of bubble print art! This delightful craft transforms ordinary household items into a vibrant canvas of unique patterns, making it an ideal activity for creative minds of all ages. It's a wonderfully tactile and engaging process that encourages experimentation and provides a satisfyingly colorful outcome. Perfect for a rainy afternoon, a classroom project, or simply a fun family bonding experience, bubble printing offers a screen-free adventure that sparks imagination and produces beautiful, one-of-a-kind artwork that you'll be proud to display.
On this page
Step-by-Step Instructions
- 1
Prepare your workspace by covering it thoroughly with newspaper or a plastic tablecloth. This is a crucial step to protect your surfaces from inevitable paint splatters and drips, ensuring a stress-free creative session.
- 2
In a small cup, begin by mixing your first color of tempera paint. Add approximately 1/4 cup of tempera paint to the cup, then stir in about 1/4 cup of water. The goal here is to achieve a consistency similar to heavy cream, which will allow the paint to flow easily and create good bubbles.
- 3
Next, add about 1 tablespoon of dish soap to the paint and water mixture. Stir this very gently until all the ingredients are just combined. Avoid vigorous stirring, as this can introduce too many tiny air bubbles into the paint itself, which won't transfer well to the paper.
- 4
Repeat steps 2 and 3 for each additional color of tempera paint you wish to use. It's essential to use a separate cup for each color mixture to prevent your colors from becoming muddy before you even start printing.
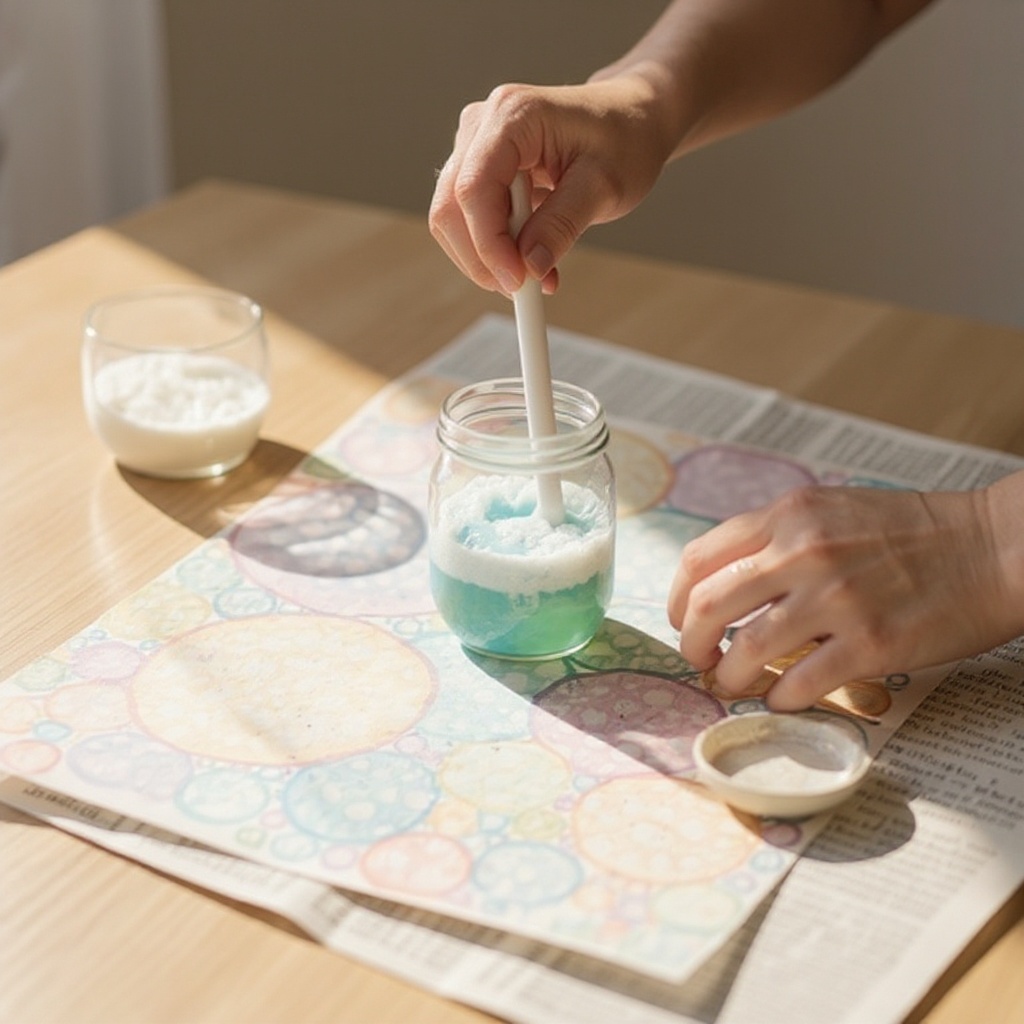
- 5
Now, prepare your main bubble solution. In a clean cup, pour about 1/4 cup of water. Add approximately 1 tablespoon of dish soap to this water and stir gently until it's combined. This solution will be used to create the actual bubbles that will transfer the color.
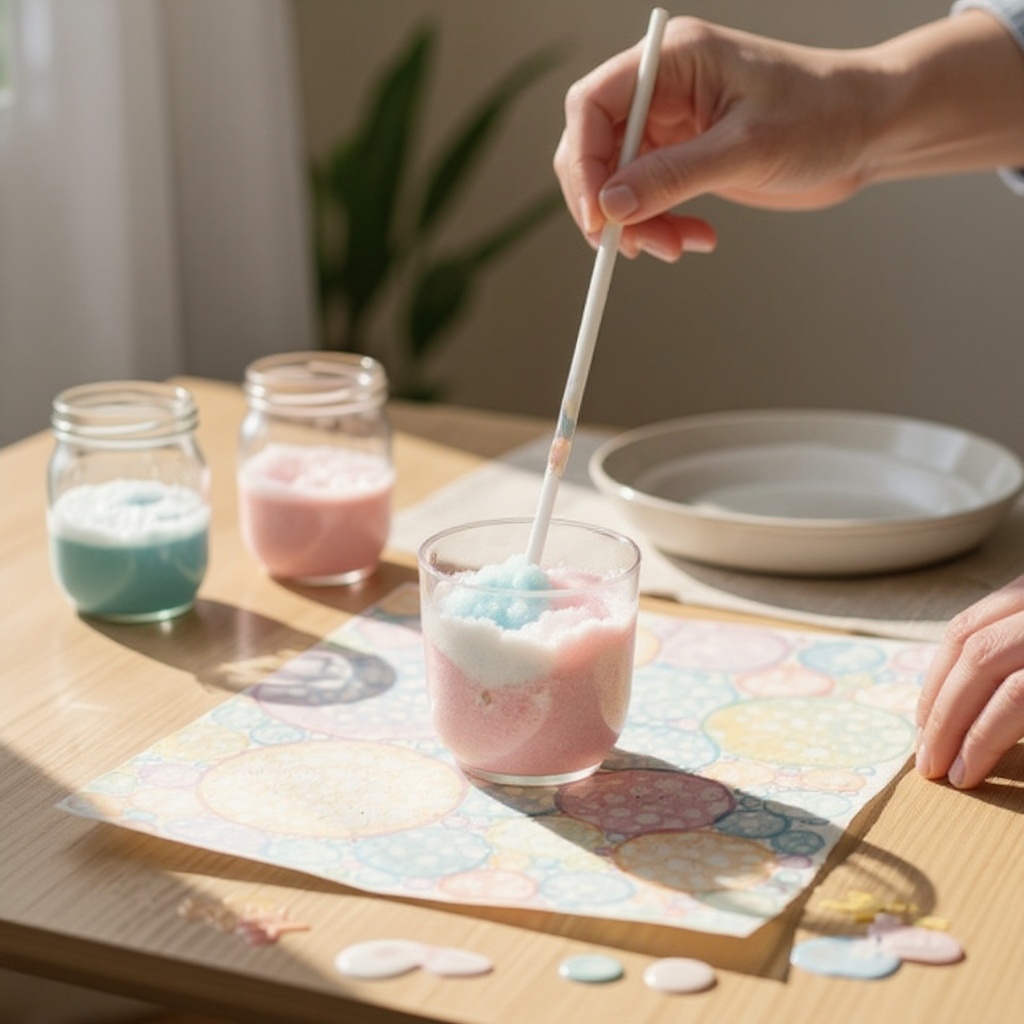
- 6
To create the colorful bubble mounds, add a few drops of one of your prepared paint mixtures into the clean bubble solution cup. You don't need much; just enough to tint the water. Stir this very gently to incorporate the color without creating excessive foam.

- 7
Insert a drinking straw into the cup containing the colored bubble solution. Gently blow into the straw, aiming to create a mound of colorful bubbles that rise above the rim of the cup. Be careful not to blow too hard, as this can cause the solution to splash out.
- 8
Once you have a good mound of bubbles, carefully take your piece of sturdy paper and gently press its surface onto the top of the bubbles. Hold the paper in place for a few seconds, allowing the bubble solution to transfer its color and pattern onto the paper.
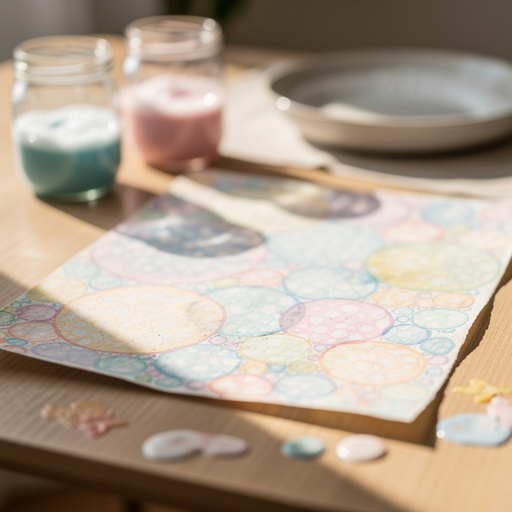
- 9
Slowly and carefully lift the paper away from the bubbles. You will observe a unique, organic pattern created by the popped bubbles, showcasing a beautiful blend of colors and textures. This is the magic of bubble print art!
- 10
To create more complex designs, you can repeat steps 6 through 8 with different colors, layering them on top of each other or in different areas of the same paper. Experiment with pressing the paper at different angles or for varying amounts of time to discover new effects.
- 11
If you notice the bubble solution is not creating enough bubbles, you can add a tiny bit more dish soap to the mixture and stir gently. Conversely, if it's too foamy, a little more water might help.
- 12
Clean your straw thoroughly between colors if you are using the same straw for multiple hues. Alternatively, using a fresh straw for each color is the easiest way to maintain the purity of your paint mixtures.
- 13
Allow your finished bubble print art to dry completely. Depending on the thickness of the paint and the paper, this can take anywhere from 15 minutes to an hour. Avoid touching the wet surface to prevent smudging the delicate patterns.
- 14
Once dry, you can assess your artwork. If you desire more color or texture, you can repeat the process on the same piece of paper, being mindful of the drying time between layers.
- 15
Consider the type of paper you are using. Thicker papers like cardstock or watercolor paper will hold up better to the moisture and prevent excessive buckling, resulting in a cleaner print.
- 16
Experiment with the ratio of paint, water, and dish soap in your initial mixtures. Slightly more or less soap can significantly alter the size and stability of the bubbles, leading to different print textures.
- 17
For a more controlled printing experience, you can place your cup of bubble solution inside a shallow tray or dish. This will catch any overflow and make cleanup much easier.
- 18
If you're working with younger children, you might consider using a larger container for the bubble solution to make it easier for them to press their paper onto the bubbles.
- 19
Don't be afraid to get a little messy! This is a fun, experimental process, and some of the best results come from happy accidents. Have paper towels handy for quick cleanups.
- 20
Once the artwork is completely dry, you can trim the edges if desired, or leave them as they are for a more organic look. The unique patterns are the star of the show!
Tips & Troubleshooting
- 1Don't over-stir the paint mixture, as this can create too many small bubbles that don't transfer well. Gentle stirring ensures larger, more defined bubble patterns on your paper.
- 2Experiment with different ratios of paint, water, and soap to see how it affects the bubble size and print. A slightly thicker paint mixture might create bolder colors, while more soap can lead to more voluminous bubbles.
- 3Use a straw for each color to avoid muddying your paint mixtures. This simple step ensures that your vibrant colors remain distinct and pure in your final artwork.
- 4If the bubbles aren't forming well, add a tiny bit more dish soap to the mixture. Sometimes, the soap concentration is key to achieving a good bubble mound.
- 5Try using different types of paper to see how the texture affects the final print. Smoother papers will capture finer details, while textured papers can add an interesting tactile dimension to your bubble prints.
- 6Consider using a shallow tray or dish to contain the bubble solution. This will catch any overflow and make cleanup significantly easier, especially when working with children.
- 7For a more intense color transfer, allow the bubbles to build up a bit more before pressing your paper. This gives the paint more time to saturate the bubble film.
- 8Don't be afraid to layer colors! After your first print is dry, you can add another layer of bubbles and press your paper again to create complex, multi-dimensional designs.
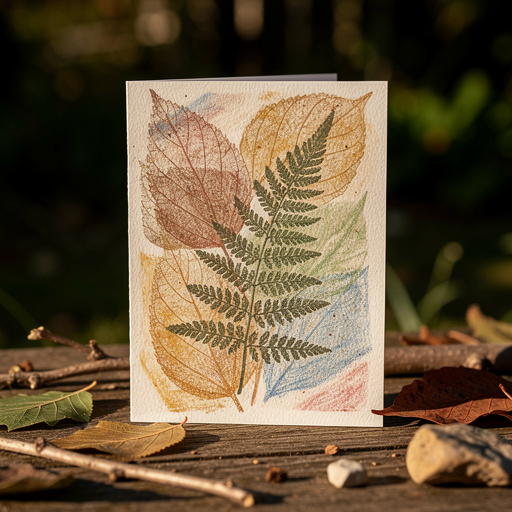
Related Activities You Might Enjoy
Frequently Asked Questions
What are the easiest printmaking ideas for kids?
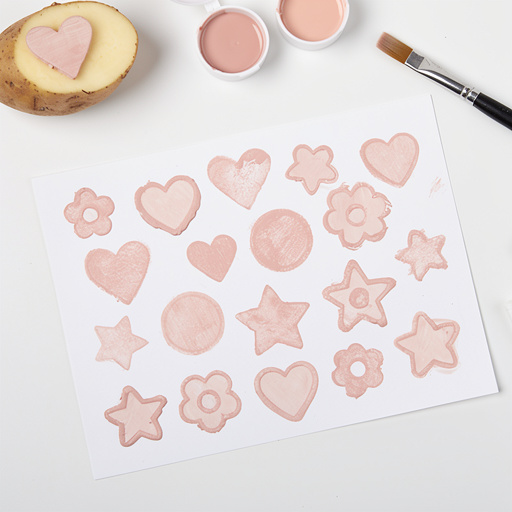
Easy printmaking ideas for kids include bubble printing, potato stamping, and foam stamping. Bubble printing, as detailed in this guide, uses simple household items like dish soap, paint, and straws to create vibrant, organic patterns. Potato stamping involves carving simple shapes into potatoes and using them as stamps with paint. Foam stamping can be done by cutting shapes from craft foam sheets and adhering them to cardboard or popsicle sticks to create reusable stamps. These methods are all low-mess, require minimal adult supervision once set up, and offer exciting, colorful results that children can be proud of, making them perfect for screen-free family fun and creative exploration.
How do you make bubble prints with paint?
To make bubble prints with paint, you'll start by creating a colorful paint and soap mixture. In a cup, combine tempera paint, water, and dish soap, stirring gently. Then, in a separate cup with water and more dish soap, add a few drops of your colored paint mixture. Insert a straw and gently blow to create a mound of bubbles that rise above the rim. Finally, carefully press a piece of sturdy paper onto the surface of these colorful bubbles. The bubbles will pop, transferring their pigment and creating a unique, organic pattern onto your paper. Repeat with different colors for a layered effect.
What materials are needed for bubble print art?
For bubble print art, you'll need a few key materials that are likely already in your home. Essential items include liquid dish soap, tempera paint in various colors, water for diluting the paint and creating the bubble solution, and sturdy paper such as cardstock or watercolor paper. Drinking straws are necessary for blowing the bubbles, and small cups or jars are needed to mix each color. To protect your workspace, it's highly recommended to have newspaper or a plastic tablecloth on hand. Having paper towels for quick cleanups is also a good idea.
Can you do bubble printing on fabric?
While bubble printing is primarily done on paper, you can experiment with fabric paints and pre-treated fabric for a unique textile design. The process would be similar: mix fabric paints with dish soap and water, blow bubbles, and then press the fabric onto the bubbles. However, the results may vary significantly compared to paper. Fabric paints are thicker and may not create as delicate or varied bubble patterns. It's best to test on a scrap piece of fabric first to see how the paint interacts with the material and the dish soap. You might need to adjust the ratios of paint, soap, and water to achieve optimal results on fabric.
What is the best type of paper for bubble printing?
The best type of paper for bubble printing is sturdy paper that can withstand moisture without buckling or tearing. Cardstock and watercolor paper are excellent choices because of their thickness and absorbency. These papers hold the paint mixture well and prevent the artwork from becoming warped or distorted by the liquid. While regular drawing paper can be used, it might buckle more easily, especially if you're layering colors or using a lot of paint. Experimenting with different paper textures can also yield interesting results, with smoother papers capturing finer bubble details and textured papers adding a unique tactile quality to the final print.
How do I get the best bubble patterns from my prints?
To achieve the best bubble patterns, focus on the consistency of your paint mixture and the technique of blowing the bubbles. Ensure your paint, water, and dish soap mixture is gently stirred to a creamy consistency, avoiding over-stirring which creates tiny, ineffective bubbles. When blowing, aim for a steady, gentle stream of air to create a substantial mound of large, stable bubbles that rise above the cup's rim. Pressing the paper gently and evenly onto the bubble mound for a few seconds allows for optimal color transfer. Experimenting with different blowing pressures and paper pressing angles can also lead to a wider variety of unique and beautiful patterns.
What Next?
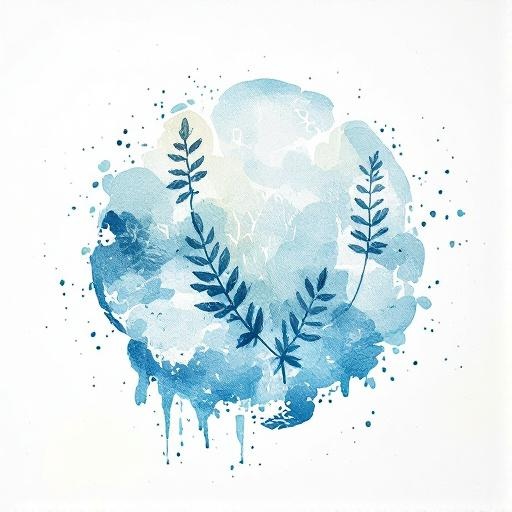
Once your bubble print masterpiece is dry, the creative possibilities continue! You can use these prints as standalone art pieces, or cut them into smaller shapes for greeting cards, gift tags, or even to embellish journals. Consider layering different bubble prints for added depth or incorporating them into mixed-media collages. For future projects, explore different types of paint, like acrylics (though they may require a bit more water to thin) or even watercolors mixed with a touch of dish soap. You might also try blowing bubbles onto fabric paints for a unique textile design. Store your finished prints flat in a portfolio or frame them to showcase your vibrant creations.
Free: 10 Paper Crafts Anyone Can Make in 5 Minutes
Get our beginner guide + new craft ideas weekly.
No spam. Unsubscribe anytime.
Did you complete this activity?
Related