How to Make Cardboard Tube Puppets — Easy Step-by-Step Guide
Transform simple cardboard tubes into engaging characters for hours of pretend play. This easy craft is perfect for little hands and big imaginations.

Quick answer
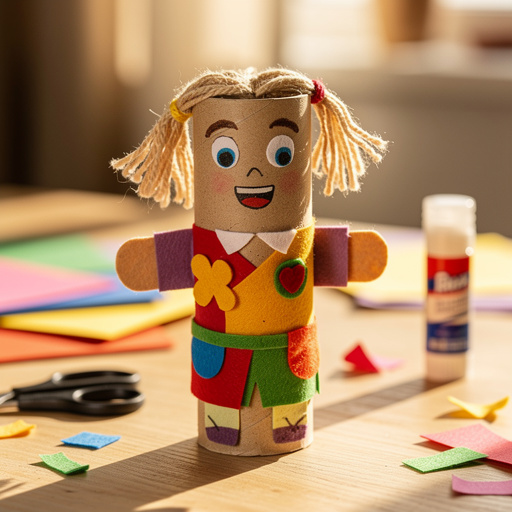
To make cardboard tube puppets, you need cardboard tubes, craft supplies, and about 30 minutes. Start by decorating your tubes. This beginner-friendly activity has 10 steps and is perfect for 3-4 year olds.
What you need
Shop on Amazon · As an Amazon Associate we earn from qualifying purchases. Links above are affiliate links — we may earn a commission at no extra cost to you.
Unleash a world of imagination with a delightful cardboard tube puppet craft! This project is a fantastic way to repurpose everyday items into captivating characters, fostering creativity and fine motor skills in young children. It's an ideal activity for rainy days, playdates, or a fun afternoon at home, offering a screen-free experience that encourages storytelling and dramatic play. With minimal materials and a short crafting time, you can quickly create a cast of unique puppets ready for endless adventures.
On this page
Step-by-Step Instructions
- 1
Gather all your materials in a clear, well-lit workspace. Ensure you have enough surface area to spread out the construction paper, tubes, and other supplies, and protect your table with newspaper or a craft mat if needed.
- 2
Begin by selecting a cardboard tube for your first puppet. Decide on the character you want to create – perhaps a friendly monster, a brave knight, or a whimsical animal.
- 3
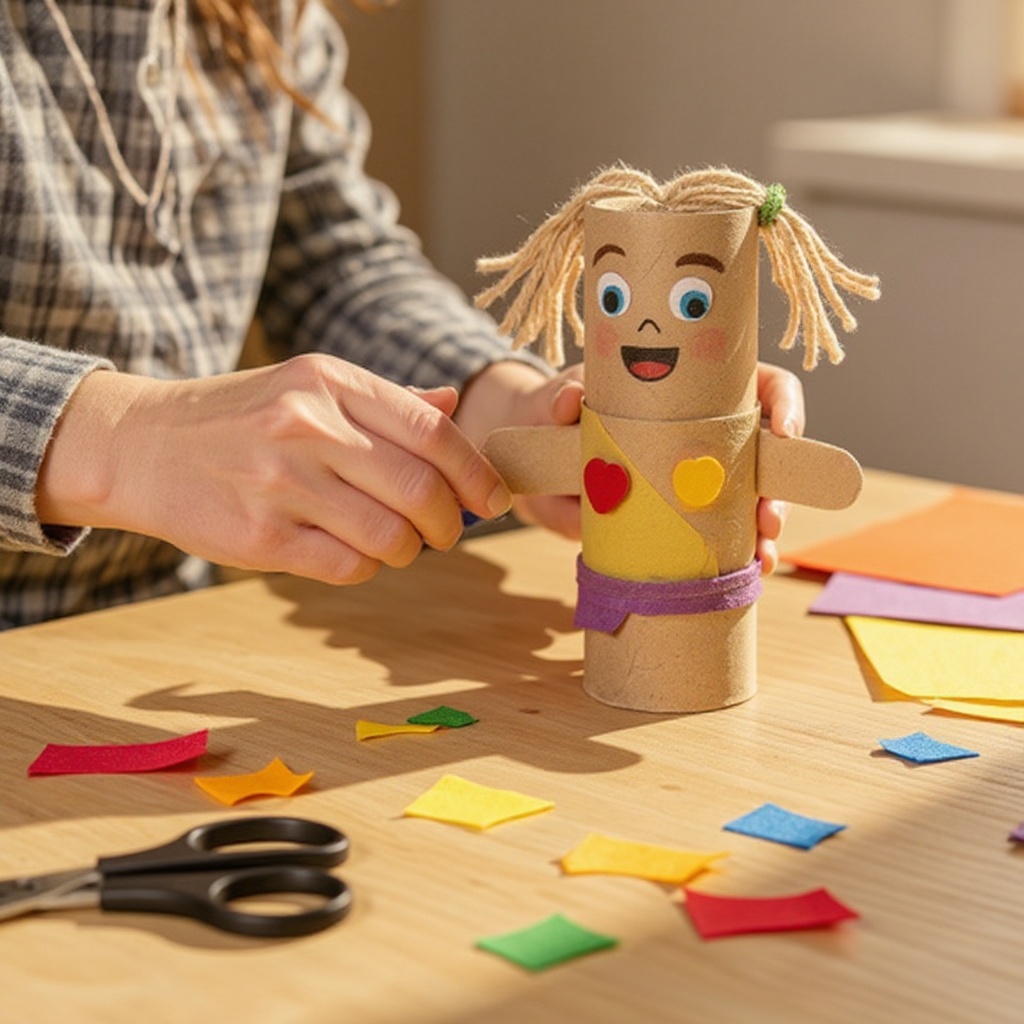
Cut out basic shapes from construction paper to form the main body or clothing of your puppet. This could be a large rectangle for a dress, a triangle for a hat, or a simple oval for a head that will be attached to the tube.
- 4
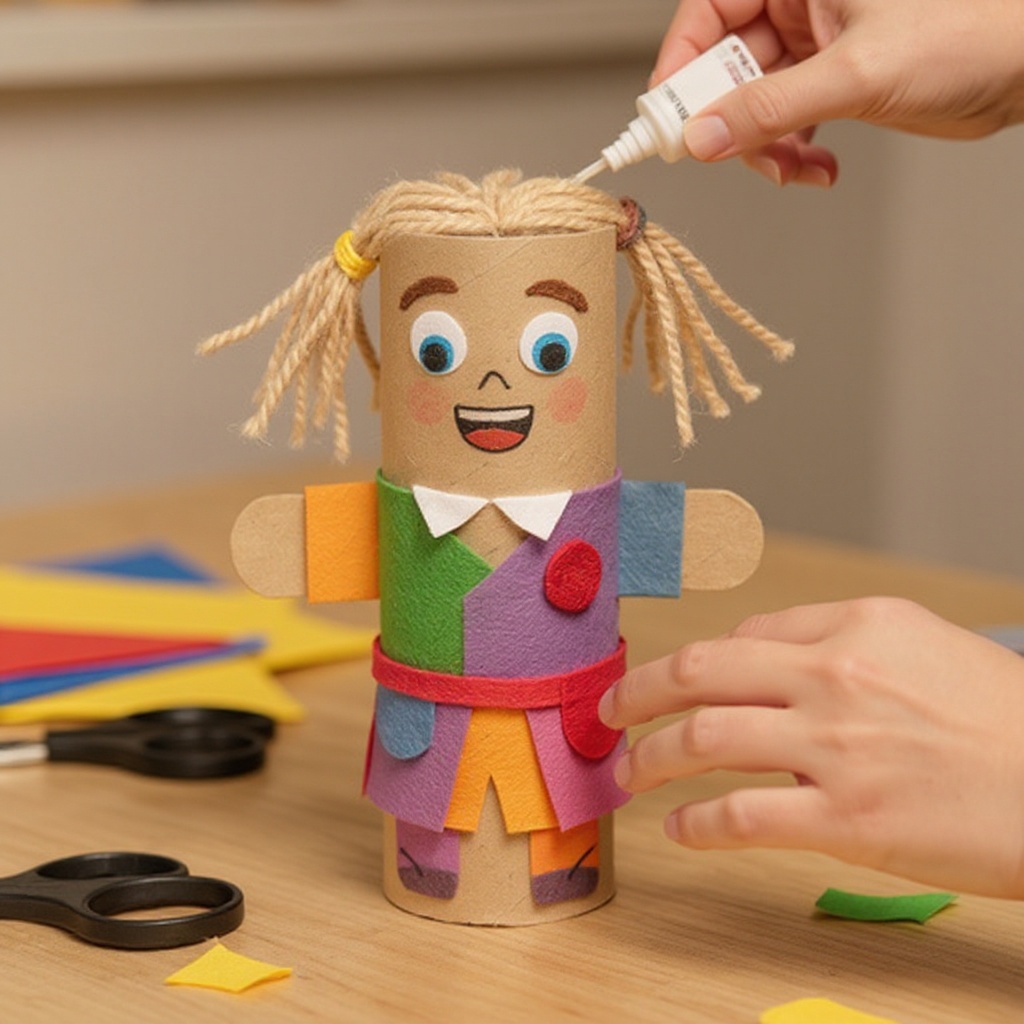
Use crayons or washable markers to draw facial features directly onto the cardboard tube. You can draw eyes, a nose, a mouth, or even add blush to the cheeks for a more detailed look.
- 5
Alternatively, cut out shapes from construction paper to create facial features like eyes, eyebrows, or a smile, and glue these onto the tube for a layered effect.
- 6
Glue the pre-cut construction paper shapes onto the tubes to create hair, hats, or outfits. For example, cut a fringe of paper for hair, a pointed shape for a wizard's hat, or a simple tunic shape for clothing.
- 7
If using googly eyes, apply a small dot of white craft glue or a generous amount of glue stick to the back of each eye and press them firmly onto the puppet's face. For a more secure attachment, use white craft glue.
- 8
Cut thin strips of construction paper or yarn to make arms or legs. For paper arms, cut long, thin rectangles and fold them accordion-style for a jointed look, then glue them to the sides of the tube. For yarn legs, tie several strands together and glue them to the bottom of the tube.
- 9
Wrap yarn around the top of a tube to create a different hair effect. You can wrap it around multiple times, creating a bun or a ponytail, and secure the ends with a dab of white craft glue.
- 10
Use pipe cleaners to create antennae, ears, or other fun appendages. Bend them into desired shapes, such as loops for antennae or pointed shapes for ears, and attach them securely to the puppet's head or body with white craft glue.
- 11
For a different hair texture, cut strands of yarn and glue them along the top edge of the tube, allowing them to hang down like hair. You can also braid or twist the yarn before gluing for unique hairstyles.
- 12
Experiment with adding other decorative elements like buttons glued onto clothing, small fabric scraps for texture, or glitter glue for a touch of sparkle. Stickers can also be a quick and easy way to add details.
- 13
If you're creating a character with a distinct personality, consider adding accessories like a small paper crown, a cape made from felt, or even a tiny paper book held in its 'hands'.
- 14
Ensure all glued elements are firmly attached and allow ample drying time for all adhesives. This is especially important if you've used white craft glue, which needs a few minutes to set.
- 15
Once all the glue has dried completely and all decorations are secure, gently test the stability of any attached limbs or accessories.
- 16
Your cardboard tube puppets are now ready for pretend play! Encourage children to give their puppets names and voices, and let their imaginations run wild.
- 17
Repeat the decorating process for each cardboard tube, creating a diverse cast of characters for your puppet show.
- 18
Consider adding a base to your puppets by gluing them onto a slightly larger piece of cardboard or a small wooden disc, which can make them easier to handle and stand up.
Tips & Troubleshooting
- 1For younger children, pre-cut some of the construction paper shapes to make the process easier and reduce frustration. This allows them to focus on the decorating and assembly aspects of the craft.
- 2Encourage children to name their puppets and create backstories for them. This simple step significantly enhances imaginative play and helps develop storytelling skills.
- 3Use different sized tubes, such as paper towel tubes cut down to various lengths, for varied puppet heights. This adds visual interest and allows for a wider range of character types.
- 4Let children experiment with different materials like fabric scraps or felt for unique textures and visual appeal. These materials can add a tactile dimension to the puppets.
- 5Don't be afraid to embrace imperfections! Wobbly eyes or slightly crooked glued pieces add to the charm and uniqueness of handmade puppets, celebrating the child's individual effort.
- 6If you want to create puppets that can be manipulated more easily, consider attaching them to craft sticks or dowels. Glue the stick to the inside of the tube, leaving enough exposed to hold.
- 7For a more durable puppet, consider covering the entire decorated tube with clear packing tape once the glue has dried. This will protect the decorations and strengthen the cardboard.
- 8Incorporate recycled materials beyond just cardboard tubes. Small bottle caps can become buttons, and bits of plastic packaging can be transformed into interesting accessories.
Related Activities You Might Enjoy
Frequently Asked Questions
What are good pretend play toys for 3 year olds?
Pretend play toys for 3-year-olds are crucial for developing imagination, social skills, and problem-solving abilities. Excellent options include dress-up clothes that allow them to embody different roles, play kitchens with food and utensils for culinary adventures, and toy tools for aspiring builders. Dolls and stuffed animals are perfect companions for nurturing and storytelling. Simple crafts like these cardboard tube puppets, which they can create and then play with, are also fantastic as they combine the joy of making with the excitement of imaginative scenarios. The key is to provide open-ended toys that encourage creativity and exploration.
How can I make cardboard tube puppets more durable?
To make cardboard tube puppets more durable and long-lasting, consider reinforcing the tubes with a layer of Mod Podge after decorating, allowing it to dry completely. This creates a protective seal. Alternatively, use stronger glue like white craft glue or Tacky Glue for attaching accessories, as glue sticks can sometimes come loose over time. Covering the decorated puppets with clear packing tape can also add significant protection against wear and tear, making them more resilient for enthusiastic play sessions. Ensuring all glued parts are thoroughly dry before playing is also essential.
What are some simple craft ideas for 4 year olds?
Simple craft ideas for 4-year-olds should focus on easy steps, engaging materials, and opportunities for creative expression. Finger painting and easel painting are always a hit, allowing for bold strokes and vibrant colors. Playdough creations are wonderful for developing fine motor skills and imaginative sculpting. Collage art, using pre-cut paper scraps, fabric remnants, and stickers, is another excellent choice that encourages texture exploration. Making puppets from household items like cardboard tubes, paper bags, or even old socks provides a fun, hands-on project that leads to immediate playtime. The goal is to foster a love for creating without overwhelming them with complex techniques.
Can 3 year olds help make these puppets?
Yes, 3-year-olds can definitely help make these cardboard tube puppets! Their involvement will depend on their fine motor skills and attention span, but they can enthusiastically assist with many steps. They can help with drawing faces using crayons or markers, gluing on pre-cut shapes like eyes or hair, and choosing colors for construction paper decorations. Adult supervision is highly recommended, especially for any cutting with scissors and for managing small parts like googly eyes to prevent choking hazards. Their participation, even in simple ways, makes the craft more rewarding and fosters a sense of accomplishment.
What are some creative ways to use cardboard tube puppets?
Beyond simple storytelling, cardboard tube puppets can be used in numerous creative ways to enhance play and learning. They are perfect for acting out favorite stories or creating new ones, which helps develop narrative skills. You can set up a simple puppet theater using a cardboard box and have the children perform shows for family members. They can also be used to teach children about emotions by having them express different feelings through their puppet's voice and actions. For educational purposes, puppets can introduce new concepts, vocabulary, or even practice counting by having them interact with objects. They can also be incorporated into music time by having the puppets 'sing' along to songs.
How can I make the puppets stand up on their own?
To make your cardboard tube puppets stand up independently, several methods can be employed. The simplest is to create a wider base by gluing the bottom of the tube onto a larger, flat piece of sturdy cardboard or a small wooden disc. Another effective technique is to cut small slits at the bottom of the tube and fold the cardboard flaps outwards to create a stable base. For a more robust solution, you can insert a craft stick or dowel into the bottom of the tube and glue it securely, then attach the other end of the stick to a heavier base. Ensure the base is wide enough to provide good balance for the puppet's height.
What Next?
Once your fantastic cardboard tube puppets are dry and ready, the real magic begins with imaginative play! Encourage your little ones to put on a show, create stories, or even invent a puppet theater using a cardboard box. For variations, consider using paper towel tubes cut to different lengths for taller characters or even toilet paper tubes stacked and glued together for more complex figures. Store your creations in a designated box or basket to keep them safe for future performances. This simple craft opens the door to a universe of storytelling possibilities!
Free: 10 Paper Crafts Anyone Can Make in 5 Minutes
Get our beginner guide + new craft ideas weekly.
No spam. Unsubscribe anytime.
Did you complete this activity?
Related