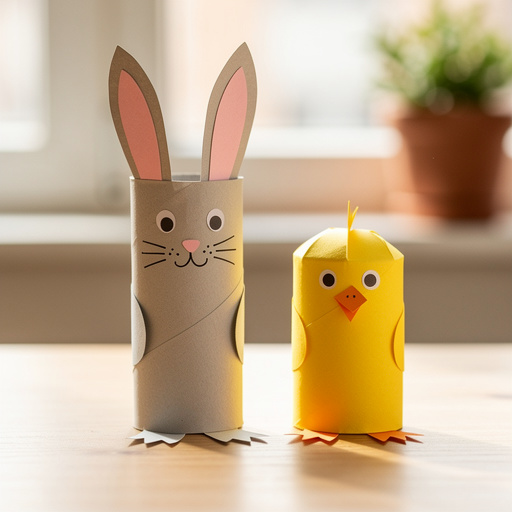
How to Make Paper Roll Bunny & Chick Friends — Easy Step-by-Step Guide
Transform empty toilet paper rolls into charming Easter characters! This easy craft is perfect for little hands and creates delightful decorations. Follow our step-by-step guide to make adorable paper roll bunnies and chicks that will add a festive touch to your Easter celebrations.
Quick answer
To make paper roll bunnies and chicks, you need toilet paper rolls, construction paper, glue, and scissors, taking about 30 minutes. Start by cutting out ear and beak shapes. This beginner-friendly activity has 10 steps and is perfect for families with young children, offering a fun and creative way to celebrate Easter.
What you need
Shop on Amazon · As an Amazon Associate we earn from qualifying purchases. Links above are affiliate links — we may earn a commission at no extra cost to you.
Easter is a time for joy, family, and delightful crafts, and what better way to capture that spirit than by transforming everyday items into charming characters? This project turns humble toilet paper rolls into adorable bunny and chick friends, perfect for little hands to create and decorate. It’s a fantastic way to engage children in a screen-free activity that sparks creativity and results in charming decorations. The simplicity of the materials and the straightforward steps make it an ideal craft for preschoolers and early elementary students, fostering fine motor skills and a sense of accomplishment.
On this page
Step-by-Step Instructions
- 1
**Prepare the Bunny Bodies:** Take two of the toilet paper rolls and gently flatten them slightly. Using your child-safe scissors, carefully cut each of these rolls in half. This will give you four shorter tubes, two of which will serve as the bodies for your bunnies. Ensure the cuts are as straight as possible for a neat finish.
- 2
**Cut the Bunny Ears (Outer Layer):** On the pink construction paper, use your pencil to lightly sketch out two long, oval-shaped ear forms. These should be generously sized to be noticeable on the bunny's head. Carefully cut these out with your scissors, aiming for smooth, rounded edges.
- 3
**Cut the Bunny Ears (Inner Layer):** Now, take the white construction paper and cut out two smaller, matching oval shapes that are slightly smaller than the pink ear shapes you just cut. These will be glued onto the pink ears to create a lovely layered effect, mimicking the inside of a real bunny's ear.
- 4
**Assemble the Bunny Ears:** Apply a thin, even layer of white craft glue to the back of each white ear shape. Carefully center and press each white ear onto its corresponding pink ear. Hold them gently for a few seconds to ensure they adhere well, then set them aside to dry.
- 5
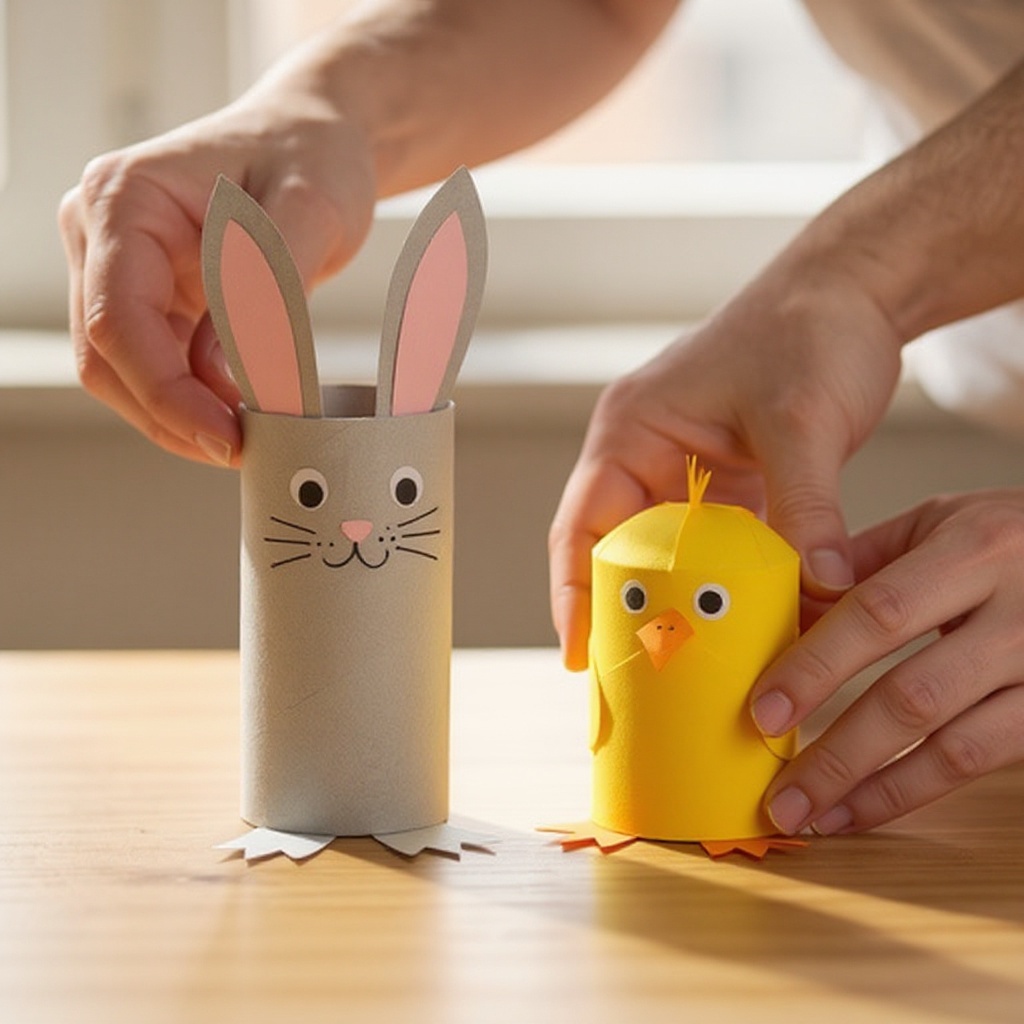
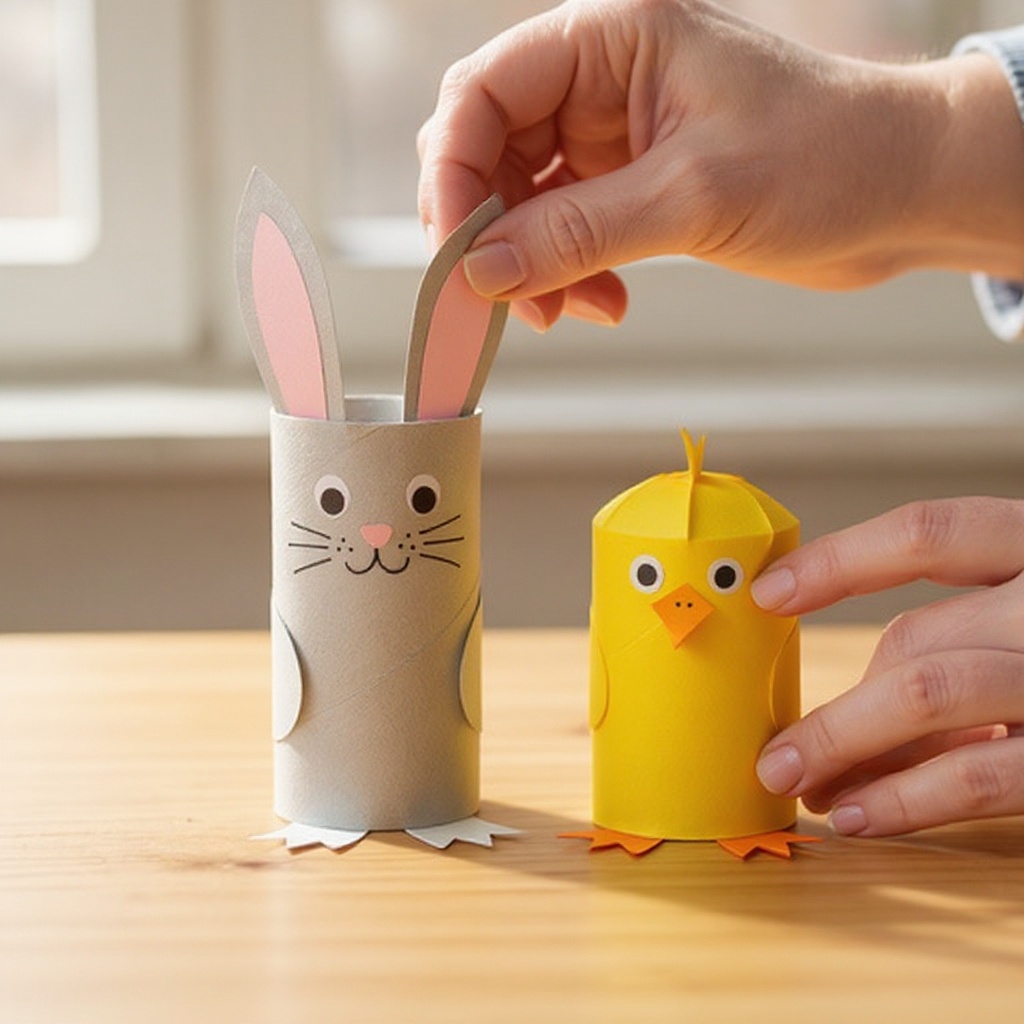
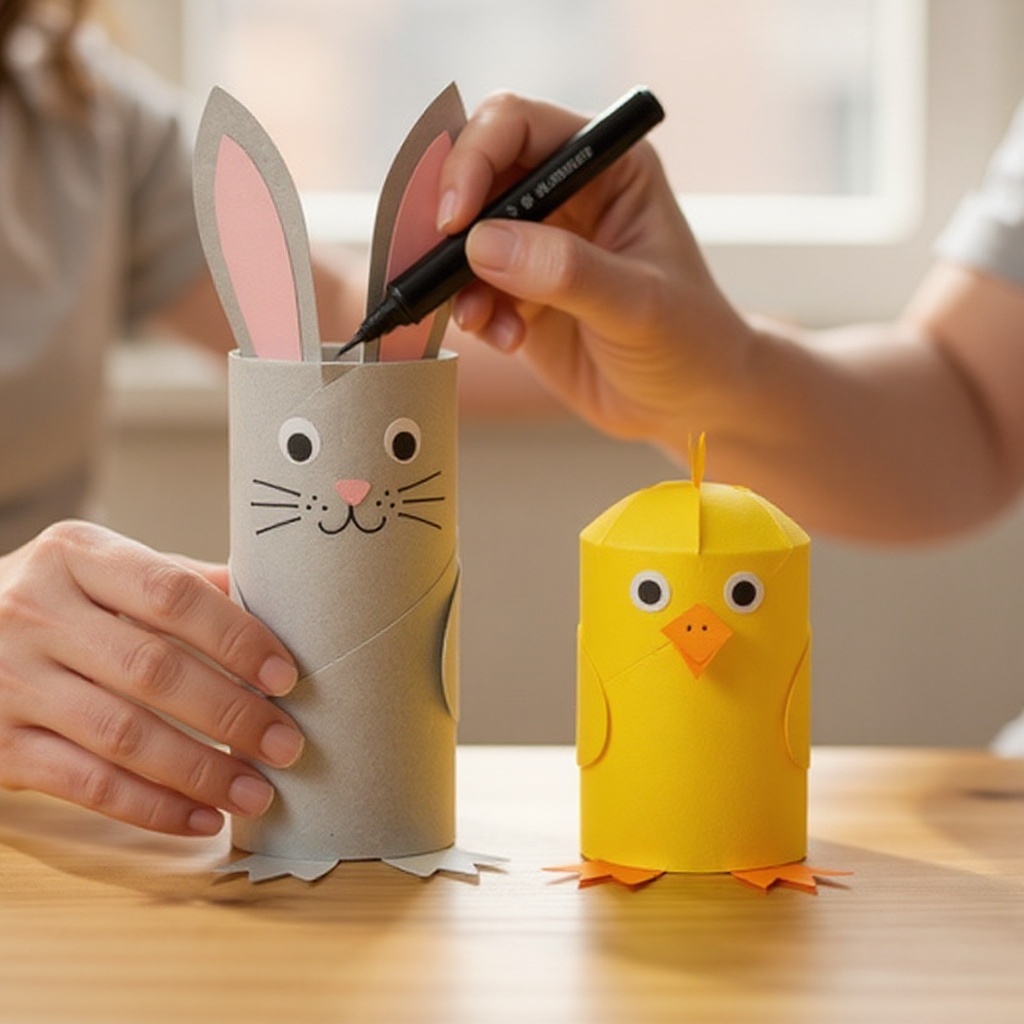
**Attach the Bunny Ears:** Select one of the shorter toilet paper rolls that you prepared earlier to be the bunny's head. Apply glue along the top inside edge of this tube. Gently press the completed, layered ears onto the glued edge, positioning them so they stand upright and look natural. You might need to hold them in place for a moment until the glue begins to set.
- 6
**Create the Bunny Tail:** From the white construction paper, cut out a small circle, about the size of a quarter. This will be the bunny's fluffy tail. Alternatively, if you have cotton balls, you can pull one apart slightly to create a fluffy texture. Apply a generous amount of glue to the back of the other shorter toilet paper roll (this is the bunny's body) and firmly press the paper circle or cotton ball onto it.
- 7
**Prepare the Chick Bodies:** Take two of the remaining whole toilet paper rolls. These will serve as the bodies for your chicks. If you wish, you can cover these rolls entirely with yellow construction paper before proceeding, by cutting a rectangle to fit around the roll and gluing it securely. This step is optional but adds a vibrant base color.
- 8
**Cut the Chick Beaks:** On the orange construction paper, draw and cut out two small, rounded beak shapes. These should be roughly triangular with a slightly curved bottom edge. You can make them as simple or as detailed as you like, ensuring they are proportionate to the size of the toilet paper roll.
- 9
**Attach the Chick Beaks:** Apply a small amount of glue to the back of each orange beak shape. Carefully position and press these onto the front of the whole toilet paper rolls (the chick's bodies), placing them close together to form a distinct beak. Ensure they are firmly attached and facing forward.
- 10
**Draw the Chick Eyes:** Using your black marker, carefully draw two small, round eyes above the beaks on each of the chick's bodies. You can make them simple dots or add small pupils for a more expressive look. Ensure the eyes are placed symmetrically for a balanced appearance.
- 11
**Draw the Bunny Face:** With the black marker, draw the facial features for your bunny. Create two eyes above where the ears are attached, and then draw a small, cute nose and a simple mouth below the nose. You can experiment with different expressions to give your bunny personality.
- 12
**Add Optional Details (Bunny):** For an extra touch, you can draw a small pink nose on your bunny's face, or even add whiskers with the black marker. If you chose to cover the bunny's body with brown paper, you can also draw a few subtle lines to suggest fur texture.
- 13
**Add Optional Details (Chick):** To enhance the chick's appearance, you could draw tiny orange feet at the bottom of its body, or add small wing shapes on its sides using yellow or orange paper. Consider adding a tiny red dot for a comb on its head if you're feeling adventurous.
- 14
**Reinforce and Dry:** Once all the pieces are glued and drawn, gently check that everything is securely attached. Place your finished paper roll bunny and chick friends in a safe spot to allow the glue to dry completely. This is crucial to prevent any parts from detaching during handling or play.
Tips & Troubleshooting
- 1**Alternative Materials for Color:** If you don't have construction paper in the exact colors you need, don't worry! You can use colored cardstock for a sturdier finish, or even paint the toilet paper rolls with acrylic paints in your desired colors before decorating. Allow the paint to dry thoroughly before proceeding with gluing on the paper elements.
- 2**Fluffy Bunny Tails:** For an extra soft and fluffy bunny tail, instead of using a paper circle, glue a small piece of a cotton ball onto the back of the bunny's body. You can gently pull the cotton ball apart to make it look more voluminous and realistic.
- 3**Personalized Faces:** Encourage children to get creative with their drawings! They can draw unique facial features for each bunny and chick, giving them different personalities and expressions. Think about adding rosy cheeks with a pink marker or even tiny eyebrows for added character.
- 4**Drying Time is Key:** Patience is a virtue when crafting! Let the glue dry completely before handling the finished characters. This ensures that all the glued elements, especially the ears and tails, are firmly attached and won't fall off, making your creations more durable and enjoyable.
- 5**Adding Texture and Dimension:** To give your characters more depth, consider layering different types of paper. For example, you could use patterned paper for the bunny's ears or add small cut-outs of different colors for the chick's wings. This adds visual interest and makes the craft more engaging.
- 6**Securing Loose Edges:** If you notice any paper edges that are starting to lift after drying, a tiny dab of glue can help secure them. You can also use a glue stick for a less messy application on small areas.
- 7**Making Them Stand Up:** To ensure your paper roll characters stand up steadily, make sure the base of the toilet paper roll is flat. If it's a bit wobbly, you can gently press down on the bottom edge to flatten it slightly, or even glue a small cardboard circle to the bottom for added stability.
- 8**Safety First:** Always supervise young children when they are using scissors, even child-safe ones. Ensure they are using the glue responsibly and not ingesting it. This craft is designed to be safe and fun for all ages with appropriate guidance.
Related Activities You Might Enjoy
Frequently Asked Questions
What other Easter characters can I make with toilet paper rolls?
The versatility of toilet paper rolls makes them ideal for a whole menagerie of Easter friends! You can easily adapt this craft to create lambs by cutting out fluffy white wool shapes and adding small ears and a tail. For a duck, cut out a yellow beak and perhaps some simple wing shapes. You could even try making a little Easter basket by cutting notches into the bottom of a roll and folding them outwards, then adding a handle. By experimenting with different shapes for ears, tails, and bodies, and using a variety of colored papers, the possibilities are nearly endless for creating a delightful Easter-themed paper roll animal collection.
Can younger children do this craft?
Yes, with adult supervision, younger children can absolutely participate in this craft! While they might need assistance with the cutting of paper shapes, they can enthusiastically help with applying glue to the pieces and pressing them onto the toilet paper rolls. Drawing the facial features with a marker is also a fantastic activity for them to engage in, allowing them to express their creativity. This project is excellent for developing fine motor skills, hand-eye coordination, and following simple instructions, making it a rewarding experience for even the youngest crafters.
How can I make these paper roll characters more durable?
To enhance the durability of your finished paper roll bunnies and chicks, consider applying a protective coating once the glue has completely dried. A thin layer of Mod Podge (matte or glossy finish) or a clear spray sealant can provide a protective barrier against moisture and wear. This will not only make them sturdier but also give them a nice sheen. For added structural integrity, you could also glue the paper decorations onto a slightly thicker cardstock base before attaching them to the toilet paper roll, or even reinforce the inside of the roll with a bit of extra cardboard.
What can I do with my finished paper roll bunnies and chicks?
These adorable paper roll characters are incredibly versatile and can be used in numerous ways to enhance your Easter celebrations! They make wonderful decorations: stand them up on shelves, windowsills, or as charming table centerpieces for your Easter meal. You can also turn them into fun puppets for imaginative play; simply hold them by the roll and put on a little show! They are perfect for gifting, attaching them to Easter baskets or tucking them into an Easter egg hunt as a special surprise. Their small size also makes them ideal for creating a festive Easter diorama or scene.
What size should the ears and beaks be relative to the toilet paper roll?
The size of the ears and beaks should be proportionate to the toilet paper roll to create a balanced and appealing character. For the bunny ears, aim for shapes that are roughly 2-3 inches long and about 1-1.5 inches wide at their widest point, allowing them to stand out without overwhelming the head. For the chick's beak, a small, triangular shape that is about 0.5-1 inch wide and 0.5 inches tall usually works well. It's always a good idea to hold the cut-out shapes up to the toilet paper roll before gluing to gauge their size and adjust if necessary. Remember, a little bit of artistic license is perfectly fine!
Can I use other types of glue besides white craft glue?
While white craft glue is generally the easiest and safest option for this project, especially for children, other glues can be used with varying results. A glue stick can work for attaching flat paper pieces, but it might not provide as strong a bond for thicker paper or for attaching elements like cotton balls. Hot glue guns, when used by an adult, can offer a very strong and quick bond, but they require caution due to the heat. For a more permanent and durable finish, a strong craft glue like Tacky Glue is an excellent alternative to white craft glue, offering a good balance of adhesion and ease of use.
What Next?
Once your paper roll bunny and chick friends are complete, they're ready to bring a touch of Easter cheer to your home! Consider creating a whole flock of chicks and a burrow of bunnies for a more extensive display. You can arrange them on a mantelpiece, use them as part of a festive table setting, or even attach them to Easter baskets for a personalized touch. For storage, gently place them in a box, perhaps with some tissue paper to protect their delicate features. This project is a wonderful springboard for further creativity; why not try making lambs, ducks, or even a whole farmyard of paper roll animals?
Free: 10 Paper Crafts Anyone Can Make in 5 Minutes
Get our beginner guide + new craft ideas weekly.
No spam. Unsubscribe anytime.
Did you complete this activity?
Related
You might also like

Paper Roll Bunny Buddies
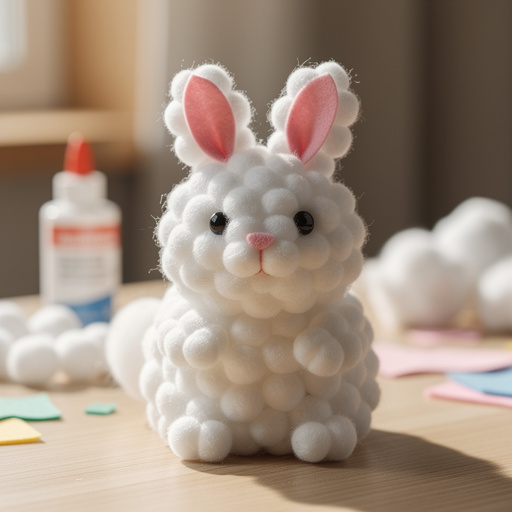
Fluffy Cotton Ball Bunny

Toilet Paper Roll Rocket Ships
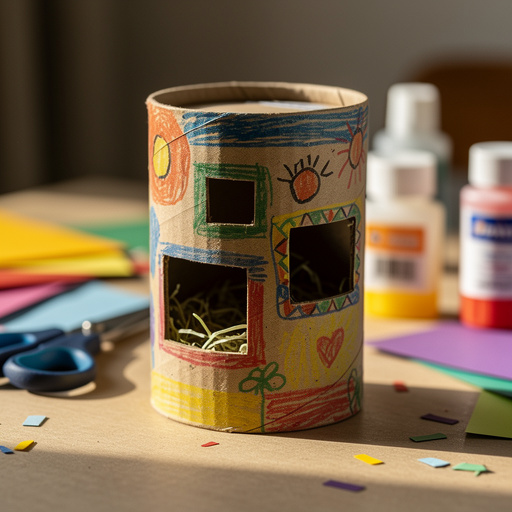
Cardboard Tube Critter Cages
Paper Jamz Guitar Craft