How to Create Soap Sculptures — Easy Step-by-Step Guide
Transform ordinary bars of soap into beautiful sculptures with simple carving tools. This engaging craft is perfect for a quiet afternoon of creativity.
Quick answer
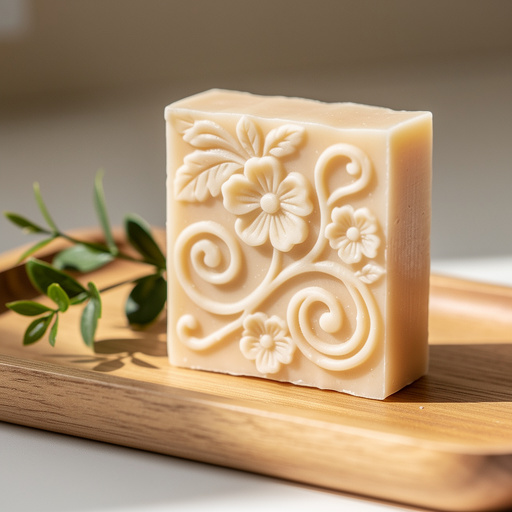
To create soap sculptures, you need bars of soap, carving tools, and about 30 minutes. Start by sketching your design on the soap. This beginner-friendly activity has 10 steps and is perfect for families looking for screen-free fun.
What you need
Shop on Amazon · As an Amazon Associate we earn from qualifying purchases. Links above are affiliate links — we may earn a commission at no extra cost to you.
Embark on a delightful journey of artistic expression with the simple yet captivating craft of soap sculpting. This project offers a unique opportunity to transform everyday bars of soap into miniature works of art, providing a satisfying and tactile creative outlet. It's an ideal activity for anyone seeking a moment of mindful engagement, a screen-free family bonding experience, or a way to add a personal touch to handmade gifts. With minimal materials and a forgiving medium, soap carving is accessible to all skill levels, making it a truly rewarding endeavor.
On this page
Step-by-Step Instructions
- 1
Choose a plain bar of soap. Opt for bars that are firm and have a smooth surface, such as classic Ivory or Dove. Avoid heavily scented or colored soaps, as these can sometimes be more brittle, crumble easily, or leave residue that makes carving difficult and obscures your design.
- 2
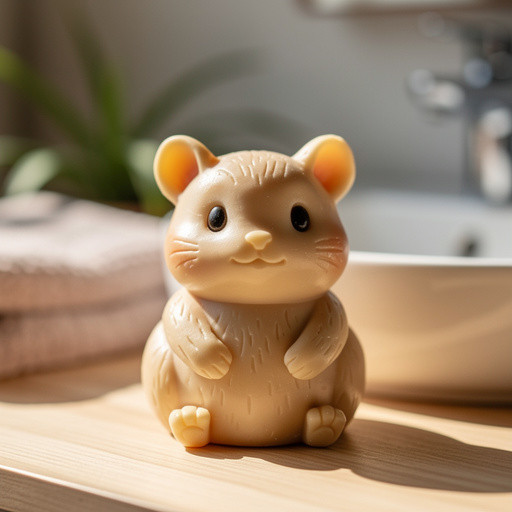
On a piece of paper, sketch a simple design. Begin with basic geometric shapes like hearts, stars, or simple outlines of animals like cats or fish. Consider the dimensions of your soap bar and how your design will fit within its form, ensuring it's not too complex for your first attempt.
- 3
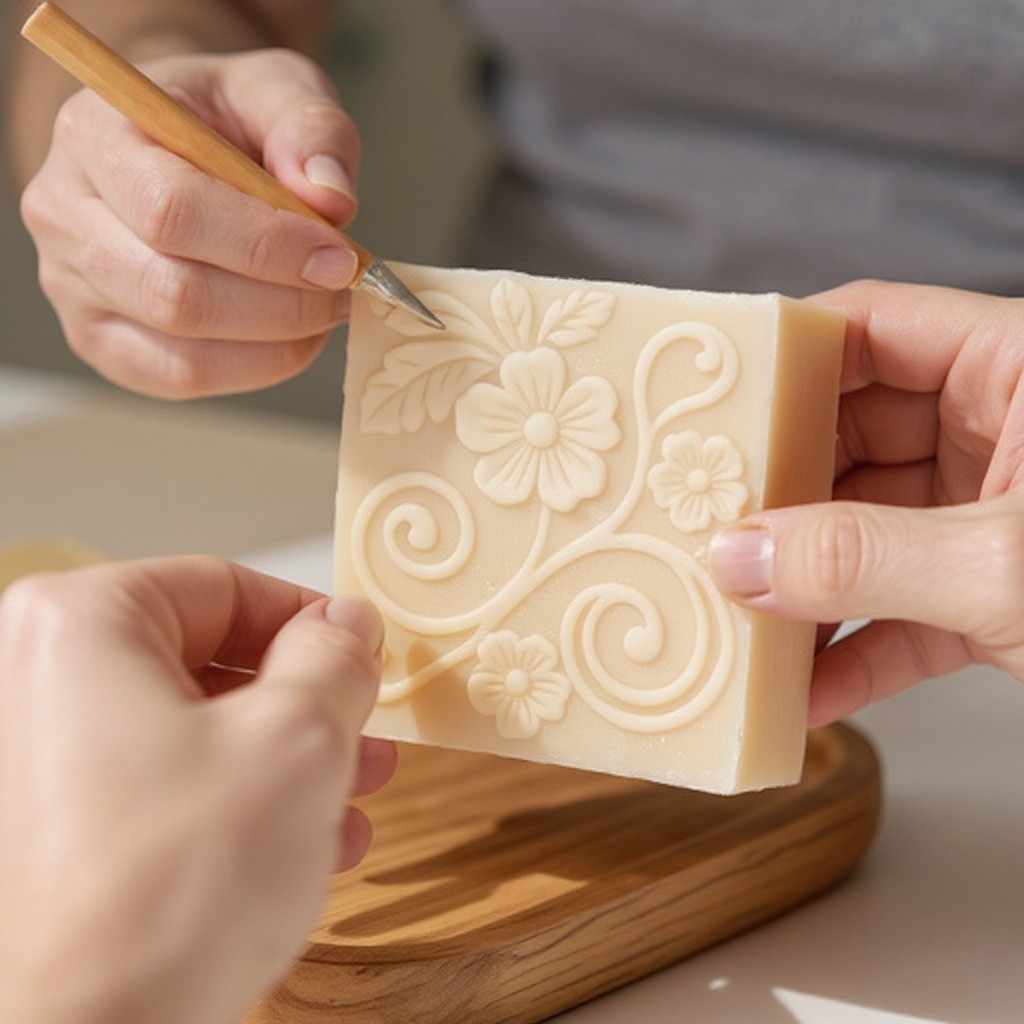
Lightly trace your design onto the soap bar with a pencil or marker. Gently transfer your chosen sketch onto the soap's surface, focusing on clear, visible lines. Avoid pressing too hard, as this can create indentations that are difficult to remove and may affect the integrity of the soap.
- 4
Hold the soap firmly in one hand. Secure the bar of soap on your protected work surface, ensuring it is stable and won't shift while you carve. If you're right-handed, hold it in your left hand, and vice-versa, to allow for comfortable access with your dominant carving hand.
- 5
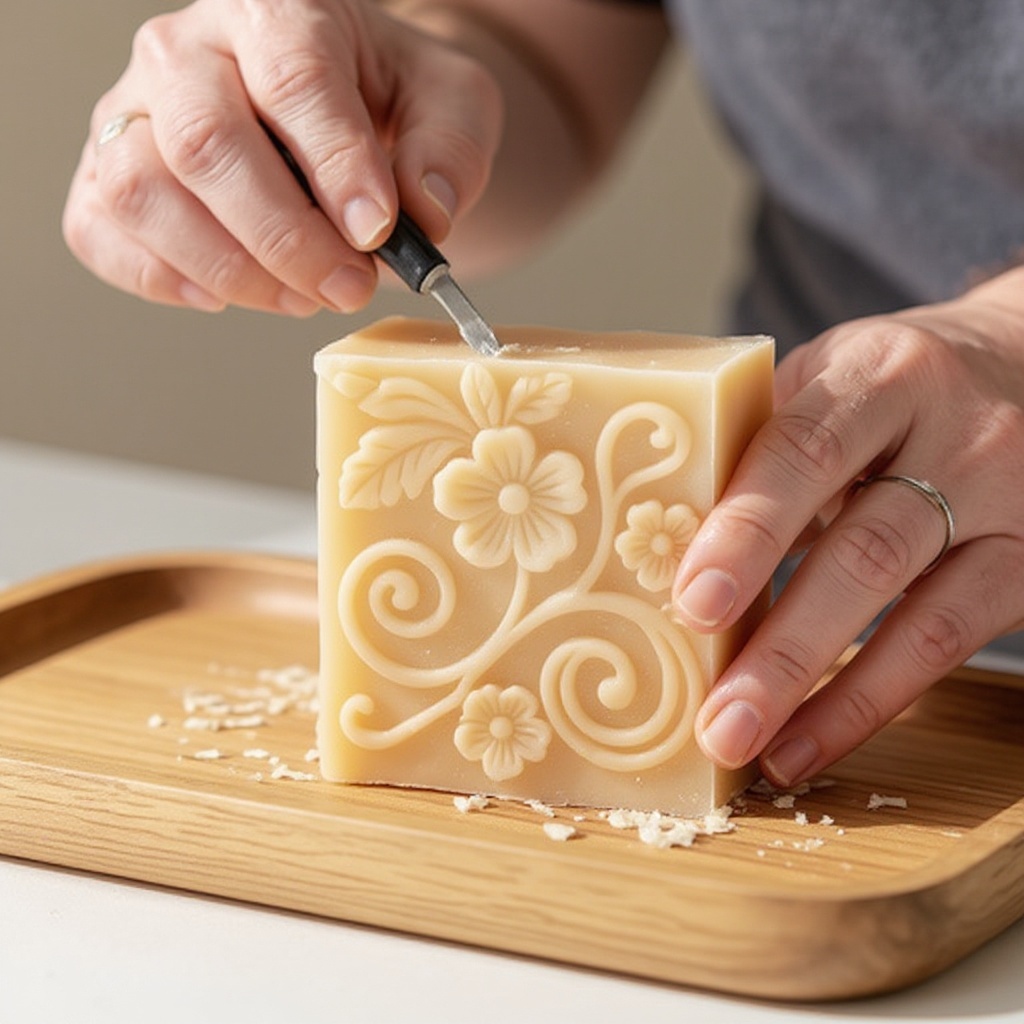
Using a carving tool, begin to gently shave away small pieces of soap along your traced lines. Start with a shallow angle, using the side of your tool to peel away thin layers of soap. This controlled removal is key to preventing accidental breakage and maintaining precision in your design.
- 6
Work slowly and deliberately, removing thin layers at a time. Resist the urge to carve too deeply or too quickly. Think of it like peeling an apple; you want to remove just enough to shape your design without taking too much away at once. This methodical approach ensures better control and fewer mistakes.
- 7
Focus on defining the main shapes of your design first. Establish the overall silhouette and the primary contours of your sculpture before moving on to finer details. This foundational carving will give you a clear framework to build upon and prevent you from getting lost in intricate work too early.
- 8
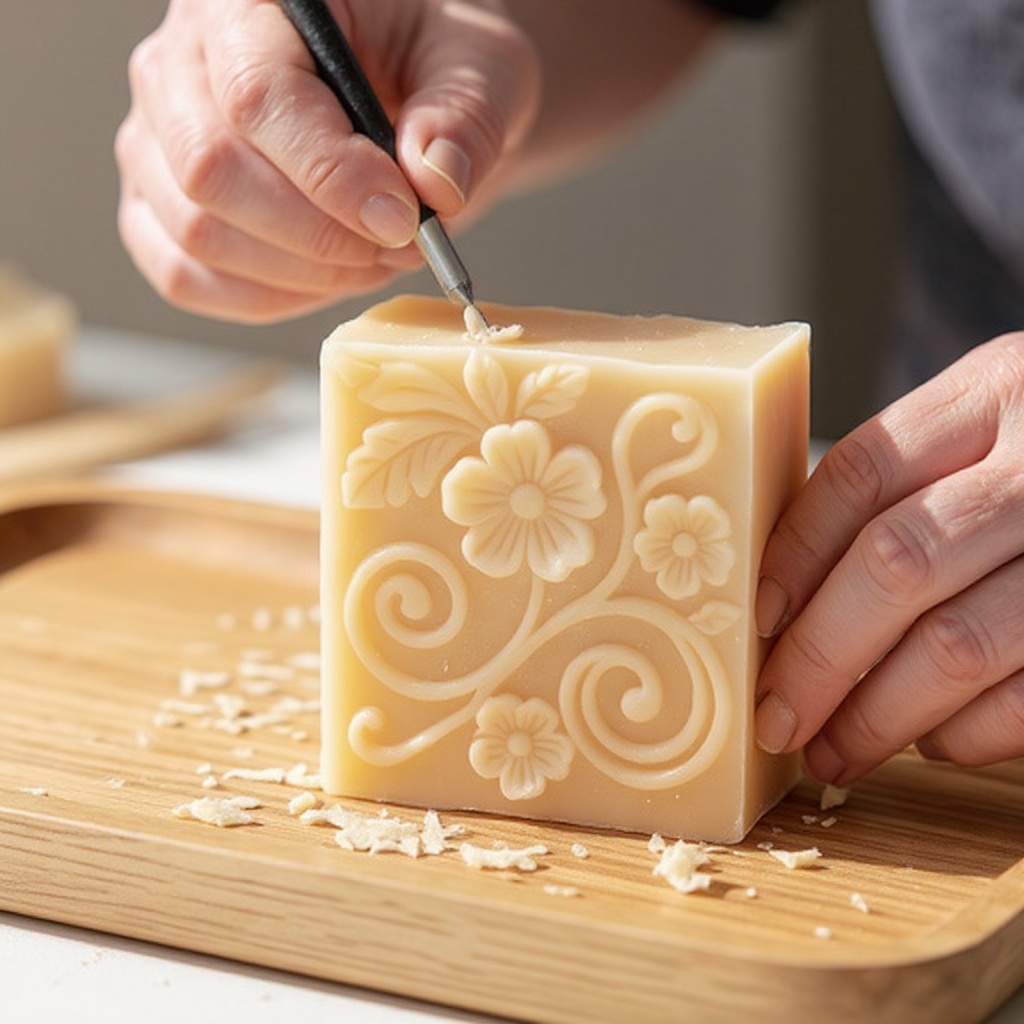
Once the basic shape is carved, you can start adding details like lines or textures. Use the tip of your carving tool or a different shaped tool to create patterns, etch lines for fur or feathers, or add subtle curves to soften edges. Experiment with different tool angles to achieve varied effects.
- 9
Use the damp cloth or paper towels to wipe away soap shavings as you go, so you can see your progress clearly. Regularly cleaning your work area and the soap surface allows you to assess your carving accurately and identify areas that need further refinement. This also helps prevent the soap dust from becoming overwhelming.
- 10
Continue carving and refining until you are happy with your soap sculpture. Step back occasionally to view your work from different angles. Don't be afraid to make small adjustments or smooth out any rough edges until you achieve the desired aesthetic. Patience is key to a satisfying result.
- 11
Begin by establishing the outer boundaries of your design. Use a slightly larger carving tool to carefully remove excess soap from around your traced lines, defining the overall silhouette of your sculpture. This step is crucial for setting the stage and ensuring your design has a clear form.
- 12
Gently round off sharp corners or edges of your main shape. Unless your design calls for sharp angles, use a curved carving tool or the edge of a flat tool to create softer, more organic transitions. This adds a professional and polished look to your sculpture.
- 13
Introduce depth by carving slightly recessed areas. For example, if you're carving a flower, you might gently indent the center to create a petal base. This technique adds dimension and visual interest, making your sculpture appear more dynamic.
- 14
Refine the edges of your carved areas. Go back over the lines you initially created and use a smaller, more precise tool to sharpen them or smooth out any jaggedness. This attention to detail significantly elevates the quality of your finished piece.
- 15
Add texture to surfaces where appropriate. For instance, if carving an animal, you might use a tool to create small, parallel lines to mimic fur, or stippling to represent scales. Experiment with different tools and techniques to achieve the desired textural effect.
- 16
Carefully remove any stray soap slivers or dust from crevices. Use your soft brush to gently sweep away loose particles, ensuring that all carved details are clean and visible. A clean sculpture looks much more appealing.
- 17
If you've made a small mistake, like a chip or a deep cut, don't despair. You can often smooth it out with your carving tool or even incorporate it into the design. For instance, a small chip could become a natural-looking imperfection on a stone or a leaf.
- 18
For very delicate parts, consider using a pointed carving tool with extreme care. These areas are prone to breaking, so work with a very light touch and remove only the smallest amounts of soap at a time.
- 19
Once you are satisfied with the overall form and details, give your sculpture a final gentle wipe-down with a dry paper towel to remove any remaining dust.
- 20
If you intend to preserve your sculpture for longer periods, consider applying a clear acrylic spray sealant. Do this in a well-ventilated area, following the product's instructions, to protect it from moisture and dust.
Tips & Troubleshooting
- 1Start with very simple shapes. As you get more comfortable, you can try more intricate designs. Beginning with basic forms like hearts, stars, or simple geometric shapes will help you master the fundamental carving techniques without the frustration of complex patterns. This builds confidence and skill gradually.
- 2If a piece breaks off unexpectedly, don't worry! You can often incorporate the change into your design or smooth it out. Sometimes, an accidental break can lead to a more interesting and unique artistic outcome. Embrace the imperfections and see where they take your creativity.
- 3Different types of soap carve differently. Experiment to find your favorite. Some soaps are harder and hold detail better, while others are softer and easier to shave. Discovering which soap best suits your carving style and desired finish is part of the fun.
- 4Keep your carving tools clean and dry when not in use. Soap residue can build up on tools, making them less effective and potentially harboring bacteria. Wiping them clean after each use and storing them properly will ensure they last longer and perform better.
- 5The soap shavings can be collected and used to make homemade potpourri or even re-melted into new soap (though this is a more advanced project). Instead of discarding the shavings, consider repurposing them. Mix them with dried flowers and essential oils for a fragrant potpourri, or research methods for soap recycling.
- 6Work in a well-lit area to ensure you can see your carving progress clearly and avoid making mistakes due to poor visibility. Good lighting is essential for precision and safety, allowing you to observe the subtle nuances of your carving.
- 7Take breaks as needed. Carving can be detailed work, and stepping away for a few minutes can help refresh your eyes and your perspective, allowing you to return with renewed focus and a clearer vision for your sculpture.
- 8Don't be afraid to experiment with different carving tools. Even within a set of plastic tools, varying the angles and edges you use can create a wide range of effects, from fine lines to broader strokes. Explore what each tool can do.
Related Activities You Might Enjoy
Frequently Asked Questions
What are the best soap carving tools for beginners?
For beginners, plastic carving tools or blunt craft knives are ideal. They are safer and allow for controlled shaving of soap without being too sharp, minimizing the risk of accidental cuts. Look for sets that include a variety of shapes, such as pointed tips for detail, rounded edges for smoothing, and flat blades for shaving larger areas. Kid-safe versions are particularly recommended for younger crafters or those new to carving. These tools provide enough precision for intricate work while offering a forgiving feel, making the learning process enjoyable and secure.
What kind of soap is best for carving?
Plain, unscented bars of soap like Ivory or Dove are best for carving. They are firm enough to hold their shape and carve smoothly without crumbling, which is crucial for detailed work. Glycerin soaps, especially those that are opaque rather than translucent, can also be excellent choices as they tend to be quite firm. Avoid soaps with added exfoliants like seeds or grains, as these can interfere with smooth carving. Also, steer clear of very soft or oily soaps, which can become mushy and difficult to shape cleanly.
Can kids do soap carving?
Yes, kids can absolutely do soap carving with adult supervision. Using kid-safe plastic tools and simple designs makes it a fun and accessible activity for them. It's a wonderful way to encourage creativity, fine motor skills, and patience. Always ensure that an adult is present to guide the child, especially when introducing any slightly sharper tools or more complex techniques. Choosing designs that are easy to follow and using soap bars that are not too hard will enhance their enjoyment and success.
How do I clean up soap carving mess?
Soap carving is generally a clean activity. Simply sweep or vacuum up the soap shavings. You can also use a damp cloth to wipe down your work surface. For larger amounts of shavings, a dustpan and brush work well. If you're concerned about dust, you can lightly mist your work area with water before you start carving, which helps the shavings clump together. The tools can be wiped clean with a damp cloth and dried thoroughly before storage.
How long does it take to carve a soap sculpture?
The time it takes to carve a soap sculpture can vary significantly depending on the complexity of the design and the carver's experience. For very simple shapes like a heart or a star, a beginner might only need 15-30 minutes. More intricate designs, such as animals or flowers with detailed petals and textures, could take anywhere from an hour to several hours. It's important to remember that soap carving is a relaxing activity, so it's best to work at your own pace and enjoy the process rather than rushing to finish.
Can I eat my soap sculpture?
Absolutely not! Soap sculptures are for decorative purposes only and are not edible. While they are made from soap, they are not formulated for consumption and can be harmful if ingested. Always keep soap sculptures out of reach of young children and pets who might be tempted to taste them. Emphasize to children that this is an art project and the finished piece is for looking at, not for eating.
What Next?
Once your soap sculpture is complete, admire your handiwork! You can choose to display it as is, or for a more permanent piece, consider sealing it with a clear acrylic spray sealant designed for crafts. This will help protect it from moisture and dust. For variations, try using different colored soaps to create layered effects or experiment with carving into glycerin soaps which often have a translucent quality. As a next step, explore more complex designs, or even try carving into larger soap blocks. Remember, the beauty of soap carving lies in its simplicity and the joy of creation.
Free: 10 Paper Crafts Anyone Can Make in 5 Minutes
Get our beginner guide + new craft ideas weekly.
No spam. Unsubscribe anytime.
Did you complete this activity?