How to Draw Basic Shapes for Beginners — Easy Step-by-Step Guide
Discover the foundational elements of drawing by learning to construct basic shapes. This screen-free activity is perfect for sparking imagination and developing artistic skills.
Quick answer
To draw basic shapes, you need paper and a pencil, taking about 15 minutes. Start by practicing simple lines and curves. This beginner-friendly activity has 8 steps and is perfect for kids aged 6 and up.
What you need
Shop on Amazon · As an Amazon Associate we earn from qualifying purchases. Links above are affiliate links — we may earn a commission at no extra cost to you.
Embark on your artistic journey with this engaging and accessible guide to drawing basic shapes. Perfect for absolute beginners, children aged six and up, or anyone looking to hone their fundamental drawing skills, this activity offers a screen-free way to boost creativity and fine motor control. Learning to construct circles, squares, rectangles, and triangles is the essential first step in creating any image, from simple doodles to complex masterpieces. This project is not just about drawing lines; it's about building confidence and understanding the visual language of art, one shape at a time.
On this page
Step-by-Step Instructions
- 1
Hold your pencil lightly, about halfway down the barrel, for a relaxed grip. This grip allows for more fluid movement and prevents your hand from becoming fatigued quickly, which is crucial when practicing many lines and shapes.
- 2
On a blank sheet of paper, practice drawing straight lines. Try making them horizontal, vertical, and diagonal. Focus on keeping the lines as steady as possible, using smooth, continuous strokes rather than short, choppy ones.

- 3
Next, practice drawing curved lines. Make them smooth and flowing, like waves or hills. Experiment with different degrees of curvature, from gentle arcs to more pronounced bends, to develop control over your pencil's movement.
- 4
Now, let's begin constructing our first fundamental shape: the circle. Start by lightly sketching a square or diamond shape as a guide, then draw a circle within it, connecting the lines smoothly. Aim for a round shape, but don't worry if it's not perfectly symmetrical; practice is key to improvement.

- 5
To draw a square, focus on making all four sides equal in length and ensuring the corners are as close to 90-degree angles as possible. You can lightly sketch a guide rectangle first and then adjust the sides to be equal, or practice drawing it freehand, focusing on visual estimation.
- 6
Draw a rectangle next. This shape is similar to a square but with two pairs of equal sides. Make two opposite sides longer than the other two, keeping the corners sharp and the lines straight.
- 7
Try drawing a triangle. You can make it with three equal sides (an equilateral triangle) or with sides of different lengths (a scalene or isosceles triangle). Focus on connecting three straight lines to form a closed shape with three distinct corners.

- 8
Let's refine our circle drawing. Instead of drawing it inside a guide box, try drawing it using a sweeping motion from your shoulder or elbow, rather than just your wrist. This often results in smoother, more consistent circles.
- 9
Practice drawing squares again, this time focusing on the corners. Ensure they are as close to right angles as possible. You can even use the corner of a piece of paper as a visual guide to help you achieve sharper angles.
- 10
For rectangles, pay attention to the relationship between the longer and shorter sides. Ensure the opposite sides are parallel and equal in length, and that the corners are clean and defined.
- 11
Explore different types of triangles. Draw an isosceles triangle with two equal sides and a different base, or a right-angled triangle with one perfect 90-degree corner. Understanding these variations will broaden your drawing capabilities.
- 12
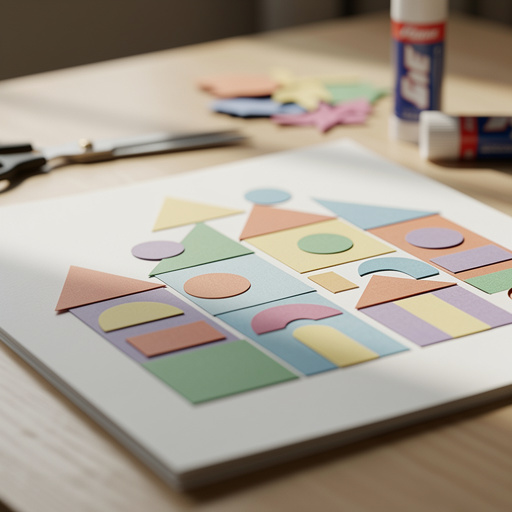
Now, let's combine shapes to create simple objects. A classic example is drawing a house by placing a triangle on top of a square. Experiment with different proportions to make your houses unique.
- 13
Create a sun by drawing a circle and then adding radiating lines or smaller circles around its perimeter. This is a great way to practice adding details to a basic shape.
- 14
Try drawing a snowman by stacking three circles of decreasing size, one on top of the other. You can then add details like eyes, a nose, and buttons using smaller shapes.
- 15
Combine a rectangle and a circle to create a simple lollipop. The rectangle forms the stick, and the circle is the candy part.
- 16
Draw a basic car by using a rectangle for the body and two circles for the wheels. You can add a smaller rectangle or square on top for the cabin.
- 17
Practice drawing a simple tree by using a triangle for the foliage and a thin rectangle for the trunk.
- 18
Combine a circle and a few triangles to create a simple flower. The circle can be the center, and the triangles can be the petals.
- 19
Draw a basic face using a large circle for the head, and then add smaller circles for eyes and a semi-circle or triangle for a mouth. This is a fundamental step in character drawing.
- 20
Combine a square and a rectangle to create a simple table. The square forms the tabletop, and the rectangle serves as the leg.
Tips & Troubleshooting
- 1Don't press too hard with your pencil; lighter lines are easier to erase and adjust. This is especially important when you're learning, as it allows you to make corrections without leaving visible marks.
- 2If your circles or squares are wobbly, try drawing them multiple times to improve your control. Repetition is key to developing muscle memory and achieving smoother, more confident lines.
- 3Experiment with different sizes of shapes. Draw big circles and small squares, tall rectangles and short triangles. This helps you understand how scale affects the appearance of objects.
- 4Connect shapes to create more complex drawings. A circle on top of a rectangle can be a snowman! Think about how everyday objects are made up of simpler geometric forms.
- 5Use a light touch when sketching. This allows you to easily erase mistakes and refine your shapes before committing to darker lines. It also makes it easier to build up shading later on.
- 6Don't be afraid to use a ruler for straight lines and a circular object (like a cup or coin) as a guide for circles when you're first starting out. The goal is to understand the form, and tools can help with that.
- 7Observe the world around you and identify the basic shapes that make up everyday objects. This practice will train your eye to see the underlying structure of everything you want to draw.
- 8Take breaks! Drawing can be mentally and physically tiring. Stepping away for a few minutes can help you come back with fresh eyes and renewed focus, leading to better results.
Related Activities You Might Enjoy
Frequently Asked Questions
What are the most basic drawing shapes?
The most fundamental drawing shapes are circles, squares, rectangles, and triangles. These geometric forms are the building blocks for virtually everything you can draw, from simple objects to complex scenes. Understanding how to draw these shapes accurately and confidently is the essential first step for any aspiring artist. They help in understanding proportion, perspective, and form, which are crucial for creating realistic and visually appealing artwork. Mastering these basics will significantly enhance your ability to represent the world around you on paper.
How can I improve my drawing of circles?
Improving your drawing of circles takes practice and a few helpful techniques. Repeatedly drawing circles freehand is the most effective method; aim for smooth, continuous lines. Try making a very light square or diamond first and then drawing a circle within it, using the guide to help with proportion. Another excellent technique is to use your whole arm, from the shoulder or elbow, to draw the circle rather than just your wrist. This often results in a smoother, more consistent motion and a rounder shape. Don't get discouraged by initial wobbles; consistency is key to improvement.
What materials do I need to learn drawing basics?
For learning drawing basics, you only need a few simple and readily available materials. The essentials are plain paper, such as standard printer paper (8.5 x 11 inches), and a pencil with an eraser. An HB pencil is a good all-around choice for beginners, offering a balance of darkness and erasability. Having a good eraser is crucial for making corrections without damaging the paper. As you progress, you might want to experiment with different types of pencils or paper, but these basic items are perfect for starting your drawing journey and practicing fundamental shapes.
Is drawing shapes important for beginners?
Yes, drawing shapes is incredibly important for beginners and forms the absolute bedrock of all drawing skills. It helps develop essential hand-eye coordination, giving you better control over your drawing tools. Understanding and practicing basic shapes teaches you about form, proportion, and how to break down complex objects into simpler components. This foundational knowledge is essential for all future drawing endeavors, whether you're sketching portraits, landscapes, or abstract art. It builds confidence and provides a solid framework upon which more advanced techniques can be built.
How long does it typically take to learn to draw basic shapes?
Learning to draw basic shapes is a continuous process, but you can achieve a good level of proficiency within a short time. For a beginner, dedicating about 15-30 minutes to practicing lines and shapes can yield noticeable improvements in a single session. To feel comfortable and confident with circles, squares, rectangles, and triangles, consistent practice over a few days to a week is usually sufficient. The key is regular, focused practice rather than long, infrequent sessions. As you get better, you'll find yourself able to draw them more quickly and accurately, but the journey of refining these skills is ongoing.
Can I use colored pencils or crayons to draw shapes?
Absolutely! While a pencil and eraser are ideal for learning the foundational techniques of drawing shapes due to their erasability and control, colored pencils and crayons can be fantastic for adding creativity and fun once you've practiced the basic forms. Using colored pencils allows you to explore different line weights and shading techniques, while crayons offer bold, vibrant colors. You can even use them to create colorful shape collages or to practice combining shapes into more complex drawings with added visual interest. The important thing is to get comfortable with the shape itself first.
What Next?
Congratulations on mastering the art of drawing basic shapes! You've built a strong foundation for all your future artistic endeavors. Now, challenge yourself by combining these shapes into more complex objects – try drawing a car, a flower, or even a simple landscape. Consider creating a 'shape alphabet' where each letter is drawn using only basic shapes. You can display your practice sheets proudly on your wall or in a sketchbook. For a more polished look, consider tracing your favorite shapes onto cardstock and coloring them in, or even using them as stencils for future projects. Keep practicing, and watch your drawing skills flourish!
Free: 10 Paper Crafts Anyone Can Make in 5 Minutes
Get our beginner guide + new craft ideas weekly.
No spam. Unsubscribe anytime.
Did you complete this activity?