How to Build an Indoor Seedling Grow Station — Easy Step-by-Step Guide
Create your own indoor seedling grow station with a built-in light! This fun project allows you to start seeds and grow plants indoors, extending your gardening season. Perfect for beginners and families, this easy-to-build station ensures your little sprouts get the light they need to thrive, no matter the weather outside.

Quick answer
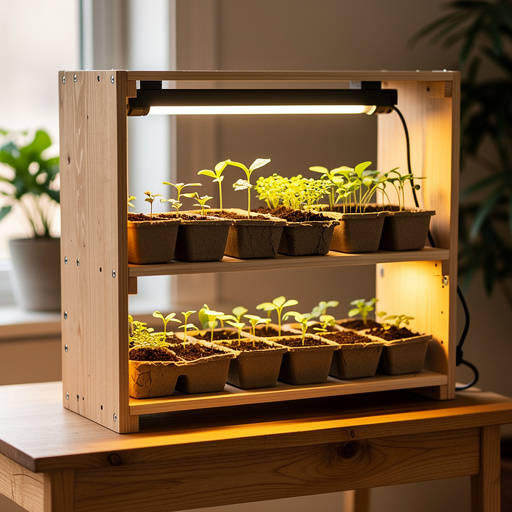
To make an indoor seedling grow station with light, you need a clear plastic bin with lid, an LED grow light fixture, aluminum foil, and duct tape, taking about 60 minutes. Start by assembling the light fixture inside the bin lid. This beginner-friendly activity has 15 steps and is perfect for families, providing a controlled environment for starting seeds indoors.
What you need
Shop on Amazon · As an Amazon Associate we earn from qualifying purchases. Links above are affiliate links — we may earn a commission at no extra cost to you.
Embarking on the journey of growing your own plants from seed is incredibly rewarding, but unpredictable weather and limited natural light can often be a challenge. This is where our DIY Indoor Seedling Grow Station shines! Designed for simplicity and effectiveness, this project allows you to create a controlled environment where your precious seedlings can flourish, regardless of the season or your local climate. It's a fantastic way to extend your gardening season, get a head start on spring planting, or even grow herbs and greens year-round. Perfect for budding gardeners, families looking for an educational activity, or anyone with a passion for plants, this grow station is your ticket to successful seed starting.
On this page
Step-by-Step Instructions
- 1
Prepare the bin lid: Begin by thoroughly cleaning and drying the inside of your clear plastic storage bin lid. This ensures a clean surface for the reflective material and prevents any unwanted moisture or debris from affecting your seedlings.
- 2
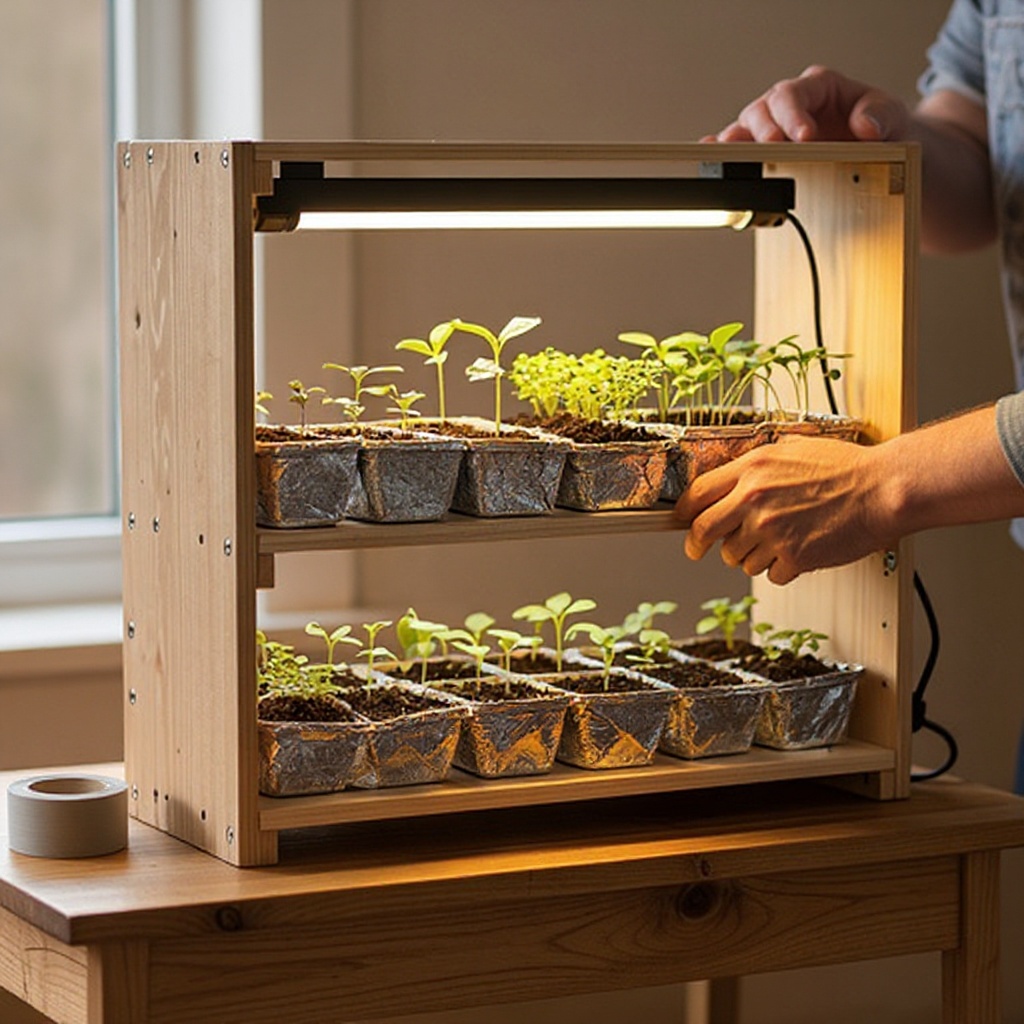
Line the lid with aluminum foil: Carefully unroll a sufficient length of aluminum foil and lay it across the inside surface of the bin lid, ensuring the shiny side is facing upwards. This reflective surface will bounce light back down onto your seedlings, maximizing their exposure and promoting even growth.
- 3
Secure the aluminum foil: Using your duct tape, firmly attach the aluminum foil to the lid. Work your way around the edges and across the surface, ensuring there are no gaps or loose pieces. A smooth, wrinkle-free surface will provide the best light reflection.
- 4
Prepare the grow light fixture: If your LED grow light fixture requires any assembly, follow the manufacturer's instructions carefully. Ensure all components are securely attached and that the light is ready for mounting or clamping.
- 5
Attach the grow light fixture: Carefully attach the LED grow light fixture to the inside of the bin lid. If it's a clamp light, ensure it's securely fastened to a sturdy part of the lid's rim, testing its stability before proceeding. If it's a fixture that needs mounting, use the provided hardware and follow its specific instructions, ensuring it's centered for even light distribution.
- 6
Position the grow light: Determine the optimal height for your grow light. When the seed starting trays are placed in the bin, the light should be approximately 4-6 inches above the surface of the soil. You can use a ruler or measuring tape to get an accurate measurement, and ensure the fixture allows for height adjustment.
- 7
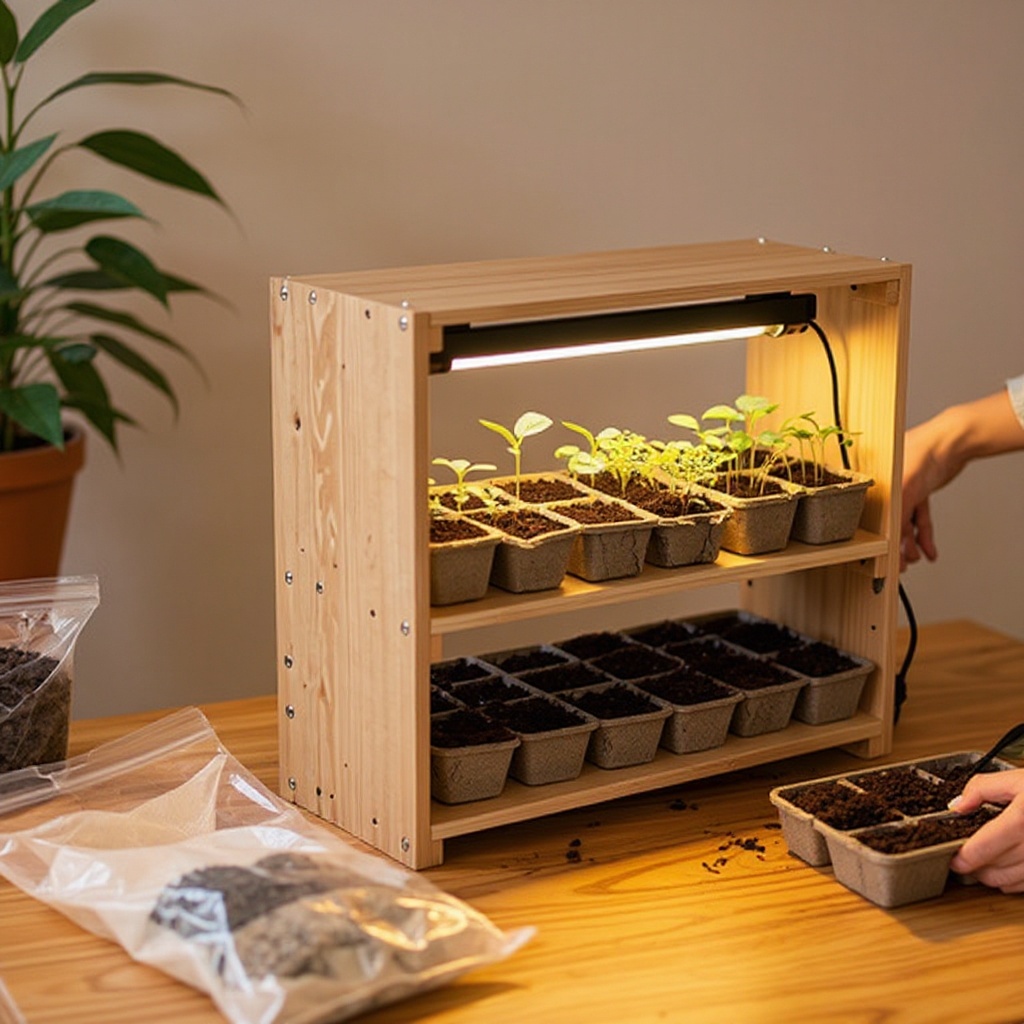
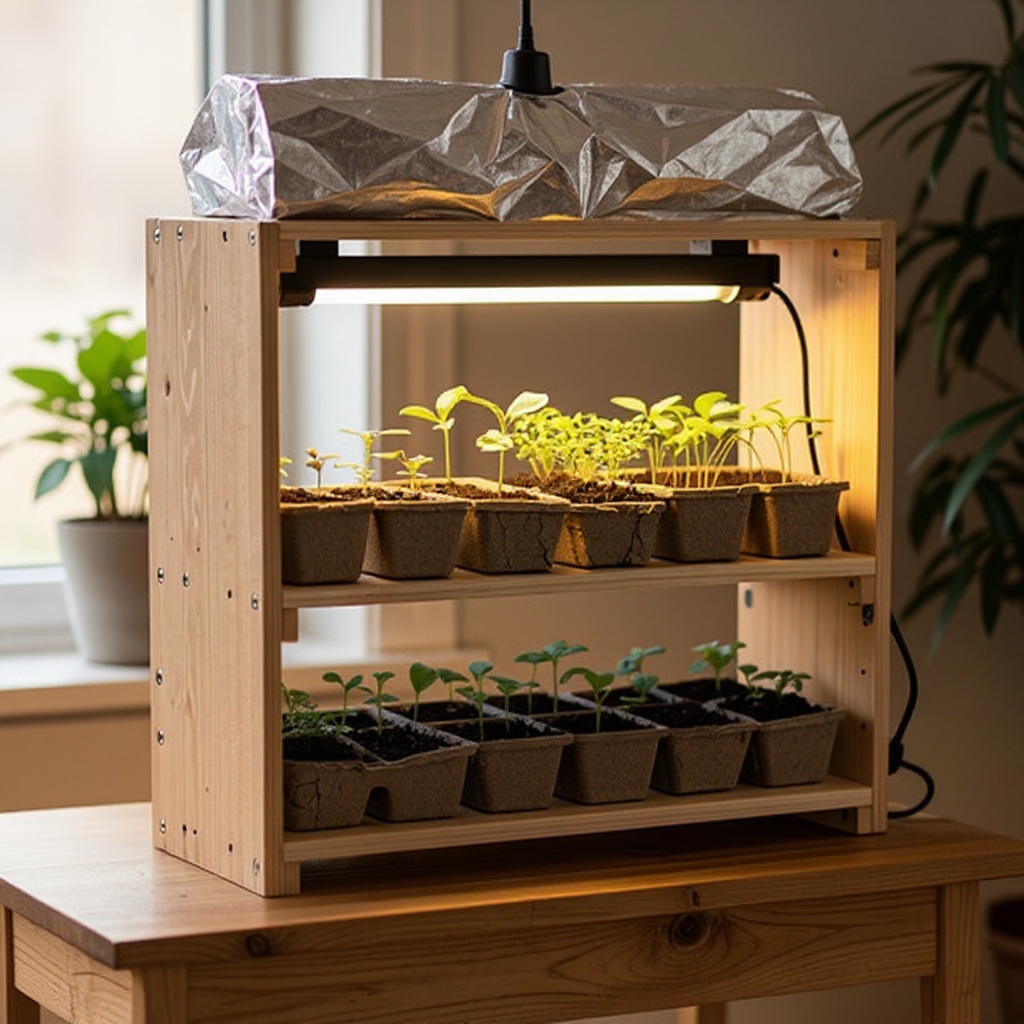
Prepare the seed starting trays: Place your seed starting trays into the bottom of the plastic bin. Ensure they fit comfortably and allow for some space around them for air circulation. If your trays don't have built-in drainage, consider placing them on a shallow tray to catch excess water.
- 8
Fill the seed starting trays with potting mix: Using your seed starting potting mix, fill each cell of the trays. Leave about 1/2 inch of space at the top of each cell. This space is crucial for watering and prevents the soil from overflowing when you add moisture.
- 9
Sow your seeds: Carefully sow your chosen seeds according to the package directions. Typically, this involves placing 1-2 seeds per cell at the depth recommended for that specific seed type. Gently press the seeds into the soil to ensure good contact.
- 10
Water the soil: Gently water the soil until it is consistently moist but not waterlogged. A watering can with a fine rose attachment or a spray bottle is ideal for this stage, as it prevents disturbing the seeds. Aim for the soil to feel like a wrung-out sponge.
- 11
Cover the bin: Once everything is in place, place the foil-lined lid, with the grow light attached, securely onto the plastic bin. Ensure a snug fit to create a mini-greenhouse environment that helps retain moisture and warmth.
- 12
Connect the grow light to power: Plug in your LED grow light fixture. For optimal results and to ensure consistency, it's highly recommended to connect the light to a timer.
- 13
Set the light timer: Set your timer for the grow light to operate for 12-16 hours per day, or as recommended for your specific seeds. This consistent light cycle is vital for healthy germination and seedling development, mimicking natural daylight hours.
- 14
Choose a suitable location: Place your completed seedling grow station in a location where it won't be disturbed by pets or heavy foot traffic. The temperature should be suitable for germination, generally between 65-75°F (18-24°C), and away from direct drafts or heat sources.
- 15
Monitor and adjust: Regularly check on your seedlings. Once they have germinated and started to grow, you will need to adjust the height of the grow light as they get taller to maintain the optimal 4-6 inch distance. This is a critical step to prevent leggy or scorched seedlings.
Tips & Troubleshooting
- 1Adjust the height of the grow light as your seedlings grow to maintain the optimal distance. Too close can scorch them, causing brown spots or wilting, while too far can cause them to stretch and become leggy as they search for light. Aim for that sweet spot of 4-6 inches above the tallest seedling.
- 2Ensure good air circulation by occasionally opening the lid for a few minutes each day, especially once seedlings have emerged. This helps prevent fungal diseases like 'damping off' and strengthens the seedlings' stems by mimicking natural breezes.
- 3Use distilled water or rainwater if your tap water is very hard, as minerals can build up in the soil and potentially harm delicate seedlings. Hard water can also affect the pH of the soil, which is crucial for nutrient uptake.
- 4Consider adding a small clip-on fan to gently circulate air around the seedlings for a few hours each day. This constant, gentle movement helps strengthen their stems, making them more robust and better prepared for transplanting outdoors.
- 5Label your seed trays! It's easy to forget which seeds are in which cell, especially when you're growing multiple varieties. Use waterproof markers and labels to keep track of your plantings, including the date sown.
- 6Don't overwater your seedlings. Overwatering is one of the most common mistakes new gardeners make. Allow the top layer of soil to dry slightly between waterings, and always ensure your trays have adequate drainage to prevent root rot.
- 7Once your seedlings have developed their first set of true leaves (the leaves that appear after the initial seed leaves), you can begin to fertilize them with a very diluted liquid seedling fertilizer. Follow the product instructions carefully, as seedlings are sensitive to too much fertilizer.
Related Activities You Might Enjoy
Frequently Asked Questions
What kind of light do I need for starting seeds indoors?
For starting seeds indoors, an LED grow light specifically designed for seedlings is the best choice. These lights provide the full spectrum of light that plants need for healthy germination and growth, mimicking natural sunlight. Unlike regular household bulbs, which often emit light in a limited spectrum and at lower intensity, seedling grow lights are optimized for the early stages of plant development. Look for lights that are labeled as 'full spectrum' or specifically designed for 'seed starting' or 'vegetative growth'. They are energy-efficient and produce less heat, which is crucial for maintaining a stable environment for your delicate sprouts.
How long should I keep the grow light on for seedlings?
Seedlings typically need a consistent light cycle of 12-16 hours per day. Using a timer is the easiest and most effective way to ensure consistent light exposure and can help you manage the schedule without constant monitoring. This consistent photoperiod is vital for healthy germination and robust growth, preventing seedlings from becoming leggy or stunted. Some plants may have slightly different light requirements, so it's always a good idea to check the specific needs of the seeds you are planting. A timer takes the guesswork out of maintaining the ideal light duration.
Can I use a regular lamp instead of a grow light?
While a regular lamp might provide some light, it's not ideal for seedlings and will likely lead to poor results. Standard household lamps, even those with LED bulbs, typically do not emit the specific wavelengths or the intensity of light that seedlings require for healthy development. Grow lights are engineered to provide the full spectrum of light needed for photosynthesis and robust growth, whereas regular lamps may not provide enough intensity or the right spectrum, causing seedlings to stretch, become weak, and potentially fail to thrive. Investing in a proper seedling grow light is crucial for success.
How often should I water my seedlings?
Water your seedlings when the top layer of soil feels dry to the touch. It's better to water thoroughly less often than to water a little bit every day. This encourages deeper root growth. Avoid letting the soil dry out completely, as this can stress the seedlings, but also be careful not to overwater, which can lead to root rot and fungal diseases. A good indicator is when the soil surface appears lighter in color and feels dry about half an inch down. Always ensure your seed starting trays have drainage holes to allow excess water to escape.
What is 'damping off' and how can I prevent it?
'Damping off' is a common and often fatal disease that affects young seedlings. It's caused by various soil-borne fungi and manifests as seedlings suddenly wilting and collapsing at the soil line, appearing as if they've been 'damped off.' To prevent it, use sterile seed starting mix, ensure good air circulation by occasionally opening the lid or using a small fan, avoid overwatering, and make sure your seed starting trays have adequate drainage. Sterilizing your tools and containers before use can also help minimize the risk of introducing fungal pathogens.
How do I know when my seedlings are ready to be transplanted?
Your seedlings are typically ready to be transplanted when they have developed at least two sets of 'true leaves' (the leaves that appear after the initial cotyledons or seed leaves) and have a strong, sturdy stem. Before transplanting them outdoors, it's crucial to 'harden them off' gradually. This process involves exposing them to outdoor conditions (sunlight, wind, temperature fluctuations) for increasing periods over a week or two. This acclimatization helps prevent transplant shock and ensures they are robust enough to survive in their new environment. Check the specific transplanting recommendations for the plants you are growing.
What Next?
Congratulations on building your very own Indoor Seedling Grow Station! This versatile setup is just the beginning of your indoor gardening adventures. Consider experimenting with different types of seeds, from vibrant flowers to delicious herbs, or even microgreens for a quick harvest. For a more advanced setup, you could explore adding a small fan for better air circulation or even a heating mat for specific seed types that require warmer temperatures. Once your seedlings are ready for transplanting, you can proudly display them in their new home or continue to nurture them in this controlled environment. This project is a fantastic stepping stone to larger indoor gardening endeavors, like a full-fledged hydroponic system or a dedicated grow tent.
Free: 10 Paper Crafts Anyone Can Make in 5 Minutes
Get our beginner guide + new craft ideas weekly.
No spam. Unsubscribe anytime.
Did you complete this activity?
Related
You might also like
Newspaper Pot Seedling Starters
Bunny Tail Cotton Ball Garland
Cardboard Box Ukulele
Tin Can Planter Makeover
Egg Carton Succulent Planters