How to Make DIY Charms for Bracelets — Easy Step-by-Step Guide
Learn to craft adorable DIY charms for your bracelets using colorful beads and simple wire techniques. A fun, screen-free activity for the whole family!
Quick answer
To make DIY charms for bracelets, you need beads, craft wire, and pliers, taking about 30 minutes. Start by threading beads onto wire. This beginner-friendly activity has 10 steps and is perfect for families with kids aged 6+.
What you need
Shop on Amazon · As an Amazon Associate we earn from qualifying purchases. Links above are affiliate links — we may earn a commission at no extra cost to you.
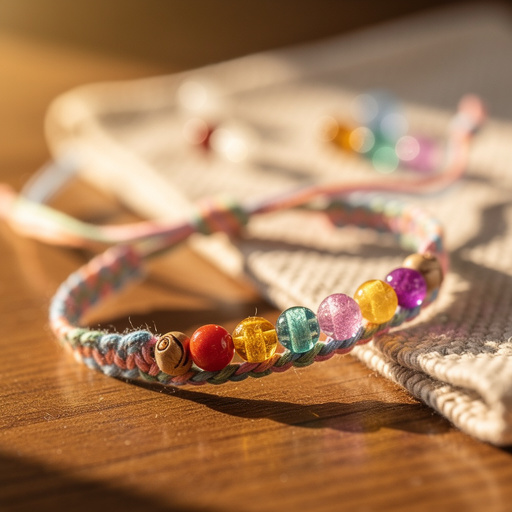
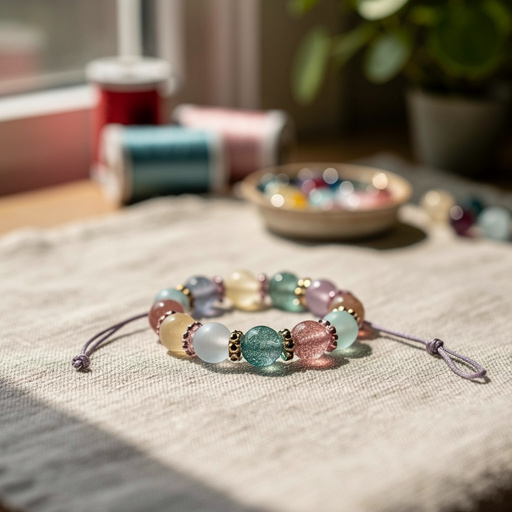
Unleash your creativity and add a personal touch to your jewelry with this delightful DIY charm-making project! Crafting your own charms is a wonderfully engaging and screen-free activity that’s perfect for a rainy afternoon, a crafty party, or simply a way to unwind. Whether you're looking to personalize a new bracelet, refresh an old one, or create thoughtful handmade gifts, these easy-to-make charms are sure to impress. This project is ideal for beginners, children aged 6 and up (with adult supervision for certain steps), and anyone who loves adding a pop of color and personality to their accessories.
On this page
Step-by-Step Instructions
- 1
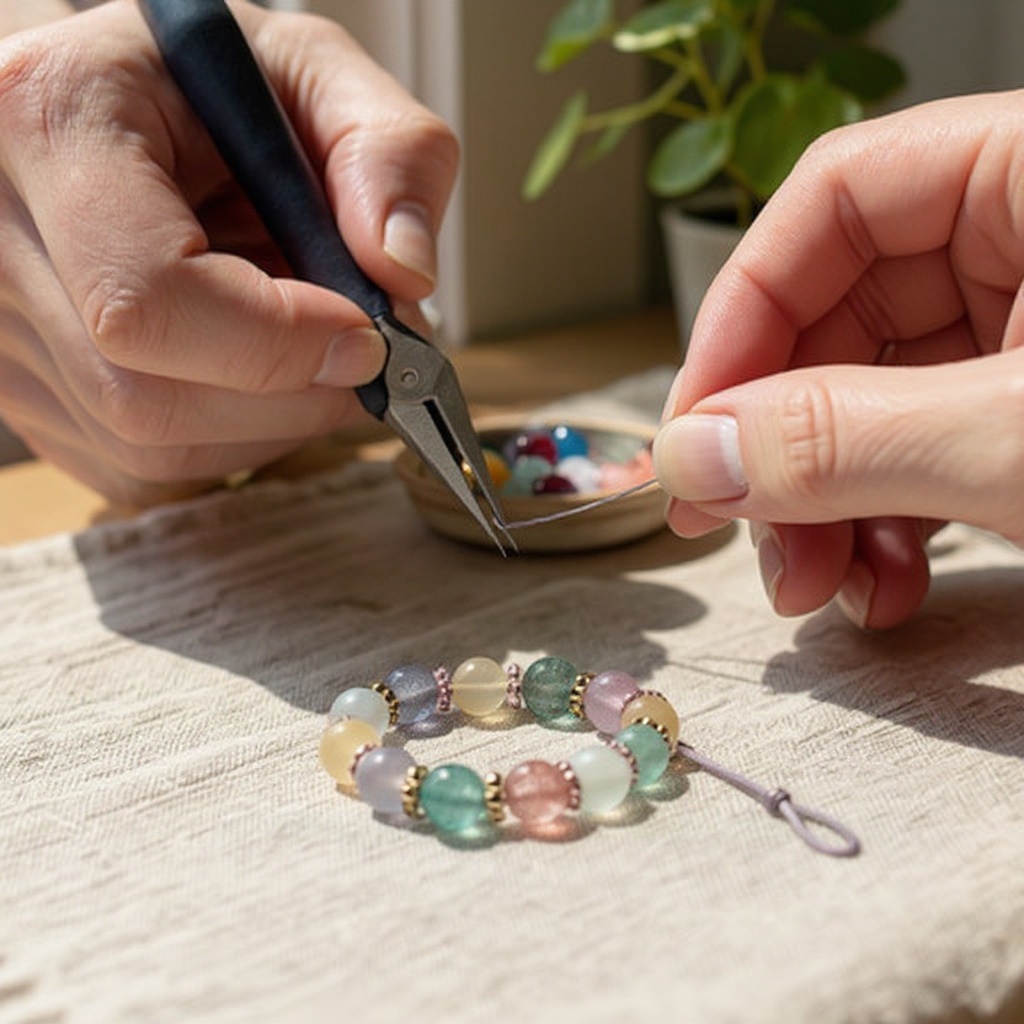
Cut a 6-inch piece of craft wire using wire cutters. Ensure you have a clean, straight cut; a jagged edge can snag beads or be difficult to work with.
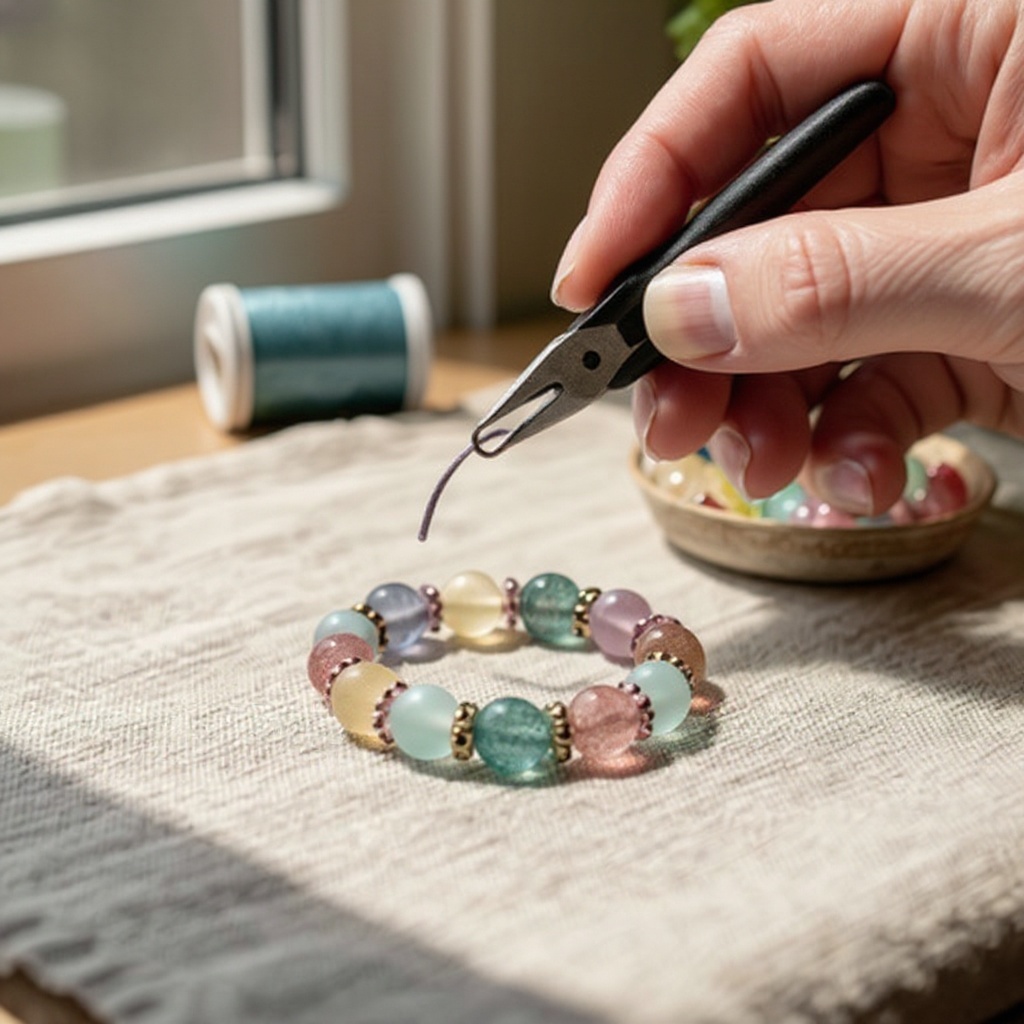
- 2
Using round-nose pliers, create a small loop at one end of the wire. Grip the very tip of the wire with the roundest part of your pliers and gently roll the wire around one of the plier jaws to form a tiny, closed circle.
- 3
Gently flatten the loop you just created with the flat part of your pliers. This step is crucial to ensure the loop is closed and won't snag on clothing or other jewelry, and it also provides a stable base for your beads.
- 4
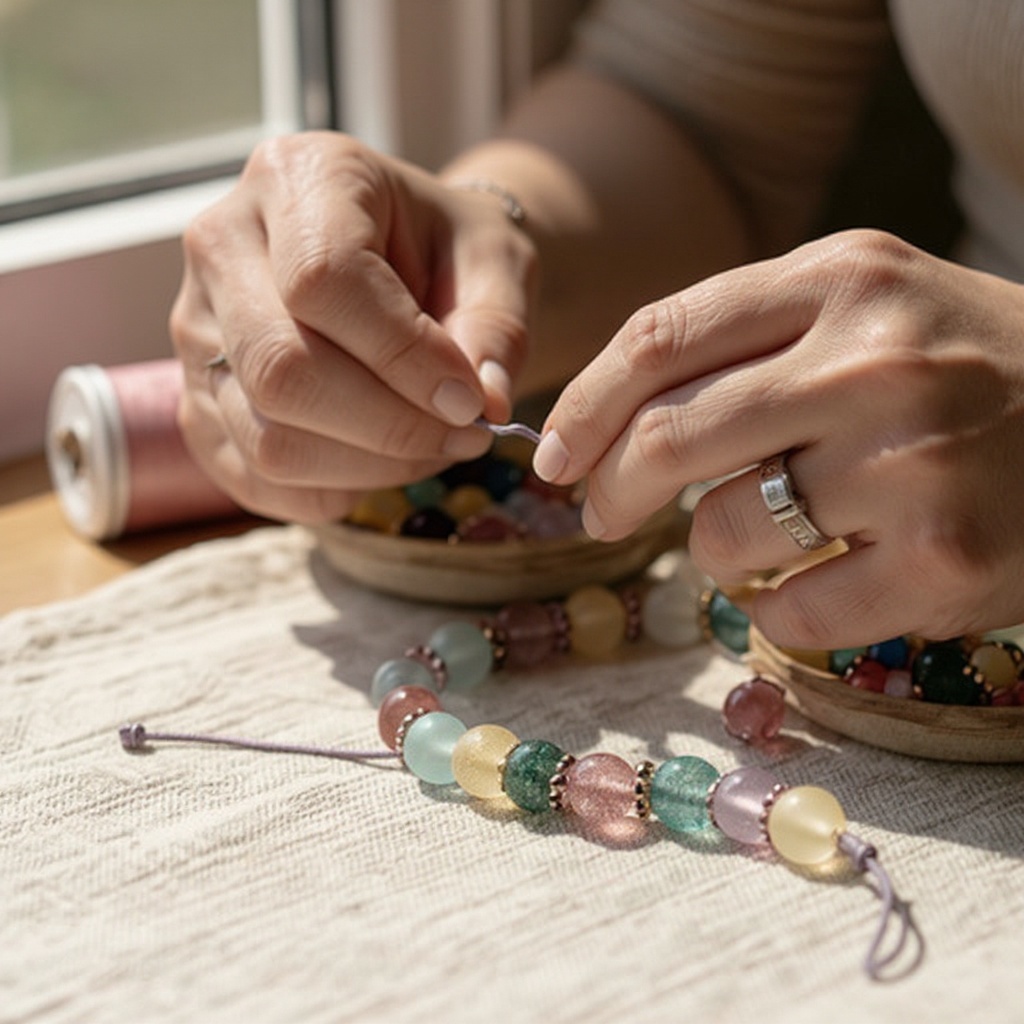
Begin threading beads onto the wire, starting with a larger bead for the base of your charm. This foundational bead will give your charm structure and a focal point.
- 5
Add smaller beads or seed beads to create patterns or shapes. Experiment with color blocking, gradients, or even simple geometric designs by alternating bead sizes and colors.
- 6
Continue adding beads until you achieve your desired charm length, leaving about 1 inch of wire at the top. Aim for a length that complements the bracelet it will be attached to; too long and it might dangle awkwardly, too short and it might get lost.
- 7
Once satisfied with the bead arrangement, hold the beads firmly in place to prevent them from sliding off as you work on the top loop.
- 8
Using round-nose pliers, create another loop at the top, securing the beads. Grip the wire just above your last bead and roll the pliers to form a loop, ensuring it's snug against the bead collection.
- 9
Gently wrap the tail end of the wire around the base of the top loop a couple of times to secure it. This creates a neat finish and prevents the beads from accidentally slipping off if the loop were to loosen.
- 10
Trim any excess wire close to the top loop using your wire cutters. Make sure the cut is clean and flush with the wrapped wire to avoid any sharp edges.
- 11
Open a jump ring by gently twisting the ends apart with pliers. Never pull the jump ring open, as this can distort its shape; instead, use two pairs of pliers to grip opposite sides of the opening and twist them in opposite directions.
- 12
Thread the jump ring through the top loop of your finished charm. Ensure the jump ring is fully threaded onto the charm's loop before proceeding.
- 13
Attach the jump ring to your bracelet or a bracelet clasp. If attaching to a bracelet chain, find a suitable link; if using a clasp, attach the jump ring to one end of the clasp mechanism.
Tips & Troubleshooting
- 1If your wire is difficult to bend, try gently warming it in your hands before starting. The warmth can make the wire more pliable, making it easier to create neat loops and wraps without excessive force.
- 2Experiment with different bead color combinations and patterns to create unique charms. Consider using a color palette that matches your favorite outfits or creating themed charms for different seasons or holidays.
- 3For extra durability, you can add a tiny drop of clear craft glue to the wire loops after they are formed. Allow the glue to dry completely before handling the charm to ensure a strong, long-lasting hold.
- 4Consider making a set of matching charms for a coordinated bracelet. You can create a series of charms with the same color scheme or a repeating pattern for a cohesive and stylish look.
- 5Always supervise younger children when using pliers and wire cutters. These tools require dexterity and can be sharp, so adult guidance is essential to ensure safety during the crafting process.
- 6To create more intricate designs, use a pencil or a small dowel rod as a guide when forming your top loop. This will help you achieve consistently sized and evenly spaced loops, giving your charms a professional finish.
- 7Don't be afraid to mix and match bead types! Combining shiny seed beads with matte pony beads or adding a faceted glass bead can create interesting texture and visual appeal in your charms.
- 8If you find your beads are sliding around too much while you're working, try placing them on a bead mat or a piece of felt. This grippy surface will help keep them in place, making the threading process much smoother.
Related Activities You Might Enjoy
Frequently Asked Questions
What are the best beads for DIY bracelet charms?
Pony beads are excellent for DIY charms due to their size and variety of colors, making them easy for beginners and children to handle. Seed beads, while smaller, are perfect for adding intricate details, patterns, and a touch of sparkle to your designs. Glass beads, such as Czech glass or Swarovski crystals, offer a more sophisticated and luxurious look, adding shimmer and depth. When choosing beads, consider their hole size to ensure they can be easily threaded onto your 24-gauge craft wire. Ultimately, the best beads are those that inspire you and fit the aesthetic you're aiming for in your personalized bracelet charms.
How do I attach DIY charms to a bracelet?
The easiest and most common way to attach DIY charms to a bracelet is by using jump rings. You'll need a pair of pliers to gently twist open a jump ring – never pull it apart, as this can weaken its shape. Once the jump ring is open, thread it through the loop you created at the top of your charm. Then, find a link on your bracelet chain where you want to attach the charm and thread the open jump ring onto that link. Twist the jump ring closed to secure the charm. For bracelets without a chain, you can attach the jump ring to a bracelet clasp, like a lobster clasp, creating a dangling charm.
Can kids make these DIY charms for bracelets?
Yes, with adult supervision, children aged 6 and up can absolutely make these DIY charms! This project is fantastic for developing fine motor skills and fostering creativity. Younger children can enjoy the tactile experience of selecting beads and threading them onto the wire. An adult can then assist with the more challenging steps, such as using the wire cutters and round-nose pliers to create the loops and secure the wire. It’s a wonderful collaborative activity that allows kids to express themselves and create something tangible they can be proud of.
What tools do I need for making DIY charms?
For making these DIY charms, you'll primarily need two essential tools: round-nose pliers and wire cutters. The round-nose pliers are crucial for creating neat, rounded loops at both ends of your craft wire, which are essential for attaching the beads and for connecting the charm to your bracelet. The wire cutters are needed to cleanly snip the craft wire to your desired length and to trim any excess wire for a polished finish. Having these two tools will allow for precise shaping and a professional-looking outcome for your handmade charms.
How long does it take to make one DIY charm?
On average, it takes approximately 15-20 minutes to create a single DIY beaded charm, assuming you have all your materials organized and ready to go. This timeframe includes cutting the wire, creating the initial loop, threading the beads, forming the top loop, securing the wire, and trimming any excess. The time can vary slightly depending on the complexity of your bead pattern, the number of beads used, and your familiarity with the wire-working techniques. For a beginner, it might take a few minutes longer per charm, but with practice, you'll find yourself becoming much quicker.
Can I make charms with different types of wire?
While 24-gauge craft wire is recommended for its balance of flexibility and strength, you can experiment with other types of wire. Thicker wires, like 20-gauge, will be more rigid and harder to bend into loops, but they can offer more durability for larger charms. Thinner wires, such as 26-gauge, are very flexible but might not hold their shape as well or support heavier beads. For a more professional look, consider using sterling silver or gold-filled wire, which are more tarnish-resistant and hypoallergenic than basic craft wire. Always ensure the wire gauge is suitable for the size and weight of the beads you intend to use.
What Next?
Congratulations on creating your own unique set of beaded charms! The possibilities are truly endless, from creating themed bracelets for holidays or special occasions to designing a signature piece that reflects your personal style. Don't stop here – consider exploring different bead types like Swarovski crystals for a touch of sparkle, or even incorporating small polymer clay elements for more intricate designs. Once your charms are complete, you can store them in a small jewelry box or a compartmentalized organizer to keep them tangle-free and ready for your next bracelet-making adventure. Happy crafting!
Free: 10 Paper Crafts Anyone Can Make in 5 Minutes
Get our beginner guide + new craft ideas weekly.
No spam. Unsubscribe anytime.
Did you complete this activity?
Related