How to Make Newspaper Pot Seedling Starters — Easy Step-by-Step Guide
Create your own eco-friendly seedling starters using just newspaper and a jar! These biodegradable pots are perfect for getting a head start on your garden. This beginner-friendly activity is perfect for families with children aged 6+ and takes about 15 minutes to complete.
Quick answer
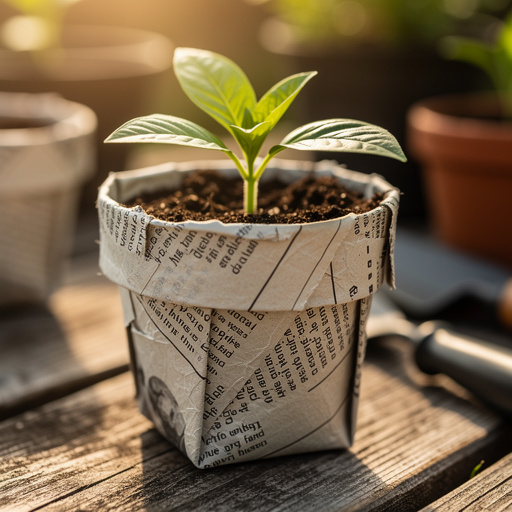
To make newspaper pot seedling starters, you need newspaper (about 2-3 sheets per pot), a clean, empty jar or can (about 4-6 inches tall), and scissors. This beginner-friendly activity takes about 15 minutes and involves cutting newspaper strips, wrapping them around a jar, folding the base, and sliding the pot off. It's a fantastic way to start your garden sustainably and is perfect for families with children aged 6+.
What you need
Shop on Amazon · As an Amazon Associate we earn from qualifying purchases. Links above are affiliate links — we may earn a commission at no extra cost to you.
Embark on a rewarding journey into sustainable gardening with this incredibly simple DIY project: newspaper seedling starters. Not only are these pots wonderfully eco-friendly, eliminating the need for plastic trays, but they also offer a fantastic way to give your plants a head start indoors. This project is perfect for budding gardeners of all ages, especially families looking for an engaging and educational activity to do with children. Imagine nurturing tiny seedlings from seed to sprout, all within pots you crafted yourself from recycled materials – it’s a truly satisfying experience that connects you closer to nature and your future harvest.
On this page
Step-by-Step Instructions
- 1
Begin by selecting your newspaper. For each seedling pot, you'll want to use about 2 to 3 full sheets of newspaper. This layering provides sturdiness and helps the pot hold its shape. If you're using a larger jar, you might need slightly more newspaper to ensure adequate coverage.
- 2
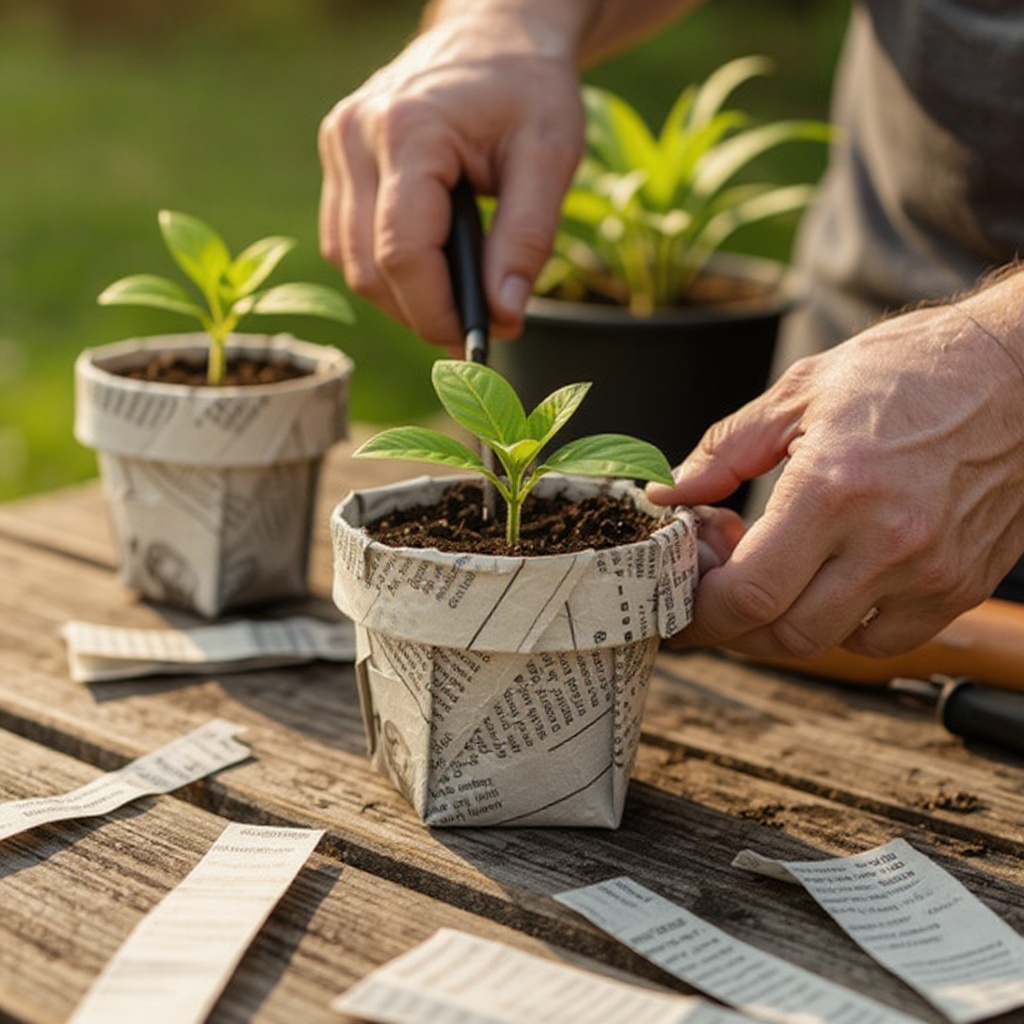
Next, carefully cut the newspaper into strips. Aim for strips that are approximately 4 to 6 inches wide and 12 to 18 inches long. The exact dimensions can be adjusted based on the height and circumference of your chosen jar, but this range generally works well for most common jar sizes.
- 3
Take one of your cut newspaper strips and fold it in half lengthwise. This creates a double layer of newspaper, which will form the main body of your pot. Ensure the fold is crisp and the edges are aligned as neatly as possible for a cleaner finish.
- 4
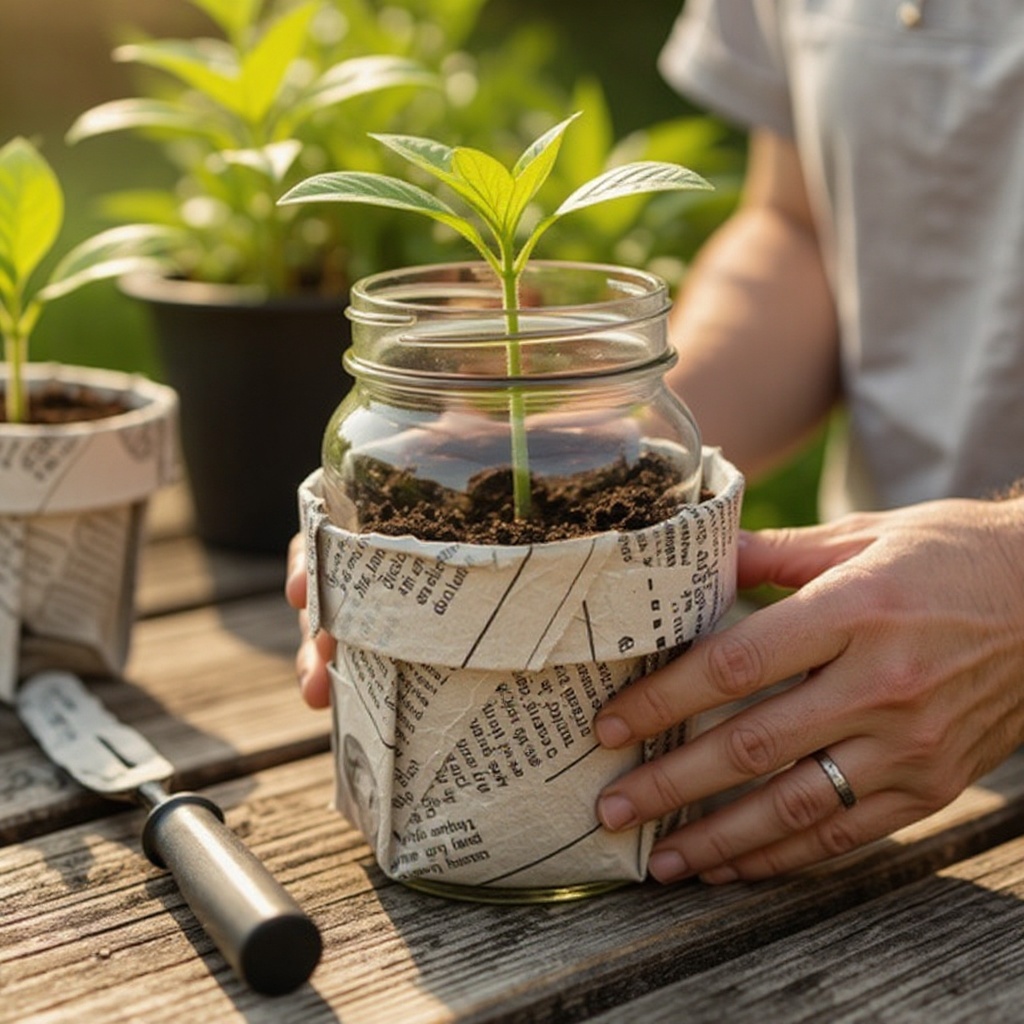
Now, place your clean jar or can on one end of the folded newspaper strip. Position the jar so that the edge of the newspaper aligns perfectly with the bottom of the jar. This alignment is crucial for creating a well-formed base for your pot.
- 5
Begin wrapping the newspaper strip tightly around the jar. Start from the bottom edge and work your way upwards, ensuring the newspaper is snug against the jar's surface. Leave about 2 inches of newspaper extending below the bottom of the jar; this excess will be used to create the pot's base.
- 6
Continue wrapping the newspaper around the jar, maintaining consistent tension to avoid wrinkles or gaps. Overlap the edges of the newspaper strip slightly as you go to ensure there are no openings. If you're using multiple strips, overlap them generously to create a continuous, sturdy layer.
- 7
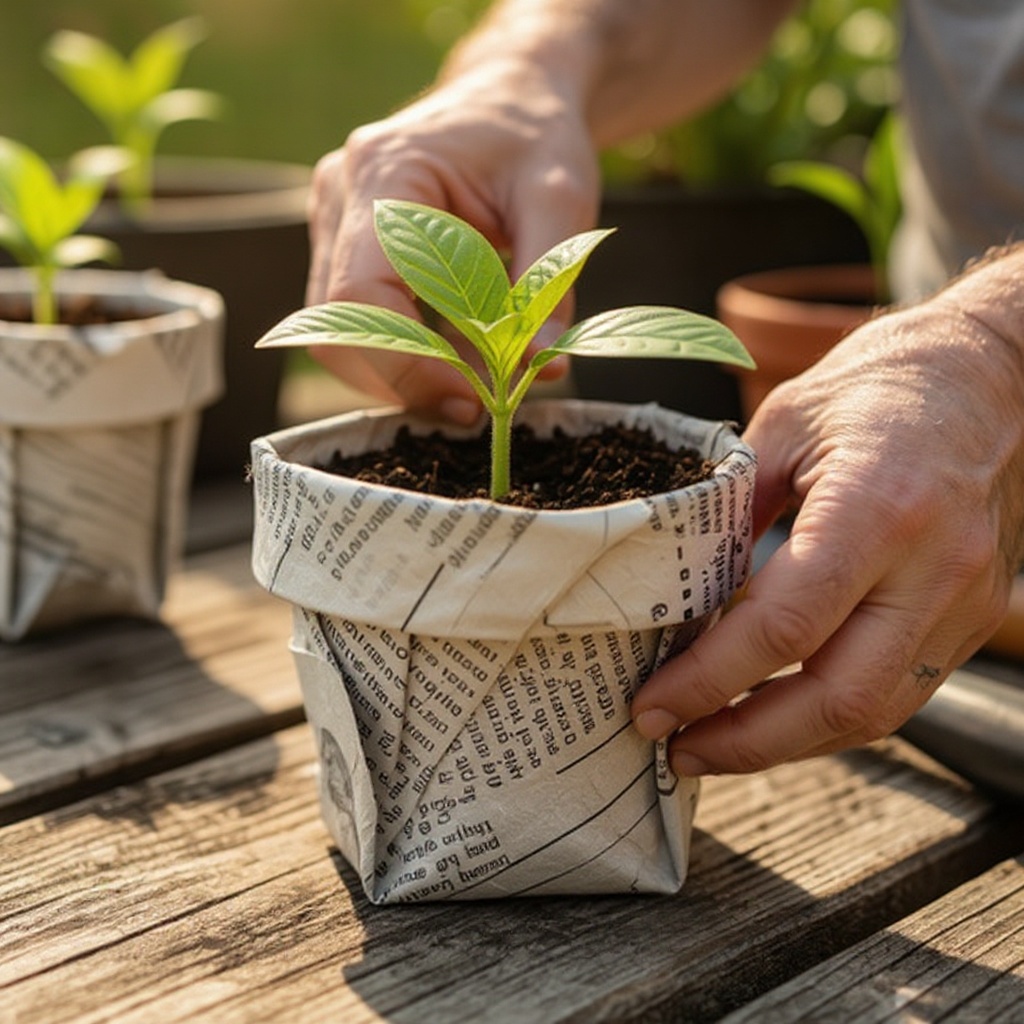
Once the entire side of the jar is covered with newspaper, you should have approximately 2 inches of excess newspaper hanging below the jar's base. This excess material is what will form the bottom of your seedling pot.
- 8
Now, it's time to create the base. Carefully fold the excess newspaper at the bottom of the jar inwards, towards the center of the jar's base. You can do this by creasing the newspaper around the circumference of the jar's bottom.
- 9
Continue folding the excess newspaper inwards, pleating it as necessary to create a flat, sturdy base. Think of it like folding the bottom of a gift bag; you want to create a sealed, solid foundation for your pot.
- 10
Once you have folded the excess newspaper inwards to form a secure base, gently press down on the folded sections to help them adhere and create a firm bottom. You can use your fingers to smooth and shape the base.
- 11
With the base securely folded, it's time to remove your newspaper pot from the jar. Gently slide the newspaper pot off the jar, maintaining its cylindrical shape. Be careful not to crush the newly formed base as you slide it off.
- 12
You should now have a sturdy, cylindrical newspaper pot with a neatly folded base. Inspect the pot to ensure the base is secure and there are no major holes or tears. If there are small gaps, you can gently press them closed.
- 13
If you desire a more robust pot, repeat the wrapping process with a second strip of newspaper, overlapping the first layer significantly. This double-layering will make the pot more durable and better able to withstand moisture.
- 14
To customize the height of your pots, simply adjust the length of your newspaper strips. Longer strips will result in taller pots, while shorter strips will create more compact ones, allowing you to tailor them to the specific needs of your seedlings.
- 15
For an extra secure base, especially if you plan to water the pots before planting, you can lightly dampen the folded base with a small amount of water. This will help the newspaper fibers meld together, creating a stronger seal.
- 16
Once your newspaper pot is complete, it's ready to be filled with your seed-starting mix and sown with seeds. The biodegradable nature of the newspaper means you can plant these directly into the ground later, minimizing transplant shock for your delicate seedlings.
Tips & Troubleshooting
- 1If your newspaper tears during the wrapping process, don't worry! Simply overlap another strip of newspaper over the torn section and continue wrapping as usual. The goal is to create a continuous, unbroken surface for your pot.
- 2For a more robust and moisture-resistant pot, consider using two layers of newspaper for each pot. Wrap the first strip as instructed, then wrap a second strip directly over the first, ensuring a good overlap. This double-layering significantly increases the pot's durability.
- 3You can customize the height of your seedling pots by adjusting the length of your newspaper strips. Longer strips will result in taller pots, which are ideal for seedlings that require more root space, while shorter strips can be used for smaller seeds or plants.
- 4These newspaper pots are wonderfully biodegradable and can be planted directly into the ground with your seedlings. As the roots grow, they will easily penetrate the newspaper, and the pot itself will break down over time, enriching the soil.
- 5When filling your newspaper pots with soil, avoid overfilling them. Leave about half an inch of space at the top to prevent soil from spilling out when you water your seedlings.
- 6To help the newspaper base hold its shape even better, especially when it's dry, you can gently press the folded base inwards with the bottom of the jar before sliding the pot off. This pre-creasing can make the folding process smoother.
- 7If you find that the newspaper is not staying folded well at the base, a tiny dab of water or even a bit of natural glue can help secure the folds. However, for most newspaper types, simple folding and pressing should suffice.
- 8Consider using newspaper that is not glossy or heavily colored, as some inks might not be as biodegradable or could potentially leach into the soil. Standard black and white newsprint is generally the best choice for this project.
Related Activities You Might Enjoy
Frequently Asked Questions
Are newspaper seedling starters good for plants?
Yes, newspaper seedling starters are excellent for plants. They are biodegradable, meaning they will naturally break down in the soil after planting, allowing the roots to grow through them easily without restriction. This process also adds organic matter to your soil. Furthermore, using newspaper pots eliminates the need for plastic seedling trays, which contribute to plastic waste. The porous nature of newspaper also allows for good air circulation around the roots, which can help prevent damping-off disease. Overall, they provide a healthy and sustainable environment for your seedlings to thrive in their early stages.
How long do newspaper seedling starters last?
Newspaper seedling starters are designed for short-term use, typically for the germination and early growth stages of seedlings. They can generally last for a few weeks to a couple of months, depending on the thickness of the newspaper used and the moisture levels. Once the seedlings develop a substantial root system and are ready for transplanting, the pots can be planted directly into the ground or a larger container. The newspaper will continue to break down, nourishing the soil and allowing the roots to establish themselves in their new environment without the stress of transplant shock.
Can I plant newspaper pots directly in the ground?
Absolutely! The beauty of newspaper seedling starters is that they are fully biodegradable. You can plant them directly into your garden bed or larger container, and the newspaper will break down over time. This method is highly beneficial as it minimizes root disturbance during transplanting, which is a common cause of stress for young plants. The newspaper will gradually decompose, enriching the soil with organic matter and allowing the roots to spread freely into their new surroundings. Just ensure the entire pot is covered with soil to facilitate decomposition.
What size jar should I use for seedling starters?
A jar or can that is about 4 to 6 inches tall and 3 to 4 inches in diameter works well for creating newspaper seedling starters. This size provides enough depth for most common seeds to germinate and develop a small root system before transplanting. The diameter is also important as it dictates the width of your pot, giving your seedlings adequate space to grow. If you are starting larger seeds or plants that require more initial space, you can opt for a slightly larger jar. Conversely, smaller jars can be used for tiny seeds.
What kind of newspaper is best to use?
The best type of newspaper to use for seedling starters is standard black and white newsprint. This type of paper is generally made from recycled materials and is designed to break down easily in the environment. Avoid using glossy inserts, colored advertising flyers, or heavily coated paper, as these may contain inks or coatings that are not as biodegradable or could potentially leach unwanted chemicals into your soil. Unprinted sections of newspaper are also a good option if you are concerned about ink content. The thickness of the newsprint will also affect the durability of your pots.
How do I prevent the newspaper pots from getting too soggy?
To prevent newspaper pots from becoming excessively soggy, it's important to manage watering carefully. Water your seedlings only when the top inch of soil feels dry to the touch. Avoid overwatering, as this can weaken the newspaper and lead to mold or mildew growth. Ensuring good drainage in your seedling setup is also crucial; place the pots in a tray that allows excess water to drain away. Using double-layered newspaper can also add extra strength and absorbency, helping the pot maintain its structure for longer periods, even with regular watering.
What Next?
Congratulations on creating your own sustainable seedling starters! These newspaper pots are not only functional but also a testament to resourceful crafting. For variations, consider using different sizes of jars to create pots of varying heights, or experiment with different types of paper like brown paper bags for a more rustic look. Once your seedlings have outgrown these pots, you can transplant them directly into your garden or larger containers, as the newspaper will naturally decompose. For your next project, consider making seed bombs or building a small compost bin to further enhance your eco-friendly gardening efforts.
Free: 10 Paper Crafts Anyone Can Make in 5 Minutes
Get our beginner guide + new craft ideas weekly.
No spam. Unsubscribe anytime.
Did you complete this activity?
Related