How to Make DIY Plant Pots from Recycled Tin Cans — Easy Step-by-Step Guide
Transform ordinary tin cans into beautiful, personalized plant pots with this fun and easy DIY project. Perfect for adding a touch of green to your home!

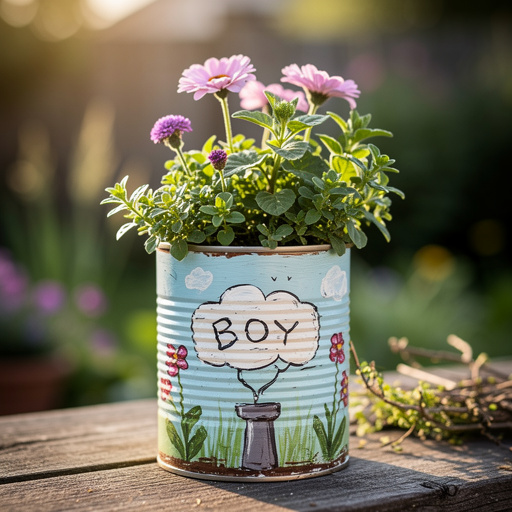
Quick answer
To make DIY plant pots from recycled tin cans, you need cleaned tin cans, paint, and about 60 minutes. Start by preparing your cans. This beginner-friendly activity has 8 steps and is perfect for families with kids aged 6+.
What you need
Shop on Amazon · As an Amazon Associate we earn from qualifying purchases. Links above are affiliate links — we may earn a commission at no extra cost to you.
Looking for a simple yet impactful way to inject some personality and greenery into your living space? This DIY project is your answer! Transforming humble tin cans into charming plant pots is not only incredibly budget-friendly but also a fantastic way to upcycle and reduce waste. It's a perfect activity for crafters of all ages, especially families with younger children, offering a creative outlet that results in beautiful, functional decor. Get ready to give your plants a stylish new home and add a unique, handmade touch to your home or garden.
On this page
Step-by-Step Instructions
- 1
Gather your clean tin cans. Ensure all labels are thoroughly removed by soaking in warm, soapy water or using a hairdryer to loosen the adhesive. Once the labels are off, wash the cans inside and out with degreaser or dish soap and warm water to remove any residue or food particles. Rinse them well and allow them to air dry completely.
- 2
Inspect the inside rim of each can for any sharp edges. If you find any, carefully file them down using a metal file until they are smooth and safe to touch. For an extra layer of safety, you can also apply a thick bead of hot glue along the inside rim once the can is painted and dry, creating a soft, protective barrier.
- 3
Lay down newspaper or a drop cloth to protect your workspace from paint and potential spills. Ensure you have good ventilation, especially if you plan to use spray sealant later on. Arrange your prepared tin cans on the protected surface, ready for painting.
- 4
If you're aiming for maximum durability and a smooth finish, apply a thin, even coat of rust-inhibiting primer to the outside of each tin can. This step is especially important if your cans have any minor rust spots or if you plan to use them outdoors. Allow the primer to dry completely according to the manufacturer's instructions.
- 5
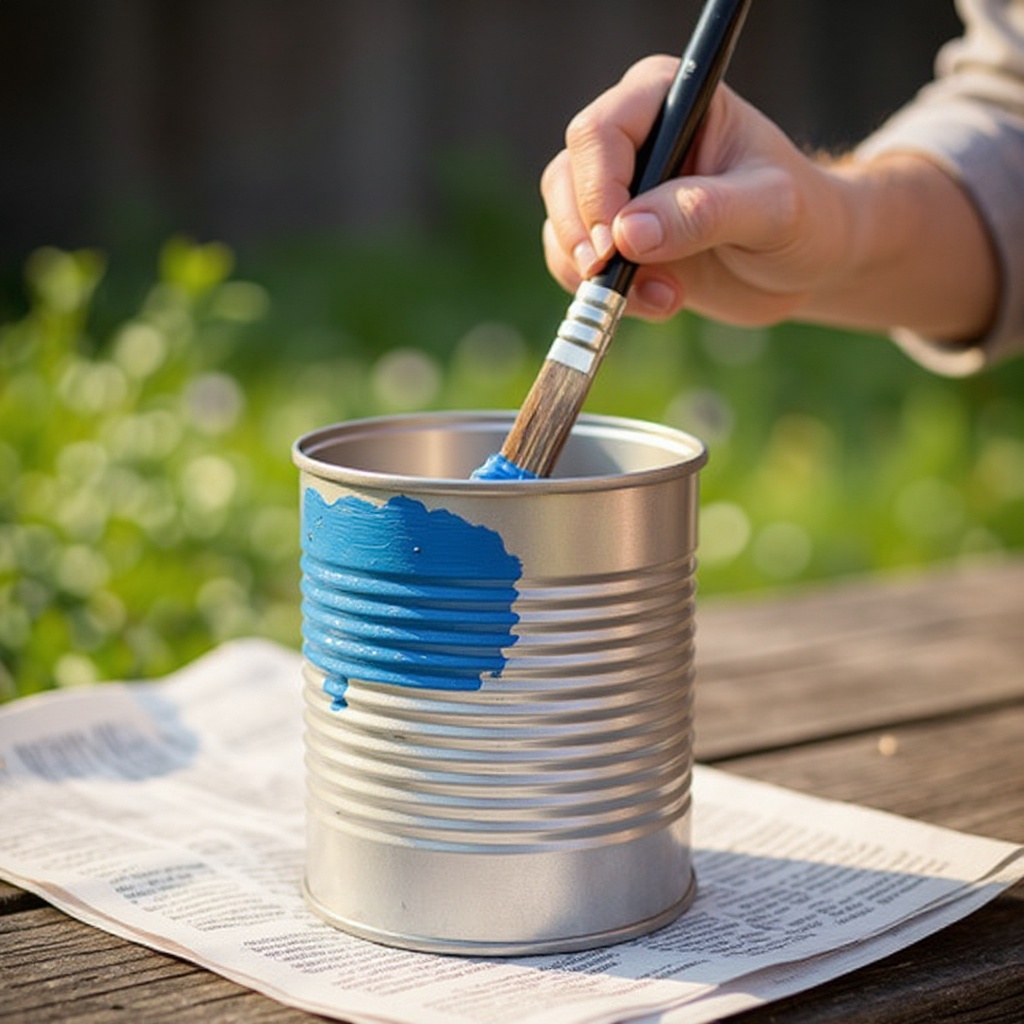
Paint the outside of each tin can with your chosen base color using acrylic paints. Apply the paint in smooth, even strokes, ensuring full coverage. For best results, use a brush that is appropriate for the size of your can and the type of paint you are using. Let the first coat dry completely before proceeding to the next step.
- 6
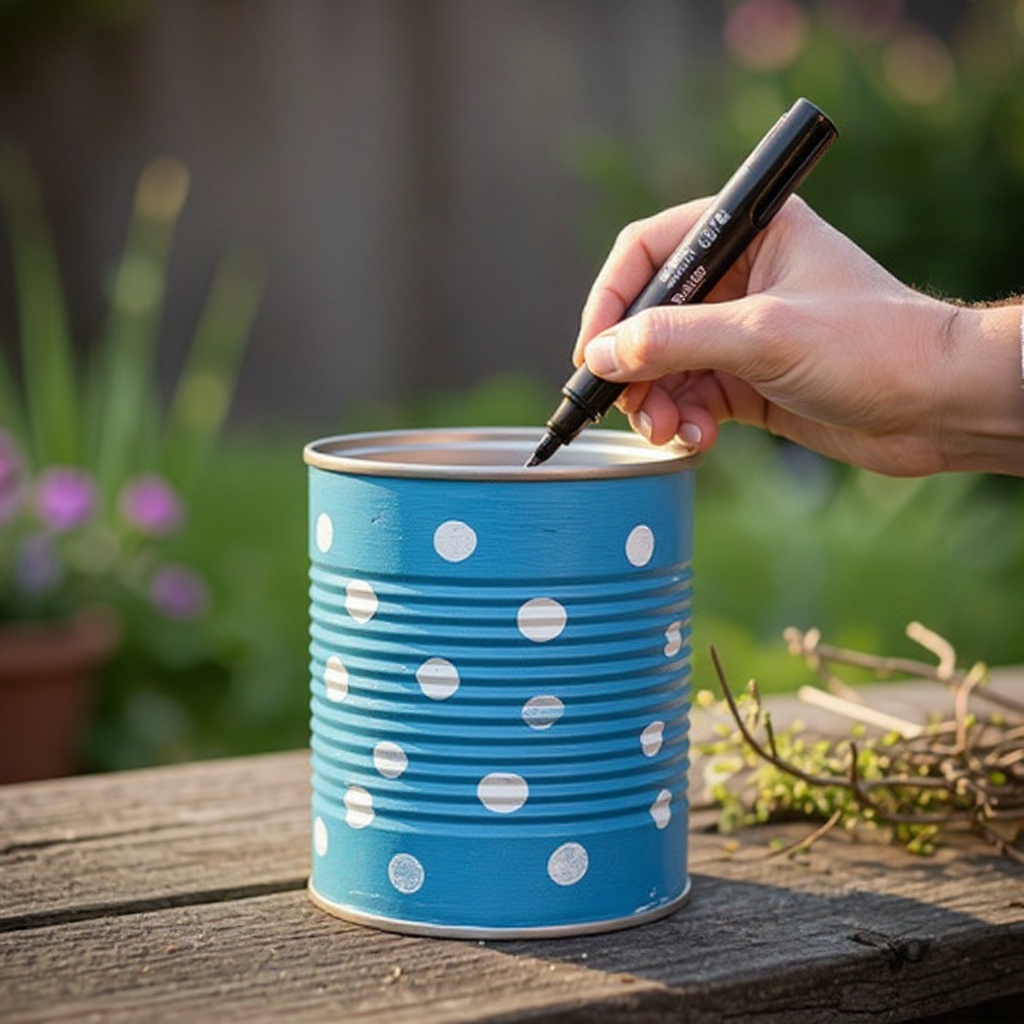
Apply a second coat of paint if needed for full coverage and a richer color. Sometimes, lighter colors over darker cans will require multiple coats. Allow this second coat to dry thoroughly. You can also experiment with different paint finishes, like metallic or chalk paint, for unique textures.
- 7
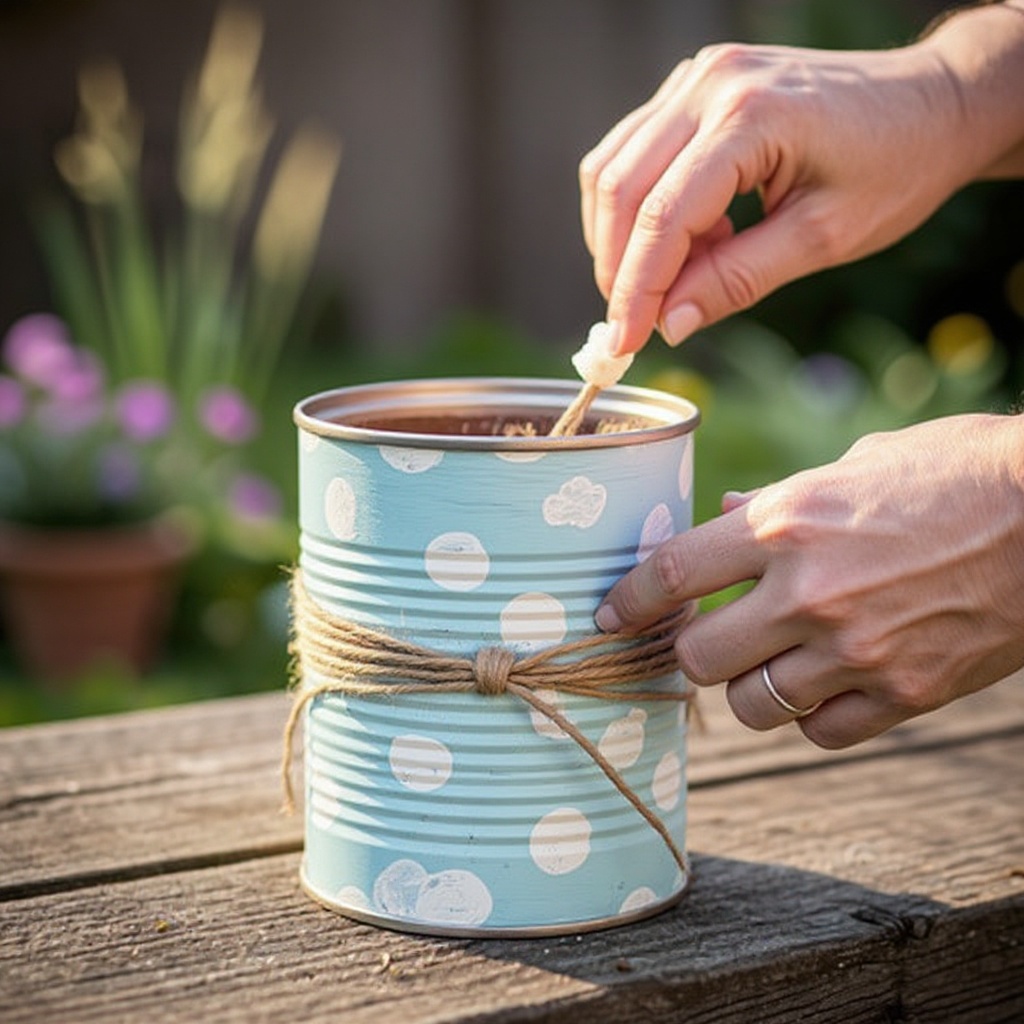
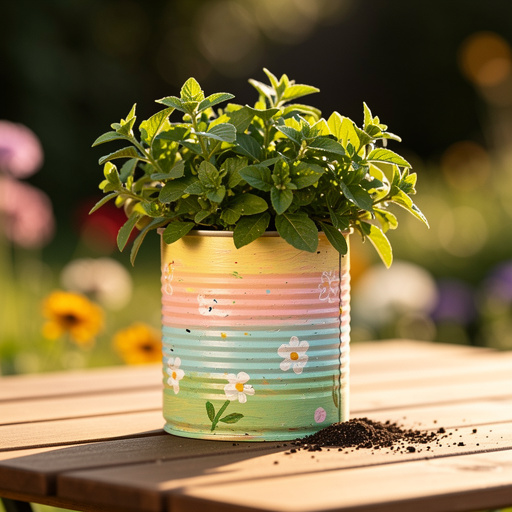
Once the base color is completely dry, it's time to add decorative elements. You can paint patterns, stripes, dots, or even draw intricate designs with permanent markers. For a more polished look, consider using stencils to create repeating motifs or geometric shapes. Wipe away any stray marks with a damp cloth before the paint dries.
- 8
For added texture and visual interest, wrap twine, ribbon, or jute rope around the top or middle of the can. Secure the ends with a dab of craft glue or a strong knot. You can also layer different materials, like lace over twine, for a more complex decorative effect. Ensure the embellishments are firmly attached.
- 9
If you're using stickers or other embellishments that require adhesion, apply them now. Ensure the painted surface is completely dry before applying stickers to prevent them from peeling or smudging. For a more permanent decoration, consider using a strong craft glue for items like small mosaic tiles or beads.
- 10
Allow all paint and decorations to dry thoroughly. This is a crucial step to ensure your designs are set and won't smudge or peel when you handle the pots. Depending on the type of paint and embellishments used, this could take anywhere from a few hours to overnight.
- 11
For added durability, especially if your planters will be used outdoors or handled frequently, consider applying a clear sealant spray. Use light, even coats and allow each coat to dry completely before applying the next. This will protect your painted designs from moisture, UV rays, and general wear and tear.
- 12
Once your decorated tin can pots are completely dry and sealed (if applicable), it's time to prepare them for planting. If you haven't already, ask an adult to carefully punch a few small drainage holes in the bottom of each can using a hammer and a nail. This is essential for plant health to prevent waterlogging.
- 13
Fill your decorated tin can pots with potting soil. Leave about an inch of space at the top to allow for watering. Gently firm the soil, but avoid compacting it too much, as this can hinder root growth.
- 14
Plant your chosen seeds or small plants into the soil. If planting seeds, follow the depth recommendations on the seed packet. For small plants, gently remove them from their nursery pots and place them in the tin can, filling in any gaps with more soil. Water your new plants lightly after planting.
Tips & Troubleshooting
- 1If your tin can edges are sharp, ask an adult to carefully file them down with a metal file or cover the edge with a thick layer of hot glue once painted. This is a vital safety step, especially if children will be handling the pots.
- 2Get creative with your decorations! Use stencils for intricate designs, or glue on small mosaic tiles for a unique, textured look. You can also experiment with decoupage by adhering decorative paper or fabric to the cans with Mod Podge.
- 3Consider painting different designs on each can to create a themed set. For example, you could paint a set of herbs with botanical illustrations, or a set of flowers with vibrant, coordinating colors.
- 4Ensure your cans are completely dry before planting to prevent rust. Moisture trapped between the paint and the metal can accelerate the rusting process, especially in humid environments.
- 5For drainage, you can ask an adult to carefully punch a few small holes in the bottom of the can with a hammer and nail. Alternatively, you can place a layer of gravel or small stones at the bottom of the can before adding soil to improve drainage, though direct holes are more effective.
- 6When choosing plants, consider their size and watering needs. Small succulents, herbs, and compact flowering plants are ideal for tin can planters. Avoid plants that require a lot of space for their root systems or those that are prone to overwatering.
- 7If you're painting with lighter colors, consider using a white primer first to make your colors pop and ensure better coverage. This will also help to mask any original branding or discoloration on the can.
- 8For a rustic look, try using natural materials like jute twine, burlap, or even dried leaves and twigs secured with glue. This can add an organic touch to your recycled planters.
Related Activities You Might Enjoy
Frequently Asked Questions
How do I make sure my tin can pots are safe for plants and people?
Ensuring safety is paramount for both your plants and yourself. First, thoroughly clean the cans to remove any food residue or chemicals. Critically, address any sharp edges on the inside rim by carefully filing them down with a metal file until smooth. An adult should supervise this step. For plant health, it's essential to create drainage. Ask an adult to carefully punch a few small holes in the bottom of the can using a hammer and nail. This prevents waterlogging, which can lead to root rot. If you're concerned about rust, especially for outdoor use, consider applying a rust-inhibiting primer before painting and a clear sealant afterward. For added safety against sharp edges, a thick bead of hot glue along the inside rim can create a soft barrier.
What kind of paint should I use for tin can plant pots, and how do I ensure it lasts?
Acrylic paints are the best choice for decorating tin cans because they adhere well to metal surfaces and offer a vast array of colors and finishes, from matte to metallic. For best results and longevity, start by cleaning the can thoroughly and, if possible, applying a rust-inhibiting primer. This creates a stable base for the paint. Apply your acrylic paints in thin, even coats, allowing each layer to dry completely before adding another. For added durability, especially if the pots will be exposed to moisture or frequent handling, a clear sealant spray (matte or gloss) applied over the dried paint is highly recommended. This protects the design from chipping, fading, and water damage.
Can I use these tin can pots outdoors, and what precautions should I take?
Yes, you can absolutely use these tin can pots outdoors to add charm to your garden, patio, or balcony! However, to prolong their life and prevent them from rusting prematurely, it's advisable to take a few precautions. Ensure you have adequate drainage holes in the bottom of the cans. Applying a rust-inhibiting primer before painting and a good quality clear sealant spray over your finished designs will provide a protective barrier against rain, sun, and humidity. Consider using outdoor-specific acrylic paints if available, as they are formulated to withstand harsher conditions. Regularly check your outdoor planters for any signs of wear or rust and touch them up as needed.
What plants are best suited for small tin can pots, and how do I plant them?
Small tin can pots are perfect for plants with compact root systems. Excellent choices include small succulents like Echeveria or Sedum, various types of cacti, and many herbs such as basil, mint, chives, or thyme. Small flowering plants like pansies, violas, or even miniature marigolds also thrive in these containers. When planting, ensure your tin can has drainage holes. Fill the can about two-thirds full with potting soil, leaving enough space for the plant's root ball. Gently place the plant in the can, fill in any gaps with more soil, and lightly firm it down. Water the plant thoroughly after planting to help the soil settle and reduce transplant shock.
How can I achieve different decorative effects on my tin can planters?
The possibilities for decorative effects are vast! For a minimalist look, simply paint the cans in solid matte or metallic colors. For more intricate designs, use stencils to create repeating patterns, geometric shapes, or even simple motifs like leaves or stars. Permanent markers, such as Sharpies, are great for drawing freehand designs, lettering, or outlining painted areas. You can also wrap the cans with natural materials like jute twine, burlap, or colorful ribbons for a textured, rustic, or bohemian feel, securing them with craft glue. For a unique mosaic effect, glue on small ceramic tiles or broken pottery pieces. Experimenting with different paint finishes like chalk paint can also add a charming, vintage appeal.
My tin cans have some rust spots. Can I still use them, and how should I prepare them?
Rust spots on tin cans don't mean they're unusable! In fact, they can add a unique, vintage character to your planters if you embrace them. However, if you want to prevent further rusting and ensure a smooth painting surface, you'll need to prepare them properly. First, gently sand down the rust spots with medium-grit sandpaper to remove loose rust. Then, clean the can thoroughly. Crucially, apply a rust-inhibiting primer specifically designed for metal. This primer will seal the remaining rust and prevent it from bleeding through your paint. Once the primer is dry, you can proceed with your chosen acrylic paints and decorative techniques. For outdoor use, a good sealant is even more important.
What Next?
Once your tin can planters are complete and your plants are happily settled, you'll have a collection of unique, personalized pots that add character to any windowsill, shelf, or garden nook. Consider creating a themed set by using a consistent color palette or decorative style, or mix and match for a vibrant, eclectic display. For a more permanent outdoor solution, explore using outdoor-specific paints or a clear sealant to protect against the elements. As a next step, you could try decorating larger food cans or even metal cookie tins for bigger plants, or explore decoupage techniques for even more intricate designs. Enjoy your beautiful, eco-friendly creations!
Free: 10 Paper Crafts Anyone Can Make in 5 Minutes
Get our beginner guide + new craft ideas weekly.
No spam. Unsubscribe anytime.
Did you complete this activity?
Related
You might also like
Recycled Magazine Coil Coasters
Painted Tin Can Planters
Shrink Plastic Plant Markers
Egg Carton Succulent Planters
Mod Podge Painted Terra Cotta Pots