How to Set Up Your Best Seed Starter Kit with Grow Light — Easy Step-by-Step Guide
Discover how to create a thriving indoor garden with your seed starter kit and grow light. This guide makes starting seeds simple and fun for the whole family. Learn the essential steps to nurture your plants from seed to sprout, ensuring a successful harvest. Perfect for beginners, this project brings the joy of gardening indoors, regardless of the season or weather outside.
Quick answer
To set up your best seed starter kit with grow light, you'll need the kit, seeds, soil, water, and the grow light. Start by filling the trays and planting your seeds. This beginner-friendly activity has 7 steps and is perfect for families. Ensure proper light, moisture, and air circulation for optimal seedling growth. You'll be enjoying fresh greens and vibrant blooms in no time!
What you need
Shop on Amazon · As an Amazon Associate we earn from qualifying purchases. Links above are affiliate links — we may earn a commission at no extra cost to you.
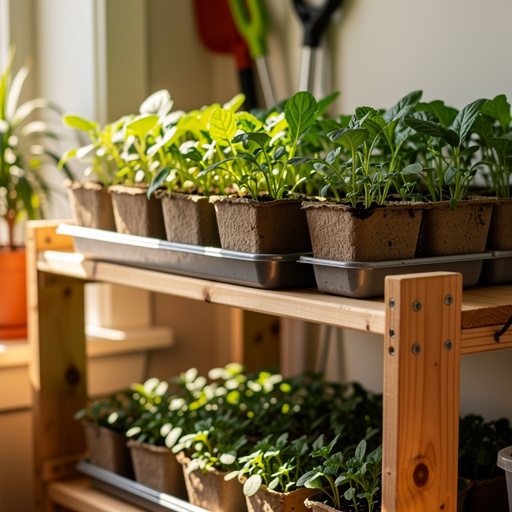
Embarking on the journey of growing your own plants from seed is incredibly rewarding, and setting up a dedicated seedling station makes it even more accessible and successful. This project is perfect for anyone looking to extend their gardening season, grow unique varieties, or simply enjoy the satisfaction of nurturing life from a tiny seed. It's an ideal activity for families, offering a hands-on educational experience that connects children with nature and the food they eat. With a few simple materials and this step-by-step guide, you'll create a thriving indoor oasis for your young plants.
On this page
Step-by-Step Instructions
- 1
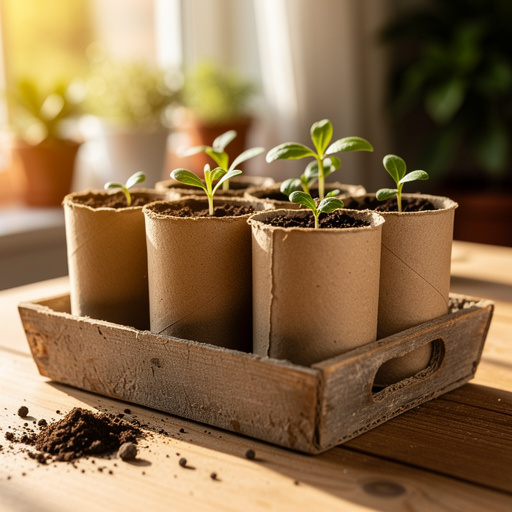
Begin by carefully unpacking your seed starter kit and familiarizing yourself with all the components. Identify the individual seed starting trays, the clear humidity dome that will cover them, and any inserts or dividers that might be included. Ensure all parts are clean and free from debris before you begin.
- 2
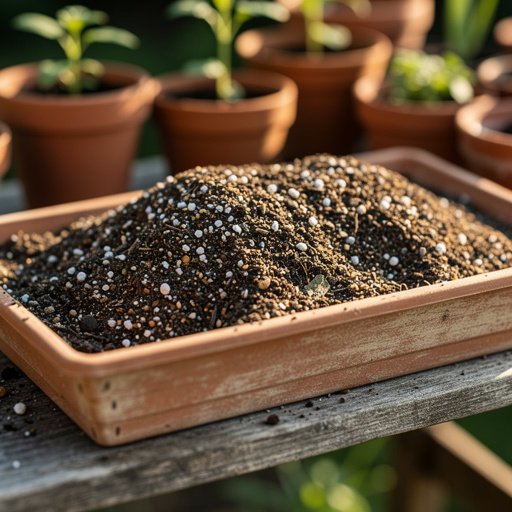
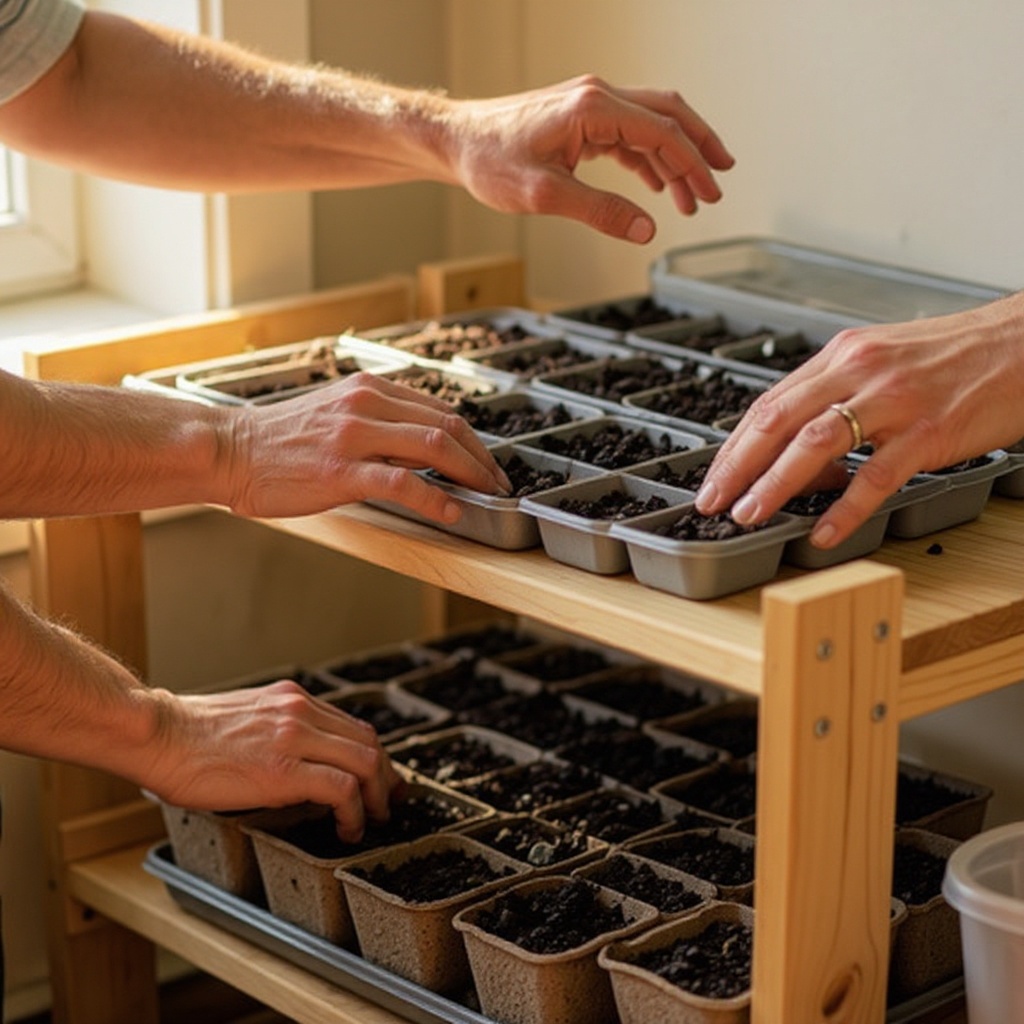
Prepare your seed starting soil mix by moistening it thoroughly. The ideal consistency is like a wrung-out sponge – damp but not dripping wet. You can do this in a separate container or directly in the seed tray by adding water gradually and mixing it in. Overly dry soil will make planting difficult, while overly wet soil can lead to root rot.
- 3
Fill each cell of the seed starting tray with the moistened soil mix, gently pressing it down as you go. Aim to fill each cell to about 1/2 inch below the rim, leaving ample space for the seeds and subsequent watering. Avoid compacting the soil too tightly, as this can hinder root development and water penetration.
- 4
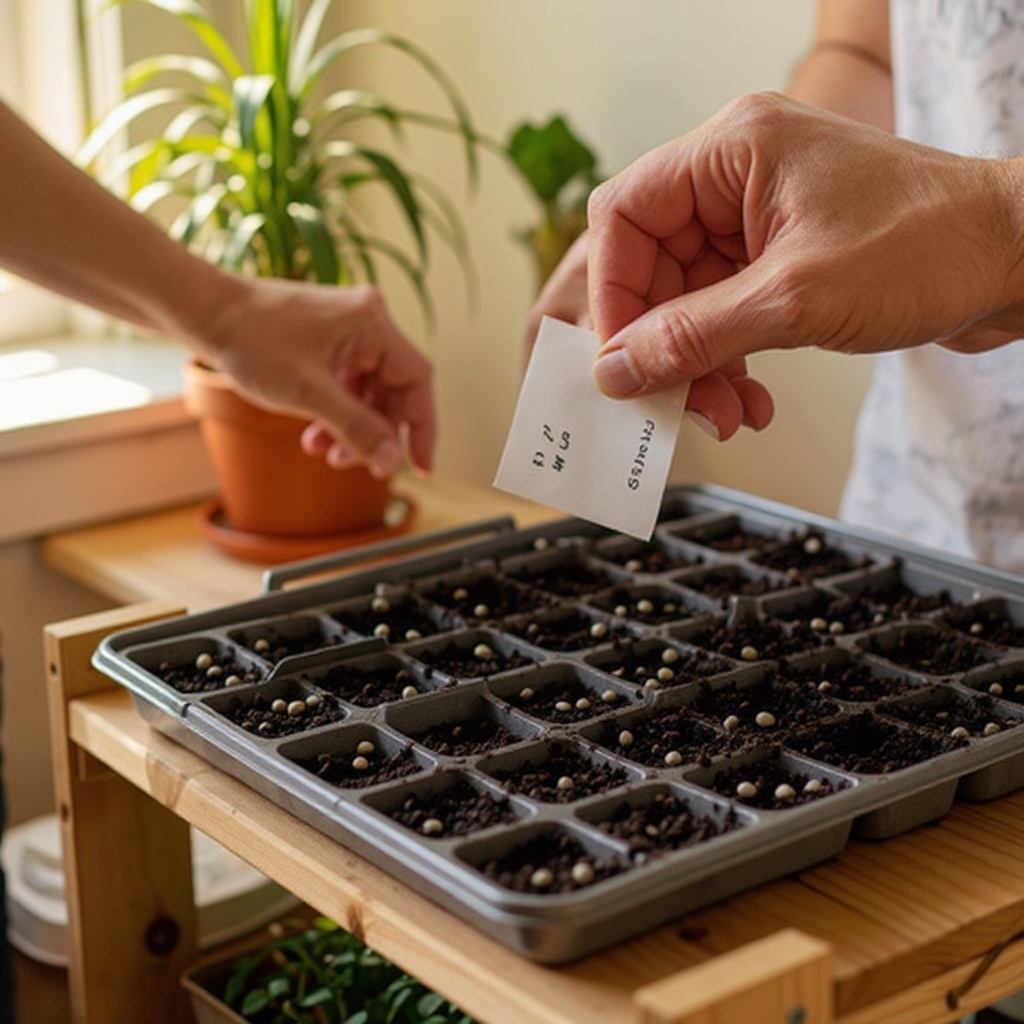
Now it's time to sow your seeds! Carefully read the instructions on each seed packet, paying close attention to the recommended planting depth and spacing. Different seeds have different needs, so it's crucial to follow these guidelines for optimal germination.
- 5
Using your fingertip or a small tool, create a small indentation in the center of each cell to the depth specified on the seed packet. Place 1-2 seeds into each indentation. Planting two seeds per cell increases the chances of successful germination, and you can thin out the weaker seedling later if both sprout.
- 6
Gently cover the seeds with the seed starting soil mix, following the depth recommendations on the packet. For very small seeds, you might only need a dusting of soil, while larger seeds require a bit more coverage. Ensure the seeds are fully enclosed by the soil for proper germination.
- 7
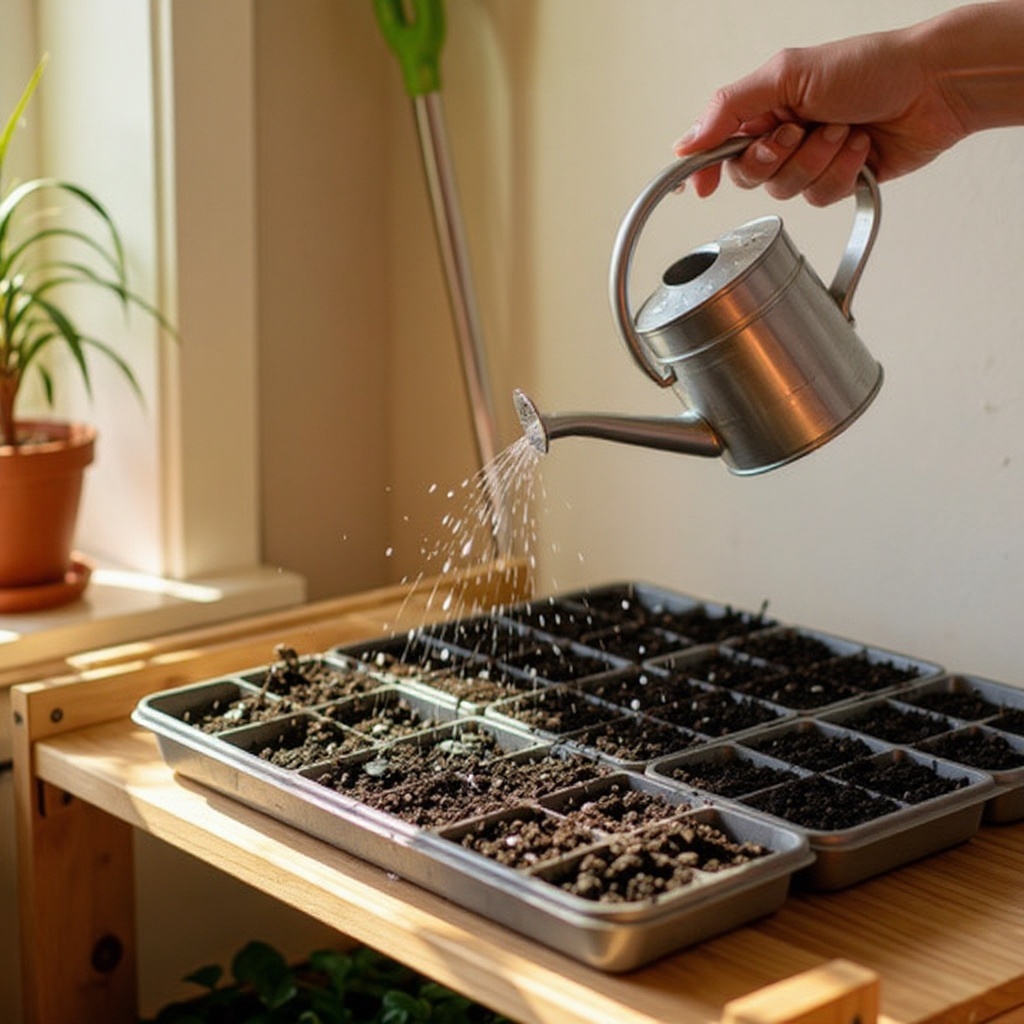
Water the newly sown seeds very gently. A watering can with a fine rose attachment or a spray bottle is ideal for this stage, as it prevents dislodging the seeds. Aim to moisten the soil evenly throughout the tray until it feels consistently damp but not waterlogged. Excess water can wash away seeds or cause them to rot.
- 8
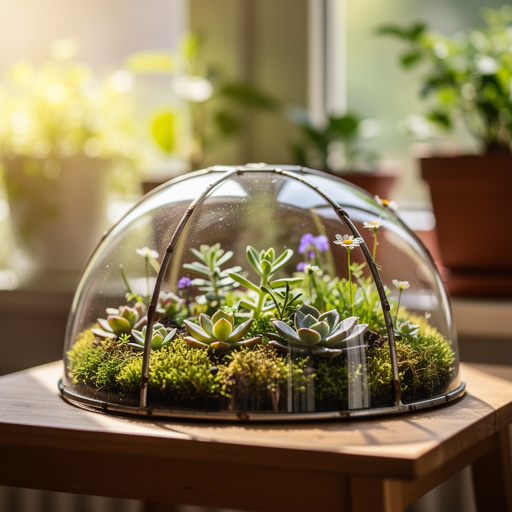
Place the clear humidity dome over the seed tray. This dome is crucial for creating a microclimate that mimics the warm, moist conditions many seeds need to germinate. It helps retain moisture and warmth, significantly boosting your success rate.
- 9
Position your adjustable grow light directly above the seed tray. The initial height should be about 2-4 inches above the soil surface. As your seedlings grow taller, you will need to adjust the light upwards to maintain this optimal distance, preventing them from becoming leggy or scorched.
- 10
If you are using a timer for your grow light, connect it now and set it for the appropriate duration. Most seedlings require 14-16 hours of light per day to thrive. This consistent light cycle is vital for healthy growth and prevents the plants from becoming weak and spindly.
- 11
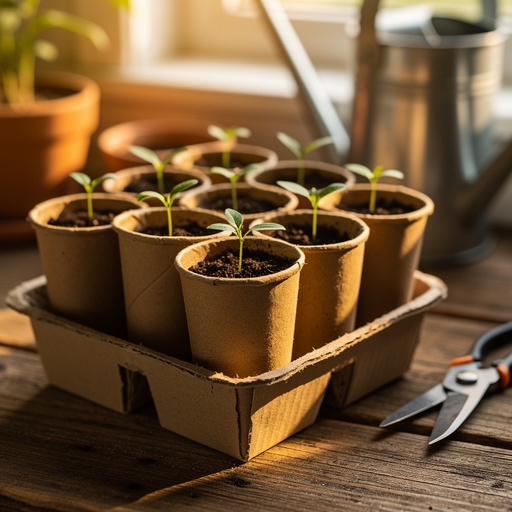
Once you observe the first signs of seedlings emerging from the soil, it's time to remove the clear humidity dome. This step is critical for improving air circulation around the young plants, which helps prevent fungal diseases like 'damping off' – a common issue where seedlings collapse at the soil line.
- 12
Continue to monitor the soil moisture levels diligently. The soil should remain consistently moist but never soggy. You can check this by gently touching the surface of the soil; if it feels dry, it's time to water. Overwatering is a common mistake that can lead to root rot and other problems.
- 13
As your seedlings grow taller, remember to adjust the height of your grow light accordingly. Maintain that 2-4 inch distance between the light source and the tops of the plants. This ensures they receive adequate light without being stressed by excessive heat or intensity.
- 14
Keep your labels updated and visible. As soon as you sow your seeds, use your waterproof labels and marker to clearly identify the type of seed planted in each cell and the date you sowed them. This organization is invaluable for tracking germination times and plant development.
- 15
Ensure your seedling station is placed in a location where it won't be easily disturbed and where the temperature is relatively stable, ideally between 65-75°F (18-24°C). Avoid drafty windows or direct heat sources that can cause temperature fluctuations.
- 16
Once your seedlings have developed their first set of true leaves (the leaves that appear after the initial cotyledons), they are ready for a slightly more robust watering. Continue to water from the bottom if possible, or gently water the soil, avoiding the leaves.
- 17
Consider fertilizing your seedlings once they have a few sets of true leaves. Use a diluted liquid fertilizer specifically formulated for seedlings, typically at half or quarter strength. This provides essential nutrients for their continued growth and development.
- 18
As your seedlings mature and their roots begin to fill the cells, you may notice them drying out more quickly. This is a sign they are ready to be transplanted into larger pots or directly into your garden, provided the outdoor conditions are suitable.
Tips & Troubleshooting
- 1Ensure your grow light is adjustable so you can raise it as your seedlings grow, maintaining the ideal distance. This prevents the plants from stretching too tall and becoming weak, a condition known as 'legginess,' and also avoids burning the delicate leaves.
- 2If using a timer, set it to provide 14-16 hours of light per day for optimal seedling growth. This consistent light cycle is crucial for healthy development, mimicking natural daylight hours and allowing the plants a period of rest.
- 3Once seedlings emerge, remove the dome to improve air circulation and prevent damping off. Good airflow is essential for strong stems and helps to reduce the risk of fungal diseases that thrive in stagnant, humid conditions.
- 4Keep the soil consistently moist but avoid overwatering, which can lead to root rot. The soil should feel like a damp sponge; if you can squeeze water out, it's too wet. Check the moisture level by touching the soil surface.
- 5Label each cell with the type of seed planted and the date sown to keep track of your progress. This simple step is invaluable for identifying your plants, noting germination times, and planning your transplanting schedule.
- 6Monitor the temperature around your seedling station. Most seeds germinate best in temperatures between 70-80°F (21-27°C), and seedlings generally prefer slightly cooler temperatures once they sprout. Avoid placing them near drafty windows or heat vents.
- 7When watering, try to water the soil directly rather than the leaves. Wet leaves can be more susceptible to fungal diseases, especially in a humid environment. Bottom watering, by placing the tray in a shallow dish of water, is an excellent method for ensuring even moisture without disturbing the seedlings.
- 8If you planted more than one seed per cell and both germinate, it's important to 'thin' them. Once the seedlings have developed their first set of true leaves, carefully snip off the weaker seedling at the soil line with small scissors, leaving the stronger one to grow.
Related Activities You Might Enjoy
Frequently Asked Questions
What is the best type of grow light for a seed starter kit?
LED grow lights are generally the best for seed starter kits due to their efficiency, low heat output, and customizable light spectrums. They offer a full spectrum of light that effectively mimics natural sunlight, promoting robust and healthy seedling growth without the risk of overheating delicate young plants. Unlike older fluorescent lights, LEDs are more energy-efficient, meaning lower electricity bills, and they have a longer lifespan. Look for 'full spectrum' LEDs, which provide a balance of red and blue light wavelengths crucial for photosynthesis and overall plant development. The wattage and coverage area of the light should be appropriate for the size of your seedling tray setup.
How long should I keep the grow light on for seedlings?
Seedlings typically need between 14 to 16 hours of light per day to thrive. This duration is crucial for mimicking natural daylight cycles and providing enough energy for photosynthesis. Using a digital timer is highly recommended to ensure a consistent light schedule without manual intervention. This consistency is vital for healthy growth, preventing plants from becoming leggy due to insufficient light or stressed by too much. The timer also allows you to provide a dark period, which is equally important for plant respiration and overall health, ensuring your seedlings get adequate rest.
When should I remove the plastic dome from my seed starter tray?
You should remove the clear plastic dome from your seed starter tray as soon as you observe the first seedlings emerging from the soil. This is a critical step in preventing fungal diseases, most notably 'damping off,' which can quickly decimate young plants. The dome creates a humid environment conducive to germination, but once seedlings sprout, they require better air circulation to develop strong stems and prevent mold growth. Removing the dome allows for airflow, reducing excess moisture on the soil surface and around the delicate stems, thereby promoting healthier, more resilient growth.
How often should I water my seedlings under a grow light?
Water your seedlings when the top layer of soil feels dry to the touch. The frequency will depend on various environmental factors such as temperature, humidity, and the type of soil used, but the goal is to keep the soil consistently moist, not soggy. Overwatering is a common mistake that can lead to root rot and other fungal issues, while allowing the soil to dry out completely can stress and kill the seedlings. A good practice is to check the moisture daily by gently touching the soil surface. If it feels dry, water thoroughly until you see moisture at the bottom of the tray, or use bottom watering techniques.
What are 'true leaves' and why are they important?
True leaves are the second set of leaves that appear on a seedling, following the initial pair of seed leaves known as cotyledons. Cotyledons are the first leaves to emerge from the seed and often look different from the mature leaves of the plant; they contain stored food reserves to help the seedling get started. True leaves, on the other hand, are the plant's first 'real' leaves and are shaped like the mature leaves the plant will eventually develop. The appearance of true leaves signifies that the seedling is photosynthesizing effectively and has a developed root system, indicating it's ready for more advanced care, such as fertilization and potentially transplanting.
Can I start seeds without a grow light?
While it is possible to start seeds without a dedicated grow light, it is significantly more challenging and often results in weaker, leggy seedlings. Seeds can be started in a very sunny windowsill that receives at least 6-8 hours of direct sunlight per day. However, even the sunniest windows may not provide consistent enough light, especially during winter months or in regions with less intense sunlight. Seedlings started without adequate light will stretch towards the nearest light source, resulting in long, thin stems that are prone to breaking and are less robust. A grow light provides consistent, full-spectrum light that is optimized for seedling growth, ensuring stronger, healthier plants.
What Next?
Congratulations on setting up your indoor seedling station! This controlled environment is your launchpad for a bountiful garden. Consider experimenting with different types of seeds, from herbs and vegetables to vibrant flowers, to discover your favorites. For a more advanced setup, explore hydroponic seed starting or integrate a heating mat for faster germination. Once your seedlings are robust enough, you can transplant them into larger pots or directly into your garden beds. Display your thriving seedlings on a shelf or windowsill, bringing a touch of green life into your home.
Free: 10 Paper Crafts Anyone Can Make in 5 Minutes
Get our beginner guide + new craft ideas weekly.
No spam. Unsubscribe anytime.
Did you complete this activity?
Related