How to Create Fabric Paint Stencil Prints — Easy Step-by-Step Guide
Discover the magic of screen printing DIY at home! This guide teaches you how to create beautiful, custom designs on fabric using simple stencils and fabric paint. Perfect for adding a personal touch to tote bags, t-shirts, and more.


Quick answer
To make fabric paint stencil prints, you need a stencil, fabric paint, a squeegee, and fabric, taking about 60 minutes. Start by securing your stencil to the fabric. This beginner-friendly activity has 10 steps and is perfect for families with kids aged 6+.
What you need
Shop on Amazon · As an Amazon Associate we earn from qualifying purchases. Links above are affiliate links — we may earn a commission at no extra cost to you.
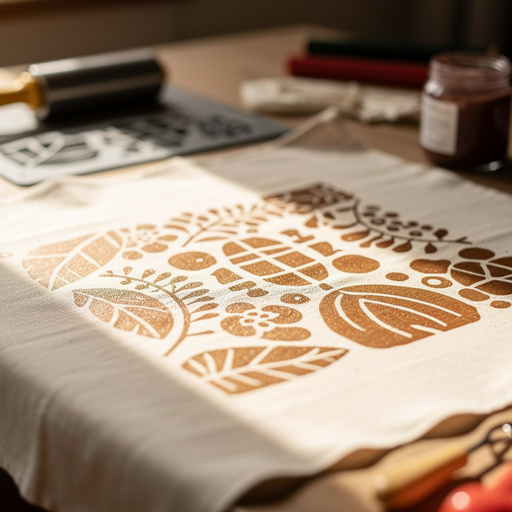
Unleash your inner artist and transform plain fabrics into personalized masterpieces with this incredibly accessible DIY screen printing technique! Creating fabric paint stencil prints is a wonderfully rewarding craft that allows you to add unique designs to everything from tote bags and t-shirts to tea towels and pillowcases. It’s a fantastic way to express your style, create thoughtful gifts, or even start a small custom apparel business. This project is perfect for crafters of all ages, especially families looking for a fun and engaging activity that yields impressive results with minimal fuss.
On this page
Step-by-Step Instructions
- 1
Prepare your workspace by covering it with newspaper or a drop cloth. This is crucial to protect your surfaces from any stray paint splatters, ensuring a clean and stress-free crafting experience.
- 2
Insert a piece of cardboard or thick paper inside your fabric item to prevent paint from bleeding through to the other side. Ensure it's smooth and lies flat, extending slightly beyond the area where you'll be stenciling.
- 3
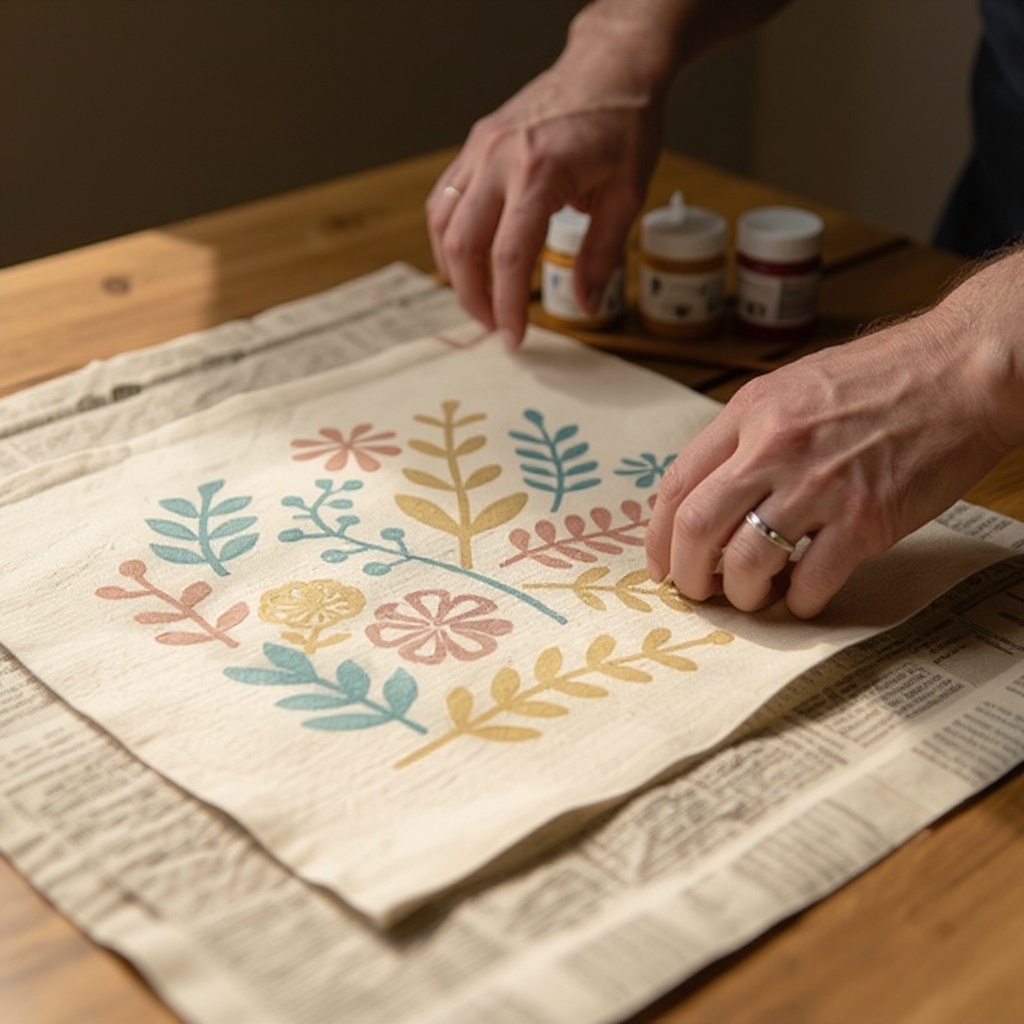
Position your stencil onto the fabric where you want your design to appear. Take a moment to center it and ensure it's exactly where you envision it before securing it.
- 4
Secure the stencil firmly with masking tape around the edges or a light spray of temporary adhesive. If using tape, press it down firmly to create a good seal, preventing paint from seeping underneath.
- 5
Open your fabric paint and stir it gently with a craft stick or the edge of your squeegee. Avoid vigorous shaking, which can introduce air bubbles into the paint.
- 6
Place a generous amount of fabric paint at the top edge of your stencil, directly above the area you intend to paint. You want enough paint to cover the stencil in one pass, but not so much that it becomes unmanageable.
- 7
Hold the stencil steady with one hand, applying gentle pressure to keep it from shifting. With your other hand, hold the squeegee (or credit card) at a slight angle, about 45 degrees, to the fabric.
- 8
Pull the paint down across the stencil in a smooth, consistent motion, ensuring even coverage over the entire design. Apply firm but not excessive pressure to push the paint through the stencil openings.
- 9
Carefully lift the squeegee and repeat the pulling motion if needed to ensure all areas of the stencil are covered with paint. Overlap your strokes slightly to avoid any gaps or streaks in the design.
- 10
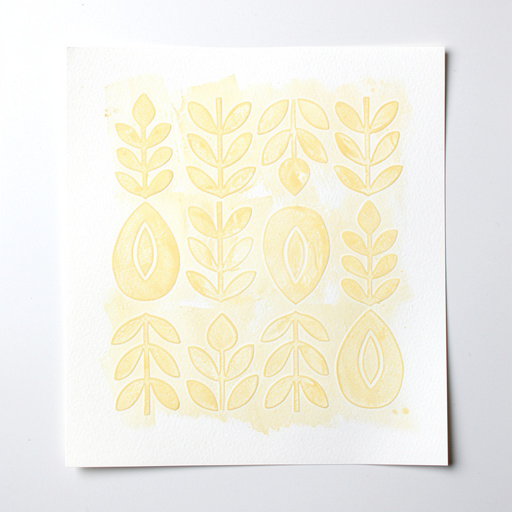
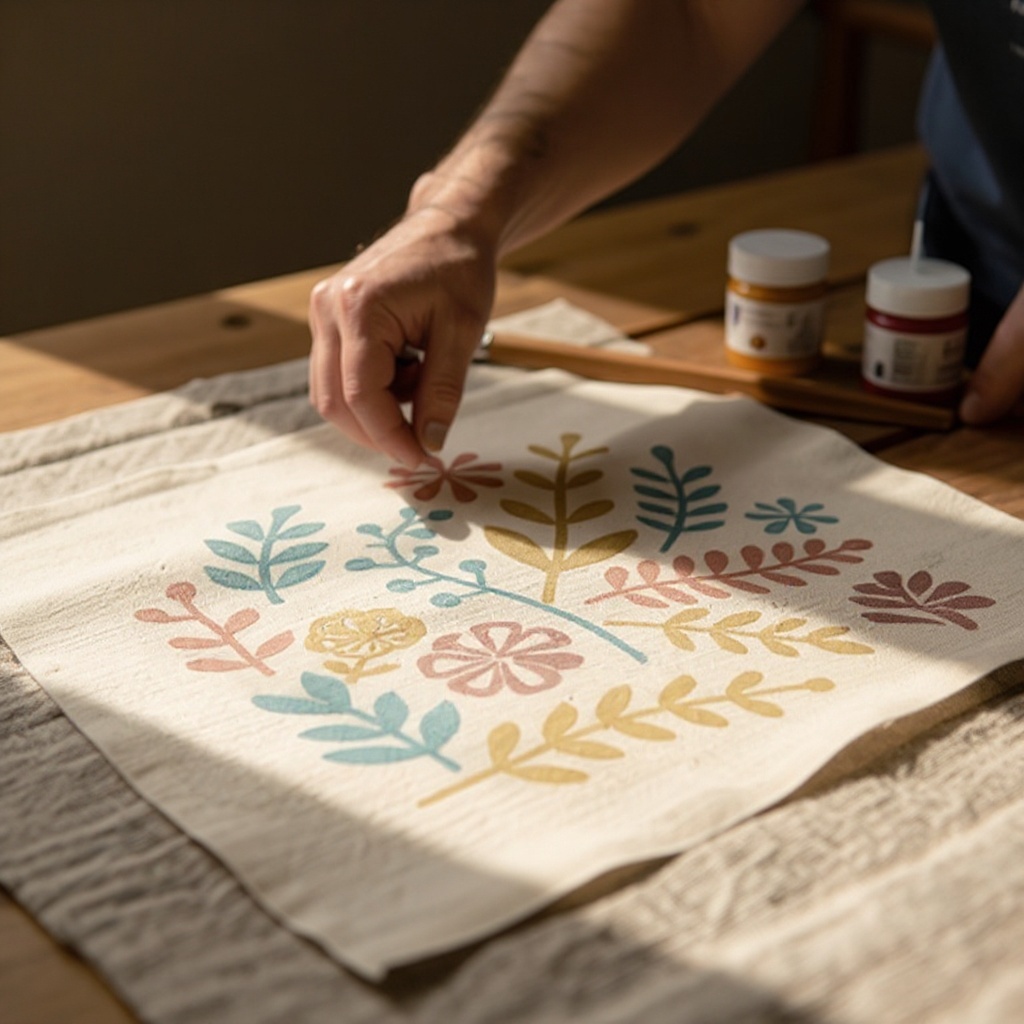
Gently peel the stencil away from the fabric, revealing your design. Do this slowly and deliberately, starting from one corner and lifting upwards to avoid smudging the wet paint.
- 11
Allow the painted design to air dry completely according to the fabric paint manufacturer's instructions, which usually takes between 24 to 72 hours. Resist the urge to touch or move the fabric during this critical drying period.
- 12
Once completely dry, heat-set the paint by ironing it on a medium-hot setting (without steam) for a few minutes, following the paint's specific instructions. This crucial step makes the design permanent and washable, ensuring your artwork lasts.
- 13
Clean your stencil and squeegee immediately after use with soap and water. Prompt cleaning prevents paint from drying and adhering, making them reusable for future projects.
- 14
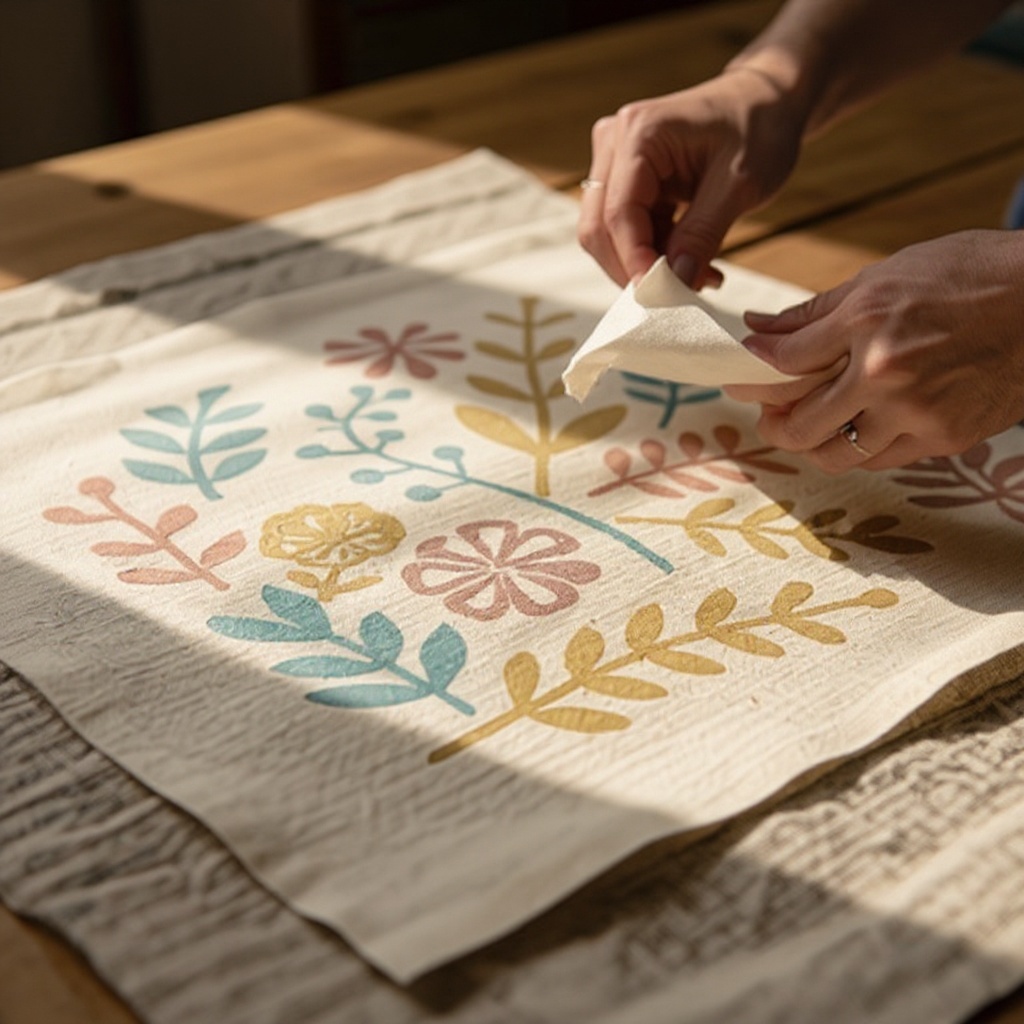
Inspect your finished design for any areas that may need touch-ups. If minor smudges occurred, you might be able to carefully correct them with a fine brush and a small amount of fabric paint before heat-setting, or accept them as part of the handmade charm.
Tips & Troubleshooting
- 1If your stencil has intricate details or fine lines, use a slightly firmer squeegee or credit card to ensure paint gets into all the nooks and crannies. A softer tool might not push the paint through effectively, leaving gaps in your design.
- 2For a layered effect or to create multi-colored designs, allow the first color to dry completely before applying a second stencil and color on top. This prevents colors from bleeding into each other and creates a cleaner, more defined look.
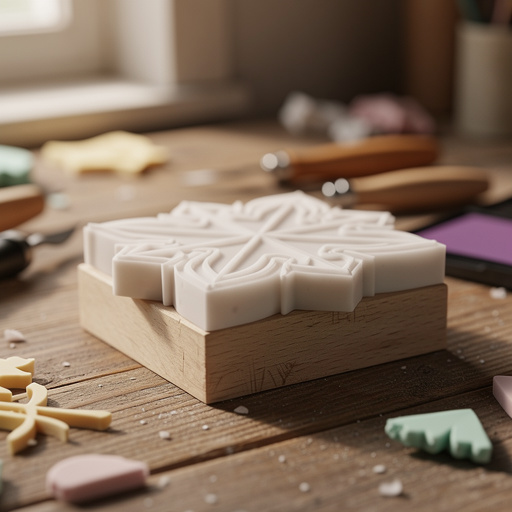
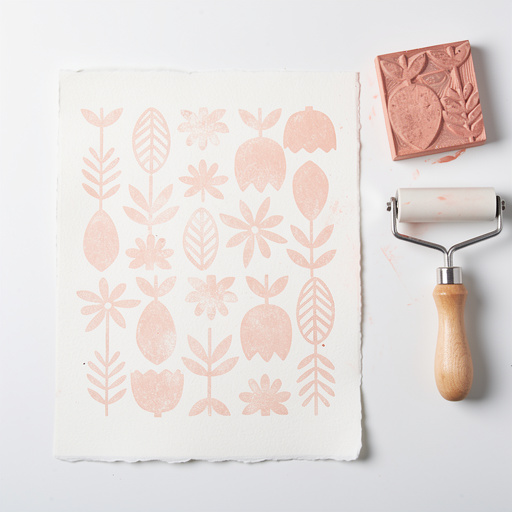
- 3Experiment with different types of stencils to achieve various effects. Pre-cut plastic stencils offer durability, while hand-cut cardstock provides flexibility for custom shapes, and vinyl can yield incredibly sharp, precise edges.
- 4Clean your stencil and squeegee immediately after use with soap and water to prevent paint from drying and making them unusable for future projects. Dried paint can be very difficult to remove and can ruin your tools.
- 5Always test your fabric paint on a scrap piece of fabric first to ensure you like the color and consistency before committing to your main project. This also allows you to practice your squeegee technique.
- 6For a more secure stencil, especially with delicate designs, consider using a light mist of temporary spray adhesive on the back of the stencil. This helps create a better seal and prevents paint from creeping underneath.
- 7If you're using a very absorbent fabric, you might need to apply a slightly thicker layer of paint or make an extra pass with the squeegee to ensure good coverage. Always check the paint manufacturer's recommendations for different fabric types.
- 8Don't be afraid to embrace imperfections! Slight variations in paint coverage or minor smudges can add to the handmade charm and uniqueness of your stencil prints, making each piece truly one-of-a-kind.
Related Activities You Might Enjoy
Frequently Asked Questions
Can I do screen printing DIY without a screen?
Absolutely! This method brilliantly mimics the effect of screen printing using simple stencils, making it a fantastic DIY alternative. You don't need a traditional silk screen frame and mesh. Instead, you can create your own stencils from readily available materials like cardstock, freezer paper, or adhesive vinyl. This accessibility makes it a perfect project for families and beginners who want to achieve custom printed fabrics without investing in specialized screen printing equipment. The key is to create a barrier on your fabric that allows paint to pass through only in the desired design areas, which is precisely what a stencil does.
What kind of paint should I use for DIY screen printing on fabric?
For DIY screen printing on fabric, it is essential to use acrylic fabric paints. These paints are specifically formulated to adhere to textiles, offering flexibility and durability that regular acrylics lack. They are designed to withstand washing and wear without cracking or fading significantly. When choosing your fabric paint, look for options labeled 'fabric paint' or 'textile paint.' These paints typically become permanent and washable after a heat-setting process, usually involving ironing. Avoid using standard craft acrylics, as they will likely wash out or become stiff and brittle on fabric.
How do I make my DIY screen prints permanent?
To make your DIY screen prints permanent and ensure they can withstand washing, you need to heat-set the fabric paint. This process cures the paint, bonding it to the fabric fibers. After the painted design has completely air-dried (which can take 24 to 72 hours, depending on the paint and humidity), you'll use an iron. Set your iron to a medium-hot setting, ensuring there is no steam. Press the iron over the painted design for a few minutes, moving it constantly to avoid scorching the fabric. Always refer to the specific instructions provided by your fabric paint manufacturer for the recommended heat-setting time and temperature.
Is screen printing DIY messy for kids?
This stencil-based DIY screen printing can indeed be a little messy, especially when involving younger children who are still developing fine motor control. Paint can sometimes drip, and squeegees can get loaded with excess paint. However, the mess level is generally considered moderate and very manageable with proper preparation. By covering your workspace thoroughly with newspaper or a drop cloth, wearing old clothes, and having plenty of paper towels or rags readily available for immediate cleanup, you can significantly minimize the mess. The exciting and rewarding results of creating their own custom designs often make the minor mess well worth the effort for kids.
What are the best materials to use for cutting my own stencils?
When cutting your own stencils for fabric paint printing, you have several excellent material options, each offering unique benefits. Cardstock is a popular choice due to its affordability and ease of cutting with scissors or a craft knife; however, it can be less durable for multiple uses. Freezer paper, with its waxy backing, can be ironed onto fabric to create a very precise seal, minimizing paint bleed, though it's typically single-use. Adhesive vinyl, often cut with a cutting machine like a Cricut or Silhouette, offers incredibly sharp edges and can be reused multiple times if handled carefully. For intricate designs, consider using a stencil film or acetate sheets, which are durable and washable.
How can I achieve a cleaner stencil print with less paint bleed?
To achieve a cleaner stencil print with minimal paint bleed, several techniques can be employed. First, ensure your stencil is firmly adhered to the fabric, creating a tight seal around all edges. Using masking tape or temporary spray adhesive can help achieve this. When applying paint with the squeegee, use a firm, consistent pressure and a smooth, single stroke. Avoid overworking the paint or making multiple passes in different directions, which can push paint under the stencil. If using cardstock, consider sealing the edges with a thin layer of Mod Podge or clear sealant before painting to prevent the paper from absorbing excess moisture and swelling.
What Next?
With your beautifully stenciled fabric creations complete, the possibilities are endless! Consider framing your artwork, sewing your designs into unique home decor items, or even gifting your personalized goods. For future projects, explore different stencil materials like freezer paper for a crisper edge, or try layering multiple colors for a more complex design. You can also experiment with different fabric types and paint finishes to achieve varied textures and looks. Remember to store your stencils and tools properly, ensuring they are clean and dry, so they're ready for your next creative adventure.
Free: 10 Paper Crafts Anyone Can Make in 5 Minutes
Get our beginner guide + new craft ideas weekly.
No spam. Unsubscribe anytime.
Did you complete this activity?
Related