How to Make Digital Stamps Online — Easy Step-by-Step Guide
Discover how to design your own custom digital stamps using free online tools. Perfect for adding a personal touch to your crafts and digital projects.

Quick answer
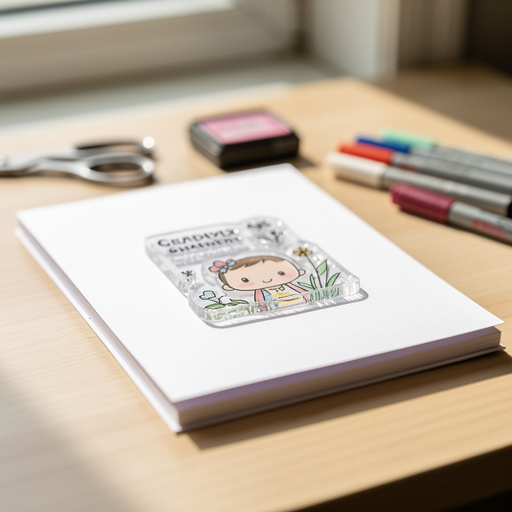
To make digital stamps online, you need a computer, internet access, and a free design tool like Canva. Start by sketching your design or using pre-made elements. This beginner-friendly activity has 7 steps and is perfect for families and crafters of all ages.
What you need
Shop on Amazon · As an Amazon Associate we earn from qualifying purchases. Links above are affiliate links — we may earn a commission at no extra cost to you.
Unleash your creativity and add a unique, personalized touch to all your projects with the magic of digital stamps! This fun and accessible craft allows you to design custom stamps without needing any special equipment beyond your computer. Whether you're a seasoned crafter looking to enhance your digital scrapbooks or a beginner wanting to add flair to online invitations, this guide will walk you through creating your own digital masterpieces. It’s a fantastic way to express your style and make your creations truly stand out, perfect for individuals, families, and anyone who loves to personalize.
On this page
Step-by-Step Instructions
- 1
**Step 1: Choose Your Digital Design Tool** Begin by selecting a free online graphic design tool that suits your comfort level and needs. Popular and user-friendly options include Canva, Photopea (which mimics Photoshop), and Adobe Express. Each offers a range of features, from pre-made elements to drawing tools, allowing you to create your stamp design effectively.
- 2
**Step 2: Set Up Your Canvas** Once your chosen tool is open, create a new blank canvas. A square canvas, such as 1000x1000 pixels, works well for most digital stamp applications, providing ample space for your design without being overwhelmingly large. Ensure the resolution is set to at least 300 DPI if you intend to print your stamp later.
- 3
**Step 3: Brainstorm and Sketch Your Design** Before diving into the digital tools, take a moment to brainstorm your stamp idea. You can sketch it out on paper first, which helps solidify the concept and composition. Think about what you want your stamp to represent – a simple icon, a word, a small illustration, or a combination of elements.
- 4
**Step 4: Translate Your Sketch to the Digital Canvas** Now, bring your sketch to life within your chosen design tool. You can either upload a scanned or photographed version of your hand-drawn sketch as a base layer, or you can recreate it directly using the tool's drawing or shape features. If uploading a sketch, consider reducing its opacity to use it as a guide.
- 5
**Step 5: Utilize Design Tool Elements and Text** Leverage the vast libraries of elements, shapes, and fonts available in your design tool. Search for icons, illustrations, or decorative elements that align with your stamp concept. Combine these with text if you're creating a word-based stamp, ensuring the font is legible and complements the overall design.
- 6
**Step 6: Upload Your Own Simple Drawing (Optional)** If you have a unique drawing or doodle you'd like to incorporate, you can upload it directly into the design tool. Ensure your drawing is relatively simple and has clear lines, as intricate details can be lost in digital stamps. This is a great way to add a truly personal and handmade feel to your creations.
- 7
**Step 7: Focus on Simplicity and Boldness** For a design to truly resemble a traditional stamp, it needs to be simple and bold. Avoid overly complex patterns or fine lines that might blur or become indistinct when the stamp is scaled down or printed. Think of classic rubber stamps; they are typically recognizable even with minimal detail.
- 8
**Step 8: Ensure a Clear Outline** A distinct and clear outline is crucial for a digital stamp. This helps define the shape of your stamp and ensures it stands out against any background. Whether you're using a pre-made shape or drawing your own, make sure the edges are well-defined and not fuzzy.
- 9
**Step 9: Maintain Recognizability** Your digital stamp should be easily recognizable at a glance. This means the core elements of your design should be prominent and not overshadowed by too many small details. Test how your design looks at different sizes to ensure its clarity remains consistent.
- 10
**Step 10: Refine Colors for Stamp Effect** To enhance the stamp-like aesthetic, consider using a limited color palette, often black and white or grayscale. This mimics the look of traditional ink stamps. If you opt for color, choose bold, saturated hues that have good contrast and don't appear muddy.
- 11
**Step 11: Experiment with Font Choices (If Using Text)** If your stamp includes text, experiment with various font styles to find one that best matches the mood and purpose of your design. Consider sans-serif fonts for a modern feel or serif fonts for a more classic look. Ensure the font is legible and stands out from the background.
- 12
**Step 12: Check for Visual Balance** Review your design for visual balance. Ensure that the elements are distributed evenly and that no single part of the stamp feels too heavy or too light. Adjust sizes, positions, and colors as needed to create a harmonious composition.
- 13
**Step 13: Consider the Stamp's Purpose** Think about how you will use your digital stamp. If it's primarily for digital projects, transparency is key. If it's for printing, ensure the design is robust enough to be cut out or applied as a sticker. This will influence your design choices regarding complexity and color.
- 14
**Step 14: Final Review and Adjustments** Before downloading, take a final look at your design. Zoom in to check for any stray pixels or imperfections. Make any last-minute adjustments to spacing, alignment, or color saturation to ensure your stamp is polished and professional.
- 15
**Step 15: Download as a PNG with Transparent Background** Once you are satisfied with your design, download it as a PNG file. This file format is essential because it supports transparency, ensuring that the background of your stamp is clear and can be placed seamlessly over any other image or color in your digital projects.
- 16
**Step 16: Organize Your Digital Stamps** Create a dedicated folder on your computer or in your cloud storage to save all your digital stamp designs. This will make it easy to find and access them whenever you need them for future projects, preventing the frustration of searching through multiple files.
- 17
**Step 17: Test Your Digital Stamp** Before committing to a large project, test your digital stamp by placing it on a sample background or in a mock-up of your intended use. This helps you verify that the transparency is working correctly and that the stamp looks as intended.
- 18
**Step 18: Prepare for Printing (If Applicable)** If you plan to print your digital stamp for physical crafts, ensure the resolution of your downloaded PNG file is high enough for printing (at least 300 DPI). You may also want to adjust the size to fit your desired output, such as sticker paper or cardstock.
- 19
**Step 19: Save Your Design File** In addition to the PNG, save your design in the native format of your chosen design tool (e.g., a Canva project file or a PSD file for Photopea). This allows you to easily go back and edit your stamp later if you decide to make changes or create variations.
- 20
**Step 20: Explore Printing Options** For physical use, consider printing your digital stamps onto various materials. High-quality sticker paper is excellent for creating peel-and-stick stamps. Cardstock can be used to create more traditional, rigid stamps that you can ink yourself. Experiment with different paper types to see what works best for your crafting needs.
Tips & Troubleshooting
- 1For a truly stamp-like feel, consider using a black and white design or limited colors. This approach mimics the classic aesthetic of traditional ink stamps and ensures your design is bold and impactful, making it versatile for various applications.
- 2Experiment with different fonts if you're adding text to your stamp. The right font can dramatically alter the mood and style of your stamp, from playful and whimsical to elegant and sophisticated, so try a few options before settling on the perfect one.
- 3Save your designs in a dedicated folder so you can easily find them later. This organizational habit is crucial for managing your digital assets and ensures you can quickly access your custom stamps whenever inspiration strikes for a new project.
- 4If you plan to print your digital stamp for physical use, ensure the resolution is high enough for printing. A resolution of 300 DPI (dots per inch) is generally recommended for clear, crisp prints that don't appear pixelated or blurry.
- 5Think about the negative space in your design. The area around your stamp's elements is just as important as the elements themselves. Well-considered negative space can enhance the clarity and impact of your design, making it more visually appealing.
- 6Don't be afraid to layer elements. Many design tools allow you to place shapes and text on top of each other. This can create depth and complexity in your stamp design, even with simple components, adding a professional touch.
- 7Consider creating variations of your stamp. Once you have a core design, you can easily create different color versions, add subtle textures, or alter the text to make a whole set of complementary stamps for a cohesive look across your projects.
- 8Test your stamp on different backgrounds before finalizing. This is especially important for digital use. See how your stamp appears over light, dark, and patterned backgrounds to ensure it maintains its visibility and impact in various contexts.
Related Activities You Might Enjoy
Frequently Asked Questions
What is the easiest way to make a digital stamp?
The easiest way to make a digital stamp is by utilizing a free online graphic design tool like Canva or Adobe Express. These platforms offer user-friendly interfaces with a vast array of pre-made elements, shapes, and fonts that you can combine to create your design. You can also upload your own simple drawings or doodles. The key is to keep the design simple, bold, and with a clear outline, much like a traditional rubber stamp. Most tools allow you to download your creation as a PNG with a transparent background, making it ready for immediate use in digital projects or for printing.
Can I make a digital stamp for free?
Absolutely! You can create fantastic digital stamps entirely for free. Many powerful online graphic design platforms, such as Canva, Photopea, and Adobe Express, offer robust free versions that provide all the necessary tools and resources. You'll have access to libraries of graphics, fonts, and editing features that are more than sufficient for designing unique and personalized digital stamps. The only requirements are a computer with internet access and your creativity. This makes digital stamp making an accessible and budget-friendly craft for everyone.
What kind of designs work best for digital stamps?
The most effective designs for digital stamps are simple, bold, and have clear, distinct outlines. Think about the essence of traditional rubber stamps; they are designed to be easily recognizable even with minimal detail. Intricate patterns, fine lines, or complex shading can become muddy or lost when the stamp is scaled down or printed. Focus on strong silhouettes, clear icons, or easily readable text. A good rule of thumb is to ensure your design is recognizable even when viewed as a small thumbnail. This clarity ensures your digital stamp will have a strong impact on any project it's used on.
How can I use my digital stamp?
The versatility of digital stamps is one of their greatest appeals. For digital crafting, you can use them in digital scrapbooking, on social media graphics, in presentations, on digital invitations, or even to create custom patterns for digital backgrounds. For physical crafts, you can print your digital stamps onto sticker paper to create custom stickers, or print them onto cardstock to use as traditional stamps that you can then ink and apply to paper crafts, journals, or cards. They are a fantastic way to add a personalized, handmade touch to almost any creative endeavor.
What is the difference between a digital stamp and a regular stamp?
The primary difference lies in their form and application. A regular stamp, like a rubber or clear stamp, is a physical object made of ink and a stamping surface that you press onto paper or other materials to transfer ink. A digital stamp, on the other hand, is a digital image file (typically a PNG with a transparent background) that exists on your computer. You use it in digital design software to overlay onto digital projects, or you can print it out and use it as a physical stamp. Digital stamps offer infinite reusability, easy customization, and the ability to be used in virtual spaces.
Do I need to be a graphic designer to make digital stamps?
Not at all! You absolutely do not need to be a professional graphic designer to create your own digital stamps. The beauty of using free online tools like Canva or Adobe Express is that they are designed with beginners in mind. They offer intuitive interfaces, drag-and-drop functionality, and a wealth of pre-made elements and templates. By following simple design principles like keeping your design bold and clear, anyone can create appealing digital stamps. It’s more about creativity and understanding the basic steps than having formal design training.
What Next?
Congratulations on creating your very own digital stamps! The possibilities are truly endless. Consider creating themed sets for holidays, birthdays, or specific hobbies. You can also experiment with different color palettes or even create outline versions for coloring. Once designed, save them in a well-organized cloud storage folder or on your computer for easy access. For physical crafts, remember to print them on high-quality sticker paper or cardstock. You might even explore creating a small online shop to share your unique designs with others. Happy stamping!
Free: 10 Paper Crafts Anyone Can Make in 5 Minutes
Get our beginner guide + new craft ideas weekly.
No spam. Unsubscribe anytime.
Did you complete this activity?
Related