How to Create a DIY Block Print Tote Bag — Easy Step-by-Step Guide
Transform a plain tote bag into a unique work of art using a DIY block printing kit. This screen-free activity is fun for all ages and results in a stylish, personalized accessory.
Quick answer
To make a DIY block print tote bag, you need a block printing kit, a tote bag, and about 60 minutes. Start by carving your design into the block. This beginner-friendly activity has 10 steps and is perfect for families looking for screen-free creative fun.
What you need
Shop on Amazon · As an Amazon Associate we earn from qualifying purchases. Links above are affiliate links — we may earn a commission at no extra cost to you.
Embark on a creative journey and transform a simple canvas tote bag into a personalized masterpiece with the art of block printing. This accessible and enjoyable craft is perfect for anyone looking to add a unique touch to their accessories, offering a satisfyingly tactile and screen-free experience. Whether you're a seasoned crafter or a complete beginner, this project is designed to be straightforward and rewarding, making it an ideal activity for families, solo creative sessions, or even a fun afternoon with friends. Get ready to unleash your inner artist and create a tote bag that truly reflects your style!
On this page
Step-by-Step Instructions
- 1
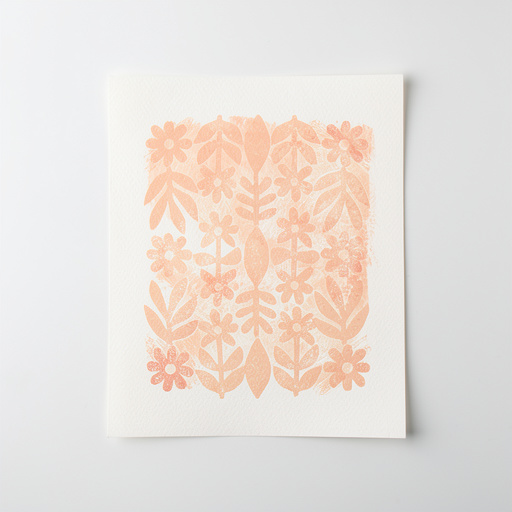
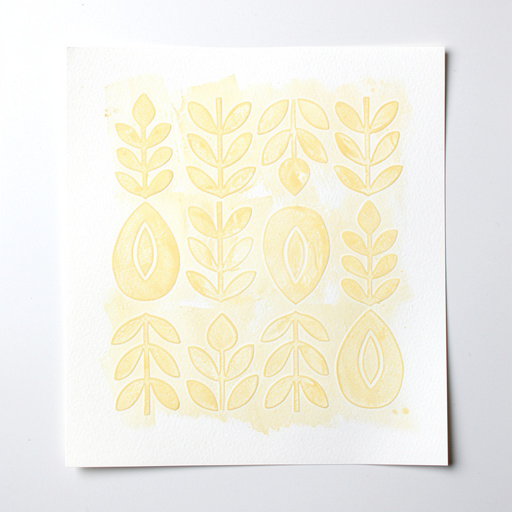
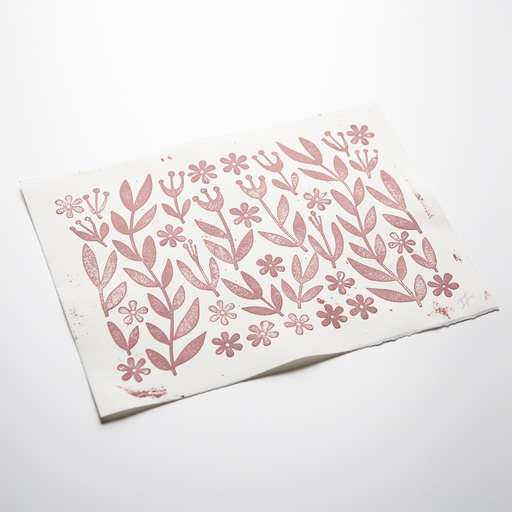
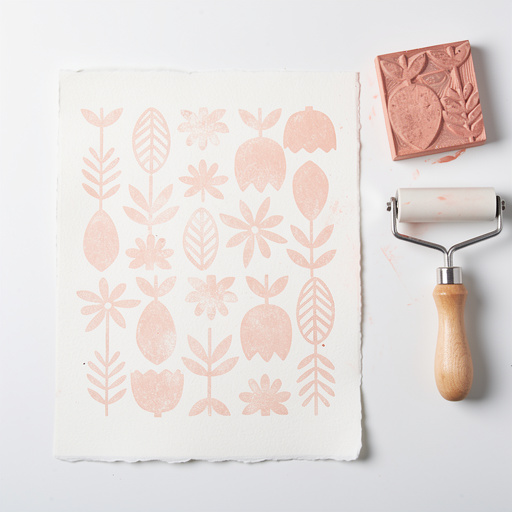
Step 1: Sketch your design on a piece of paper. Keep it relatively simple for your first try, focusing on bold lines and clear shapes that will translate well to a carved block. Consider designs like simple geometric patterns, leaves, stars, or abstract motifs, as intricate details can be challenging for beginners.
- 2
Step 2: Transfer your design onto the printing block. You can do this by lightly tracing over your sketch with a pencil on the back of your paper, then pressing the graphite-covered side of your sketch firmly onto the printing block. Alternatively, some blocks have a printable surface where you can draw directly with a pencil or marker.
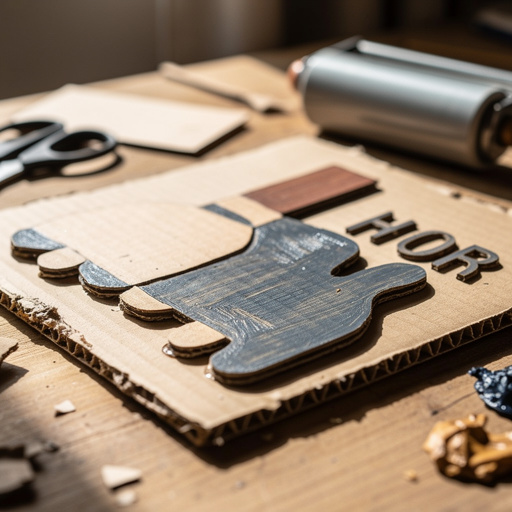
- 3
Step 3: Carefully carve your design into the printing block using the carving tool. Remember to carve away the areas you *don't* want to print, as these will be the negative spaces. Work slowly and deliberately, holding the block steady and carving away from your body to ensure safety and precision. Different carving blades can create varied line widths and textures.
- 4
Step 4: Once carving is complete, remove any loose carving dust and debris from the block. A soft brush or a gentle wipe with a dry paper towel is usually sufficient. Ensure the surface is clean and dry before proceeding to inking.
- 5
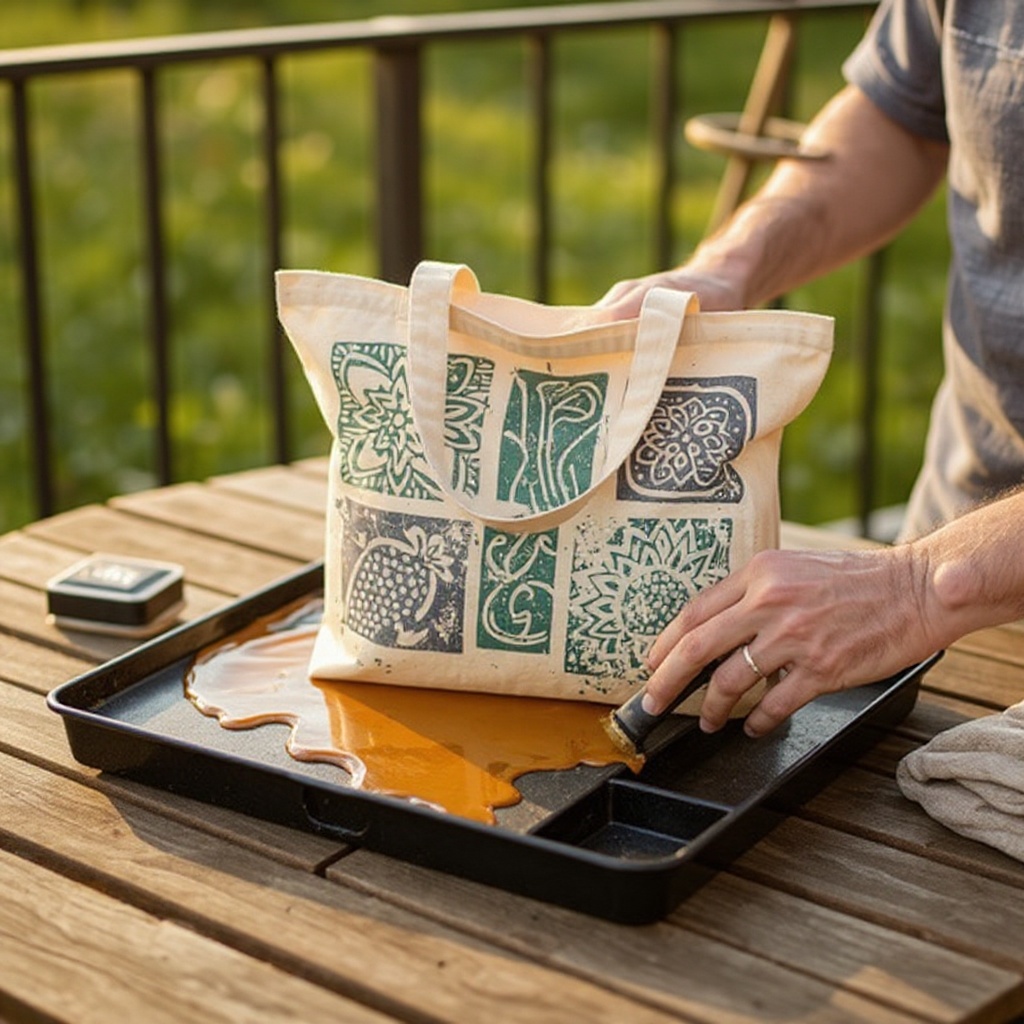
Step 5: Prepare your ink. Squeeze a small amount of block printing ink into the ink tray, about a tablespoon or two to start. It's better to add more ink as needed than to start with too much, which can lead to a messy printing process.
- 6
Step 6: Use the brayer to spread the ink evenly across the ink tray. Roll the brayer back and forth in a consistent motion, aiming for a thin, even layer of ink that coats the entire surface of the brayer. You should hear a slight 'hissing' sound as you roll; if it's too sticky or clumpy, you need more ink or more rolling.
- 7
Step 7: Roll the inked brayer over your carved printing block, ensuring all raised surfaces that will form your design are covered with a thin, consistent layer of ink. Avoid over-inking, which can fill in fine details and create muddy prints. A few passes with the brayer should suffice.
- 8
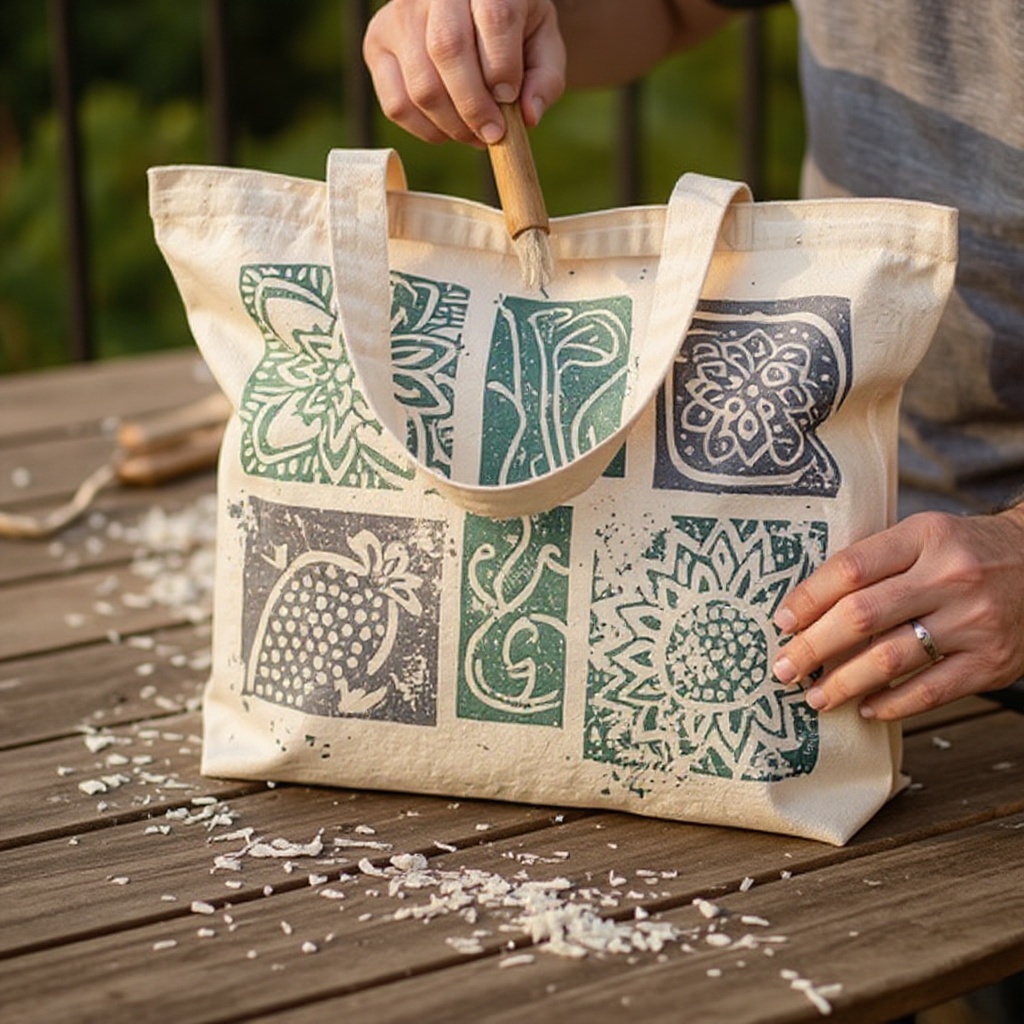
Step 8: Prepare your tote bag for printing. Place a piece of cardboard or thick paper inside the tote bag to prevent ink from bleeding through to the other side. Position the inked block carefully onto your tote bag, aligning it precisely where you want your design to appear. You can use masking tape to mark placement guides if you're printing multiple designs.
- 9
Step 9: Press down firmly and evenly onto the back of the printing block. You can use your hands, the brayer, or even a clean, flat object like a wooden spoon to apply pressure. Ensure consistent pressure across the entire surface of the block for a clear and even print.
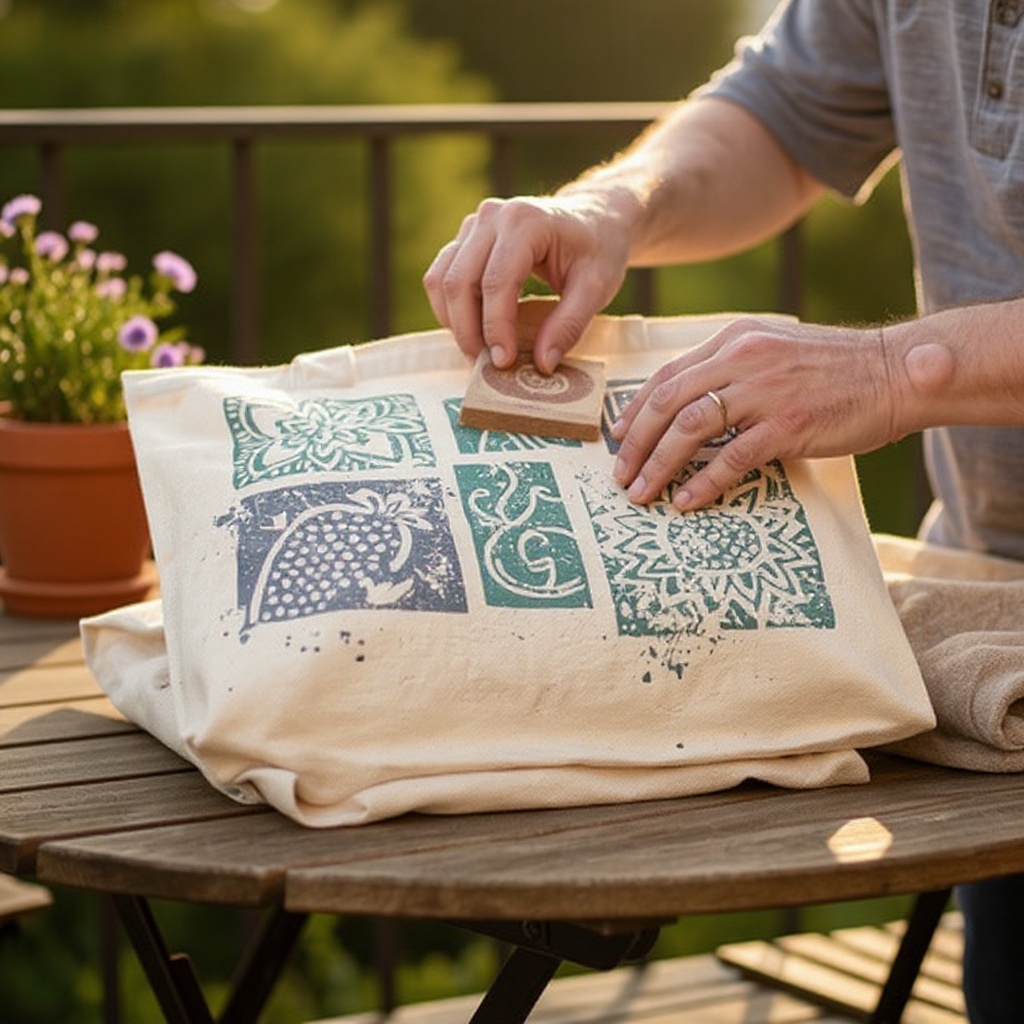
- 10
Step 10: Gently lift the block straight up to reveal your print. Take care not to smudge the ink as you lift. If the print is too light, you may need to ink the block again and apply more pressure. If it's too dark or smudged, you might have over-inked or applied too much pressure.
- 11
Step 11: Repeat steps 7-10 to create more prints, repositioning the block as desired. You can create a repeating pattern, a scattered design, or a single focal point. Allow a small amount of space between prints to prevent them from overlapping and becoming muddy, unless that is the desired effect.
- 12
Step 12: Allow the ink to dry completely according to the ink manufacturer's instructions. This is crucial for a permanent and washable print. Fabric inks typically require 24-48 hours of drying time, and some may benefit from heat setting (e.g., ironing) to further cure the ink.
- 13
Step 13: Clean your tools immediately after use. This is a vital step to ensure your block printing supplies remain in good condition for future projects. Use rubbing alcohol and paper towels to thoroughly clean the brayer, ink tray, and any excess ink off your carving tools.
- 14
Step 14: Inspect your finished tote bag. Once the ink is fully dry and cured, your DIY block print tote bag is ready to be used and admired. Check for any areas where the ink might have smudged or faded and consider if any touch-ups are needed, though often the slight imperfections add to the handmade charm.
Tips & Troubleshooting
- 1If you make a mistake while carving, such as cutting too deep or into an area you wanted to keep, you can often fill the area with a bit of quick-drying craft glue or a specialized carving filler. Once dry, you can carefully re-carve around the repaired area to salvage your design. This technique is particularly useful for correcting minor errors on linoleum blocks.
- 2For beginners, consider using softer blocks like rubber blocks or soft-cut blocks, which are significantly easier to carve than traditional linoleum. These materials require less pressure and are more forgiving, allowing you to focus on mastering the carving technique and design transfer without struggling with hard materials.
- 3Experiment with different color inks or even layering colors for unique and visually interesting effects. For instance, you could print a base color and then, once dry, print a second design in a contrasting color on top. Always ensure the first layer is completely dry before applying the second to avoid muddying the colors.
- 4Don't limit yourself to tote bags! This block printing technique can be applied to a variety of fabric items. Try printing on plain tea towels for a charming kitchen accessory, custom t-shirts for personalized gifts, or even canvas pouches for a coordinated set of handmade accessories.
- 5Store your carved blocks in a safe and dry place to prevent them from warping or becoming damaged. Labeling your blocks with the design they represent can be helpful for future reference. Consider storing them in small containers or a dedicated craft drawer to keep them organized and protected.
- 6Clean your brayer and ink tray thoroughly with rubbing alcohol and paper towels immediately after use to prevent ink from drying and hardening. Dried ink can make your tools unusable and difficult to clean. For stubborn ink, you might need to repeat the cleaning process or use a specialized ink remover.
- 7Always supervise children closely when they are using carving tools, even those designed for younger crafters. Ensure they understand the importance of carving away from their bodies and keeping their fingers clear of the blades. Good lighting and a stable work surface are also essential for safety.
- 8Ensure good ventilation when working with block printing inks, as some inks can have strong fumes. Work in a well-aired room or near an open window. If you have sensitive respiratory systems, consider wearing a mask. This also applies to using rubbing alcohol for cleanup.
Related Activities You Might Enjoy
Frequently Asked Questions
What is a block printing kit?
A block printing kit is a curated collection of tools and materials specifically assembled for the art of block printing. Typically, it includes a carving tool with interchangeable blades for creating different line widths and textures, a printing block (often made of linoleum, rubber, or a softer synthetic material), block printing ink, a brayer (a roller used to apply ink), an ink tray or palette for spreading ink, and sometimes a cutting mat for safe carving. These kits are designed to provide everything a beginner needs to get started with this traditional printmaking technique, allowing them to carve a design into the block, ink it, and transfer it onto surfaces like paper or fabric.
Can I use a block printing kit on fabric?
Yes, many block printing kits are specifically designed for use on fabric, and the process is very similar to printing on paper. The key is to ensure that the ink you are using is fabric-safe and formulated for textile applications. Most block printing inks intended for fabric will be permanent and washable once properly dried and cured, often requiring a heat-setting step like ironing. Always check the ink manufacturer's instructions for specific drying and curing recommendations to achieve a durable and long-lasting print on your tote bag or other fabric items.
How do I clean up after block printing?
Thorough cleanup is essential for maintaining your block printing tools. Immediately after you finish printing, use rubbing alcohol and paper towels to clean your brayer, ink tray, and any excess ink off your carving tools. Rubbing alcohol is highly effective at dissolving most block printing inks. For fabric inks, some brands may recommend specific cleaning agents or methods, so it's always best to consult the ink's packaging. Ensure all tools are completely dry before storing them to prevent rust or damage.
What kind of designs work best for block printing?
For block printing, especially for beginners, simple, bold designs with clear lines and distinct shapes tend to work best. Think of graphic elements like geometric patterns, stylized leaves, stars, or abstract motifs. These types of designs are easier to carve accurately and translate well onto the fabric, resulting in crisp, legible prints. Avoid very fine details, intricate patterns, or subtle shading, as these can be challenging to carve effectively and may become lost or muddy during the printing process. The beauty of block printing often lies in its graphic simplicity.
How long does the ink take to dry and how do I make it permanent?
The drying time for block printing ink on fabric can vary significantly depending on the type of ink, the thickness of the application, and environmental factors like humidity and temperature. Generally, fabric-specific block printing inks require at least 24 to 48 hours to dry to the touch. To make the print permanent and washable, most fabric inks need to be heat-cured. This usually involves ironing the printed area with a dry iron on a medium-high setting for a few minutes, following the ink manufacturer's specific instructions. This heat-setting process chemically bonds the ink to the fabric fibers, ensuring it withstands washing.
Can I reuse my carved blocks multiple times?
Absolutely! One of the most wonderful aspects of block printing is the reusability of your carved blocks. Once you've invested the time in carving a design, you can use that same block to create countless prints on various surfaces. As long as the block is cared for properly – kept clean, dry, and free from damage – it can be inked and printed from hundreds, if not thousands, of times. This makes block printing an economical and sustainable craft, allowing you to create a consistent design across multiple projects or to produce limited edition prints.
What Next?
Congratulations on creating your one-of-a-kind block print tote bag! This project opens the door to endless creative possibilities. Experiment with different block shapes, sizes, and intricate designs for future projects. Consider printing on other fabric items like tea towels, aprons, or even custom greeting cards. Once your ink is fully cured, your tote bag is ready for everyday use, showcasing your handmade artistry. Store your carved blocks carefully, perhaps in a small wooden box, to preserve them for future printing adventures. Enjoy your stylish, personalized creation!
Free: 10 Paper Crafts Anyone Can Make in 5 Minutes
Get our beginner guide + new craft ideas weekly.
No spam. Unsubscribe anytime.
Did you complete this activity?
Related