How to Create DIY Friendship Bracelet Kits — Easy Step-by-Step Guide
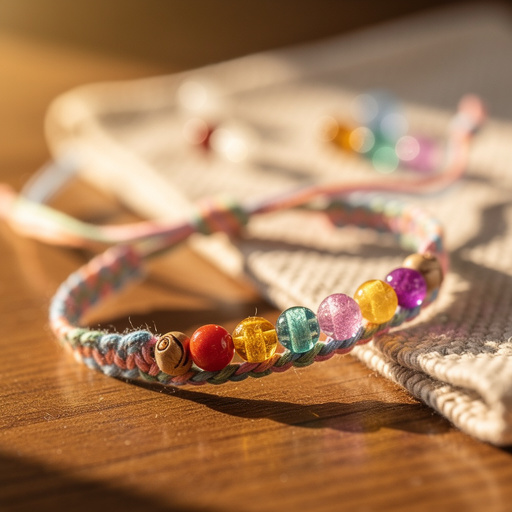
Assemble your own custom friendship bracelet kits! This guide shows you how to gather materials and package them for hours of screen-free crafting fun. Perfect for gifts, parties, or just a rainy day activity, these kits empower creativity and connection.
Quick answer
To create DIY friendship bracelet kits, you need embroidery floss in assorted colors (at least 10 skeins), sharp scissors, and small containers like resealable plastic bags or small cardboard boxes (approx. 4x6 inches). You can also add optional beads and securing tools. The process involves gathering materials, cutting floss to 30-inch lengths, assembling 4-6 strands per kit, adding optional beads, and including scissors and a note about securing methods. This beginner-friendly activity takes about 30 minutes to assemble a few kits and is perfect for teens looking for screen-free activities.
What you need
Shop on Amazon · As an Amazon Associate we earn from qualifying purchases. Links above are affiliate links — we may earn a commission at no extra cost to you.
In a world increasingly dominated by screens, the simple act of creating something with your hands holds a special kind of magic. DIY friendship bracelet kits offer a delightful escape, tapping into a timeless craft that fosters creativity, patience, and connection. These kits are more than just a collection of supplies; they are an invitation to slow down, engage in tactile artistry, and craft tangible tokens of affection. Perfect for gifting to friends, party favors, or as a thoughtful activity for a rainy afternoon, these kits provide everything needed for hours of enjoyable, screen-free fun, making them an ideal project for teens and anyone looking to reconnect with hands-on hobbies.
On this page
Step-by-Step Instructions
- 1
Gather your embroidery floss. Select a vibrant and diverse range of colors that you think teens will enjoy, aiming for a mix of brights, pastels, and classic tones. Having a good selection ensures that each kit can be unique and appealing.
- 2
Measure and cut each strand of embroidery floss to a length of 30 inches. This length provides ample room for knotting and tying off the bracelet without being excessively long and wasteful. It's crucial to cut them accurately to avoid frustration later.
- 3
Prepare the strands for each kit. For a standard friendship bracelet, you'll need at least 4 strands, but 6-8 strands often create a thicker, more visually appealing bracelet. Ensure you have the correct number of pre-cut strands for each kit.
- 4
Carefully place the pre-cut strands of embroidery floss into a resealable plastic bag or a small cardboard box. Gently fold the floss to fit, ensuring it doesn't become too tangled before it's even used.
- 5
If you're including beads, add a small, curated assortment to each kit. Choose beads with holes large enough for the embroidery floss to easily pass through; testing this beforehand is a good idea to avoid disappointment.
- 6
Include a pair of sharp scissors in each kit. Sharp scissors are essential for clean cuts when starting and finishing bracelets, preventing frayed ends and making the crafting process much smoother.
- 7
Add a note suggesting how recipients can secure their bracelets while knotting. This could be a simple suggestion to use safety pins attached to a pillow or jeans, or a small clipboard to hold the strands in place.
- 8
Seal the bag or close the box securely. If using boxes, you might want to add a decorative sticker or a ribbon to make the kit feel even more special and gift-worthy.
- 9
Organize your completed kits. Stack them neatly or arrange them in a basket, ready to be gifted or distributed for a crafting session. Ensure they are stored in a dry place to protect the floss.
- 10
Consider adding a small, printed instruction sheet to each kit. This sheet can visually guide beginners through basic friendship bracelet knots, such as the forward knot, backward knot, and the diagonal stripe pattern, empowering them to start creating immediately.
- 11
For an extra touch, decorate the exterior of the boxes or bags with stickers, drawings, or colorful washi tape. This personalization makes the kits even more appealing and shows extra effort.
- 12
If you have a variety of beads, consider creating themed kits. For example, a 'ocean' kit with blue and green beads, or a 'rainbow' kit with all the colors of the rainbow.
- 13
Double-check that all components are present in each kit before sealing. This includes the correct number of floss strands, any beads, scissors, and the instruction note.
- 14
Ensure the scissors are child-safe if the kits are intended for younger children, or clearly label them as sharp if they are for older teens and adults.
- 15
If using cardboard boxes, ensure they are sturdy enough to protect the contents during transport or storage. You might want to reinforce the corners with tape.
- 16
For a more advanced option, you could include thicker cord or paracord in some kits for sturdier, more durable bracelets, alongside instructions for working with these materials.
- 17
If you're assembling kits for a group event, consider having a central supply of extra beads or different types of floss available for participants to share and experiment with.
- 18
Finally, label each kit with a fun name or a brief description of its contents to add an extra layer of appeal.
Tips & Troubleshooting
- 1Encourage teens to experiment with different color combinations and bead patterns to personalize their bracelets. The beauty of DIY is the freedom to express individual style, so let them play with color theory and arrangement.
- 2If you don't have resealable bags, small gift boxes or even sturdy envelopes can work wonderfully. Decorate them with markers, stamps, or collage materials for an extra personal and visually appealing touch.
- 3Consider adding a small instruction sheet for basic friendship bracelet knots, like the square knot or diagonal stripe pattern, to the kit. Clear diagrams can significantly boost confidence for beginners and make the crafting process more accessible.
- 4For a more advanced option, include thicker cord or paracord for sturdier bracelets, perhaps alongside instructions for simple paracord knots. This caters to those who might want to create more robust accessories.
- 5When cutting the floss, ensure you're using a sharp pair of scissors to get clean, even cuts. Dull scissors can fray the ends of the floss, making them harder to work with and less aesthetically pleasing.
- 6If you're assembling kits for a party, consider having a 'floss bar' where guests can choose their own colors before the kits are assembled, adding an interactive element to the preparation.
- 7Don't be afraid to include other small craft embellishments like glitter glue pens, small charms, or even temporary tattoo transfers that can be incorporated into the bracelet design or used to decorate the kit itself.
- 8When selecting beads, ensure the hole size is appropriate for the embroidery floss. If you're including seed beads, you might need to suggest using a needle or a thinner string for threading them onto the floss.
Related Activities You Might Enjoy
Frequently Asked Questions
What are good screen-free activities for teenagers?
Encouraging teenagers to engage in screen-free activities is vital for their development and well-being. Beyond crafting like making friendship bracelets, excellent options include diving into a captivating book, expressing thoughts and feelings through journaling, gathering friends for strategic board games or card games, and embracing the outdoors with activities like hiking, cycling, or sports. Learning a new skill, such as playing a musical instrument, cooking, or coding, also provides a fulfilling challenge. Creative arts like drawing, painting, sculpting, or photography offer avenues for self-expression. Even simple activities like puzzles, building models, or gardening can be incredibly engaging and rewarding, offering a much-needed break from digital stimulation.
How can I encourage my teen to do screen-free activities?
Encouraging teens to embrace screen-free activities requires a thoughtful and collaborative approach. Start by offering a variety of engaging and age-appropriate options that genuinely pique their interest; involve them in the selection process to foster a sense of ownership. Lead by example by participating in screen-free activities yourself and demonstrating their enjoyment. Creating dedicated screen-free times or zones within the home, such as during meals or in specific rooms, can help establish boundaries. Highlight the benefits of unplugging, such as improved focus, better sleep, and enhanced creativity, rather than simply imposing restrictions. Make these activities accessible and appealing, perhaps by setting up a cozy reading nook or providing art supplies.
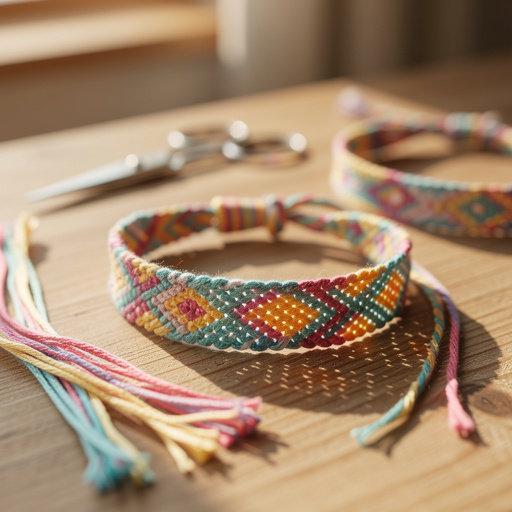
What materials are needed for friendship bracelets?
The essential materials for creating classic friendship bracelets are surprisingly simple and readily available. At its core, you need embroidery floss in a variety of colors; the more colors, the more intricate and personalized your designs can be. Sharp scissors are crucial for cutting the floss cleanly and precisely, ensuring neat ends. To hold the bracelet securely while you knot, a method is needed; this can be as basic as a safety pin attached to your jeans or a pillow, or a dedicated clipboard designed for crafting. For added flair and decoration, beads are a popular addition, but it's important to ensure their holes are large enough to accommodate the embroidery floss.
Are friendship bracelets still popular?
Absolutely! Friendship bracelets are experiencing a significant resurgence in popularity, particularly among teens and young adults. This revival is fueled by social media platforms like TikTok and Instagram, where intricate designs and modern twists on the classic craft are frequently showcased. They represent a fun, creative, and affordable way to express personal style, create meaningful gifts for friends, and engage in a nostalgic, hands-on activity. The appeal lies in their versatility, allowing for endless customization with different patterns, colors, and embellishments, making them a timeless craft that continues to resonate with new generations.
How long does it take to assemble a DIY friendship bracelet kit?
Assembling a DIY friendship bracelet kit is a relatively quick and straightforward process, making it an ideal activity for a short burst of creativity or as a preparation for a larger crafting event. For a single kit, the time investment is minimal, typically around 5-10 minutes, focusing on cutting the floss, adding any optional beads, and packaging. If you're assembling multiple kits, say 5 to 10, the total time might extend to 30-60 minutes, depending on your efficiency and the complexity of the kit's contents. This efficiency allows you to quickly create a batch of thoughtful, handmade gifts or party favors.
What are some advanced friendship bracelet patterns or techniques?
Once you've mastered the basic knots, the world of friendship bracelets opens up to more intricate and exciting patterns. Advanced techniques include the 'chevron' pattern, which creates a V-shape, and the 'candy stripe,' a diagonal pattern that's easy to learn but visually striking. For more complex designs, consider the 'diamond' pattern, which involves interlocking chevrons, or the 'fishtail' braid, which uses a unique knotting sequence. You can also explore patterns that incorporate multiple colors in more elaborate ways, such as the 'ombre' effect achieved by blending shades. Incorporating beads in more intricate ways, like creating beaded channels or using alphabet beads to spell out names or messages, also elevates the complexity and personalization of the bracelets.
What Next?
Assembling these DIY friendship bracelet kits is a rewarding endeavor that opens the door to endless creative possibilities. Once assembled, encourage recipients to explore different knotting techniques and color combinations to truly make their bracelets their own. For variations, consider adding different types of string like waxed cotton cord or even thin leather strips for a more bohemian look. You could also include charms or alphabet beads for extra personalization. Once crafted, friendship bracelets can be displayed proudly on wrists, hung as decorative accents, or stored in small jewelry boxes. This project is a fantastic springboard for further crafting adventures, perhaps leading to macrame or other knot-tying crafts.
Free: 10 Paper Crafts Anyone Can Make in 5 Minutes
Get our beginner guide + new craft ideas weekly.
No spam. Unsubscribe anytime.
Did you complete this activity?
Related