How to Make Construction Paper Animals — Easy Step-by-Step Guide
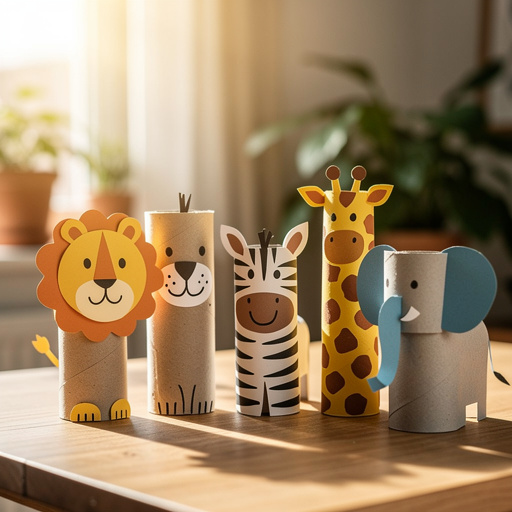
Transform simple construction paper into a menagerie of cute animals! This easy craft is perfect for little hands and big imaginations. Learn to create a variety of creatures with basic shapes and a few craft supplies. Get ready for hours of creative fun!

Quick answer
To make construction paper animals, you need assorted construction paper (at least 10 sheets), child-safe scissors, white school glue or glue sticks, and a black marker or crayon. Optional additions include googly eyes. This beginner-friendly activity involves cutting out basic shapes for bodies, heads, and features, then assembling them with glue. It typically takes about 20-30 minutes per animal, depending on complexity. This craft has 15 steps and is perfect for kids aged 4 and up, fostering creativity and fine motor skills.
What you need
Shop on Amazon · As an Amazon Associate we earn from qualifying purchases. Links above are affiliate links — we may earn a commission at no extra cost to you.
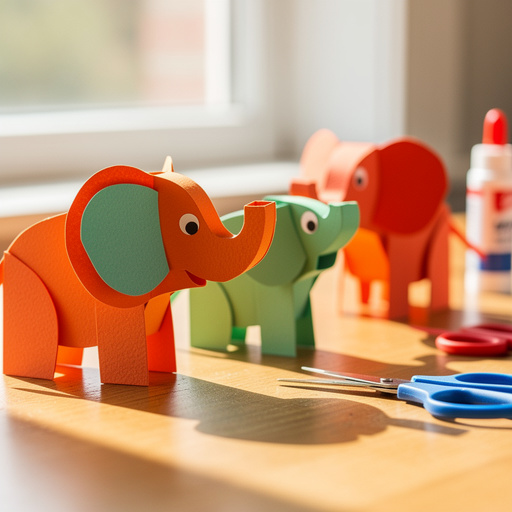
Embark on a delightful crafting journey that transforms ordinary construction paper into a vibrant collection of adorable animals! This project is a fantastic way to spark creativity in young children, offering a screen-free activity that enhances fine motor skills and encourages imaginative play. It's wonderfully adaptable, allowing for endless variations and personalization. Whether you're a parent looking for a rainy-day activity, a teacher seeking a classroom project, or simply someone who enjoys the simple joy of making things, this construction paper animal craft is an absolute winner. Prepare to unleash your inner zookeeper!
On this page
Step-by-Step Instructions
- 1
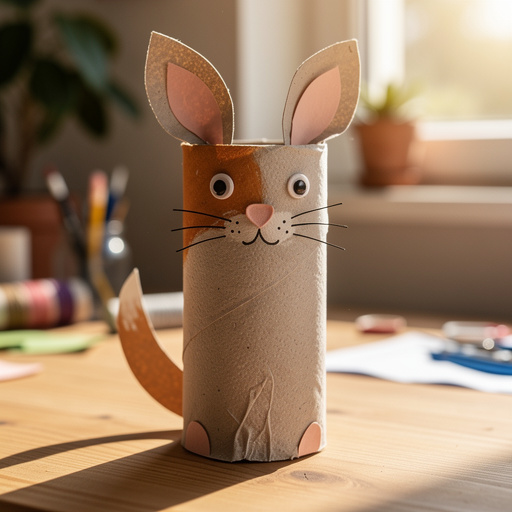
Begin by selecting a color of construction paper for your animal's main body. For a bear, a nice medium brown is a classic choice. Cut out a large oval shape from this paper; this will serve as the foundation of your animal's body. Aim for an oval that is roughly 4-6 inches in length, ensuring it's substantial enough to be the primary component.

- 2
Next, choose the same color paper to create the animal's head. Cut out a smaller circle or a slightly flattened oval from the construction paper. This shape should be noticeably smaller than the body oval, typically about half to two-thirds the size, to maintain proportional balance.
- 3
Now, let's add some ears! For our bear, select a contrasting color like pink construction paper. Cut out two small circles, each about 1-1.5 inches in diameter. These will be the outer, softer parts of the bear's ears, adding a touch of color and detail.
- 4
To give the ears more dimension, cut two even smaller circles from the same brown construction paper used for the bear's body. These smaller brown circles should be slightly smaller than the pink circles you just cut, acting as the inner lining of the ears.
- 5
Time to assemble the ears! Apply a thin layer of glue to the back of each pink ear circle. Carefully center and press the smaller brown ear circles onto the pink ones, ensuring they are aligned. This layering technique creates a more realistic and visually appealing ear structure.

- 6
Now, attach the completed ears to the bear's head. Apply glue to the flat edge of the brown side of each ear and position them on the top of the bear's head circle. You can place them slightly angled outwards or directly on top, depending on the look you desire for your bear.
- 7
For the bear's snout and nose, cut a small triangle from pink construction paper. This triangle should be proportionate to the head size, with the pointed end facing downwards to create a cute nose shape. You can also cut a slightly larger, rounded shape from white paper for the snout area if you prefer.
- 8
To create the eyes, cut two small circles from white construction paper. These will serve as the base for the eyes. If you have googly eyes, you can skip this step and use those later for a more playful look. Ensure these white circles are a good size for the head, not too large or too small.
- 9
Now, let's bring the bear's face to life. Glue the white eye circles onto the bear's head, positioning them where you envision the eyes should be. If you're using a snout shape, glue that below the eyes. Then, carefully glue the pink triangle nose onto the center of the snout or directly onto the head below the eyes.
- 10
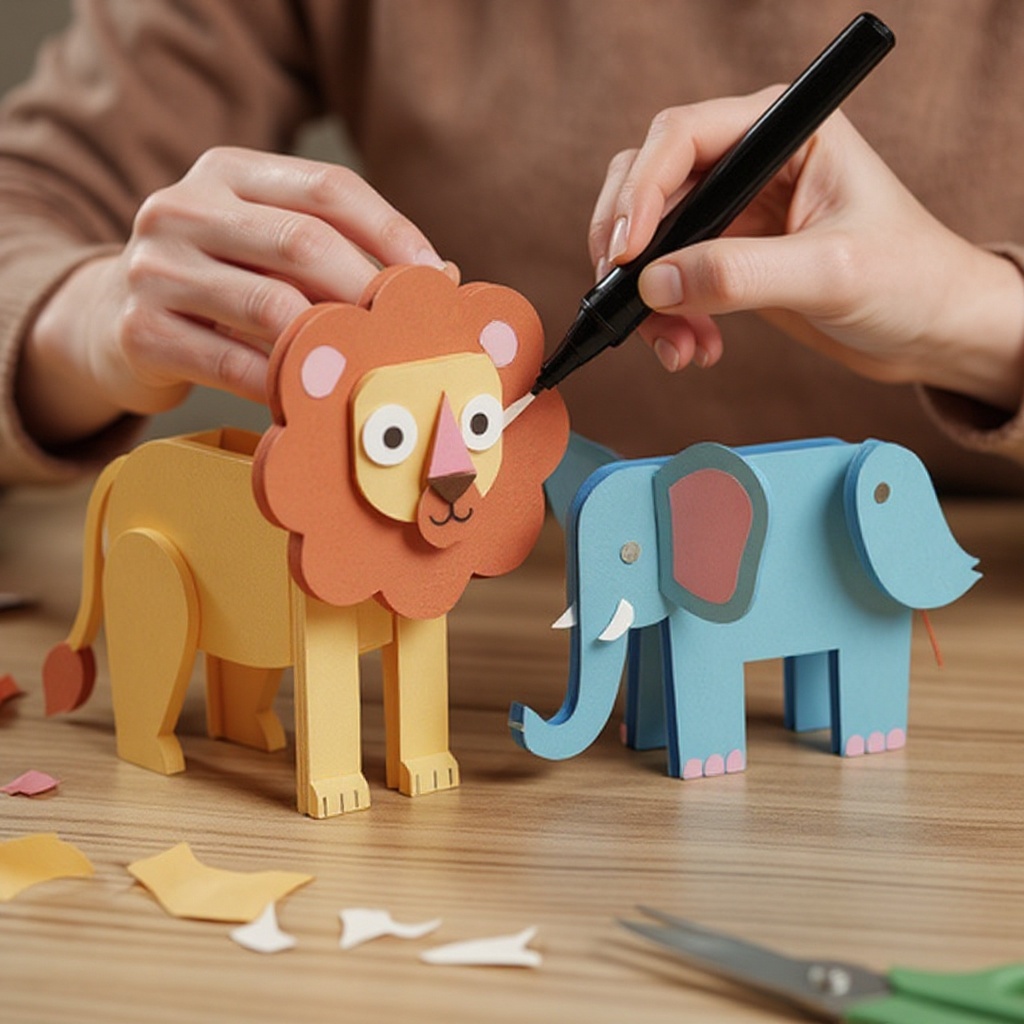
With the main facial features in place, use your black marker or crayon to draw the pupils of the eyes on the white circles. You can draw simple dots or small circles for the pupils. If you used a snout shape, draw a mouth below the nose, perhaps a gentle curve for a happy bear or a slightly downturned line for a thoughtful one.
- 11
It's time to connect the head to the body. Apply a generous amount of glue to the bottom edge of the bear's head and carefully position it onto the top center of the bear's body oval. Press down gently to ensure a secure bond.
- 12
Add any final details to your bear. You can use the black marker to draw claws on the paws (which can be simple rounded shapes glued to the bottom of the body), or add stripes if you're making a different animal like a tiger. This is where your creativity can really shine!
- 13
To create a blue bird, start with a blue oval for the body and a smaller blue circle for the head. Cut out wing shapes from blue or a contrasting color like yellow, perhaps teardrop or curved shapes. Attach the head to the body, then glue on the wings to the sides of the body. For the beak, cut a small orange triangle and glue it to the head, and use black marker for the eyes.
- 14
For a yellow duck, use a yellow oval for the body and a yellow circle for the head. Cut a distinct beak shape from orange construction paper – a rounded triangle works well. Glue the head to the body, then attach the beak to the front of the head. You can add small black dots for eyes or use googly eyes for a more animated look.
- 15
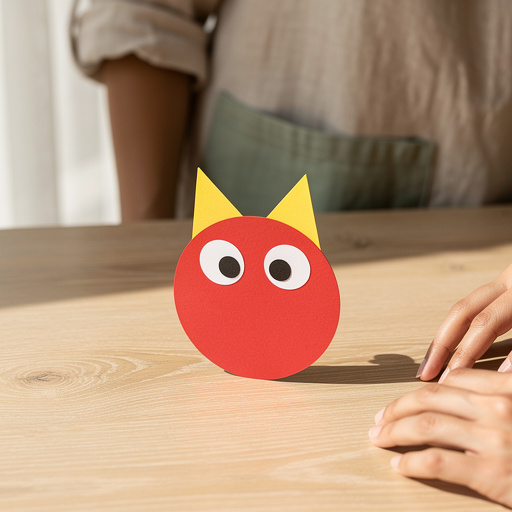
Expand your animal kingdom! For a giraffe, cut a long, slender rectangle for the neck and attach it to a brown oval body. Use a brown circle for the head and add small brown triangles for ears. For a cat, cut a rounded body shape, a smaller head circle, and two pointed triangles for ears. Don't forget to add a long, thin rectangle for the tail!
Tips & Troubleshooting
- 1Encourage kids to experiment with different shapes and sizes to create unique animal features. For example, a long rectangle can become a giraffe's neck, a series of small circles can form a caterpillar's body, or triangles can be adapted for a cat's ears or a shark's fin. This fosters problem-solving and creative thinking.
- 2When using liquid glue, a little truly goes a long way. Applying too much can cause the construction paper to wrinkle and warp, making it difficult to achieve clean edges and a smooth finish. A thin, even layer is usually sufficient for most paper-to-paper applications.
- 3For adding intricate details and patterns, a black marker or crayon is your best friend. You can draw stripes on a tiger, spots on a leopard, feathers on a bird, or a playful smile on any animal. This step allows for personalization and brings the animals to life with character.
- 4Don't strive for absolute perfection! The charm and appeal of these handmade crafts lie in their unique, slightly imperfect, and handmade quality. Embrace any wobbly lines or slightly crooked cuts, as these are signs of a child's effort and creativity. The process is as important as the final product.
- 5Consider using different types of paper for added texture and visual interest. For instance, corrugated cardboard scraps can make interesting textures for animal fur, or glitter paper can add a touch of sparkle to a fairy animal. Even using patterned scrapbook paper for accents can elevate the design.
- 6If you're working with younger children who have difficulty with scissors, pre-cut some of the basic shapes for them. This allows them to focus on the gluing and decorating aspects of the craft, building their confidence and enjoyment without the frustration of complex cutting.
- 7To make your animals stand up, you can create a simple stand by cutting a rectangular strip of cardstock, folding it in half to create a V-shape, and gluing the animal's body to the top of the V. This is great for displaying your finished creations.
- 8For a more durable and long-lasting craft, consider laminating the finished animals or mounting them on a piece of cardstock. This will protect them from wear and tear, especially if they are intended for play or frequent handling.
Related Activities You Might Enjoy
Frequently Asked Questions
What are the easiest construction paper crafts for kids?
The easiest construction paper crafts for kids typically involve simple cutting, gluing, and decorating techniques that require minimal complex steps. Examples include creating basic animal cutouts by assembling simple shapes like circles and ovals, making colorful paper plate masks by cutting out eyeholes and decorating with paper scraps, folding basic paper airplanes that can be decorated with markers, and assembling simple collages by layering different colored papers and shapes. These activities are excellent for developing fine motor skills, color recognition, and spatial awareness in young children, providing hours of engaging and creative fun with readily available materials.
What materials are needed for construction paper crafts?
The essential materials for construction paper crafts are quite basic and readily available. You will definitely need construction paper in a variety of vibrant colors, as it forms the foundation of most projects. Child-safe scissors are crucial for cutting the paper into desired shapes, and a good quality glue, either white school glue or a convenient glue stick, is necessary for assembly. For adding details and personality, markers, crayons, or colored pencils are highly recommended. To add an extra touch of fun and dimension, consider incorporating googly eyes, glitter, yarn, or other small embellishments. A designated workspace with a protective mat or newspaper is also helpful.
How can I make construction paper crafts less messy?
Minimizing mess during construction paper crafts is achievable with a few simple strategies. Opting for glue sticks over liquid glue is a primary way to reduce spills and sticky fingers, as they offer a more controlled application. Designating a specific crafting area, such as a table covered with a placemat, newspaper, or a washable craft mat, will contain any stray glue or paper scraps. Keeping wipes or a damp cloth readily accessible is essential for immediate clean-up of sticky hands and surfaces. Encouraging children to use only the amount of glue needed and to close containers promptly also helps maintain a tidier workspace.
What age is appropriate for construction paper crafts?
Construction paper crafts are wonderfully versatile and suitable for a wide age range, typically starting around age 3 with active adult supervision, especially for the cutting tasks. Toddlers can begin by practicing tearing paper or applying glue to pre-cut shapes. As children grow, their abilities develop, and by age 4 or 5, they can usually handle child-safe scissors with some guidance and begin to cut out simpler shapes independently. Older children, from age 6 up to 10 and beyond, can tackle more intricate designs, experiment with more complex cutting techniques, and develop their own creative ideas with minimal assistance, making it a craft that evolves with the child.
How can I make construction paper animals more realistic?
To enhance the realism of your construction paper animals, focus on layering and detail. Instead of flat shapes, try creating dimension by slightly curling or folding paper edges before gluing. For fur texture, you can fringe the edges of paper strips or use a craft knife (with adult supervision) to create fine cuts. Incorporate subtle color variations by lightly shading with crayons or colored pencils, or by layering lighter shades over darker ones. Pay close attention to proportions and anatomical features, using reference images to guide your cuts for ears, snouts, tails, and limbs. Even small details like drawing whiskers with a fine-tip marker can make a significant difference.
What are some other animals I can make with construction paper?
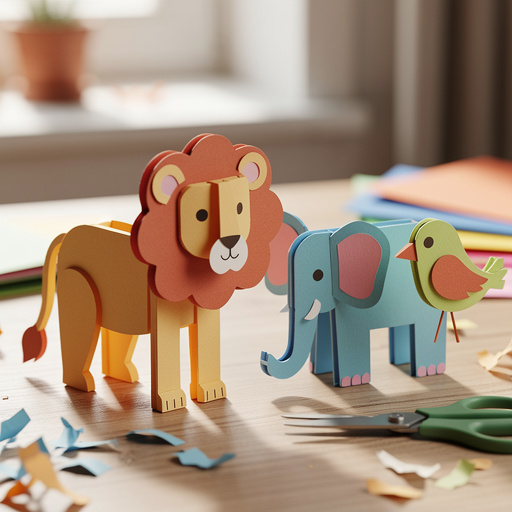
The possibilities for construction paper animals are virtually endless! Beyond bears, birds, and ducks, you can create a whole safari or farm. Think about a lion with a fluffy mane made from cut paper strips, an elephant with large, floppy ears and a long trunk, or a playful monkey with a long, curly tail. For farm animals, a pig with a curly tail and a round body, a cow with spots, or a sheep with a textured body using cotton balls or fringed paper are great options. Even underwater creatures like fish with fin shapes or a simple octopus with multiple tentacle strips can be brought to life with construction paper.
What Next?
Congratulations on creating your own charming zoo of construction paper animals! You've learned how to transform simple shapes into lively creatures, fostering creativity and fine motor skills. Don't stop here – experiment with different color combinations, add unique patterns with markers, or even try layering different paper textures for added depth. These delightful creations can be used as decorations for a child's room, props for storytelling, or even as unique handmade gifts. For storage, consider placing them in a portfolio or a shallow box to prevent bending. Next, you might explore making construction paper flowers or even simple paper robots!
Free: 10 Paper Crafts Anyone Can Make in 5 Minutes
Get our beginner guide + new craft ideas weekly.
No spam. Unsubscribe anytime.
Did you complete this activity?
Related