How to Make a Sensory Rainmaker Tube — Easy Step-by-Step Guide
Create a magical rainmaker tube that mimics the soothing sound of rain! This easy craft is perfect for little hands and provides a wonderful sensory experience. Learn how to make your own with simple materials and clear instructions.
Quick answer
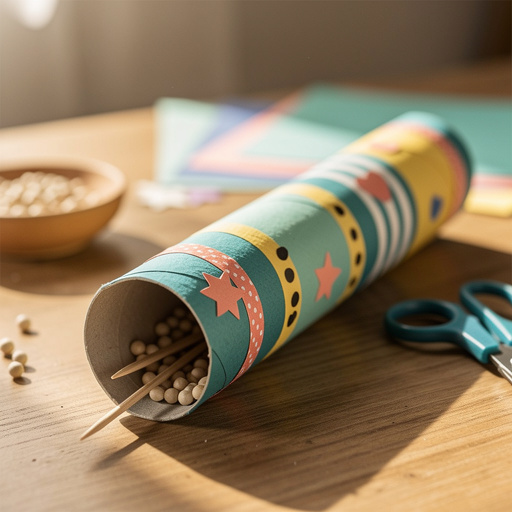
To make a sensory rainmaker tube, you need a cardboard tube, plastic wrap, tape, rice, and decorations, taking about 30 minutes. Start by covering one end of the tube. This beginner-friendly activity has 8 steps and is perfect for preschoolers.
What you need
Shop on Amazon · As an Amazon Associate we earn from qualifying purchases. Links above are affiliate links — we may earn a commission at no extra cost to you.
Embark on a delightful crafting adventure with this easy-to-follow guide to creating your very own sensory rainmaker tube! More than just a fun craft, this project offers a captivating auditory and visual experience, perfect for stimulating young minds and soothing busy bodies. The gentle cascade of sound as the filler tumbles down the tube is incredibly calming, making it an ideal tool for quiet time, relaxation, or simply imaginative play. This project is wonderfully accessible for preschoolers and young children, fostering fine motor skills, creativity, and an understanding of cause and effect, all while producing a beautiful, handmade instrument.
On this page
Step-by-Step Instructions
- 1
Gather all your materials in a clear, well-lit workspace. Ensure you have enough room to spread out your decorative supplies and that any younger helpers are in a comfortable and safe area.
- 2
Prepare your cardboard tube. If you are using a standard paper towel tube, you may wish to join two together end-to-end using tape to create a longer, more substantial rainmaker. A wrapping paper tube is often a good length on its own.
- 3
Cut a square of plastic wrap. This piece should be large enough to comfortably cover one end of the cardboard tube with at least 2-3 inches of overhang on all sides. A roughly 8x8 inch square is usually sufficient for a standard tube.
- 4
Drape the first plastic wrap square over one end of the cardboard tube. Gently pull the plastic wrap taut, ensuring there are no major wrinkles or slack across the opening. This tautness is crucial for the sound quality.
- 5
Secure the plastic wrap tightly to the tube. Use a strong rubber band, wrapping it multiple times around the tube just below the plastic wrap. Alternatively, use strong tape (like packing or duct tape) to secure the edges of the plastic wrap firmly to the cardboard, creating a sealed end.
- 6
Carefully pour the chosen filling material into the open end of the tube. For a classic rain sound, use 1/4 cup of uncooked rice. If you're experimenting with other fillers, start with a similar amount and adjust later for sound preference.
- 7
Prepare the second piece of plastic wrap. Just like the first, cut a square of plastic wrap that is large enough to cover the remaining open end of the cardboard tube with ample overhang.
- 8
Drape the second plastic wrap square over the open end of the tube. Again, pull the plastic wrap taut, ensuring it is smooth and wrinkle-free across the opening for optimal sound production.
- 9
Secure the second plastic wrap end just as you did the first. Use a strong rubber band or wrap strong tape around the edges of the plastic wrap and the cardboard tube. Double-check that both ends are completely sealed with no gaps where the filling could escape.
- 10
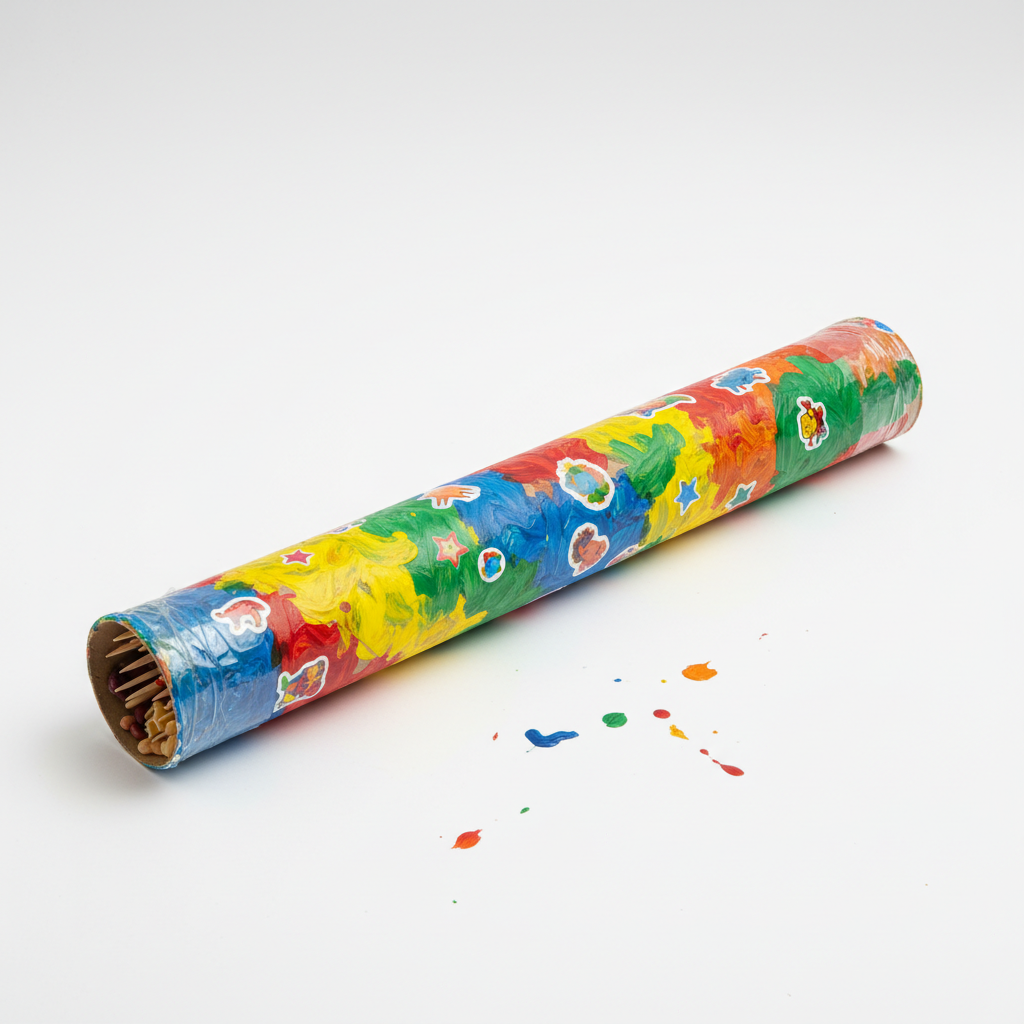
Now for the fun part: decorating! This is where creativity truly shines. Cover the entire exterior of your rainmaker tube with construction paper, drawing designs with crayons or markers, or applying stickers. Let your imagination guide you!
- 11
If you're using glue for paper or glitter, apply it now. For a more vibrant look, consider painting the tube before adding other decorative elements. Ensure any paint or glue is completely dry before proceeding to the next step.
- 12
Add embellishments like glitter, yarn, or more stickers to personalize your rainmaker. This step is a fantastic opportunity for children to express their artistic flair and make the rainmaker uniquely theirs.
- 13
Allow all decorative elements, especially glue and paint, to dry completely. This might take anywhere from 15 minutes to an hour, depending on the materials used and the humidity. Patience here ensures a durable and beautiful finish.
- 14
Once everything is dry, it's time to test your creation! Gently tilt the rainmaker tube. Listen to the mesmerizing sound of the filler cascading down, mimicking the gentle patter of rain.
- 15
If the filling seems to escape or the sound isn't quite right, re-examine the secured ends. Ensure the plastic wrap is pulled very taut and that there are absolutely no gaps where the filler could leak out. Add extra tape for reinforcement if needed.
- 16
Experiment with the sound! Gently shake the tube to hear the different nuances of the filler. You can also try tilting it at different speeds to alter the sound intensity and rhythm.
- 17
Store your finished rainmaker tube upright when not in use. This prevents the filling from settling too much, ensuring that the soothing rain sound is ready to be enjoyed whenever you pick it up.
Tips & Troubleshooting
- 1If the rice or filler falls out, the most common culprit is an insufficiently sealed end. Ensure the plastic wrap is pulled extremely taut and secured very tightly with no gaps. Adding extra layers of strong tape around the edges of the plastic wrap can provide excellent reinforcement and prevent leaks.
- 2Don't be afraid to experiment with different fillers! Small dried beans (like lentils or split peas), colorful beads, small pasta shapes (orzo, ditalini), or even tiny pom-poms will create unique and interesting sounds. Just be sure the items are small enough to move freely within the tube and won't get stuck.
- 3The amount of filling material directly impacts the sound. For a softer, more delicate rain sound, use less filler. For a louder, more robust rain sound, use more. You can even try a combination of different fillers to create a complex auditory experience.
- 4Involve children in the decorating process as much as their fine motor skills allow. They can help choose colors, apply stickers, draw pictures, or even carefully spread glue for glitter. This hands-on participation makes the craft more meaningful and personal for them.
- 5To prolong the life and sound quality of your rainmaker, store it upright when not in use. This prevents the filling material from compacting at the bottom, ensuring a more consistent and enjoyable sound each time you tilt it.
- 6Consider adding a visual element to the inside of the tube before filling. You could glue small pieces of colored tissue paper or glitter to the inside walls of the tube. This will create a subtle visual effect as the filler moves past them.
- 7For a more durable rainmaker, especially if it will be handled by very young children, consider using a sturdier cardboard tube, like one from wrapping paper. You can also reinforce the plastic wrap ends with duct tape for extra security.
- 8If you want to create a rainmaker with a slightly different texture or sound, try using a mix of fillers. For example, a combination of rice and small beads can produce a more complex and layered sound.
Related Activities You Might Enjoy
Frequently Asked Questions
What can I use instead of rice for a rain stick?
The beauty of the sensory rainmaker tube is its versatility when it comes to fillers! Beyond uncooked rice, you can explore a delightful array of small items to create unique sounds. Small dried beans, such as lentils, split peas, or even tiny black beans, offer a deeper, more resonant sound. For a brighter, sharper rattle, consider using small craft beads (ensure they are not too small to be a choking hazard if young children are involved). Tiny pasta shapes like orzo or ditalini also work wonderfully, providing a distinct clicking sound as they tumble. Even small, smooth pebbles or dried corn kernels can be used. Experimentation is key to discovering your favorite auditory experience – each material will produce a slightly different sonic texture, transforming your rainmaker into a personalized instrument.
How do I make my rain stick louder or quieter?
Adjusting the volume of your sensory rainmaker tube is wonderfully simple and directly related to the amount of filling material you use. To achieve a louder, more pronounced rain sound, simply increase the quantity of your chosen filler – whether it's rice, beans, or beads. A fuller tube will create more friction and impact as the materials cascade, resulting in a more robust sound. Conversely, for a quieter, more subtle rain effect, use less filling material. A sparser amount will lead to a gentler, softer cascade of sound. Additionally, ensuring the plastic wrap is stretched very taut across both ends of the tube is crucial for optimal sound projection, regardless of the volume you're aiming for.
Can preschoolers make a rain stick by themselves?
Preschoolers can absolutely be involved in making a sensory rainmaker tube, but adult supervision and assistance are definitely needed for certain steps. They can enthusiastically help with pouring the rice or other fillers into the tube, which is a fantastic sensory experience in itself. Decorating the outside of the tube is another area where preschoolers can shine, using their creativity with crayons, markers, stickers, or glue for glitter. While they might be able to help secure the plastic wrap with adult guidance, tasks like cutting the plastic wrap and ensuring it's tightly and securely taped or rubber-banded to create a sealed end are best handled by an adult to guarantee the rainmaker's integrity and safety. With a little help, it's a perfect project for them!
How long does it take to make a rain stick?
The actual construction of the sensory rainmaker tube is quite quick, typically taking around 30 minutes from start to finish. This timeframe includes gathering your materials, preparing the tube, sealing the ends with plastic wrap and tape or rubber bands, and adding the filling. The majority of the time, especially if children are involved, is dedicated to the decorating phase. Depending on the complexity of the decorations and whether you're using paint or glue that needs drying time, this part can extend the overall project duration. If you opt for simple marker drawings or stickers, the drying time is minimal, and you can be enjoying your rainmaker almost immediately. For projects involving paint or extensive glue, allow an extra hour or so for drying.
What is the purpose of the plastic wrap on the rainmaker tube?
The plastic wrap plays a crucial role in the functionality and sound production of your sensory rainmaker tube. Its primary purpose is to act as a secure, yet flexible, barrier at both ends of the cardboard tube. This barrier effectively contains the filling material – be it rice, beans, or beads – preventing it from spilling out while allowing it to tumble freely when the tube is tilted. The tautness of the plastic wrap is also essential for creating the desired sound. When stretched tightly, it helps to amplify and project the sound of the falling filler, mimicking the gentle patter of rain. Without the plastic wrap, the filler would simply fall out, and the characteristic soothing sound would not be produced.
Can I make a rainmaker tube that makes different sounds?
Absolutely! Creating a sensory rainmaker tube that produces a variety of sounds is one of the most exciting aspects of this craft. The key to altering the sound lies in the choice of filling material. As mentioned, rice provides a classic, soft rain sound. Small dried beans offer a deeper, more percussive rattle. Tiny beads can create a sharper, more distinct clicking or rattling noise. Even different sizes and types of pasta can yield unique auditory textures. You can also experiment with mixing different fillers together – for instance, a combination of rice and small beads might produce a layered sound with both soft and sharp elements. The size of the tube can also influence the sound; a longer tube might create a more sustained cascade.
What Next?
Congratulations on creating your very own sensory rainmaker tube! This versatile craft can be adapted in countless ways. Consider adding different types of beads or even small, dried pasta shapes for varied sound effects. For an extra visual element, try filling the tube with colorful pom-poms or tiny bells. Once your rainmaker is complete, store it upright to keep the filler from settling, ensuring the magical rain sound is always ready. This project is a fantastic springboard for exploring other DIY musical instruments or sensory toys, encouraging continued creativity and hands-on learning.
Free: 10 Paper Crafts Anyone Can Make in 5 Minutes
Get our beginner guide + new craft ideas weekly.
No spam. Unsubscribe anytime.
Did you complete this activity?
Related