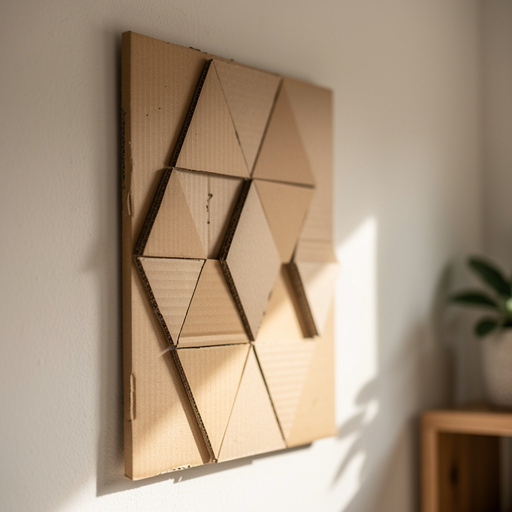
How to Build a Pretend Play Store — Easy Step-by-Step Guide
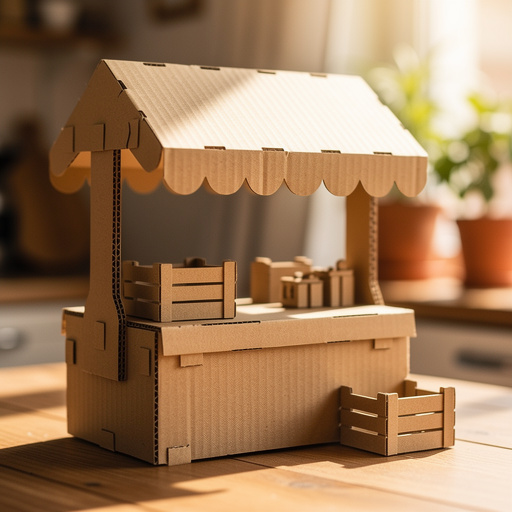
Transform a cardboard box into an imaginative pretend play store! This simple DIY project sparks creativity and hours of screen-free fun for kids. Learn how to build your own market stall with this easy step-by-step guide, perfect for little entrepreneurs aged 4 and up.

Quick answer
To make a pretend play store, you need a large cardboard box (like an appliance box), box cutter or sturdy scissors, packing tape, craft knife (adult supervision), ruler, pencil/marker, decorating supplies (paint, crayons, markers), construction paper/cardstock, glue, and optional embellishments. Start by cutting an opening for the counter. This beginner-friendly activity has 10 core steps and can be expanded to 15-20 steps for more detail, taking about 1-2 hours to complete. It's perfect for kids aged 4+.
What you need
Shop on Amazon · As an Amazon Associate we earn from qualifying purchases. Links above are affiliate links — we may earn a commission at no extra cost to you.
Unleash your child's inner entrepreneur with this delightful cardboard market stall project! Building a pretend play store is more than just a craft; it's a gateway to imaginative worlds, fostering crucial developmental skills like problem-solving, social interaction, and creative expression. This easy-to-follow guide transforms a humble cardboard box into a vibrant hub for imaginative play, offering hours of screen-free entertainment. It's the perfect activity for rainy days, playdates, or simply sparking a child's natural curiosity and love for make-believe.
On this page
Step-by-Step Instructions
- 1
Find a large cardboard box that can stand upright. If it has top flaps, decide if you want to tape them down to create a solid roof or cut them off for an open-air market feel. For a more stable base, securely tape any bottom flaps together using packing tape, ensuring they won't pop open during play.
- 2
Determine which side of the box will be the front of your store, where customers will interact. On this chosen front side, use your ruler and pencil or marker to measure and mark a large rectangular opening for the counter. Aim for a height that is comfortable for children to stand at and reach over, typically around 2-3 feet from the bottom of the box, depending on the child's height.
- 3
Carefully cut out the marked counter opening using a box cutter or sturdy scissors. This is a crucial step that requires adult supervision and precision. For a cleaner cut, score the lines first with a craft knife before cutting through with scissors or a box cutter. Ensure the edges are as smooth as possible to prevent snags.
- 4
On the opposite side of the counter opening, which will serve as the back of your store, cut a smaller rectangular opening. This 'back door' or access point is essential for restocking your pretend products and for children to easily enter and exit the stall to manage their shop.
- 5
If your box has top flaps and you opted for a roof, securely tape them down from both the inside and outside to create a solid, flat surface. If you prefer an open-air market feel, carefully cut off the top flaps using a box cutter or strong scissors, ensuring a clean removal that doesn't compromise the box's structure.
- 6
Now, it's time to plan the aesthetic of your market stall. Use your pencil or marker to lightly sketch out design ideas directly onto the cardboard. Think about where you want to place signs, any decorative elements like windows or flower boxes, and if you plan to add internal shelves.
- 7
Begin painting or coloring the exterior of your cardboard box. This is where your child's creativity can truly shine! Use a variety of colors and patterns to bring your store to life. Consider painting a base coat first, and then adding details once it dries. Let your imagination run wild with vibrant hues and exciting designs!
- 8
While the paint dries, start creating the signage for your store. Cut out shapes from construction paper or cardstock – rectangles for main signs, circles for price tags, or banners for special offers. Use markers or crayons to write the name of your store (e.g., 'Fruity Delights,' 'Toy Emporium,' 'Sweet Treats Bakery') and any other desired text.
- 9
Once the paint is dry, begin gluing your handmade signs onto the front and sides of your store. You can also draw or glue on additional decorative elements like windows, door handles, or even a charming flower box beneath the counter opening. This is a great opportunity to add personal touches that reflect the type of store you're creating.
- 10
To add functionality and visual appeal, consider creating internal shelves. Cut strips of sturdy cardboard, about 3-4 inches wide, and tape them horizontally inside the box at different heights. These shelves will be perfect for displaying your pretend products, making the store more organized and realistic.
- 11
Reinforce the edges of the counter opening with extra packing tape or duct tape. This not only adds durability, preventing the cardboard from tearing with frequent use, but also gives the counter a more finished and professional look. You can even use colored tape to match your store's theme.
- 12
Prepare your pretend products! Encourage children to draw pictures of food items, toys, books, or anything else they might find in a real store. Alternatively, small household items like clean food containers, empty boxes, or even small stuffed animals can be used as inventory.
- 13
If you're aiming for a specific type of store, like a grocery or bakery, get creative with product creation. For a grocery store, cut out small circles from colored paper to represent fruits and vegetables, or use small fabric scraps for baked goods. For a toy shop, small drawings of toys or even empty toy packaging can work.
- 14
Consider adding a charming awning to the top of your counter opening. Attach a piece of fabric, colorful cardstock, or even a folded piece of cardboard to create a shaded canopy. This adds a delightful visual element and makes the store feel more inviting.
- 15
To enhance the play experience, create a simple cash register from a smaller cardboard box. Decorate it with buttons, a small screen drawn on paper, and a slot for pretend money. This adds another layer of interactive fun for your little shopkeeper.
- 16
Encourage children to create their own 'money' to use for transactions. They can draw coins and bills on paper, or use old buttons or beads as currency. This introduces basic concepts of exchange and value.
- 17
Once all the paint, glue, and tape are completely dry, your pretend play store is officially ready for business! Do a final check to ensure all parts are securely attached and there are no sharp edges.
- 18
Allow children to take ownership of their store. Let them decide what to sell, how to arrange their products, and what prices to set. This fosters a sense of responsibility and encourages independent decision-making.
- 19
Introduce role-playing scenarios. You can be a customer, and they can be the shopkeeper, or vice versa. This helps develop social skills, communication, and understanding of different perspectives.
- 20
If you want to make the store more robust, consider using papier-mâché over some of the structural elements, like the roof or counter edges, once the initial construction is complete and dry. This adds significant durability and a smoother finish for painting.
Tips & Troubleshooting
- 1For a more durable counter, reinforce the edges of the cut-out opening with extra tape, such as duct tape or colorful packing tape. This prevents fraying and tearing, especially with enthusiastic play, and can also add a decorative touch.
- 2Get creative with the 'products' for your store! Kids can draw pictures of food, toys, or books, or use small household items like clean empty containers, small toys, or even fabric scraps. The more variety, the more engaging the play will be.
- 3Consider adding a small awning by attaching a piece of fabric or cardstock to the top of the counter opening using tape or glue. This adds a charming visual element and can be decorated to match the store's theme, making it feel more authentic.
- 4If you're making a grocery store, cut out small circles from colored paper to represent fruits and vegetables, or use small pom-poms for berries. For a bakery, small fabric scraps or painted cardboard shapes can mimic loaves of bread or pastries.
- 5Encourage children to create their own 'money' to use for transactions in the store. They can draw coins and bills on paper, or use buttons, beads, or even small pebbles as currency, introducing basic economic concepts.
- 6To make the store more interactive, consider adding a simple cash register made from a smaller box, decorated with buttons and a paper screen. You can also create price tags for the items, encouraging children to practice counting and simple math.
- 7If you want to add more detail and realism, use contact paper to cover the shelves or counter area for a more finished look. This can mimic wood grain, marble, or other textures, adding a professional touch to your DIY market stall.
- 8Don't forget the power of sound! Encourage children to create sound effects for their store, like ringing a bell for customers or making 'cha-ching' noises when a sale is made. This enhances the imaginative play experience.
Related Activities You Might Enjoy
Frequently Asked Questions
What are the best materials for a pretend play store?
The best materials are readily available household items that are safe and easy to work with. A large, sturdy cardboard box, such as one from an appliance or large electronic item, is the foundation. You'll also need strong packing tape or duct tape for assembly and reinforcement. For cutting, a box cutter or sturdy scissors are essential, with adult supervision always required for sharp tools. Decorating supplies like paint, crayons, markers, construction paper, and glue are key for personalization. Optional additions like fabric scraps, buttons, or yarn can add extra flair and texture, making the store truly unique and engaging for hours of imaginative play.
How can I make a pretend play store more interactive?
To make a pretend play store more interactive, focus on adding elements that encourage role-playing and engagement. Install simple shelves inside the box using extra cardboard strips to display 'products' effectively. Create a pretend cash register from a smaller box, complete with drawn-on buttons and a slot for play money. Encourage children to make their own price tags and 'money' from paper or craft supplies. Role-playing different customer and shopkeeper scenarios, with you or other children taking on roles, significantly enhances interaction and develops social skills. You can also add a bell to ring for customers or a chalkboard for daily specials.
What age is a pretend play store suitable for?
A pretend play store is suitable for children aged 4 and up. Younger children, around 4-5 years old, will thoroughly enjoy the imaginative play aspect, acting as shopkeepers and customers with minimal guidance. They can also participate in simpler decorating tasks. As children get older, around 6-8 years old, they can become more involved in the construction and decorating process, helping with measuring, cutting (with supervision), and designing the store's look. The play itself can also become more complex, involving price calculations, inventory management, and more elaborate customer interactions, making it a versatile toy for a range of ages.
How long does it take to build a pretend play store?
Building a basic pretend play store from a cardboard box typically takes about 1 to 2 hours, including decorating time. The initial construction, such as cutting openings and reinforcing the box, might take around 30-45 minutes. The decorating phase, which can involve painting, drawing, and gluing on signs and embellishments, can take anywhere from 30 minutes to over an hour, depending on the complexity of the design and the child's involvement. This timeframe is an estimate and can vary based on the number of people involved, the drying time for paint or glue, and the desired level of detail in the final product.
Can I make the cardboard store more durable?
Yes, you can significantly increase the durability of your cardboard market stall. Reinforcing all cut edges, especially the counter opening and any doors, with strong packing tape or duct tape is crucial. Applying a layer of papier-mâché over key structural areas like the roof or counter edges before painting can add substantial strength and a smoother finish. Using thicker cardboard for shelves and ensuring all taped seams are well-secured will also help. For an even more robust option, consider using a double layer of cardboard for the main structure or reinforcing corners with extra cardboard pieces taped securely in place. Proper storage, keeping it dry and out of direct sunlight, will also prolong its life.
What kind of 'products' can kids make for their store?
The possibilities for pretend store products are endless and limited only by imagination! Children can draw and cut out pictures of various items like fruits, vegetables, baked goods, toys, books, or clothing. They can also use small, clean household items such as empty food containers, small boxes, fabric scraps, or even small stuffed animals as inventory. For a bakery, they could create 'cookies' from painted cardboard circles or 'bread' from rolled-up paper. For a toy store, they could draw pictures of popular toys or use small toy figures. Encouraging them to create price tags for each item adds another layer of educational play.
What Next?
Once your cardboard market stall is complete, the real fun begins! Encourage your child to stock it with their own creations – drawings of food, handmade crafts, or even small toys. This project is a fantastic springboard for further imaginative play, perhaps leading to building a whole town or a fantastical kingdom. For storage, consider collapsing the box if it's not permanently decorated, or find a corner where it can stand proudly as a centerpiece for ongoing adventures. Don't be afraid to revisit and redecorate it for new themes!
Free: 10 Paper Crafts Anyone Can Make in 5 Minutes
Get our beginner guide + new craft ideas weekly.
No spam. Unsubscribe anytime.
Did you complete this activity?
Related
You might also like
Paper Jamz Guitar Craft
Cardboard Kitchen Creations
Cardboard Kitchen Creations
Cardboard Castle Diorama
Cardboard Animal Sculptures