How to Make a Paper Jamz Guitar — Easy Step-by-Step Guide
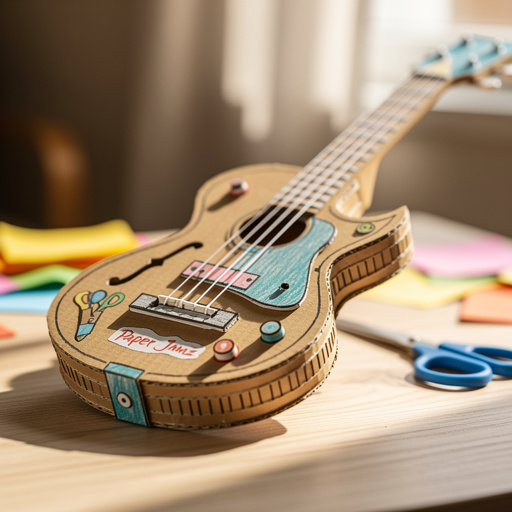
Unleash your inner rockstar with this fun Paper Jamz Guitar craft! Create your own playable instrument using everyday materials for hours of screen-free musical fun. This beginner-friendly activity has 10 steps and is perfect for kids aged 6+.
Quick answer
To make a Paper Jamz Guitar, you need cardboard, paper, scissors, tape, and markers, and about 45 minutes. Start by cutting out the guitar shape. This beginner-friendly activity has 10 steps and is perfect for kids aged 6+.
What you need
Shop on Amazon · As an Amazon Associate we earn from qualifying purchases. Links above are affiliate links — we may earn a commission at no extra cost to you.
Get ready to strum your way to musical stardom with this incredibly fun and easy Paper Jamz Guitar craft! In a world often dominated by screens, this project offers a refreshing opportunity for hands-on creativity and imaginative play. It's the perfect way for budding musicians and crafty kids alike to design and build their very own, albeit pretend, instrument. With just a few common household items, you can transform simple cardboard into a vibrant, personalized guitar that's ready for its first jam session. This activity is ideal for children aged 6 and up, fostering fine motor skills, artistic expression, and a love for music in a playful, screen-free environment.
On this page
Step-by-Step Instructions
- 1
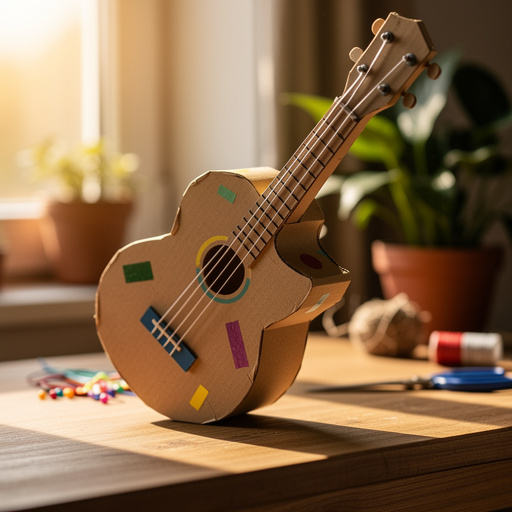
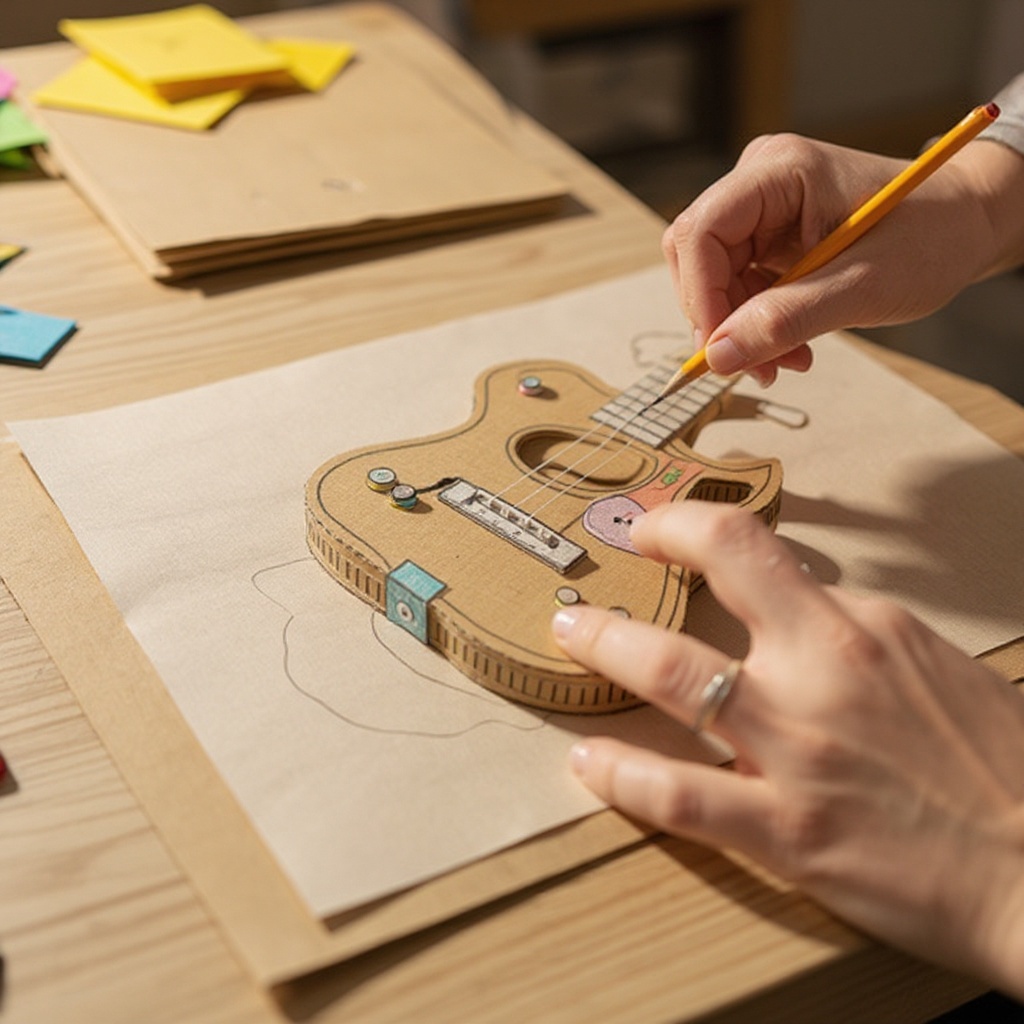
Draw a guitar shape onto the cardboard. Aim for a classic body shape with a neck, ensuring the body is large enough to be visually appealing and the neck is proportional. You can find simple guitar outlines online to trace if needed, or freehand your own unique design.
- 2
Carefully cut out the guitar shape from the cardboard using scissors. For the neck and any intricate curves, an adult may need to use a craft knife for a cleaner, more precise cut. Take your time to ensure smooth edges.
- 3
Measure and cut a rectangular piece of decorative paper for the fretboard. This piece should be slightly narrower than the cardboard neck and approximately 12-15 inches long, allowing for a small overlap at the top and bottom of the neck section.
- 4
Apply a generous amount of glue stick or craft glue to the back of the fretboard paper and carefully adhere it to the cardboard neck. Smooth out any wrinkles or air bubbles to ensure it's perfectly flat and centered, creating a clean surface for your frets.
- 5
Using a ruler and a pencil, draw thin, straight lines across the fretboard paper to represent the frets. Space these lines evenly, typically about 1-1.5 inches apart, ensuring they run perpendicular to the length of the neck for a realistic look.
- 6
Select your colored paper or cardstock and cut out 6 thin strips for the guitar strings. These strips should be about 1/2 inch wide and approximately 18-20 inches long, providing enough length to stretch from the headstock to the guitar body with a little slack.
- 7
Securely tape one end of each paper string to the top of the guitar's headstock, which is the very end of the neck. Ensure the tape is firmly pressed down to prevent the strings from coming loose during play.
- 8
Gently stretch each paper string down the length of the guitar neck and across the body. Try to maintain an even tension across all strings, avoiding excessive pulling that could tear the paper or the cardboard.
- 9
Tape the other end of each string to the bottom of the guitar body, near where the bridge would typically be. Ensure the strings are taut enough to create a visual representation of tension but not so tight that they rip the paper or detach from the cardboard.
- 10
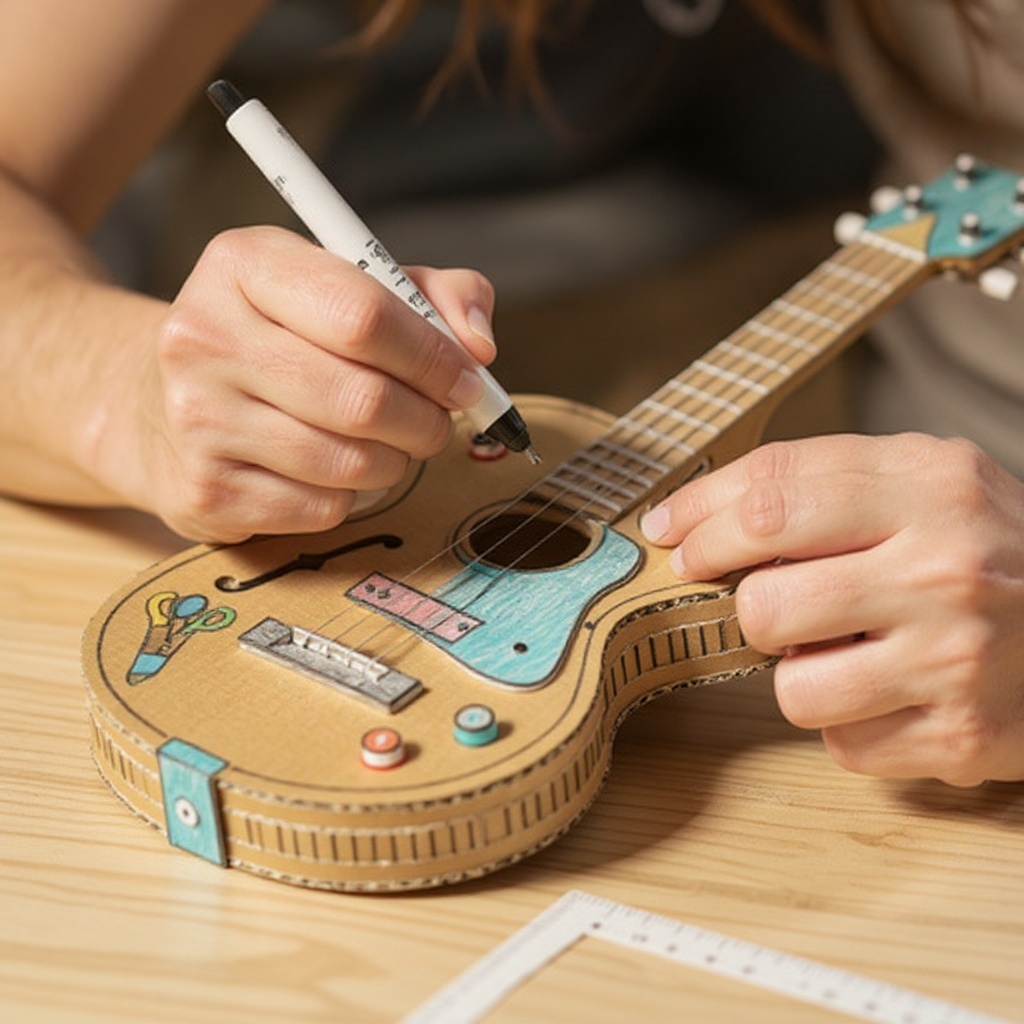
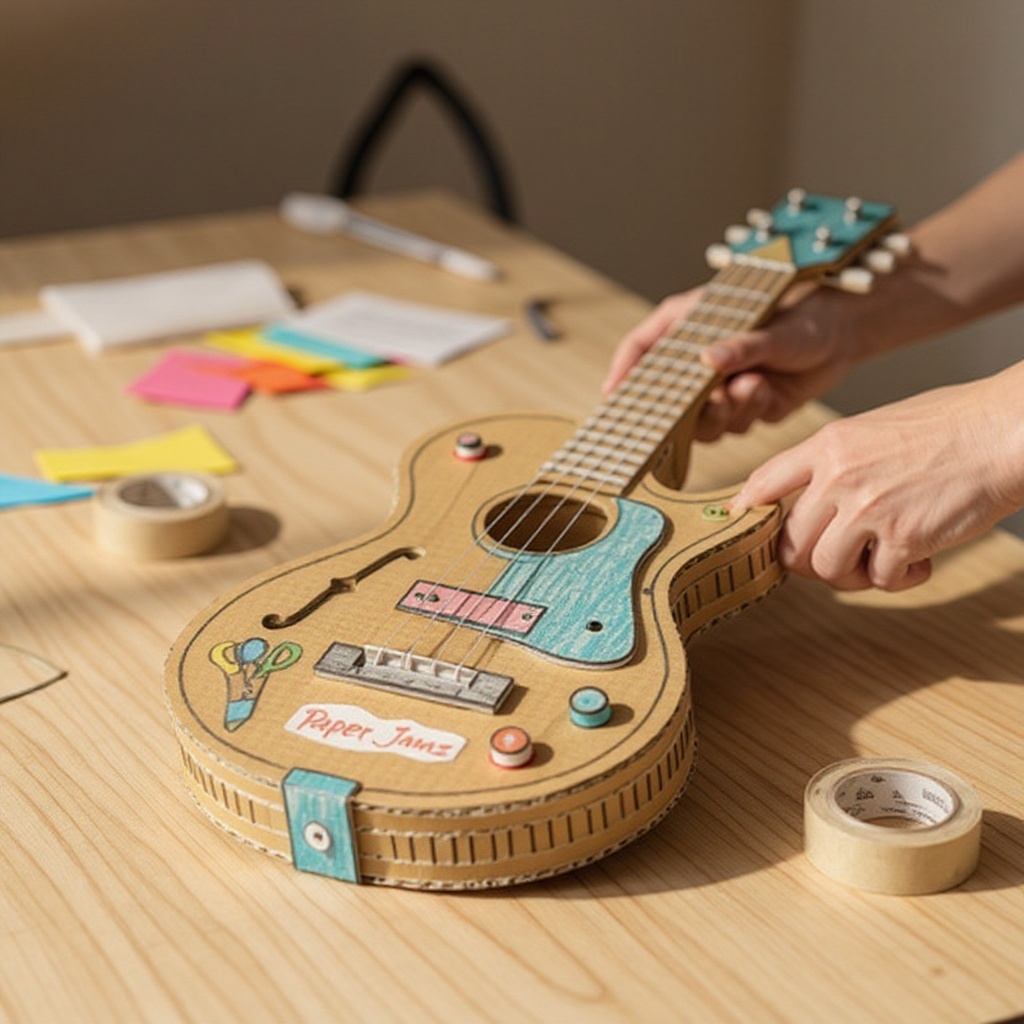
Now for the fun part: decorate the main body of your guitar! Unleash your creativity with markers, crayons, or paint. Get inspired by real guitars or invent your own wild patterns, vibrant colors, and unique designs to make your Paper Jamz Guitar truly one-of-a-kind.
- 11
Add a soundhole to the guitar body before decorating for a more authentic appearance. Cut a small circle (about 2-3 inches in diameter) from a contrasting piece of paper and glue it onto the body, or simply draw one on with a marker.
- 12
Consider adding tuning pegs to the headstock. You can draw these on with markers, or for a more tactile experience, cut out small circles of cardboard and glue them in place.
- 13
Reinforce the neck and body connection if needed. If your cardboard feels a bit flimsy, you can add extra tape along the seam where the neck meets the body for added stability.
- 14
If you plan to hang your guitar, punch two holes near the top of the headstock and thread a piece of string or yarn through them to create a hanging loop.
- 15
Use stickers, glitter glue, or other embellishments to add extra flair and personality to your guitar's design.
- 16
Test the tautness of your strings. Gently pluck them to see if they hold their position. If any feel too loose, you can re-tape them with a bit more tension, being careful not to overstretch.
- 17
Allow any paint or glue to dry completely before handling your guitar extensively to prevent smudging or damage.
- 18
Name your guitar! This is a crucial step in unleashing its rockstar potential. Encourage children to come up with a cool name for their creation.
Tips & Troubleshooting
- 1If your cardboard is too flimsy, you can cut out two identical guitar shapes and glue them together for extra sturdiness. This double-layering will make your guitar more durable and resistant to bending during enthusiastic strumming sessions.
- 2Experiment with different types of paper for the strings. Thicker cardstock will create a more durable string that is less likely to tear, while thinner paper might be easier to handle for younger children and can offer a slightly different visual effect.
- 3For a more realistic look, you can add a small circle of paper for the soundhole on the guitar body before decorating. This adds a touch of authenticity and can be a focal point for your artistic design.
- 4Encourage kids to name their guitars and create their own band names! This imaginative element transforms the craft into a storytelling and role-playing experience, fostering creativity and engagement.
- 5Consider adding a pickguard. Cut a small, decorative shape from a contrasting piece of paper or cardstock and glue it onto the guitar body near where the strings are strummed. This adds another layer of detail and realism.
- 6If you want your strings to have a bit more dimension, you can gently curl them around a pencil before taping them down. This will give them a slight curve, making them appear more like actual guitar strings.
- 7Don't be afraid to go bold with your decorations! Use bright colors, geometric patterns, or even draw on elements like volume knobs and a bridge to make your Paper Jamz Guitar truly stand out.
- 8For a more robust fretboard, consider using a thin strip of wood veneer or even painting the fretboard directly onto the cardboard neck before adding the paper frets for a more permanent solution.
Related Activities You Might Enjoy
Frequently Asked Questions
Can I make a Paper Jamz Guitar without a craft knife?
Absolutely! If you don't have a craft knife readily available, or if you're crafting with very young children who require extra supervision, sturdy scissors can be used effectively to cut out the guitar shape. For particularly thick or corrugated cardboard, you might need to make multiple passes with the scissors or have an adult assist with the cutting. While a craft knife offers precision for intricate details, the overall shape and playability of your Paper Jamz Guitar can be achieved perfectly well with good quality scissors, ensuring this fun project is accessible to everyone.
How do I make the strings sound like a guitar?
The Paper Jamz Guitar is designed as a visual and imaginative craft, meaning the paper strings themselves won't produce actual musical notes or sounds like a real instrument. However, the magic lies in pretend play! Encourage children to strum the paper strings with their fingers or a homemade pick, making their own vocal sound effects and musical noises. This fosters creativity and allows them to engage in musical pretend-time, developing their own unique songs and melodies. The tactile experience of strumming and the visual representation of the strings are key to the imaginative fun this craft provides.
What kind of cardboard is best for a Paper Jamz Guitar?
For the most durable and satisfying Paper Jamz Guitar, sturdy corrugated cardboard is highly recommended. This is the type of cardboard typically found in shipping boxes, offering excellent rigidity and strength. It's robust enough to hold its shape well and withstand enthusiastic strumming and handling by children. Avoid using thin cardboard, such as that from cereal boxes or thin cardstock, as these materials can bend, crease, or tear too easily, compromising the structural integrity of your guitar and its longevity.
Can I make a different shaped guitar?
Absolutely! The beauty of this craft is its adaptability to your imagination. Feel free to get creative with your guitar shape beyond the classic design. You can draw and cut out the silhouette of a ukulele, a bass guitar, a banjo, or even a completely unique, fantastical instrument shape that springs from your mind. The core steps of cutting, decorating, and adding paper strings remain the same, allowing you to personalize your instrument to your heart's content and explore a wider variety of musical instrument aesthetics.
My paper strings keep tearing. What can I do?
Tearing paper strings can be frustrating, but there are a few solutions to ensure your Paper Jamz Guitar is ready for action. Firstly, try using a slightly thicker paper or cardstock for the strings; this will inherently be more durable than standard printer paper. When taping the strings, ensure you're using enough tape to secure them firmly without pulling too hard. You can also reinforce the ends of the strings with a small piece of tape before attaching them. Another effective method is to gently curl the strings around a pencil before taping them down; this adds a slight curve and can make them more resilient to tearing.
How long does this craft typically take to complete?
The Paper Jamz Guitar craft is designed to be a relatively quick and engaging project, perfect for an afternoon of creative fun. With all materials gathered and a clear workspace, the actual construction and decoration typically take around 45 minutes to an hour. This timeframe can vary slightly depending on the complexity of the chosen design, the age and dexterity of the crafter, and how much time is spent on intricate decorating. It's a project that offers a satisfying sense of accomplishment without requiring an entire day.
Can I make this guitar with younger children, like preschoolers?
Yes, with some modifications and adult assistance, this craft is definitely suitable for preschoolers! For younger children, an adult should handle all the cutting with scissors or a craft knife. They can also help with applying glue and taping the strings. The decorating phase is where preschoolers can truly shine, allowing them to express their creativity with markers, crayons, or stickers. Focus on the fun of coloring and designing rather than perfect execution. You might simplify the guitar shape to make cutting easier and skip the fret lines if they prove too challenging to draw.
What Next?
Congratulations on creating your very own Paper Jamz Guitar! This project is a fantastic springboard for further musical exploration. Consider adding extra decorative elements like glitter glue for dazzling effects, or even attaching small bells to the headstock for a jingle. You can also create a whole band by making different types of instruments. Once your masterpiece is complete, find a special place to display it – perhaps hanging on a bedroom wall or proudly placed on a shelf. Store it carefully to protect the paper strings from moisture or damage, ensuring it's ready for countless future jam sessions and imaginative performances.
Free: 10 Paper Crafts Anyone Can Make in 5 Minutes
Get our beginner guide + new craft ideas weekly.
No spam. Unsubscribe anytime.
Did you complete this activity?
Related