How to Make Your Own Jigsaw Puzzles — Easy Step-by-Step Guide
Transform old magazines, drawings, or photos into unique, custom jigsaw puzzles! A fun and rewarding screen-free activity for the whole family. This guide provides easy-to-follow instructions for creating personalized puzzles that are perfect for gifts or a rainy day.
Quick answer
To make DIY jigsaw puzzles, you need sturdy cardboard, a chosen image (photo, drawing, magazine page), craft glue or Mod Podge, scissors or a craft knife, a pencil, and optional ruler and wax paper. The process involves gluing the image to the cardboard, letting it dry, drawing puzzle lines, and then carefully cutting out the pieces. This beginner-friendly activity takes about 45 minutes to an hour of active crafting time and is perfect for families with kids aged 6+.
What you need
Shop on Amazon · As an Amazon Associate we earn from qualifying purchases. Links above are affiliate links — we may earn a commission at no extra cost to you.
Unleash your creativity and embark on a delightful crafting adventure by making your very own custom jigsaw puzzles! This project is a fantastic way to repurpose cherished photos, personal artwork, or captivating images from magazines into a tangible, engaging activity. It's more than just a craft; it's an opportunity to create lasting memories, foster problem-solving skills, and enjoy quality screen-free time with loved ones. Whether you're looking for a unique gift idea or a fun way to spend an afternoon, this DIY jigsaw puzzle tutorial is perfect for beginners and seasoned crafters alike.
On this page
Step-by-Step Instructions
- 1
**Prepare Your Image:** If you're using a magazine page, carefully select the image you want to use. Use scissors to cut it out, ensuring you leave a small border around the image itself to avoid cutting into the main picture when you trim the cardboard later.
- 2
**Prepare Your Cardboard:** Select a piece of sturdy cardboard that is at least 2 inches larger than your chosen image on all sides. This extra border will make it easier to handle the puzzle during the gluing and cutting stages. Trim any rough edges from the cardboard to create a clean surface.
- 3
**Apply Glue to the Image:** Turn your chosen image face down on a protected surface. Using a craft glue or Mod Podge, apply a thin, even layer to the entire back of the image. A small brush can help ensure complete coverage and prevent clumps of glue.
- 4
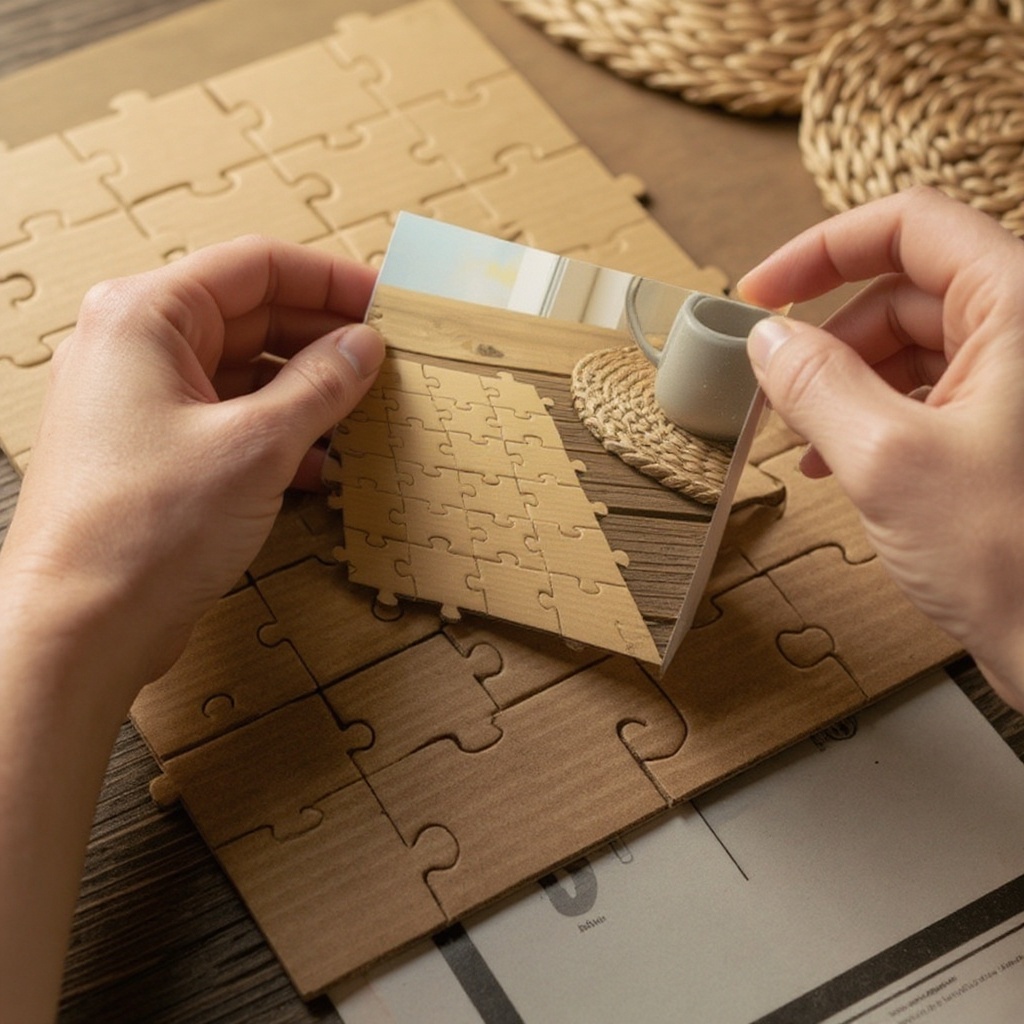
**Adhere Image to Cardboard:** Carefully pick up the glued image and center it precisely onto the prepared cardboard. Gently press down from the center outwards, smoothing out any air bubbles or wrinkles to ensure a smooth, flat surface for your puzzle.
- 5
**Press and Dry:** Place a sheet of wax paper or parchment paper over the glued image to protect it. Then, place another sheet of wax paper or parchment paper on top of that. Position a heavy book or flat object evenly over the entire surface to apply consistent pressure. Allow the glue to dry completely, which typically takes about 30 minutes to an hour, depending on the humidity and the type of glue used.
- 6
**Check for Adhesion:** Once the initial drying period is complete, carefully lift the heavy book and the protective paper. Gently feel the edges of the image to ensure it is firmly adhered to the cardboard with no lifting or peeling. If any areas feel loose, apply a little more glue underneath and re-press.
- 7
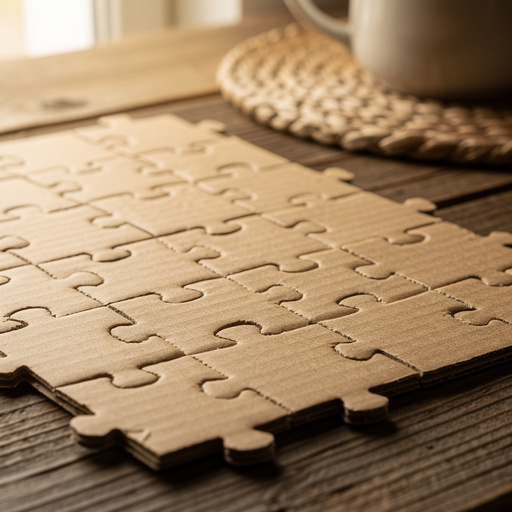
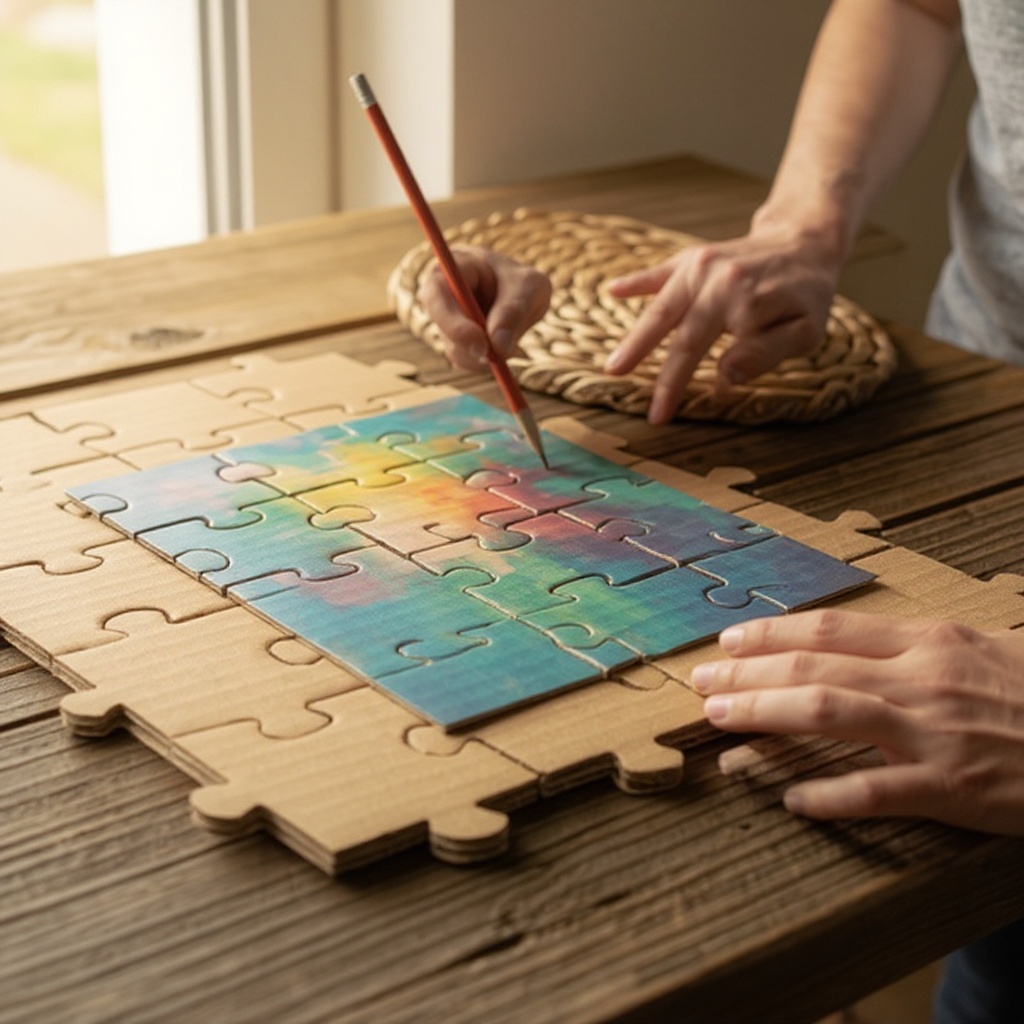
**Mark Your Puzzle Lines:** Once the glue is completely dry and the image is securely attached to the cardboard, it's time to plan your puzzle cuts. Using a pencil, lightly draw your desired puzzle lines directly onto the image. You can opt for a simple grid, more organic shapes, or even interlocking puzzle piece designs for an added challenge.
- 8
**Create a Basic Grid (Optional but Recommended for Beginners):** For a straightforward approach, use a ruler to draw straight lines that divide the image into equal sections. For example, a 4x4 grid will yield 16 pieces, a 5x5 grid will result in 25 pieces, and so on. Measure carefully to ensure your pieces will be roughly the same size.
- 9
**Consider Interlocking Shapes (Advanced):** For a more traditional jigsaw puzzle feel, draw interlocking shapes. This involves sketching curved lines that connect one piece to the next, mimicking the classic puzzle design. This method requires more precision and patience.
- 10
**Prepare for Cutting:** If you are using a craft knife, place your cardboard on a cutting mat to protect your work surface. Ensure you have good lighting and a stable surface to work on. If using scissors, make sure they are sharp enough to cut through the cardboard cleanly.
- 11
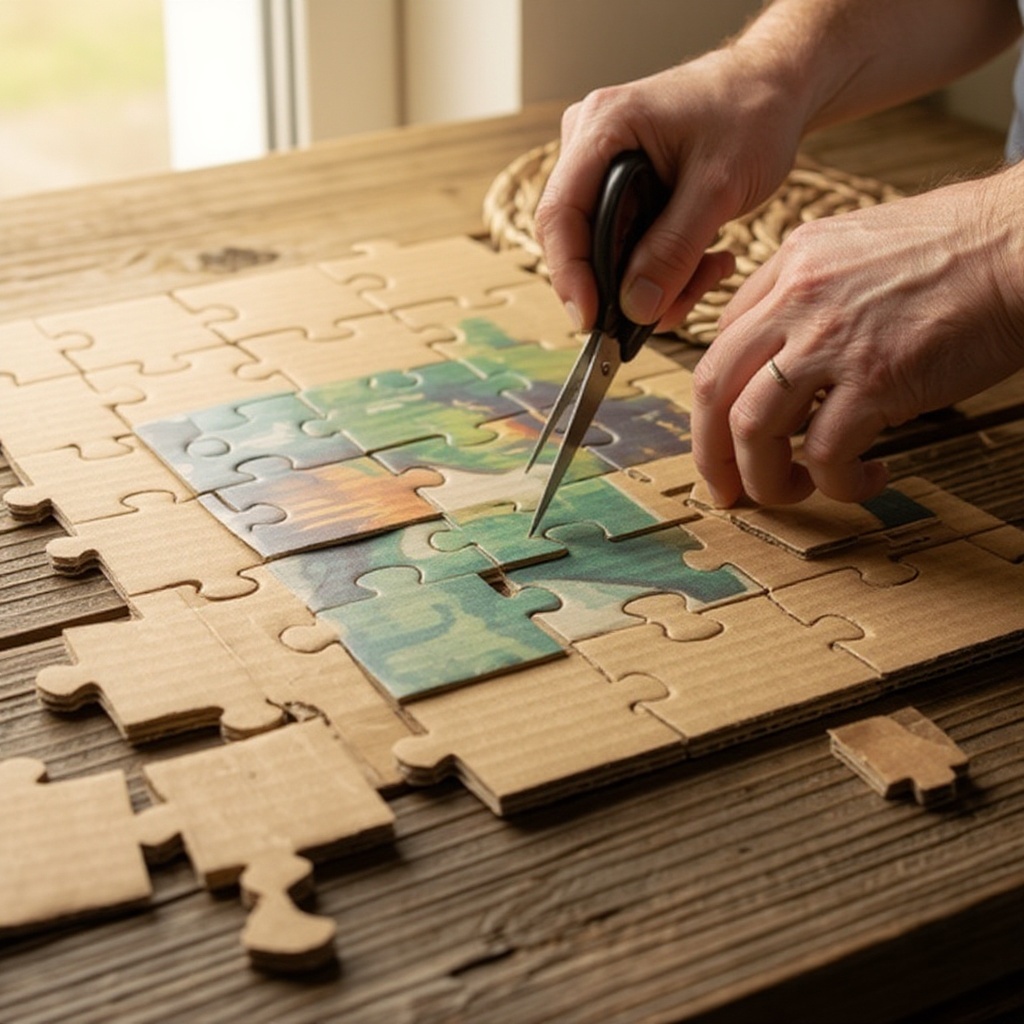
**Cut the Puzzle Pieces:** Carefully cut along your drawn lines using your chosen cutting tool. If using scissors, try to make smooth, continuous cuts. If using a craft knife, cut away from yourself and apply steady pressure to slice through the cardboard cleanly. Take your time to ensure accuracy, especially if you've drawn interlocking shapes.
- 12
**Refine Edges (Optional):** After cutting, you might notice some rough edges on the cardboard pieces. You can gently trim these with scissors or a craft knife to create cleaner, more uniform edges, which can improve the fit of the puzzle pieces.
- 13
**Separate the Pieces:** Once all the cuts are made, gently separate the individual puzzle pieces. Be careful not to bend or damage the corners as you pull them apart.
- 14
**Inspect and Adjust:** Examine each piece to ensure clean cuts and that they fit together reasonably well. If any pieces are difficult to fit, you may need to make minor adjustments with your cutting tool, but be cautious not to remove too much material.
- 15
**Test Assembly:** Before declaring your puzzle complete, try assembling it to ensure all the pieces fit together as intended. This is also a great opportunity to check for any missed cuts or areas that need slight refinement.
- 16
**Final Touches:** Once you're satisfied with the fit and appearance of your puzzle pieces, your custom DIY jigsaw puzzle is ready to be assembled and enjoyed!
Tips & Troubleshooting
- 1**Cardboard Thickness Matters:** For a more durable and professional-feeling puzzle, opt for thicker cardboard, such as that from a sturdy shipping box. You can even enhance sturdiness by gluing two pieces of cardboard together before attaching your image, creating a robust base that will withstand repeated use.
- 2**Image Detail and Piece Size:** The complexity of your image should influence the number of puzzle pieces you create. If your chosen picture has very fine details or intricate patterns, it's best to make fewer, larger puzzle pieces to ensure those details remain visible and the puzzle is not overwhelmingly difficult. Conversely, simpler images can accommodate more, smaller pieces for a greater challenge.
- 3**Storage and Reassembly Aid:** To make storing and reassembling your custom puzzle easier, consider drawing a faint outline of the original image on the back of each cardboard piece. This subtle guide can be incredibly helpful when putting the puzzle back together, especially for younger puzzlers or those who prefer a little assistance.
- 4**Image Quality is Key:** When using photographs, ensure they are printed on good quality, matte or semi-gloss paper. Avoid highly glossy finishes, as they can sometimes cause issues with glue adhesion and may reflect light distractingly. For the best results, consider using a professional photo printing service to get a crisp, vibrant image that will translate beautifully into a puzzle.
- 5**Embrace Interlocking Shapes:** For a truly authentic jigsaw puzzle experience, challenge yourself by drawing interlocking puzzle piece shapes instead of a simple grid. This requires more precision and patience during the cutting phase, but the result is a more engaging and satisfying puzzle that feels like a traditional store-bought version.
- 6**Consider Puzzle Size:** Think about who will be using the puzzle and where it will be stored. Smaller puzzles are great for travel or for younger children, while larger puzzles can be a more substantial and engaging project for adults or families. Adjust the size of your image and cardboard accordingly.
- 7**Edge Pieces First:** When drawing your puzzle lines, consider creating a border of 'edge' pieces first. This can make the initial stages of assembly more familiar and provide a solid framework to build upon, especially for larger or more complex puzzles.
- 8**Practice Cuts:** If you're new to using a craft knife, it's a good idea to practice cutting on scrap pieces of cardboard first. This will help you get a feel for the pressure needed and how to achieve clean, straight cuts before you start on your actual puzzle.
Related Activities You Might Enjoy
Frequently Asked Questions
What kind of pictures can I use for a DIY jigsaw puzzle?
You can use almost any flat image that you can adhere to cardboard! This includes printed photographs of family, friends, pets, or vacations; original artwork and drawings created by children or adults; interesting and visually appealing pages from magazines; postcards; or even custom-designed graphics printed on good quality paper. The key is to choose an image that is clear, has good contrast, and isn't overly busy or chaotic, as this will make the puzzle easier and more enjoyable to assemble. Avoid very dark or very light images that lack detail, as these can be challenging to piece together.
How many pieces should my DIY puzzle have?
The ideal number of pieces for your DIY jigsaw puzzle depends entirely on the intended puzzlers and the complexity of the image. For very young children (ages 3-5), start with just 4-6 large, simple pieces. For older children (ages 6-10), aim for 12-30 pieces, keeping the shapes relatively large and the cuts straightforward. For teenagers and adults, you can increase the piece count to 50, 100, or even more, depending on the size of your image and your desired level of challenge. Consider the detail in your image; more detailed images can support a higher piece count.
How do I make the puzzle pieces fit together better?
Achieving a good fit between DIY puzzle pieces relies on precision during the cutting stage. Ensure your glue is applied evenly and the image is fully adhered to the cardboard without any bumps or wrinkles, as these can affect how pieces lie flat. When drawing your lines, use a ruler for straight cuts and practice drawing smooth, consistent curves for interlocking shapes. The most crucial step is careful cutting: use sharp scissors or a craft knife and cut precisely along your drawn lines. For interlocking shapes, try to cut cleanly and consistently, ensuring the 'knobs' and 'holes' match up. Minor adjustments with a craft knife can sometimes help refine the fit.
Can I reuse my DIY jigsaw puzzle?
Yes, absolutely! Once your DIY jigsaw puzzle is created and the glue is completely dry, you can take it apart and reassemble it as many times as you like. The durability of your puzzle will depend on the quality of the cardboard and glue you used, as well as how carefully you handle the pieces. To keep your puzzle pieces organized and prevent them from getting lost, store them in a small bag, a resealable plastic container, or a decorative box. This makes it easy to grab your custom puzzle for another fun assembly session whenever the mood strikes.
What is the best type of cardboard to use?
The best type of cardboard for DIY jigsaw puzzles is sturdy and relatively flat. Cereal boxes are a good starting point for smaller puzzles, offering a decent level of thickness. For larger or more durable puzzles that you want to last, opt for thicker cardboard from shipping boxes. Corrugated cardboard from shipping boxes provides excellent rigidity and a satisfying weight. Ensure the cardboard is clean and free from major creases or damage. If using corrugated cardboard, you might want to glue your image to the smoother side for a cleaner finish. For an extra-sturdy puzzle, consider gluing two pieces of thinner cardboard together before attaching your image.
How long does it take to make a DIY jigsaw puzzle?
The total time to make a DIY jigsaw puzzle can vary, but the active crafting time is typically around 45 minutes to an hour. This includes preparing the image, applying glue, adhering it to the cardboard, and drawing the puzzle lines. The most significant time commitment is the drying period for the glue, which can take anywhere from 30 minutes to a couple of hours, depending on the type of glue used and environmental conditions. The cutting process itself can take anywhere from 15 minutes for a simple grid to 30+ minutes for intricate interlocking shapes. So, while active work is relatively quick, plan for a few hours total from start to finish to allow for proper drying.
What Next?
Congratulations on creating your unique DIY jigsaw puzzle! The possibilities are endless, from personalizing puzzles with family vacation photos to crafting educational puzzles for children. Once assembled, consider framing your completed masterpiece as a piece of art, or store the pieces in a decorative box or a custom-made pouch for future enjoyment. For your next project, explore different cutting techniques, try larger or smaller puzzles, or even create a 3D puzzle effect by layering cardboard. This rewarding craft offers a tangible and enjoyable way to bring your favorite images to life.
Free: 10 Paper Crafts Anyone Can Make in 5 Minutes
Get our beginner guide + new craft ideas weekly.
No spam. Unsubscribe anytime.
Did you complete this activity?
Related