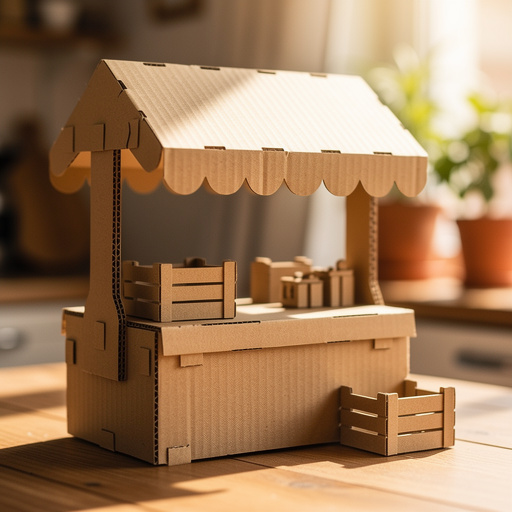
The Ultimate DIY Cardboard Box Puppet Theater: From Simple Stage to Storytelling Magic
Transform a humble cardboard box into a captivating puppet theater, igniting imagination and bringing stories to life for hours of screen-free fun.
Quick answer
To make a DIY puppet theater, you'll need a large cardboard box (approx. 24"x18"x18"), a craft knife, ruler, paint, and scissors. The process takes about 2-3 hours and is perfect for families wanting creative, screen-free entertainment. For a 24" wide box, the stage opening will be roughly 18" wide by 15" tall.
What you need
Shop on Amazon · As an Amazon Associate we earn from qualifying purchases. Links above are affiliate links — we may earn a commission at no extra cost to you.
There are countless ways to build a puppet theater, from elaborate woodworking projects to simple fabric drapes. But for families seeking an accessible, budget-friendly, and highly customizable option, the cardboard box method is truly a winner. It's a fantastic way to repurpose materials you likely already have, and it offers endless possibilities for personalization. Plus, it’s a project kids can genuinely participate in, fostering creativity and a sense of accomplishment. I remember one year my daughter insisted on decorating our theater like a giant slice of pizza, complete with pepperoni cutouts! I've found that this sturdy, yet simple, cardboard box design is perfect for beginners, with tips to make it truly your own.
On this page
Step-by-Step Instructions
- 1
Step 1: Prepare the main box. Lay your large cardboard box on its side so the opening faces you; this will be the front of your theater. Keeping the top flaps can create a natural overhang for a marquee, while keeping the bottom flaps can add stability to the base. For a cleaner look and easier cutting, I recommend cutting off the top and bottom flaps flush with the box edges using your craft knife and ruler.

- 2
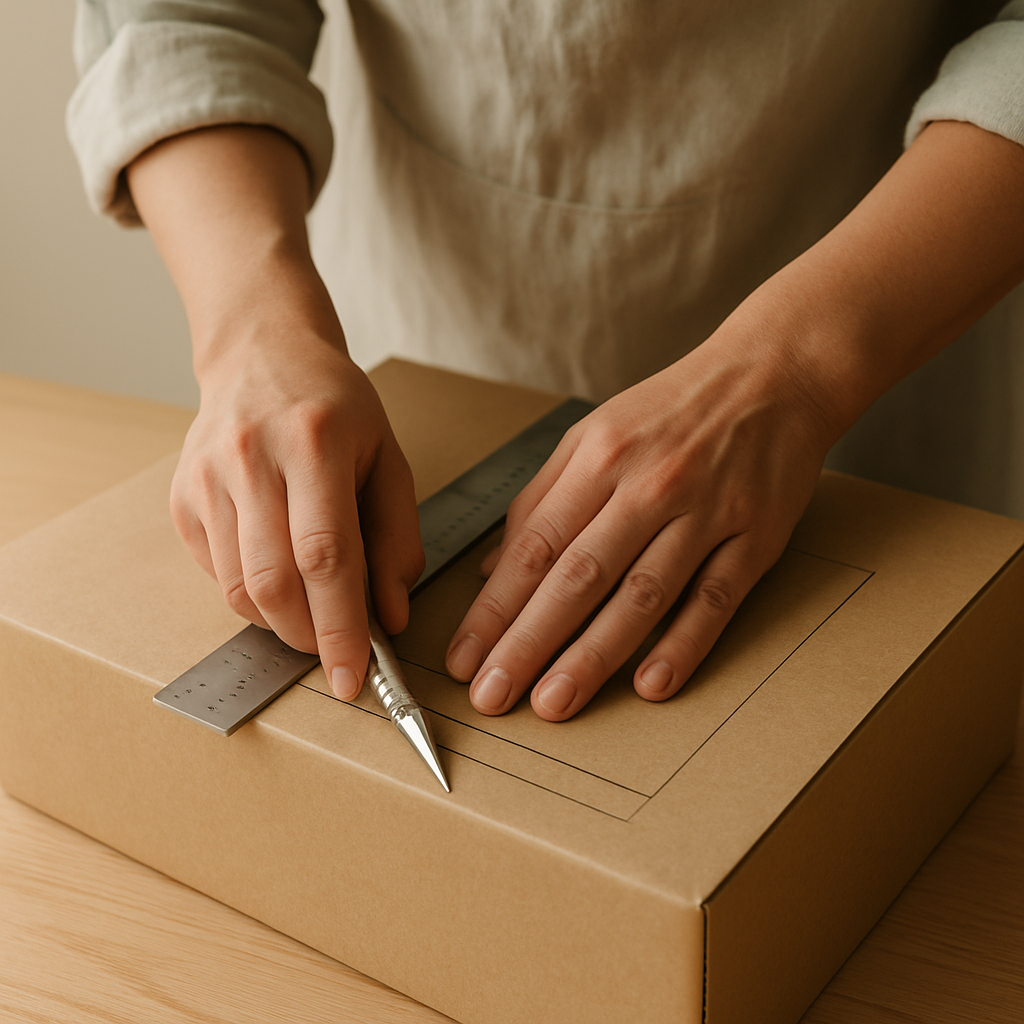
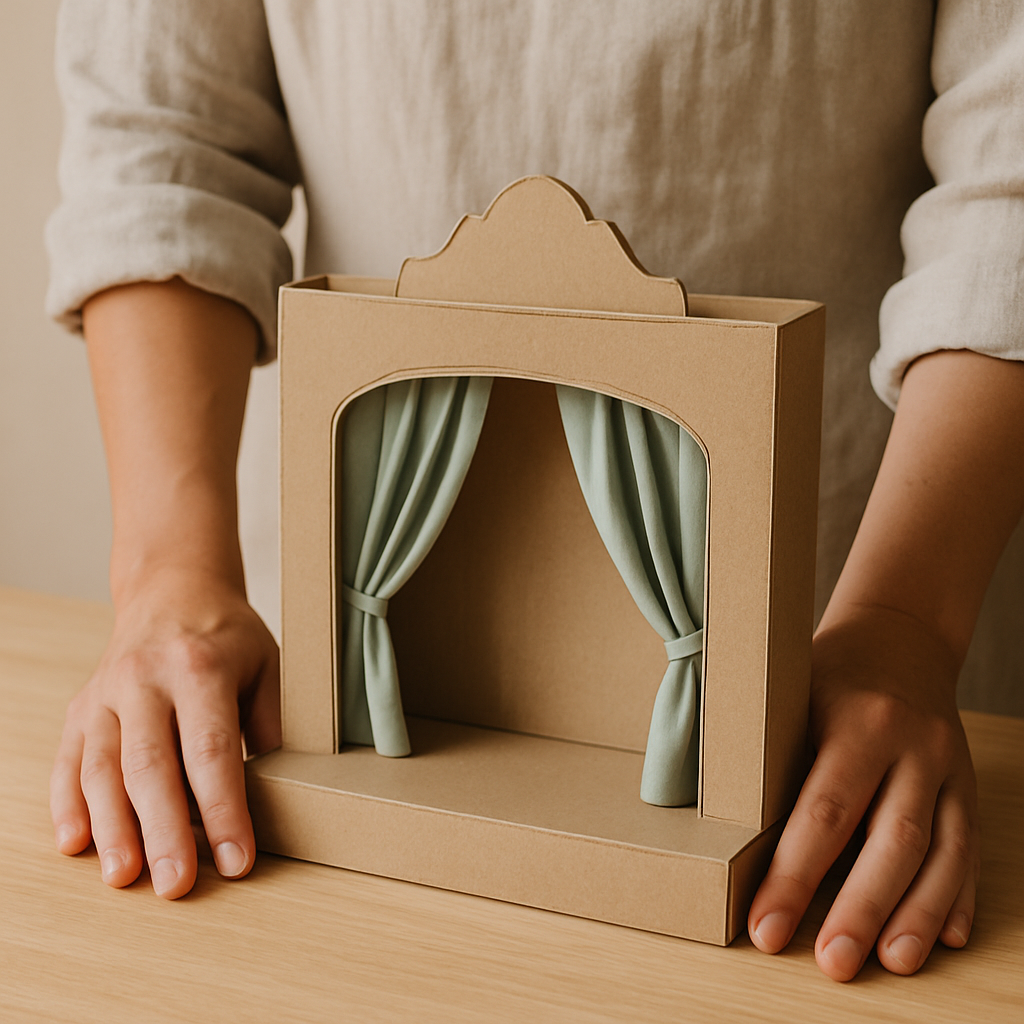
Step 2: Measure and mark the stage opening. On one of the wider sides of the box (this will be the front), measure and mark a rectangular opening for your stage. A good starting point is to leave a 3-inch border on the top and sides, and a 5-inch border at the bottom. For example, on a 24" wide box, this would create an opening of approximately 18" wide by 15" tall. Use your pencil and metal ruler to draw this rectangle precisely.

- 3
Step 3: Cut the stage opening. Carefully use your craft knife and metal ruler to cut along the marked lines, pressing firmly. Make multiple passes if needed to cut through the cardboard cleanly. If the cuts are slightly jagged, don't worry; you can reinforce and neaten the edges with packing tape in the next step.
- 4
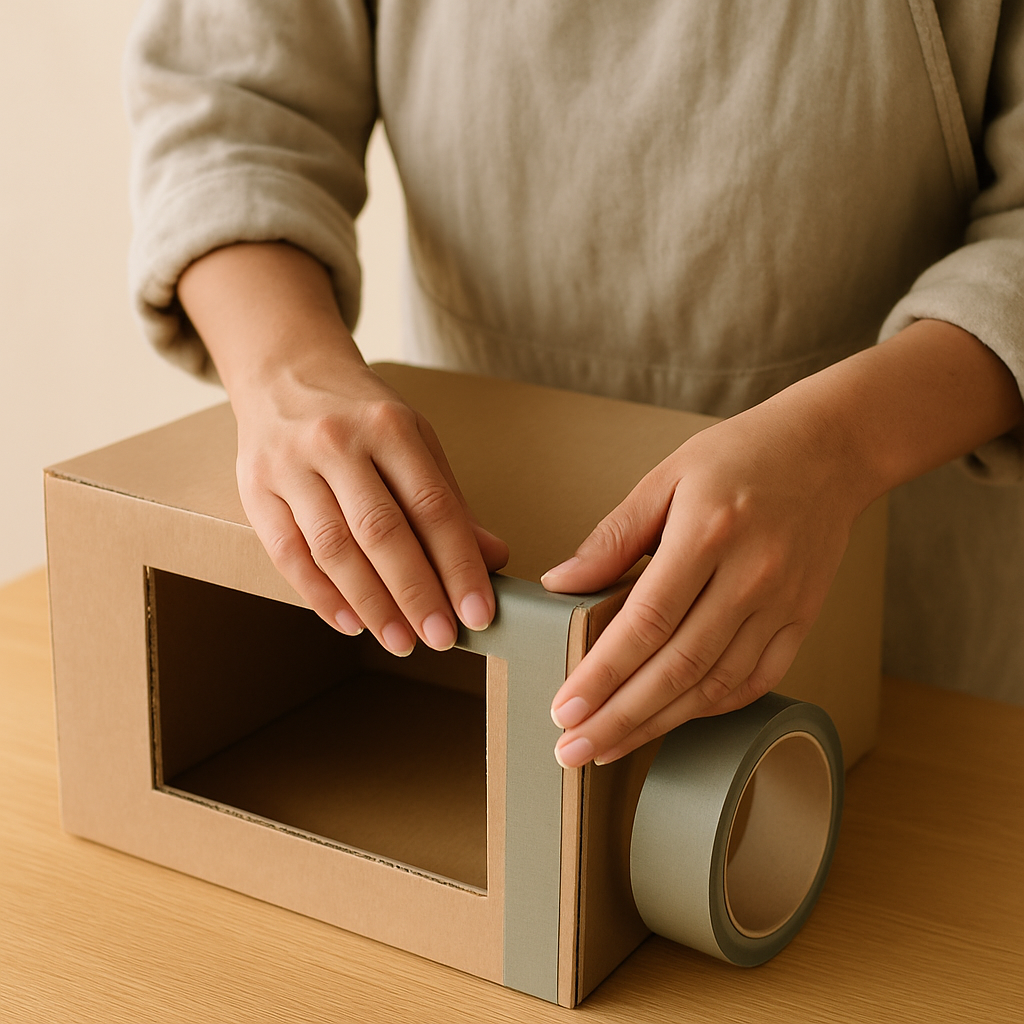
Step 4: Reinforce the stage opening edges. Once the opening is cut, use packing tape to secure all the cut edges. This prevents tearing and gives a neater, more durable finish. Wrap the tape around the edges, pressing firmly to ensure good adhesion. If the cardboard is thin, you might want to double-layer the tape for extra strength.
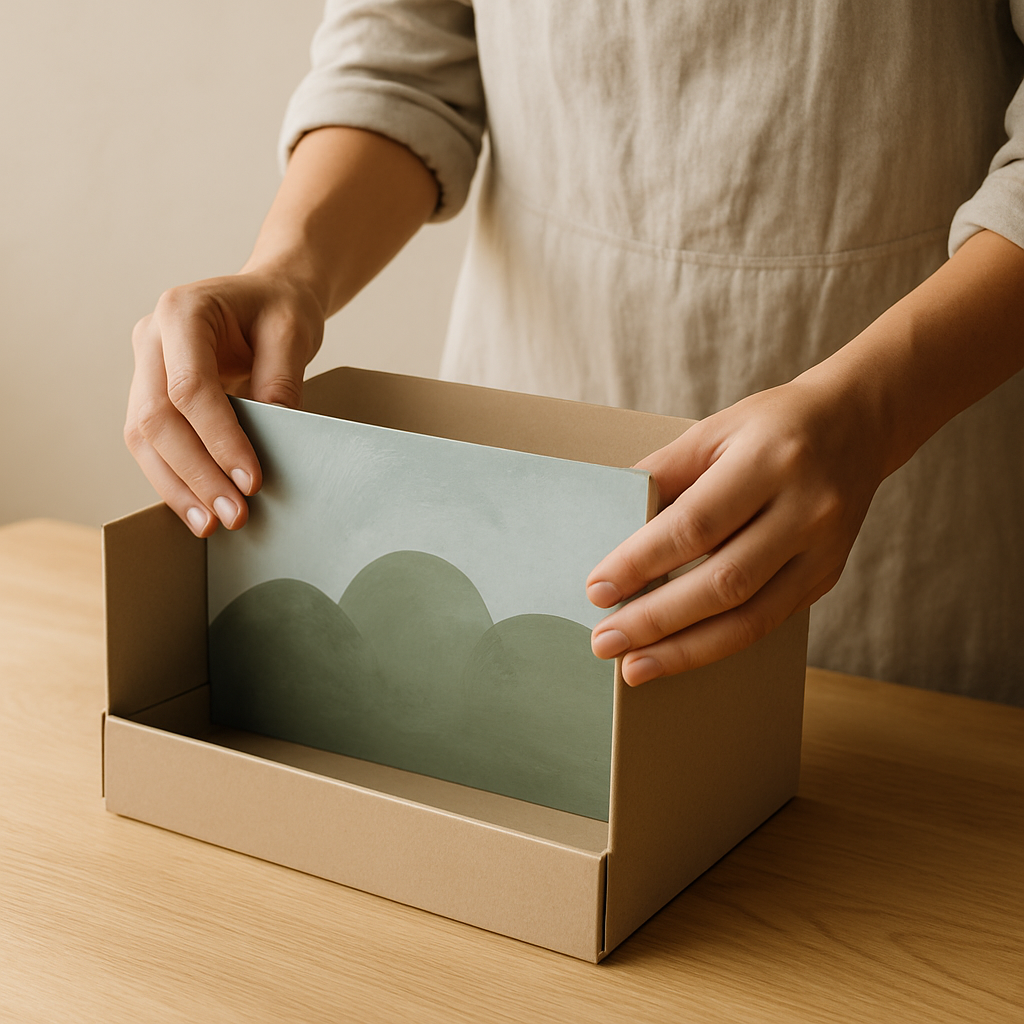
- 5
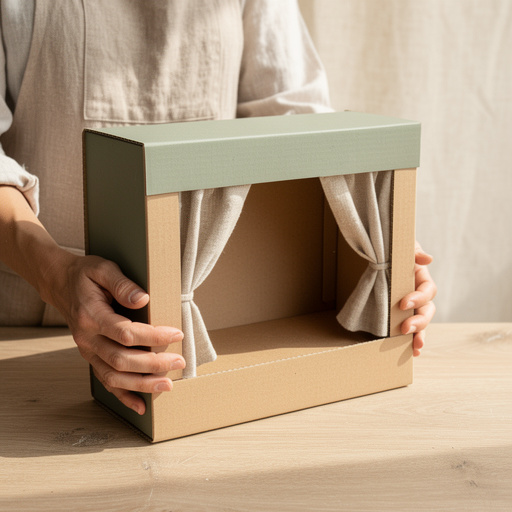
Step 5: Create and cut the backdrop. Cut a piece of cardboard from scrap material or the box flaps to fit the inside back of the theater, measuring the interior width and height of the back panel. This piece should be the exact width of your theater box (e.g., 24" wide) and about 18" tall to reach from the bottom to just below the stage opening. You can paint or draw a scene on this backdrop before attaching it, or leave it plain for a minimalist look.
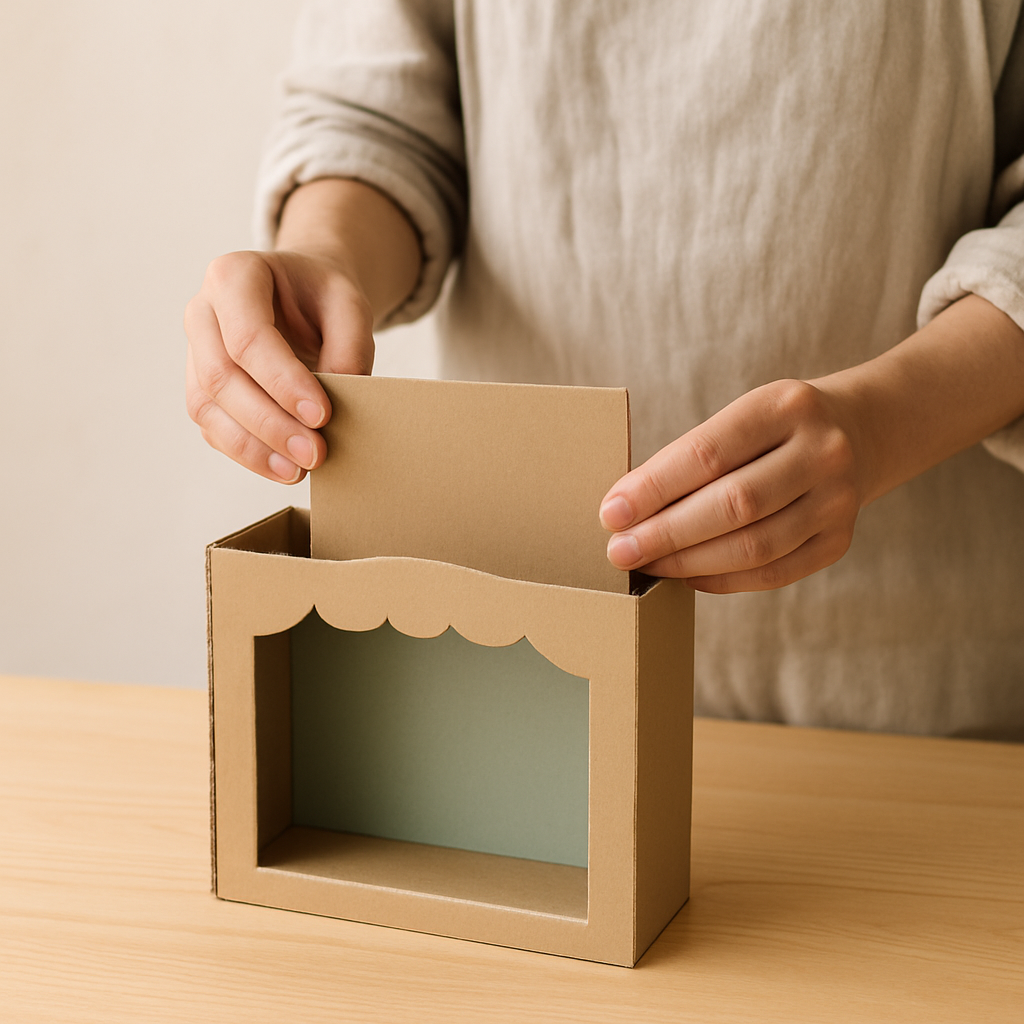
- 6
Step 6: Attach the backdrop. Slide the backdrop piece into the theater box, resting it against the back wall. Secure it in place using packing tape along the sides and bottom edges, ensuring it's snug and doesn't wobble. If you want to swap backdrops later, consider using Velcro strips for attachment.
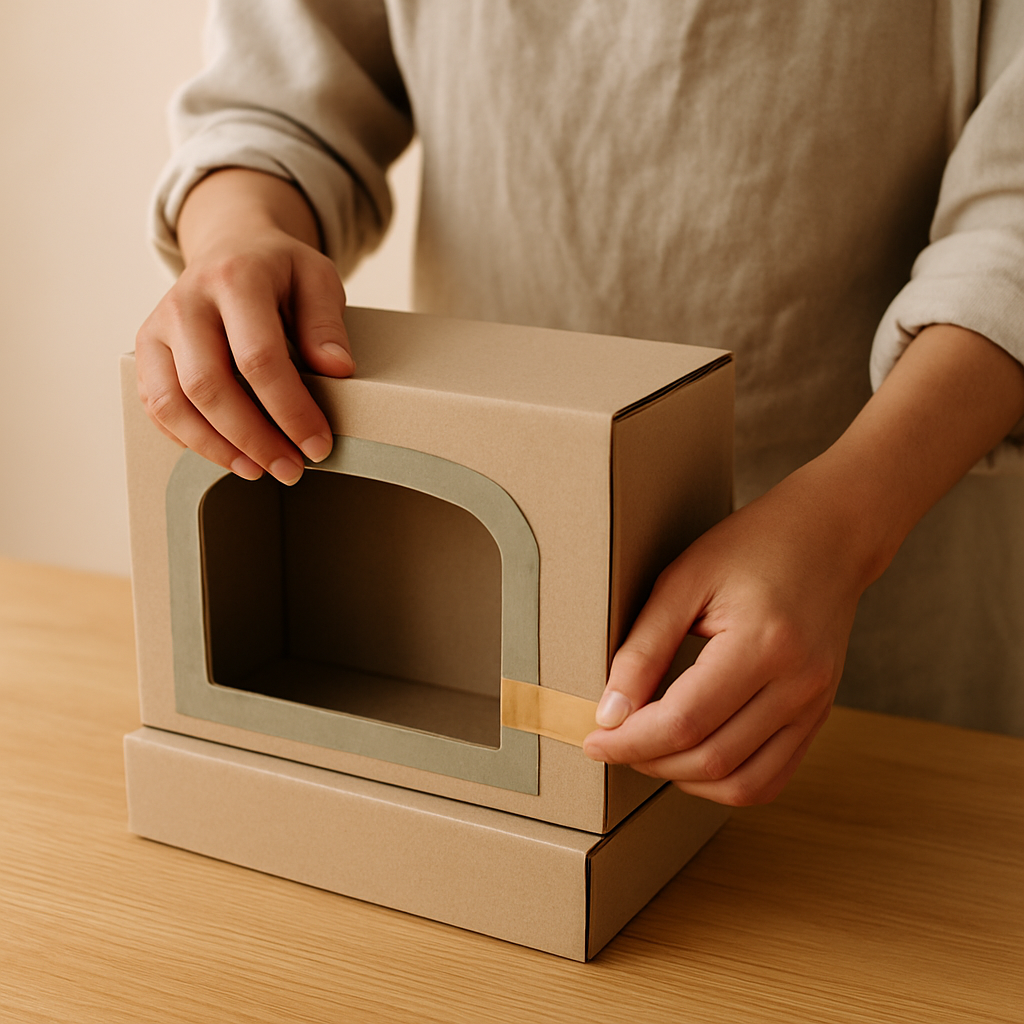
- 7
Step 7: Add a base for stability (optional but recommended). If your theater feels wobbly, use the smaller cardboard box as a base. Cut a section out of the top of the smaller box to create a cavity that the main theater box can sit inside. Then, place your main theater box on top of this smaller box, aligning the openings. Secure the main box to the base with plenty of packing tape around the connection points.
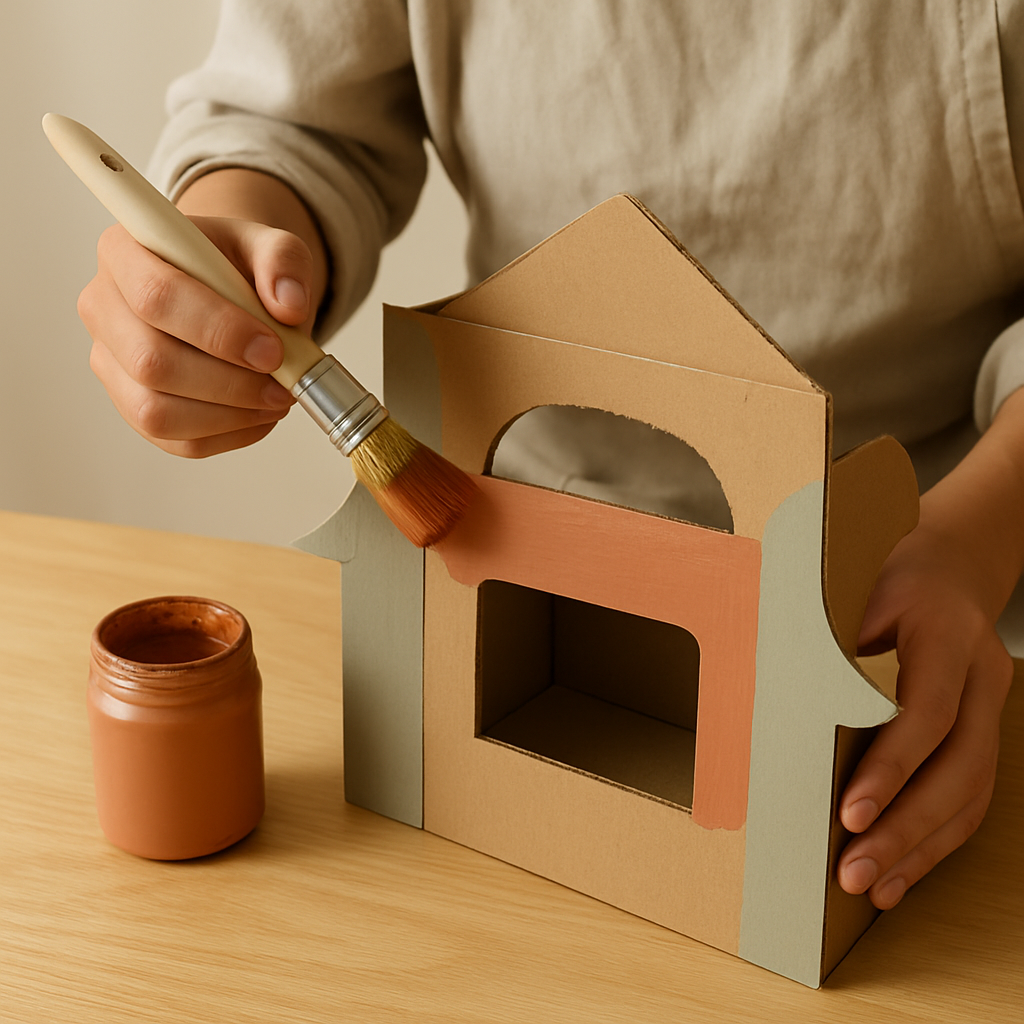
- 8
Step 8: Decorate the exterior. Now for the fun part! Use acrylic paints, markers, or crayons to decorate the outside of your puppet theater. Think about adding a marquee, curtains, or even the name of your theater. For a unique touch, consider a collage using old magazines or fabric scraps. For younger kids (under 5), focus on large stickers, washable paints, and simple shapes.
- 9
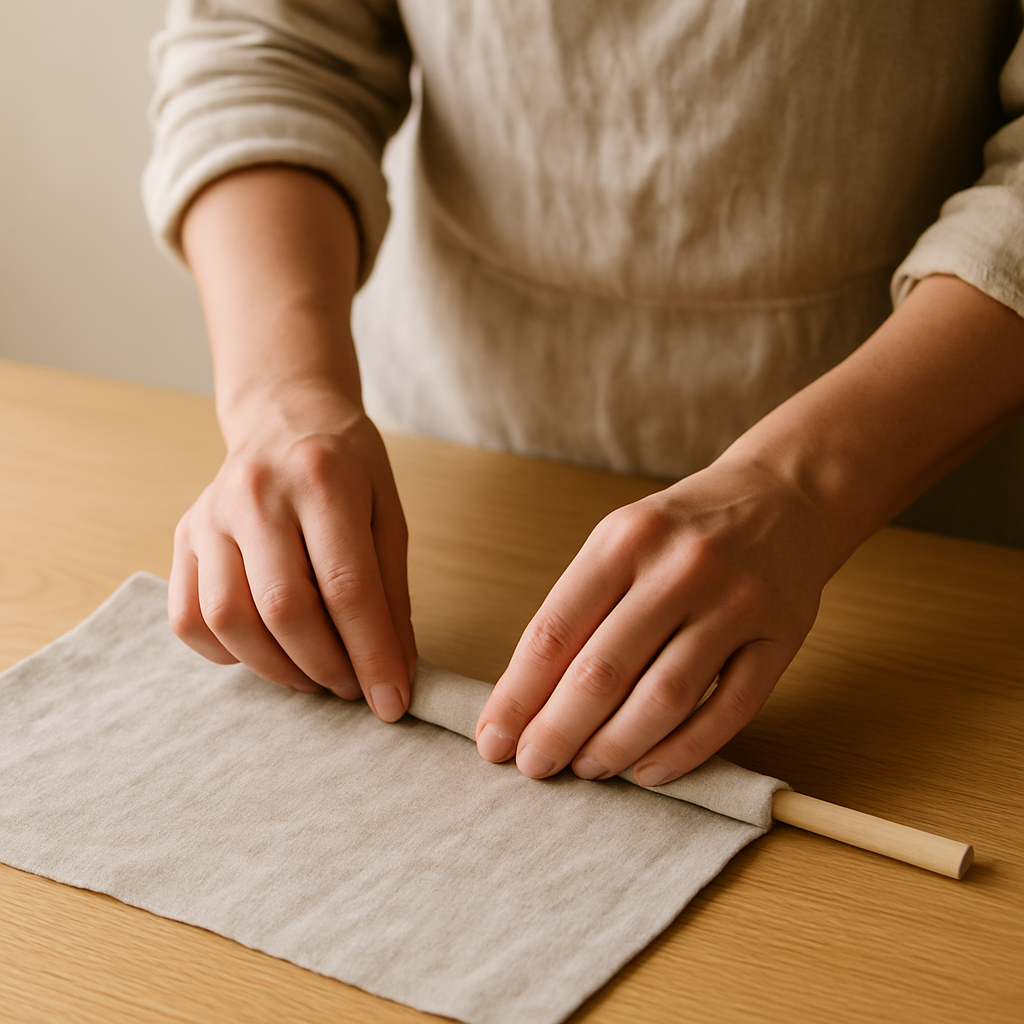
Step 9: Add curtains (optional). Cut two fabric panels slightly wider than your stage opening (e.g., 22" wide) and about twice the height (e.g., 30" tall). For a no-sew option, use fabric glue or iron-on hemming tape to create a 1-inch hem along all edges. Then, create a channel at the top by folding over about 2 inches and securing it with glue or tape. Slide a thin dowel rod (approx. 1/4 inch in diameter) or a sturdy paper straw through this channel and attach the ends to the inside top edges of your theater opening.
- 10
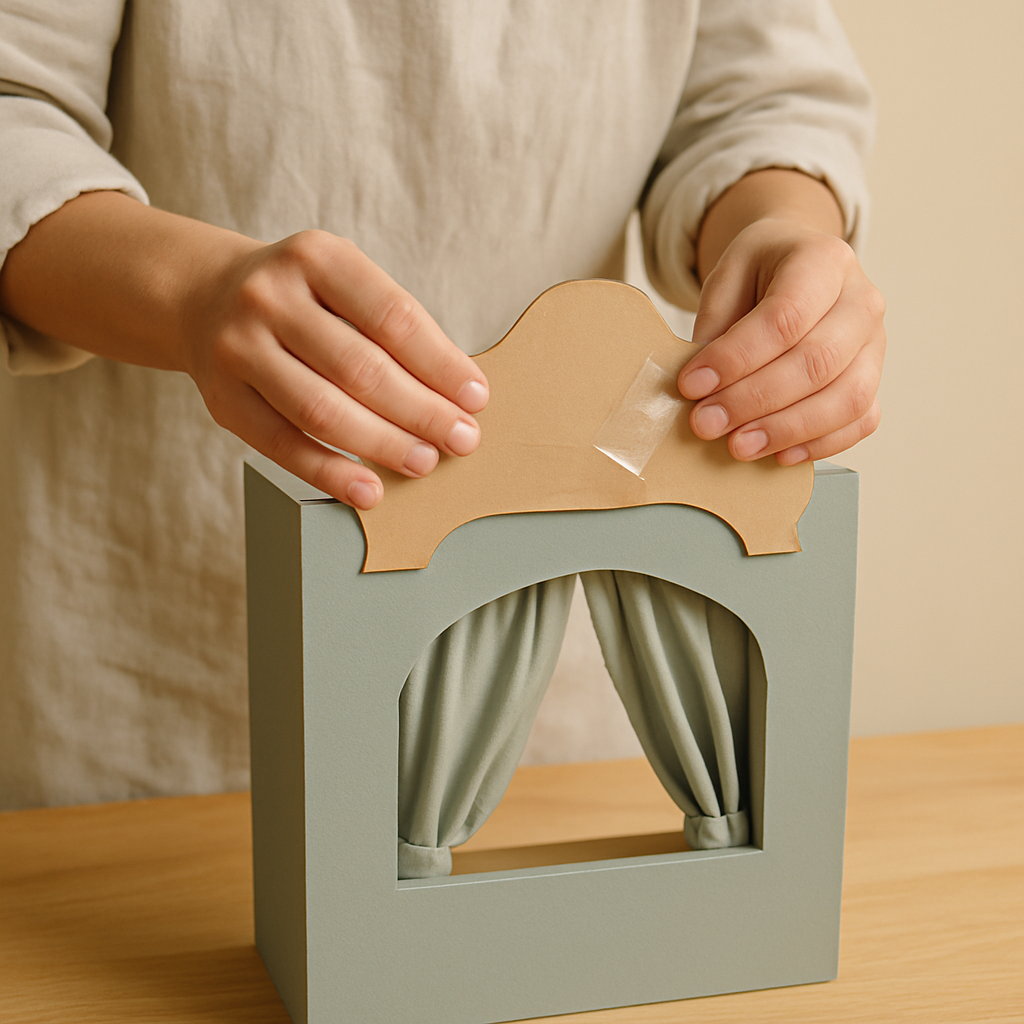
Step 10: Personalize the marquee. If your box has a top flap, this is perfect for a marquee. Cut it into a decorative shape (like a triangle or arch) and paint or write the theater's name on it. Secure it firmly to the top of the theater using packing tape. For a more elaborate marquee, you can cut a separate piece of cardboard and attach it above the main opening.
- 11
Step 11: Add decorative trim. Use colored paper, paint, or even glitter glue to add decorative trim around the stage opening or along the edges of the theater. This adds a professional and polished look. Consider using strips of contrasting colored paper (approx. 1 inch wide) to frame the stage opening, hiding any minor imperfections from cutting.

- 12
Step 12: Test the stage. Once all decorations are dry, place your puppet theater on a stable surface. Peek through the opening to ensure the stage area is clear and ready for performances. Check for any loose tape or decorations and secure them as needed.
- 13
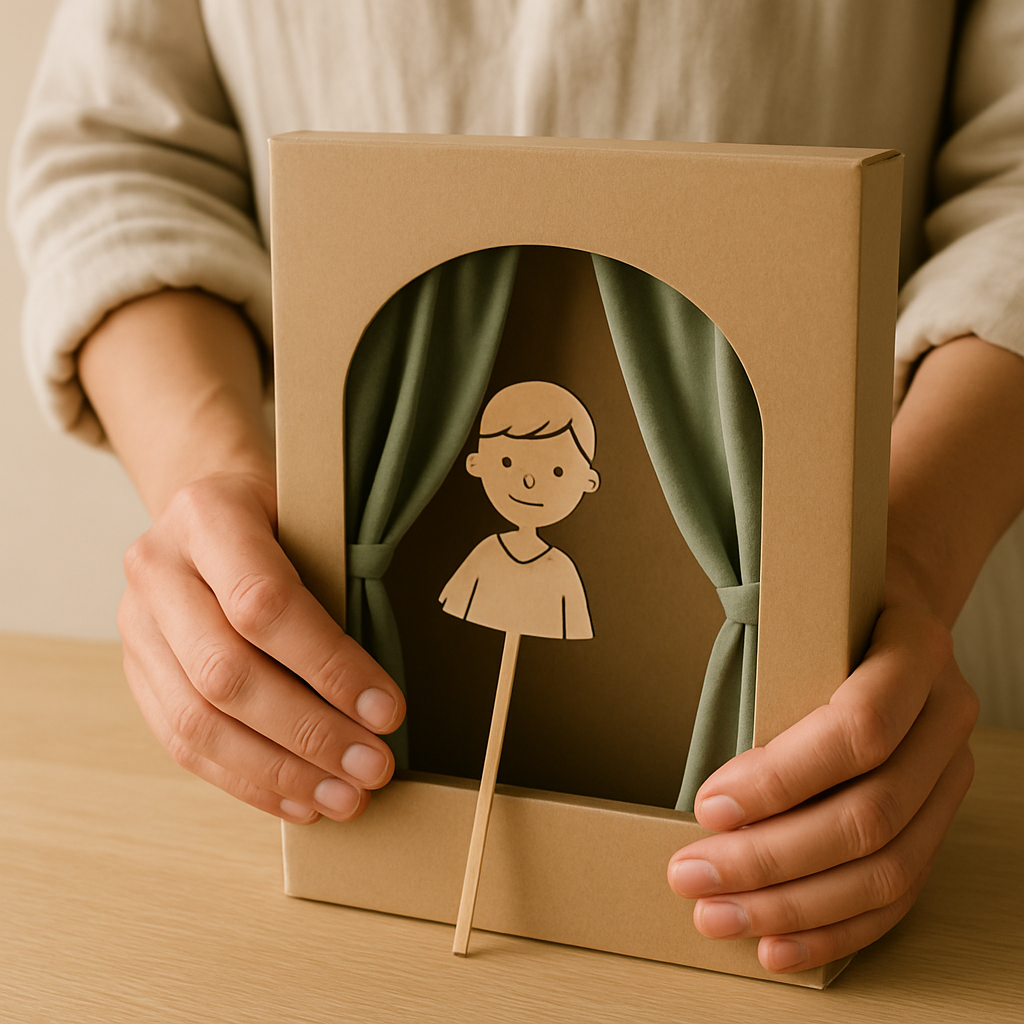
Step 13: Prepare your puppets. Gather or make your puppets! Simple stick puppets, finger puppets, or even sock puppets work wonderfully with this size theater. For stick puppets, ensure they are not too tall to fit comfortably behind the stage opening. If using larger puppets, you might need to cut the opening a bit wider or taller.
- 14
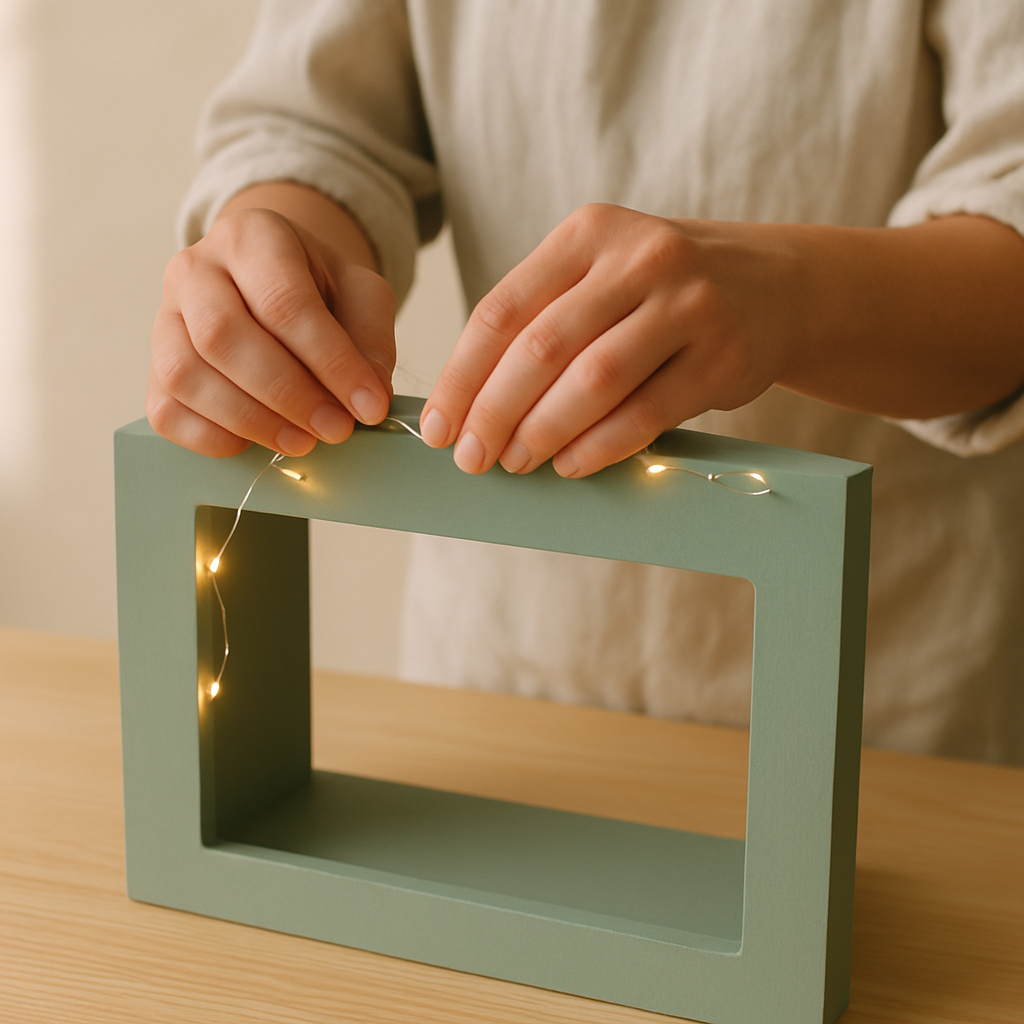
Step 14: Set up for a show. Position the theater so the audience has a clear view of the stage opening. Ensure good lighting on the stage area so the audience can see the puppets clearly. Battery-operated LED fairy lights can be taped inside along the top edge of the opening for a magical stage glow.
- 15
Step 15: Rehearse and perform! Encourage your child to create a story, practice their lines, and put on a show. The simple design allows for easy manipulation of puppets from behind the stage. For older kids (8+), encourage them to think about sound effects or even simple lighting cues.
- 16
Step 16: Clean up and store. When not in use, this cardboard theater can be easily stored. If it's particularly precious, consider reinforcing the interior corners with extra tape to prolong its life. If you've made it foldable, ensure all parts are securely attached for easy assembly later.
- 17
Step 17: Troubleshooting wobbly cuts. If your stage opening cuts are uneven, don't despair! Apply a thick layer of acrylic paint around the edges, or cover them with decorative paper strips or fabric tape. This hides imperfections and strengthens the opening, making it more durable for puppet manipulation.
- 18
Step 18: Troubleshooting weak structure. If the main box feels flimsy, reinforce all interior corners and seams with extra packing tape. You can also add cardboard 'beams' by cutting strips of cardboard (approx. 2" wide) and taping them along the inside edges of the box for added rigidity. This is especially helpful if using a thinner cardboard box.
- 19
Step 19: Troubleshooting paint adhesion. If your paint is flaking off the cardboard, it might be too glossy or the surface too smooth. Lightly sand the surface with fine-grit sandpaper before painting, or use a primer specifically designed for cardboard or mixed media. Alternatively, a matte finish paint will adhere better. I once had paint flake off a glossy box, and realized a quick sanding made all the difference.
- 20
Step 20: Troubleshooting curtain sag. If your fabric curtains are sagging, ensure they are securely attached at the top. You can add a thin dowel or even a sturdy straw across the top of the curtain opening and attach the fabric to that for better support and drape. Make sure the channel you created is wide enough for the rod to slide through easily.
Tips & Troubleshooting
- 1Budget-Friendly Materials: For an ultra-low-cost version, skip the paint and use colorful construction paper, old magazines for collage, or even crayons. The key is the structure; decoration is where you can save! Use leftover wrapping paper for a quick, vibrant finish.
- 2Age Adaptation (Younger Kids): For children under 5, pre-cut the stage opening for them. Let them focus on decorating the outside with large, easy-to-handle items like stickers, chunky crayons, or washable paint. Keep the design simple and sturdy, avoiding small, detachable parts.
- 3Age Adaptation (Older Kids): Older children (8+) can help with more precise cutting and even design more elaborate backdrops. Encourage them to think about adding sound effects (like clapping or rustling paper) or even simple lighting with battery-operated fairy lights taped inside. They might also enjoy researching different puppet theater styles for inspiration.
- 4Portability: If you want a more portable theater, skip the base box and instead cut the main box so it can fold flat. You can then create a separate, flat backdrop and attach curtains with Velcro for easy assembly and disassembly. This makes it great for taking to grandparents' houses!
- 5Puppet Variety: This theater works well with various puppets. For finger puppets, ensure the stage opening isn't too high. For larger puppets, you might need to cut the opening a bit wider or taller. Stick puppets are generally the easiest to manage, and you can even make your own by taping drawings to craft sticks.
- 6Safety First: Always supervise children when using craft knives or scissors. Ensure all painted surfaces are completely dry and non-toxic before allowing children to play with the theater. Secure any added elements firmly to prevent choking hazards. If using battery-operated lights, ensure the battery pack is inaccessible to very young children.
- 7Unique Angles: Consider a 'no-sew' vs. 'basic woodworking' comparison if you were to offer alternative designs. For this cardboard version, we're focusing on the no-sew approach. Another unique angle is integrating storytelling prompts directly into the design, like a 'story starter' panel on the marquee. Here are a few prompts to get you started: 'A lost astronaut lands on a strange planet and meets an alien who loves to sing,' or 'Two best friends discover a secret map leading to a hidden treasure in their backyard.'
- 8Failure Troubleshooting: If the cardboard tears during cutting, don't fret! Reinforce the tear with strong tape and then cover it with a decorative element like a painted patch or a sticker. This turns a mistake into a design feature.
- 9Comparison of Methods: While this tutorial focuses on the no-sew cardboard method, it's worth noting other approaches. Fabric theaters are quick to assemble but may lack structural integrity. Basic woodworking offers durability and a professional finish but requires tools and skills. Cardboard offers the best balance of accessibility, affordability, and customization for most families.
Related Activities You Might Enjoy
Frequently Asked Questions
What are the best materials for decorating a DIY puppet theater?
You have so many options! Acrylic paints offer vibrant colors and good coverage on cardboard. Markers are great for details and quick designs. Crayons are perfect for younger children. For a textured look, consider gluing on fabric scraps, yarn, or even natural materials like leaves. Stickers and glitter glue add sparkle and personality. If you want a professional finish, try covering sections with decorative paper or wrapping paper. Always ensure any paints or glues used are non-toxic and child-safe.
How can I make my cardboard puppet theater more durable?
Durability is key for repeated play! Start with a sturdy, thick-walled cardboard box. Reinforce all cut edges and interior corners with strong packing tape or duct tape. You can also add extra cardboard 'beams' inside along the seams for added rigidity. Covering the entire exterior with a layer of Mod Podge or a similar sealant can protect the paint and cardboard from moisture and wear. If you're adding fabric curtains, use strong fabric glue or sew them on for extra hold.
What's the easiest way to add curtains to a cardboard puppet theater?
The simplest method uses fabric glue or strong double-sided tape. Cut two fabric panels slightly wider than your stage opening and about twice the height. Fold over the top edge about 1 inch and glue or tape it down to create a channel. You can then slide a thin dowel rod, a sturdy straw, or even a piece of thick cardboard through this channel and tape or glue the ends of the rod to the inside top edges of your theater opening. This allows the curtains to hang freely and be pulled aside.
Can I make a puppet theater that folds for storage?
Absolutely! To create a foldable theater, choose a box that can be cut and reassembled. Instead of permanently taping the main box together, use tape strategically on the *inside* of the seams, allowing the box to fold flat. Alternatively, cut the box into panels and reassemble them using strong tape or even binder clips on the outside edges. For curtains, use Velcro strips attached to the fabric and the theater frame, so they can be easily removed for flat storage. A separate, foldable backdrop is also easier to store.
How can I add lighting or sound effects to my puppet theater?
For lighting, battery-operated LED fairy lights are a safe and easy option. Tape them along the inside top edge of the stage opening for a magical glow. For sound effects, encourage kids to use their voices, or provide simple props like a small drum, shakers, or even just rustling paper to create atmospheric sounds. You could even designate a 'sound effects corner' for a sibling or parent to manage.
What Next?
While elaborate puppet theaters can be stunning, the cardboard box approach offers unparalleled accessibility and affordability. For beginners, this method is a clear winner, requiring minimal tools and offering immediate, satisfying results. More experienced makers might explore adding fabric curtains, painted backdrops, or even simple lighting elements. Regardless of your skill level, the joy of creating a space for stories to unfold is immense. Start with the cardboard box – it’s the most forgiving and rewarding entry point into the wonderful world of DIY puppet theaters. It’s amazing what you can create with just a box and some imagination!
Free: 10 Paper Crafts Anyone Can Make in 5 Minutes
Get our beginner guide + new craft ideas weekly.
No spam. Unsubscribe anytime.
Did you complete this activity?
Related
You might also like
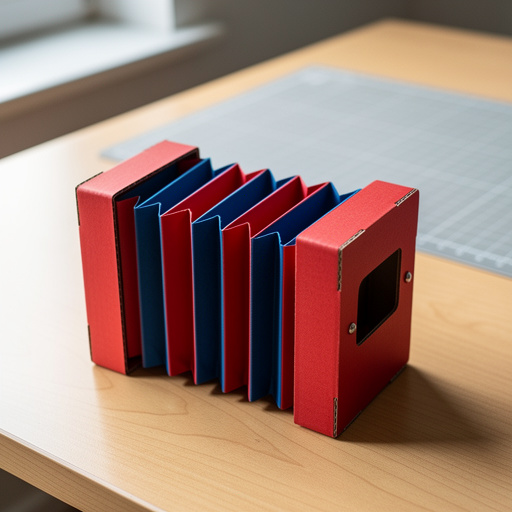
Cardboard Box Accordion
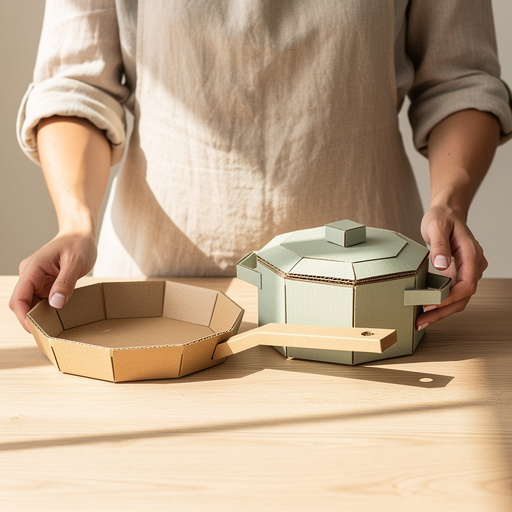
Cardboard Kitchen Creations
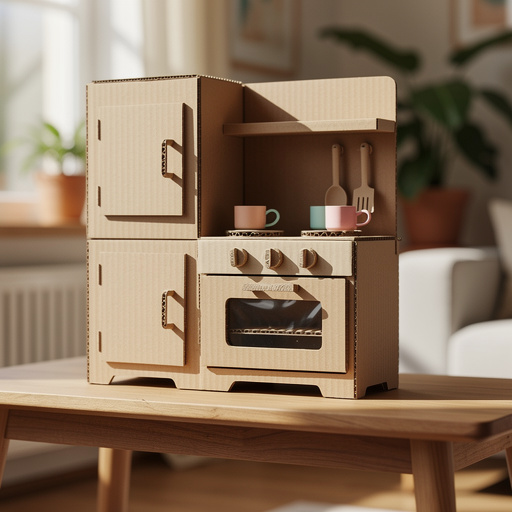
Cardboard Kitchen Creations
Cardboard Geometric Wall Art
Cardboard Castle Diorama