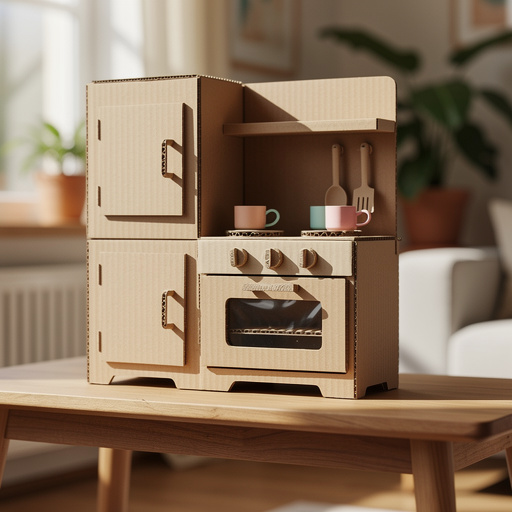
DIY Pretend Play Kitchen Props: Easy Cardboard Creations for Little Chefs
Transform everyday cardboard into a fantastic pretend play kitchen, complete with pots, pans, and utensils! This guide offers step-by-step craft tutorials for creating durable, imaginative props using recycled materials, with tips for adapting for different ages and troubleshooting common issues. We'll cover unique variations and how to make these props even more engaging for various age groups.

Quick answer
To make pretend play kitchen creations, you'll need cardboard, cardstock, child-safe scissors, glue, masking tape, and paints, taking about 60 minutes. This guide provides 15 easy steps to craft pots, pans, and utensils, with added tips for age adaptations, troubleshooting, and unique variations.
What you need
Shop on Amazon · As an Amazon Associate we earn from qualifying purchases. Links above are affiliate links — we may earn a commission at no extra cost to you.
Let's whip up some culinary fun with a DIY pretend play kitchen! I love using recycled materials to create toys that spark my kids' imaginations, and this set of cardboard pots, pans, and utensils is a huge hit. This guide will show you how to craft a charming set from simple cardboard. These durable, screen-free props are perfect for inspiring hours of imaginative cooking adventures, encouraging creativity and fine motor skills as your child plays chef. We'll even explore some unique twists and age-specific adaptations to make this project even more special!
On this page
Step-by-Step Instructions
- 1
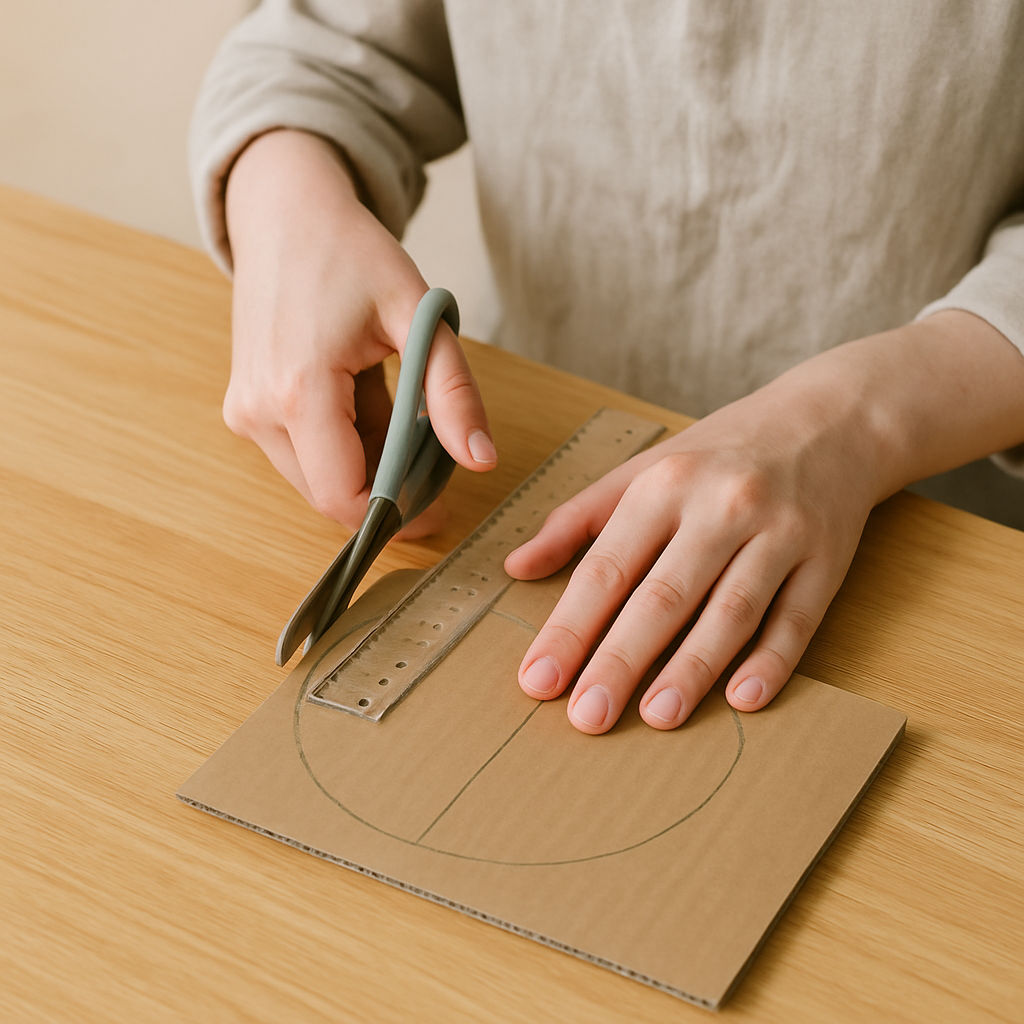
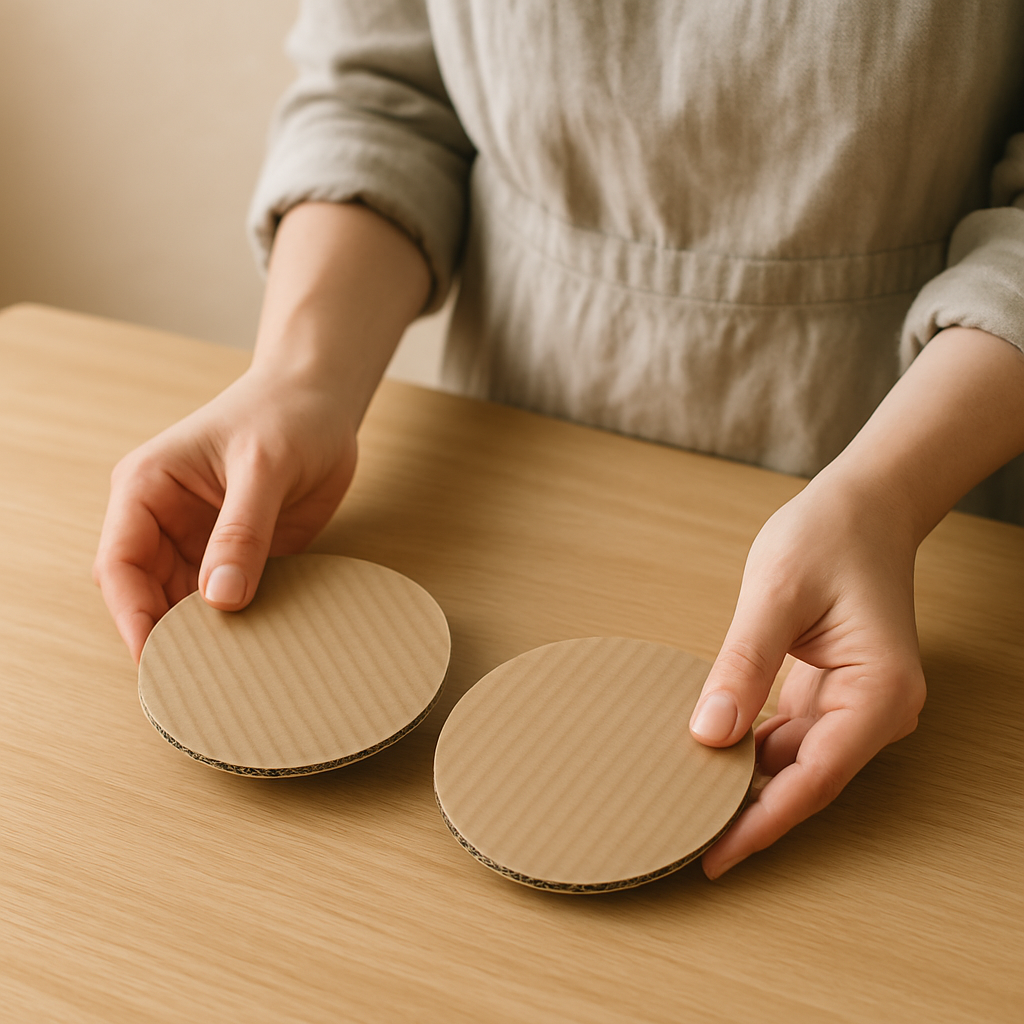
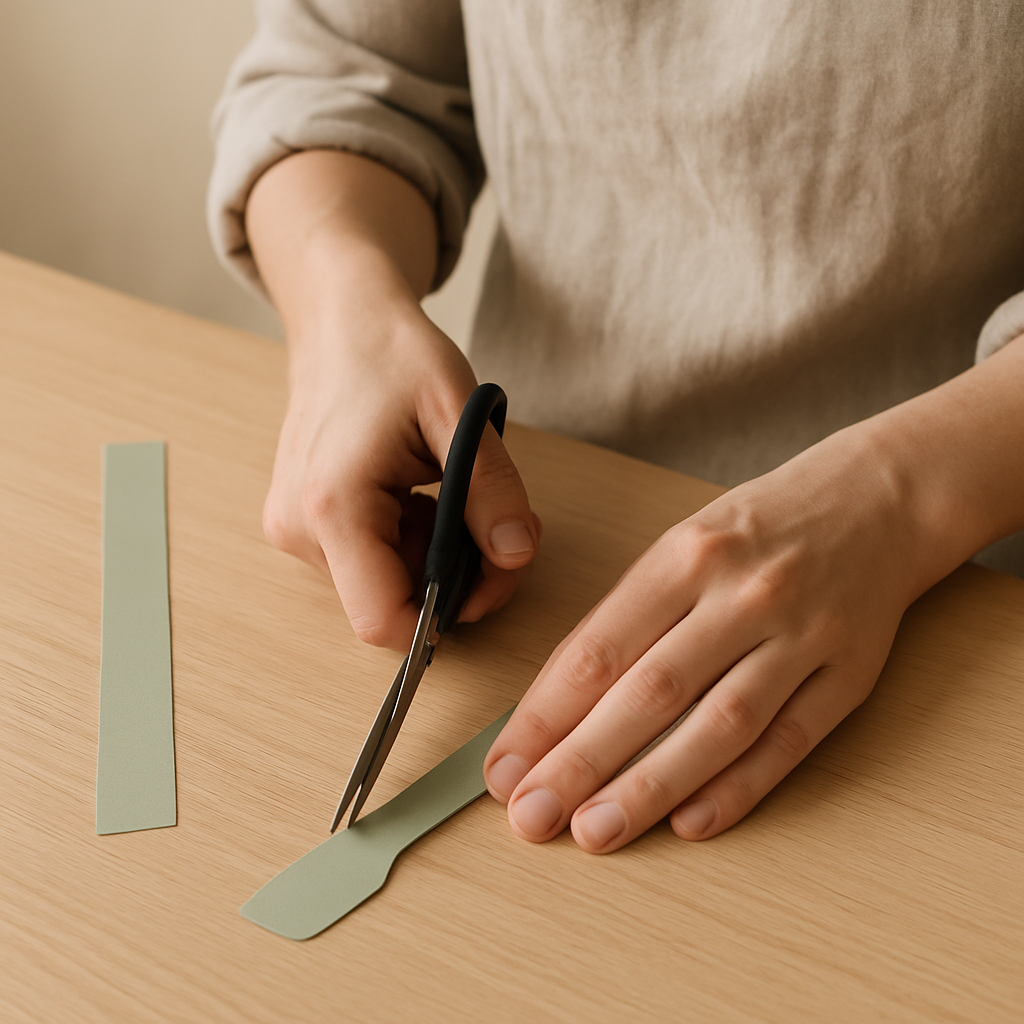
Step 1: For the frying pan base, cut a circle 15 cm in diameter from one sheet of corrugated cardboard using your ruler and pencil to guide your scissors. This will form the main cooking surface of your pan. If your cut is slightly uneven, you can trim it with scissors for a neater edge.
- 2
Step 2: Cut a second identical circle from the same cardboard sheet; these two circles will create the top and bottom of your frying pan. Ensure they are as close to the same size as possible for a neat finish, and if one is slightly larger, use it as the base.
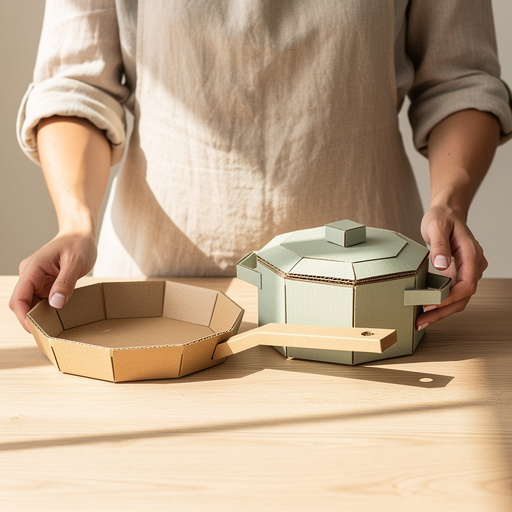
- 3
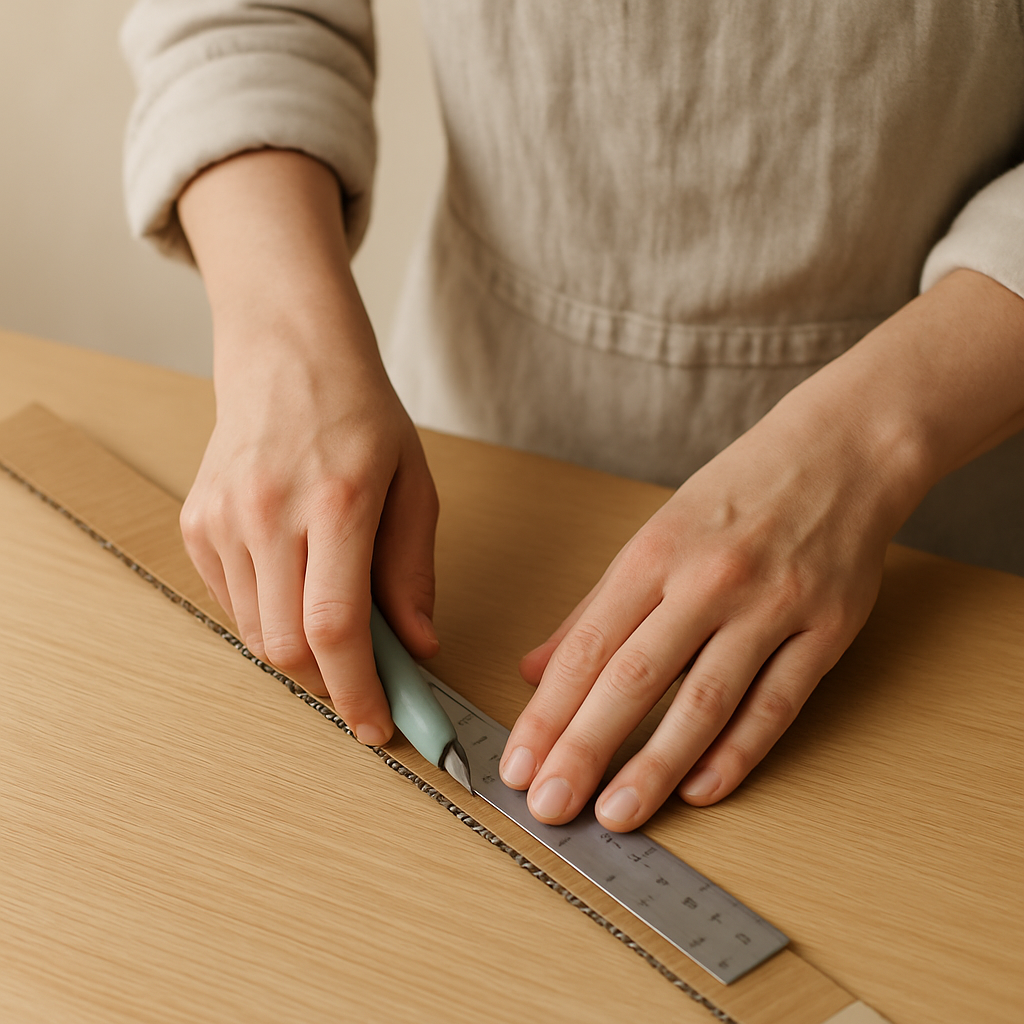
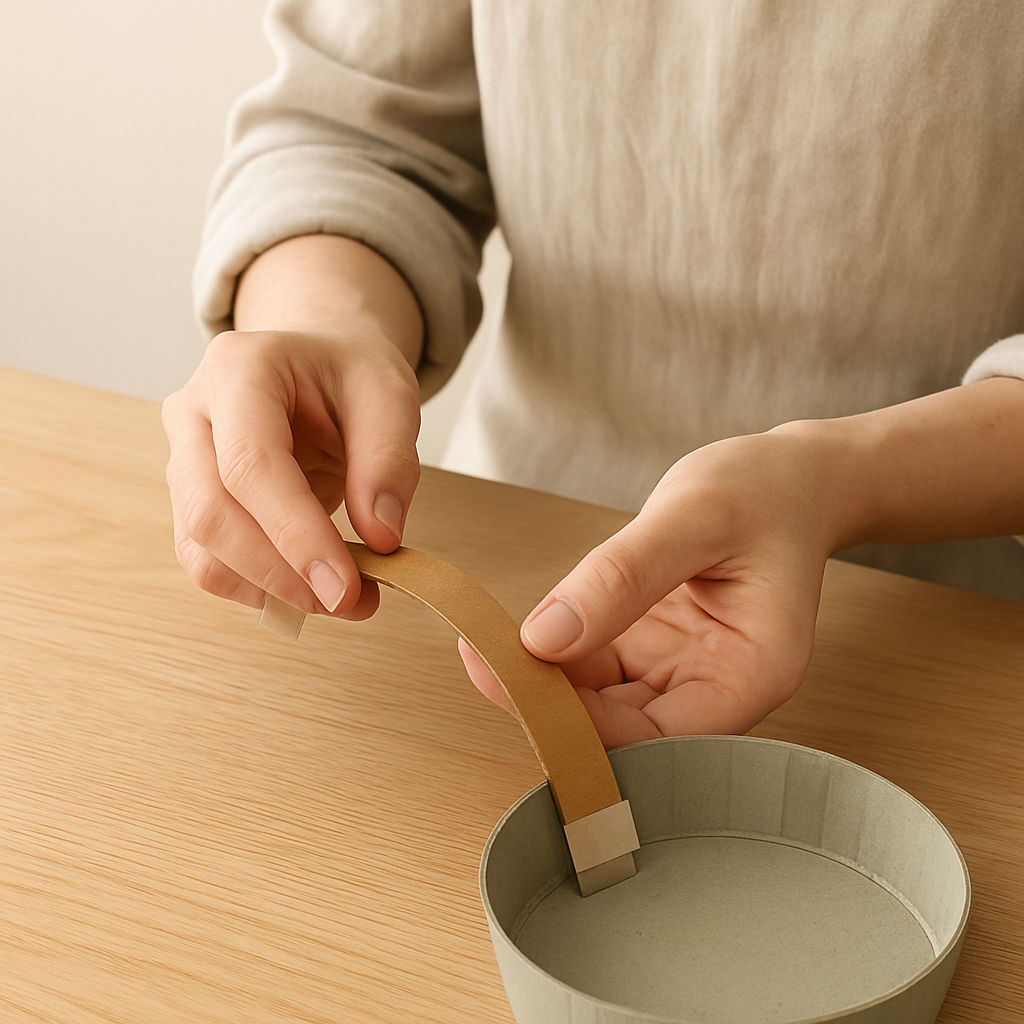
Step 3: Cut a strip of corrugated cardboard that is 3 cm wide and approximately 47 cm long. This strip will form the curved side wall of your frying pan. If your cardboard isn't long enough, securely tape two smaller strips together end-to-end to achieve the required length, ensuring the tape is on the underside of the strip.
- 4
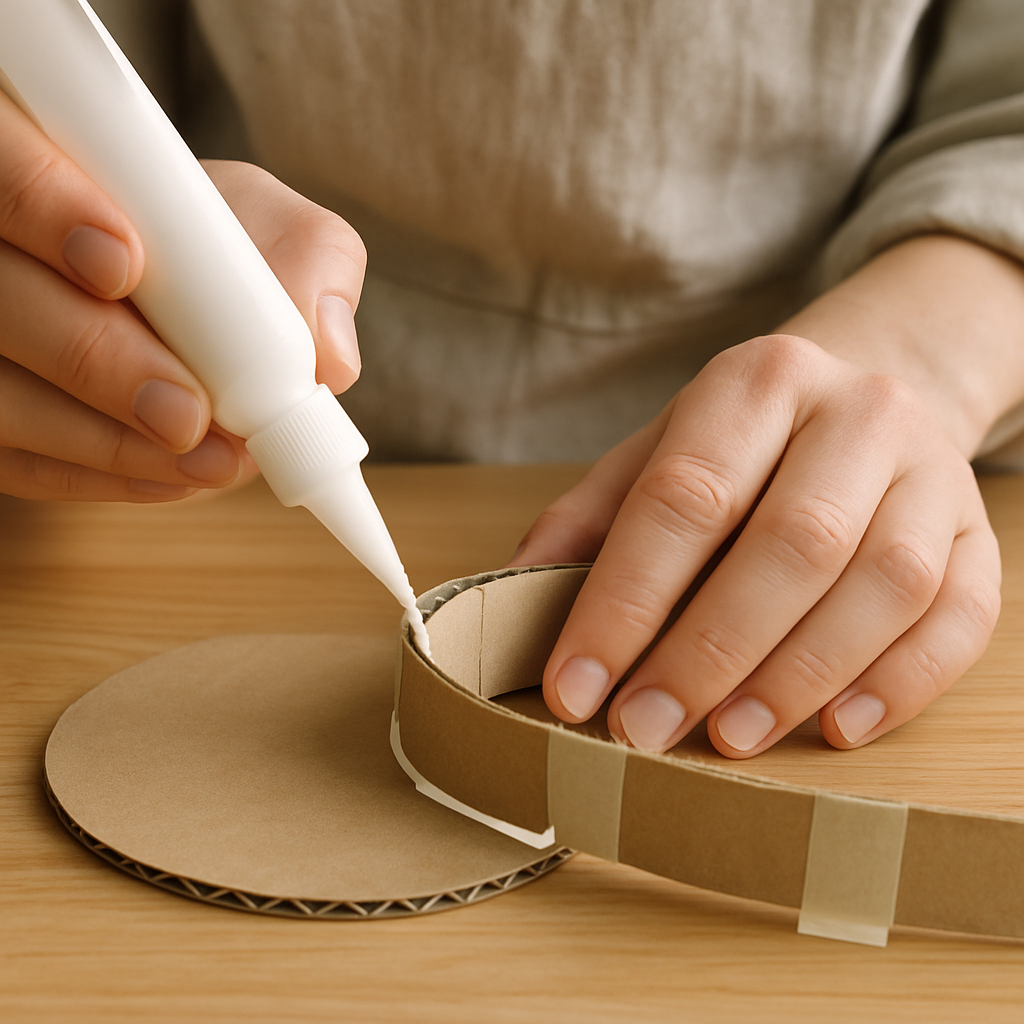
Step 4: Apply a thin, even line of white craft glue along the edge of one of the cardboard circles. Carefully press the 3 cm wide cardboard strip onto the glue, starting to form the side of the pan. Use masking tape at intervals to hold the strip in place while the glue dries, ensuring it adheres well to the edge.
- 5
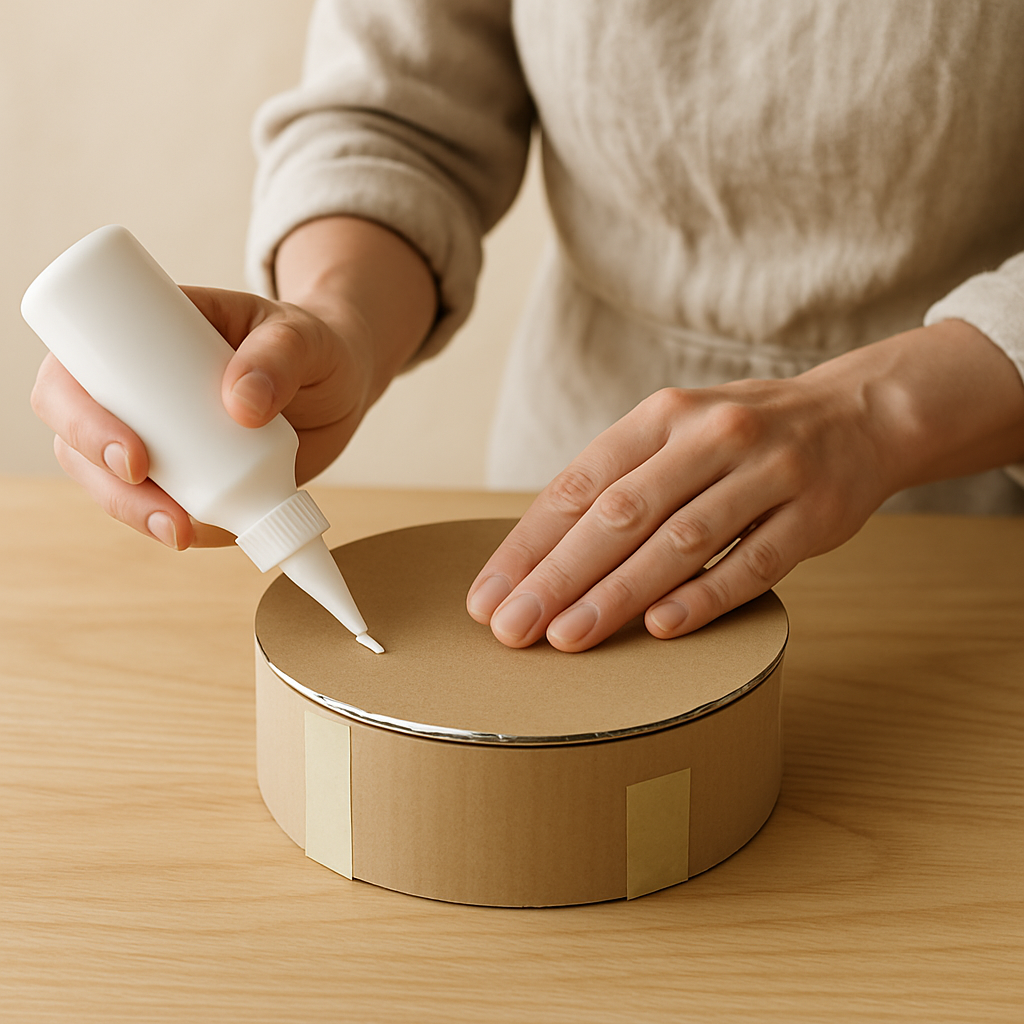
Step 5: Once the glue on the side strip is dry and secure, apply glue along the top edge of this strip. Align the second cardboard circle precisely on top of the first, enclosing the side wall, and tape it securely in place to maintain its shape while drying. If the circles don't align perfectly, gently trim the edges before taping.
- 6
Step 6: To create the frying pan handle, cut a strip of corrugated cardboard 2 cm wide and 12 cm long. Gently curve this strip to mimic the shape of a real pan handle, then glue one end to the side of the pan, approximately 2 cm from the rim. Reinforce the attachment with a small piece of masking tape on the underside where the handle meets the pan for extra stability.
- 7
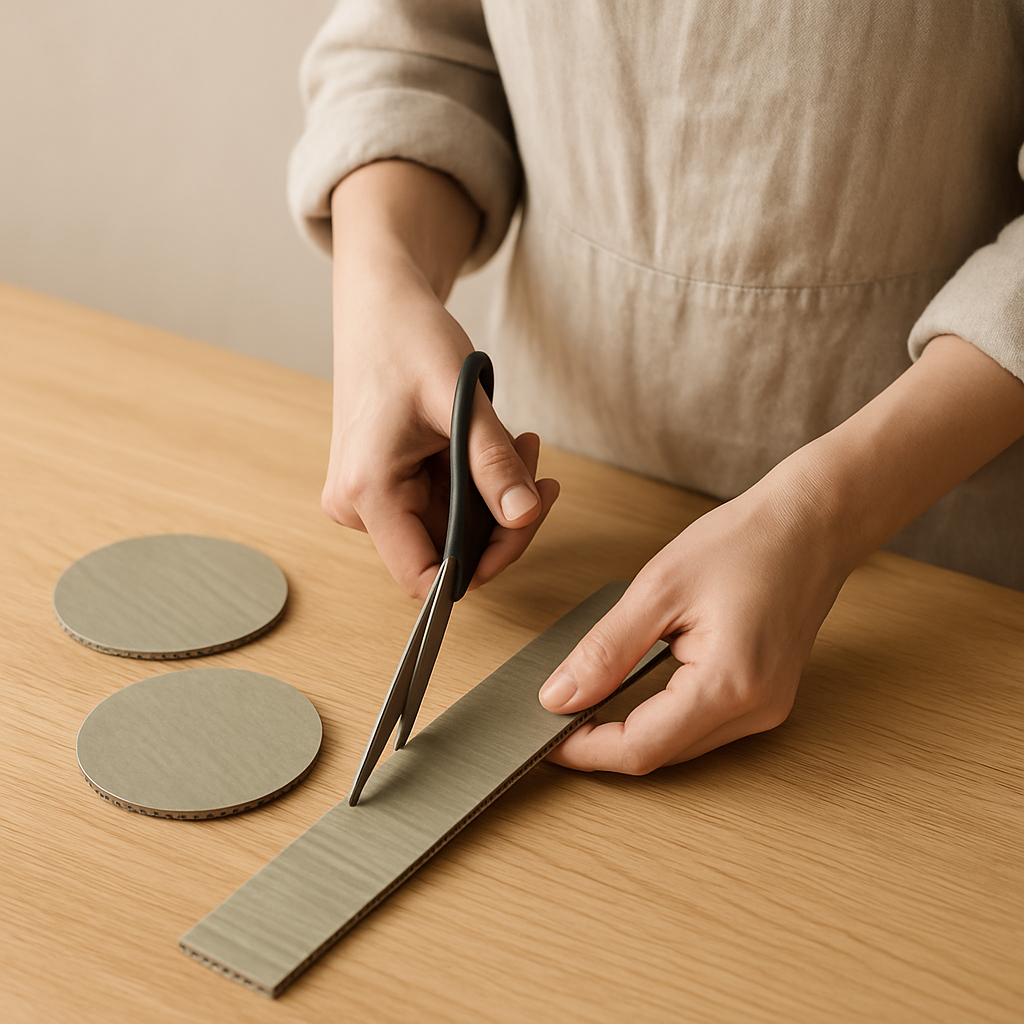
Step 7: To make a pot, cut two circles 12 cm in diameter from the remaining corrugated cardboard. Then, cut a strip of cardboard 3 cm wide and approximately 38 cm long for the pot's side wall. If the strip isn't flexible enough, gently score the inside of the curve with the back of your scissors to help it bend without creasing.
- 8
Step 8: Assemble the pot using the same gluing and taping method as the frying pan (Steps 4 & 5), ensuring the 3 cm wide side wall is securely attached to the edges of both 12 cm circles. Press firmly and use tape to hold it while the glue sets; if the cardboard tears, you can patch it with a small piece of tape.
- 9
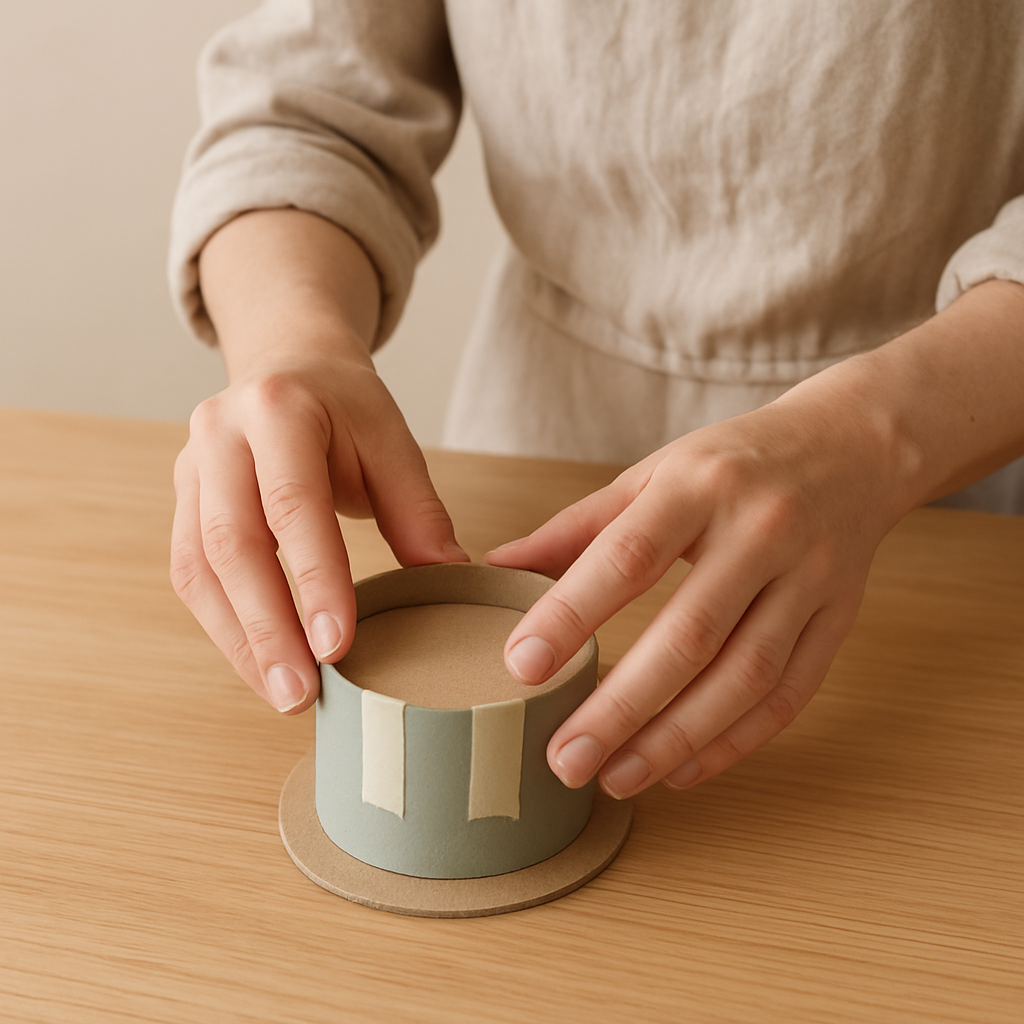
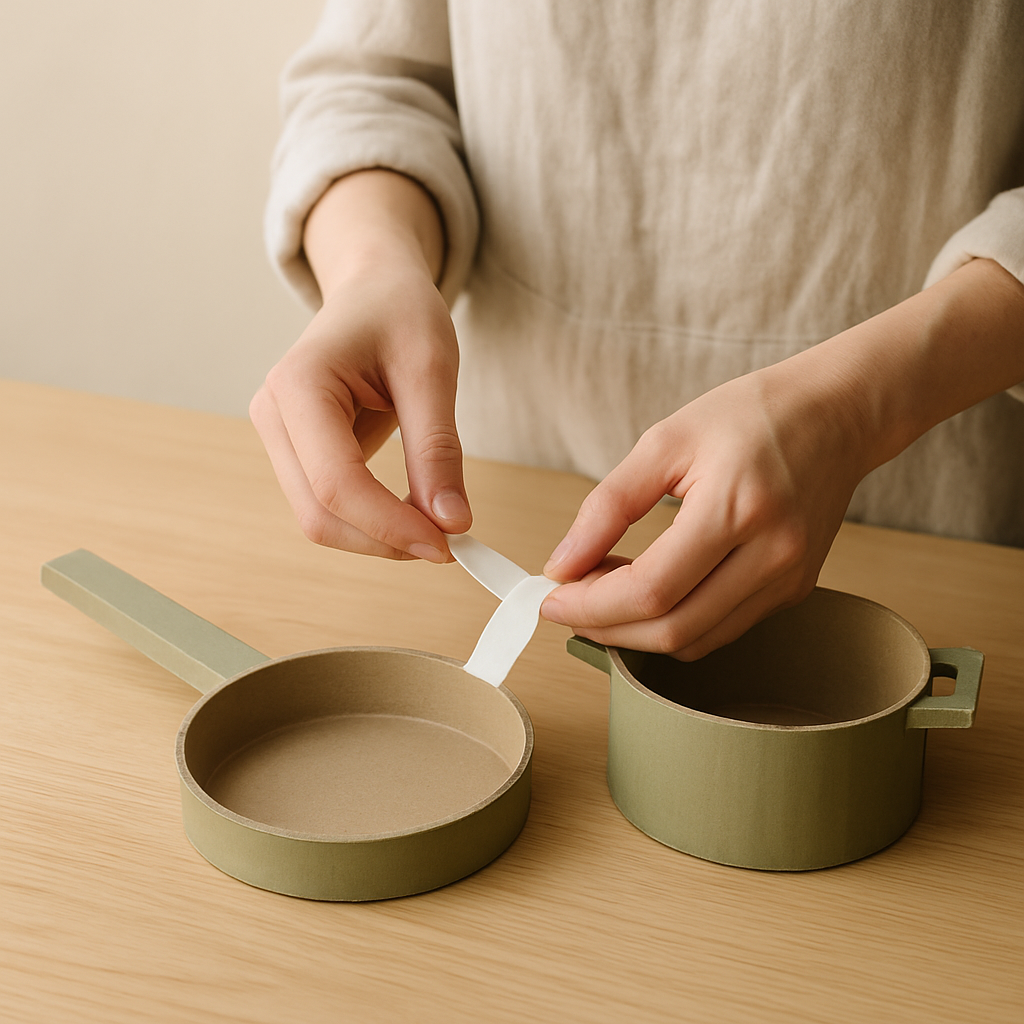
Step 9: For the pot handles, cut two small rectangles (3x5 cm) from the cardstock and fold them in half lengthwise to create a sturdy, doubled-up handle. Glue one folded half to the side of the pot, about 2 cm from the top rim, on opposite sides. Alternatively, if using jar lids, glue the rim of one lid to each side of the pot, ensuring the lid opening faces outwards, for a different handle style.
- 10
Step 10: To create a spatula, cut a long, thin rectangle (approx. 1.5 cm wide, 15 cm long) from cardstock. At one end, cut a slight curve to form the spatula head, making it wider than the handle. You can reinforce the handle by gluing a second identical strip of cardstock underneath it for added strength; if the cardstock tears, use a fresh piece.
- 11
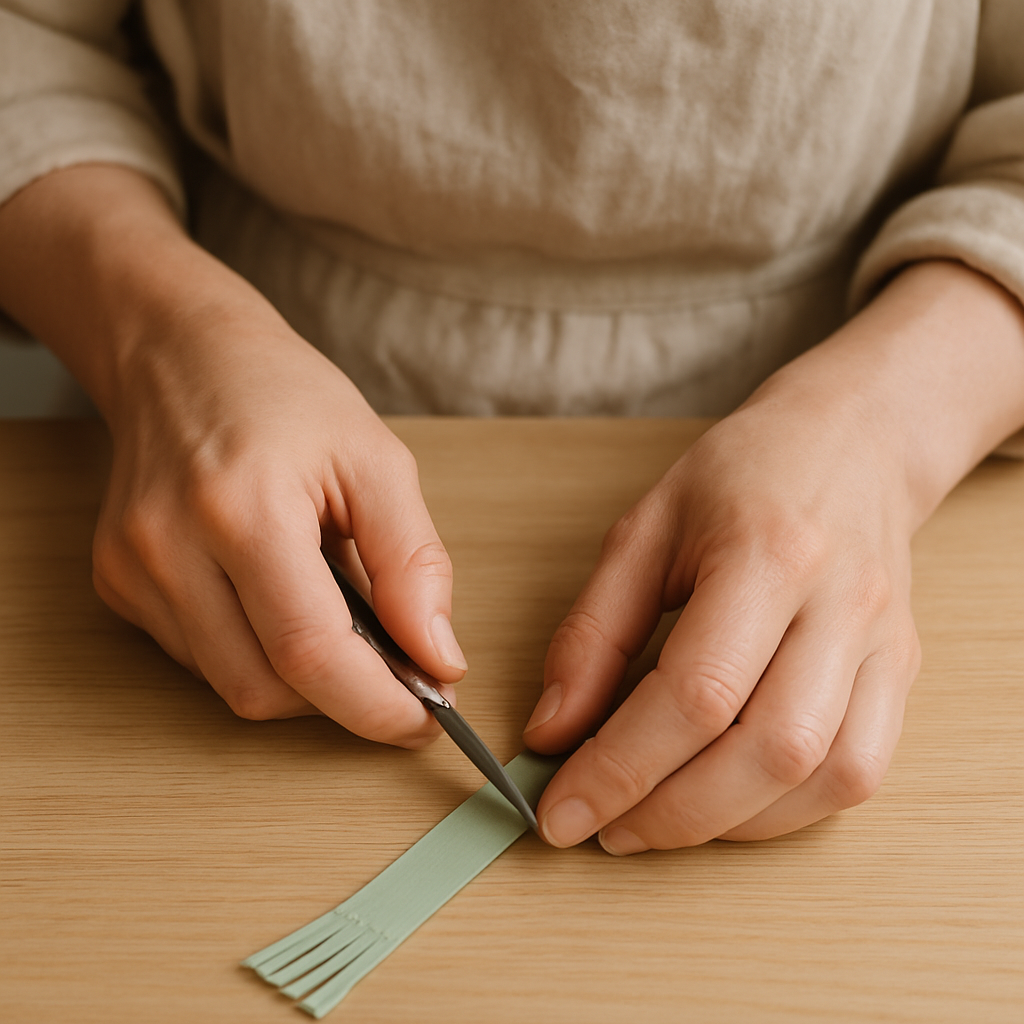
Step 11: For a whisk, cut another long, thin rectangle (approx. 1.5 cm wide, 15 cm long) from cardstock for the handle. At one end, carefully cut several thin strips (about 0.5 cm wide, 3 cm long) and bend them outwards to create the whisk effect. If the strips tear, a very sharp craft knife can be used for cleaner cuts, but this step requires direct adult supervision and should only be performed by the adult.
- 12
Step 12: Once all glue is completely dry, which usually takes at least 30 minutes, carefully remove any visible masking tape. If any edges feel rough or uneven, you can trim them carefully with your scissors for a smoother finish. If tape residue remains, gently rub it with a damp cloth.
- 13
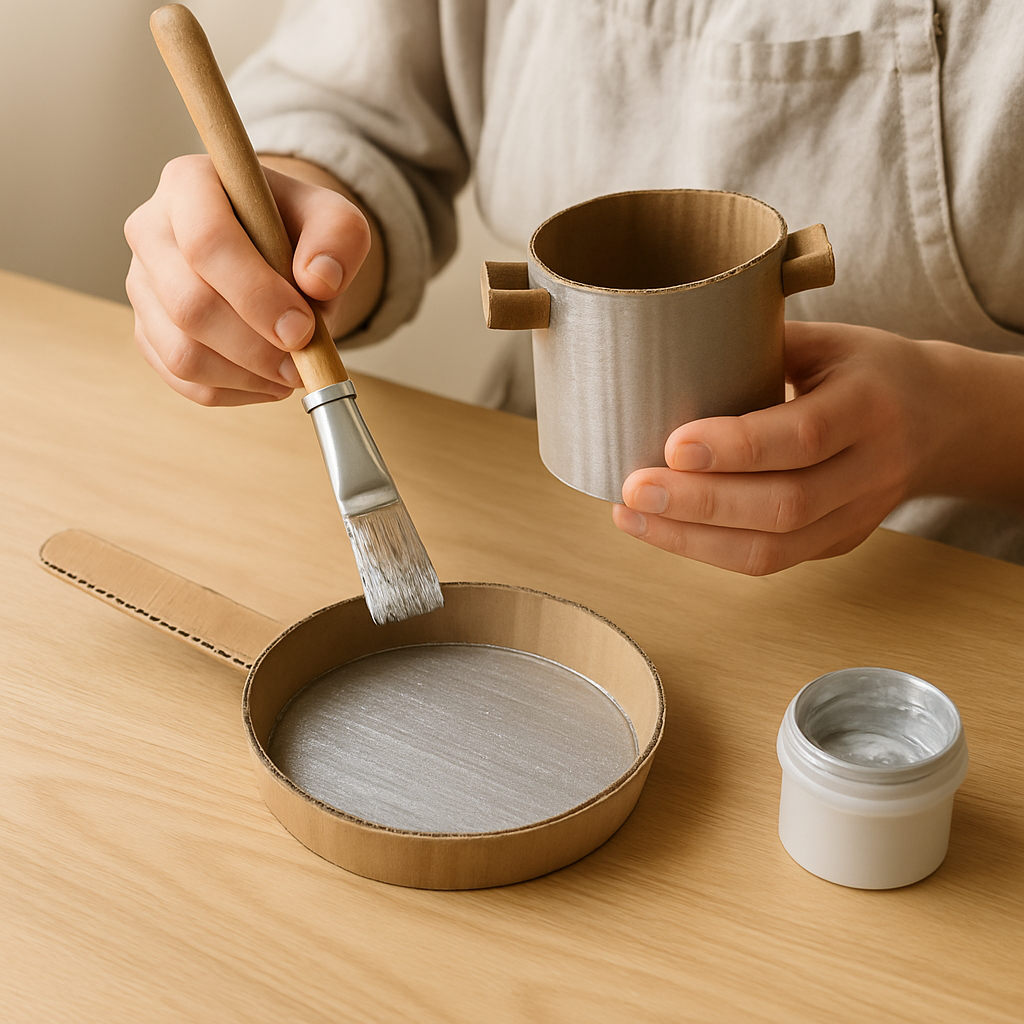
Step 13: Paint the frying pan and pot with silver or grey acrylic paint to give them a metallic look, mimicking real cookware. Let this base coat dry completely, which typically takes about 15-20 minutes. If the paint is streaky, apply a second coat.
- 14
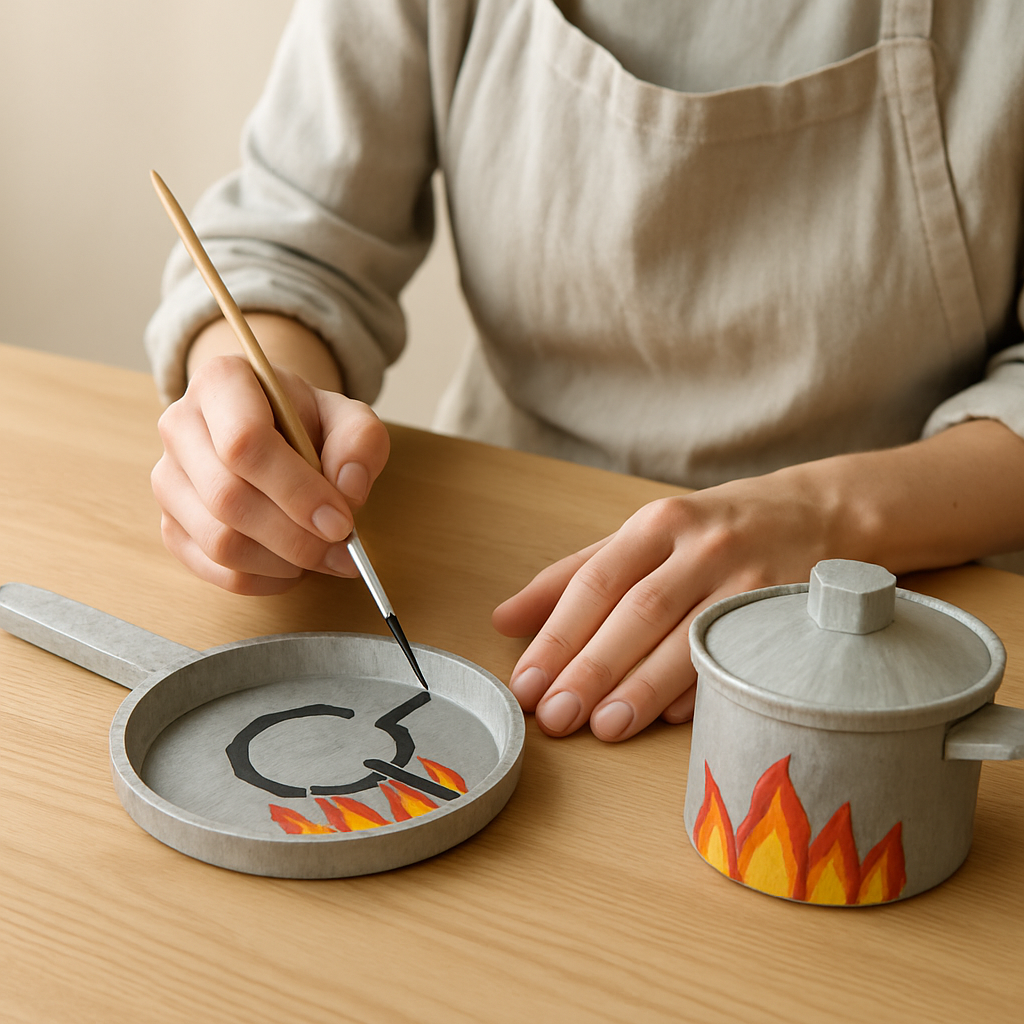
Step 14: Use black paint to add details like burner marks on the frying pan base or a decorative rim around the pot. Red and yellow can be used for 'flames' if you want to add a fun, dynamic element. Paint the spatula and whisk any color you like – bright colors are always a hit! For a unique variation, try adding a textured finish with a sponge.
- 15
Step 15: Allow all paint to dry thoroughly before letting your child enjoy their new kitchen creations; this usually takes about 20-30 minutes for acrylics. If the paint seems streaky, a second coat can be applied once the first is dry. For a glossy finish, a clear sealant can be applied after the paint is fully dry.
Tips & Troubleshooting
- 1If the cardboard strips for the pan/pot sides aren't bending easily, score them lightly on the inside of the curve with the back of your scissors along the length. This creates a crease that helps them bend smoothly without cracking. Be careful not to cut all the way through.
- 2For younger children (ages 3-4), pre-cut all the shapes and let them focus solely on the painting and decorating. They can also help apply glue to larger surfaces, but supervise closely to avoid excessive mess and ensure they use child-safe glue.
- 3Troubleshooting wobbly handles: If a handle feels loose, add an extra layer of glue and reinforce it with a small piece of masking tape on the inside of the pan/pot where it attaches. Let it dry completely before painting over the tape. For a more robust handle, consider using a thicker cardboard strip or doubling it up.
- 4To make your kitchen creations even more durable, consider using hot glue (with adult supervision) for attaching the side walls and handles. Be extremely careful as hot glue can cause burns. This provides a stronger, faster bond.
- 5Adaptation for older kids (ages 7-8): Encourage them to design their own kitchen tools, like ladles, slotted spoons, or even a pizza cutter, using the same cardboard techniques. For example, a ladle could be made by cutting a spoon shape from cardstock and attaching it to a cardboard handle. They can also experiment with adding more complex details like rivets or textured handles by layering smaller cardboard pieces.
- 6If you don't have jar lids, you can create sturdy pot handles by cutting two 5x5 cm squares of corrugated cardboard, folding them in half, and gluing the folded edge to the pot. This creates a strong, flat handle that's easy to grip. For a more unique handle, try using small painted wooden dowels or even thick cardboard tubes.
Related Activities You Might Enjoy
Frequently Asked Questions
What are the best materials to use for pretend play props?
For these pretend play kitchen props, sturdy corrugated cardboard is excellent for the main structures like pots and pans, offering durability. Cardstock is great for handles and utensils. Using recycled items like cardboard boxes and jar lids is not only cost-effective but also eco-friendly. Always ensure paints and glues are non-toxic and washable, like the PVA glue and acrylic paints used here, for safety and easy cleanup. For added durability, consider using a thicker cardstock for utensils or reinforcing cardboard pieces with an extra layer.
How can I make these pretend play kitchen props more realistic?
Realism can be enhanced through thoughtful painting and detailing. Use metallic paints (silver, grey) for pots and pans to mimic metal, as suggested in Step 13. Adding black paint for burner details on stovetops or rims on pots, as in Step 14, also boosts realism. You can even use a fine-tip marker to draw rivets or seams. For handles, consider using actual small knobs or even painted wooden dowels if you have them, but remember the focus of this tutorial is on cardboard creations.
My child isn't engaging with the pretend play props. What can I do?
Sometimes, a little prompting is all that's needed! Start by playing alongside your child. Pretend to cook something simple, like 'soup' or 'toast,' using the props yourself. Ask open-ended questions like, 'What should we cook next?' or 'Can you pass me the salt?' You can also introduce a new element, like a pretend grocery bag filled with 'ingredients' (more DIY food items or even real, produce). Troubleshooting repetitive play: If your child is stuck on one type of play, gently introduce variations. For example, if they only 'fry' eggs, suggest they 'bake' a cake or 'boil' water for tea. For younger children, simplify the scenario and focus on basic actions like stirring or pouring.
How do I store these DIY pretend play kitchen items?
Storage is key to keeping these creations organized and accessible. A dedicated 'imagination station' or a corner of a playroom works well. You can use a small basket or bin to hold the pots, pans, and utensils. If you've made a larger play kitchen structure, ensure it has designated spots for each item. For longer-term storage, consider stacking the pots and pans if they are designed to nest. Labeling the bin or shelf can also help children put things away neatly. To prevent damage, store them in a dry place away from direct sunlight.
What Next?
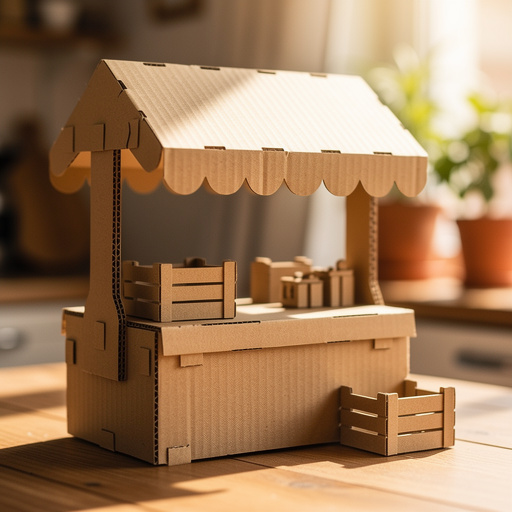
You've successfully crafted a wonderful set of pretend play kitchen props! My kids always enjoy playing chef with these, and the best part is how easy they are to personalize. Remember, the beauty of DIY is in the customization; next time, try adding more detailed handles or even painting on burner designs. For your next project, consider crafting a matching 'grocery store' with cardboard food items to expand the play possibilities! (Look for our upcoming tutorial on DIY cardboard food!)
Free: 10 Paper Crafts Anyone Can Make in 5 Minutes
Get our beginner guide + new craft ideas weekly.
No spam. Unsubscribe anytime.
Did you complete this activity?
Related