How to Build a Cardboard Castle Diorama — Easy Step-by-Step Guide
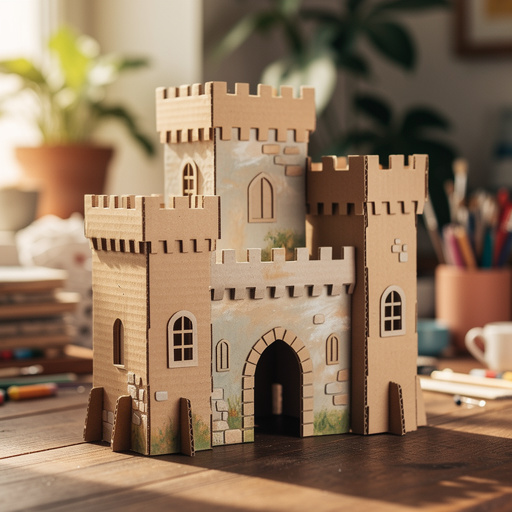
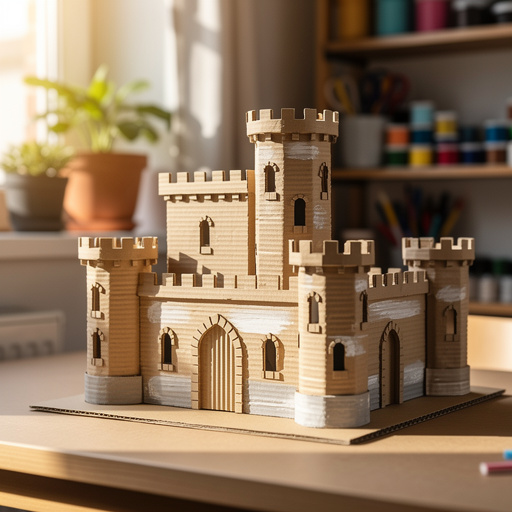
Transform a simple cardboard box into a magnificent castle diorama, complete with towers, flags, and tiny inhabitants. A fantastic screen-free adventure awaits!
Quick answer
To make a cardboard castle diorama, you need a cardboard box, craft supplies, and about 90 minutes. Start by cutting out your castle shape. This beginner-friendly activity has 10 steps and is perfect for families with kids aged 6+.
What you need
Shop on Amazon · As an Amazon Associate we earn from qualifying purchases. Links above are affiliate links — we may earn a commission at no extra cost to you.
Embark on a magical journey of imagination with this delightful cardboard castle diorama project! Perfect for sparking creativity in young minds and providing a rewarding crafting experience for all ages, this project transforms a humble cardboard box into a majestic fortress. It's an ideal way to encourage imaginative play, develop fine motor skills, and enjoy quality family time away from screens. Get ready to build a kingdom that’s entirely your own!
On this page
Step-by-Step Instructions
- 1
Prepare your cardboard box by removing any excess tape, labels, and ensuring the interior is clean and free of debris. This will serve as the primary structure and base of your castle diorama.
- 2
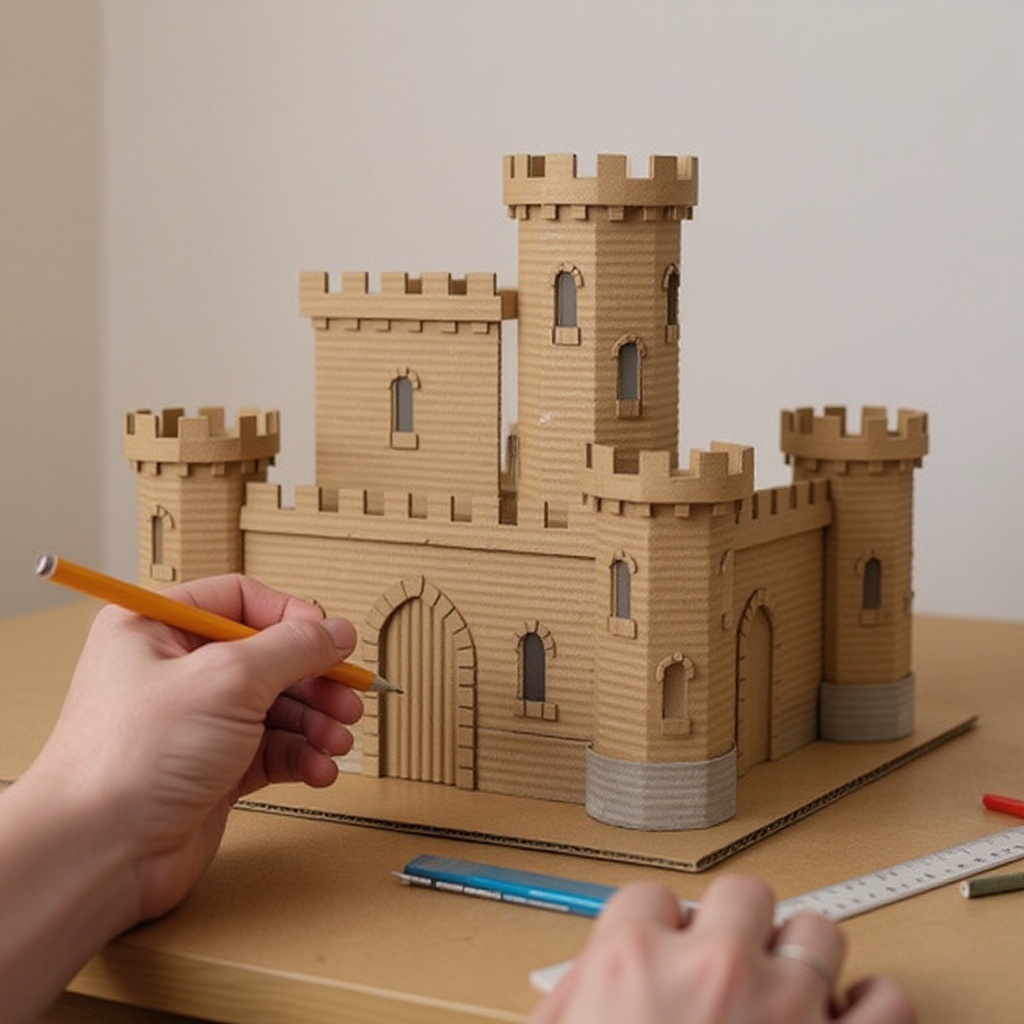
On one of the main sides of the box, use your ruler and pencil to lightly sketch the outline of your castle. Think about a classic castle silhouette with battlements (crenellations) along the top edge and perhaps the beginnings of turret shapes.
- 3
Carefully cut along the lines you've drawn to create the main castle shape. If you're using a craft knife, place a cutting mat underneath and use a ruler for straight cuts; for scissors, make sure the cardboard is manageable. This step defines the primary architectural element of your diorama.
- 4
Now, let's add some dimension with towers! Cut out smaller rectangular shapes from your extra cardboard or a smaller box. These will become your castle's turrets. You can make them varying heights for visual interest.
- 5
Attach your newly created towers to the sides or corners of the main box structure using white craft glue. Apply a generous amount of glue along the edges that will connect and hold them firmly in place. You might need to prop them up while the glue dries.
- 6
Once the glue is completely dry and the towers are securely attached, it's time for the base coat of paint. Using grey or brown acrylic paint, cover the entire exterior of the box and all attached towers. Apply a smooth, even coat and allow it to dry thoroughly before proceeding.
- 7
After the base coat is dry, it's time to bring your castle to life with details. Using a smaller paintbrush and contrasting colors like black or a darker grey, paint in windows, doors, and archways. You can also use a fine-tip brush to add subtle stone textures by dabbing or dry-brushing different shades of grey and brown.
- 8
To create the flags that will adorn your castle, cut small rectangular or triangular shapes from colorful construction paper. Attach these to toothpicks or small twigs by folding a small edge of the paper over the top and securing it with a dab of glue.
- 9
Carefully insert the flagged toothpicks or twigs into the tops of your castle towers. You might need to make a small pilot hole with a sharp pencil or the tip of your craft knife (with adult supervision) to help them stand upright. Ensure they are securely placed.
- 10
Now, focus on the interior of your diorama. Paint the inside surfaces of the box with colors that represent your desired landscape. Green is perfect for grass, while blue can signify a sky or a shimmering moat.
- 11
Enhance the landscape within your diorama by gluing small twigs or craft sticks to the base. These can create a rustic interior courtyard, a path leading to the castle, or even a small forest outside its walls. Consider adding small pebbles for texture.
- 12
Finally, it's time for the magical finishing touches! Glue small toy figures inside to populate your castle, add glitter to represent stardust or magical elements, or use stickers to create banners and crests on the castle walls. Let your imagination run wild with decorative elements.
Tips & Troubleshooting
- 1If your cardboard box has flaps, you can fold them inside to create a sturdier base or cut them off entirely for a cleaner look. Experiment with how the flaps can be incorporated to add architectural features like drawbridges or interior levels.
- 2For a more realistic stone effect, try dabbing different shades of grey and brown paint with a sponge or a crumpled piece of paper towel. This technique creates a natural, uneven texture that mimics real stone walls.
- 3Encourage kids to design their own unique crests or banners for their castle using construction paper and markers. They can draw symbols that represent their family, their favorite animals, or even a magical emblem.
- 4Consider adding a functional drawbridge by carefully cutting three sides of a rectangle on the front of the castle and folding it down. You can attach it with a small piece of string or a brad to make it movable.
- 5Ensure all paint and glue are completely dry before adding delicate elements like small figures or engaging in active play with the diorama. This prevents smudging and ensures a durable final product.
- 6To create a more dynamic landscape, consider layering different textures. You could glue down some green felt for grass, add a few small pebbles for rocky outcrops, or even use blue cellophane to simulate a water feature like a moat or a pond.
- 7Don't be afraid to experiment with different painting techniques. Dry brushing can highlight raised textures, while washes of diluted paint can create depth and shadow, making your castle appear more ancient and imposing.
- 8Think about the story your castle tells. Is it a bustling royal residence, a lonely watchtower, or a hidden magical stronghold? Let the narrative guide your decorating choices, from the colors you use to the accessories you add.
Related Activities You Might Enjoy
Frequently Asked Questions
What kind of cardboard box is best for a diorama?
The ideal cardboard box for a diorama is one that is sturdy and has a good, solid structure. Think about boxes that previously held small appliances, large toys, or even a robust set of shoes. Avoid boxes that are too flimsy, have too many creases, or are made of thin cardboard like cereal boxes, as they may not hold their shape well or withstand the weight of decorations. A box with a relatively smooth surface will also be easier to paint and decorate. Aim for a box that is roughly cube-shaped, around 12x12x12 inches, as this provides a good balance of space for creativity without being overwhelming.
How can I make the castle look more realistic?
To enhance the realism of your cardboard castle, focus on texture and detail. Utilize textured paint techniques like dabbing with a sponge or a crumpled paper towel using various shades of grey and brown to mimic stone. Dry brushing with a lighter grey can highlight edges and create depth. Adding small details like vines made from green paper strips, tiny pebbles glued to the base, or even a bit of moss can further enhance the naturalistic feel. Consider painting subtle cracks or weathering marks to give your castle an aged appearance, as if it has stood for centuries.
Can I use other materials besides paint?
Absolutely! While paint is a primary medium, you can incorporate a wide array of other materials to add texture, color, and visual interest to your cardboard castle diorama. Markers, crayons, and colored pencils are excellent for adding finer details, shading, and intricate patterns. You can also cover sections of the cardboard with construction paper in different colors and textures for a unique look. For example, brown paper can create a wood effect for doors or bridges, while green paper can be cut into leaf shapes for foliage. Felt scraps can add a soft texture, and even fabric remnants can be used for banners or cloaks on figures.
What age is this cardboard project suitable for?
This cardboard castle diorama project is best suited for children aged 6 and up. At this age, children typically have developed enough fine motor skills to handle scissors and paintbrushes with reasonable control, though adult supervision is still highly recommended, especially during the cutting stages with a craft knife. Younger children, around ages 3-5, can certainly participate with significant adult assistance. They can help with painting larger areas, gluing on pre-cut shapes, and placing decorative elements. The project offers scalability, allowing younger helpers to contribute meaningfully while older children or adults can tackle more intricate details.
How can I add a moat or water feature to my diorama?
Creating a realistic moat or water feature for your castle diorama is a fun and achievable step. You can start by painting the area where the moat will be a deep blue or green, mimicking water. For a more dynamic effect, consider using blue cellophane or iridescent craft film. Cut it to the shape of your moat and glue it down, perhaps with a few crinkles to catch the light and create a shimmering appearance. Another option is to use clear craft resin or a thick, clear gel medium, which can be poured into a designated moat area to create a glossy, water-like surface. You can even add tiny toy fish or lily pads for extra detail.
What are some ideas for decorating the castle walls and battlements?
The castle walls and battlements offer a fantastic canvas for creative decoration. For a classic stone look, use a sponge-dipping technique with various shades of grey and brown paint to create a textured, uneven surface. You can also use a fine-tip black marker to draw individual stone blocks or cracks. For a more regal appearance, consider gluing on small pieces of colored construction paper or felt to create banners and flags that hang from the battlements. Stickers featuring crests, shields, or even tiny windows can also add character. Don't forget to add depth by painting shadows under the battlements and around windows and doors.
What Next?
Congratulations on building your magnificent cardboard castle diorama! This creation is more than just a craft; it's a gateway to endless storytelling and imaginative adventures. Consider adding a drawbridge, a moat with shimmering blue cellophane, or even a tiny dragon guarding its treasures. For display, find a prominent shelf or use it as a centerpiece for a themed party. Store your diorama carefully to preserve its magic for future play sessions. What other fantastical structures will you build next?
Free: 10 Paper Crafts Anyone Can Make in 5 Minutes
Get our beginner guide + new craft ideas weekly.
No spam. Unsubscribe anytime.
Did you complete this activity?
Related