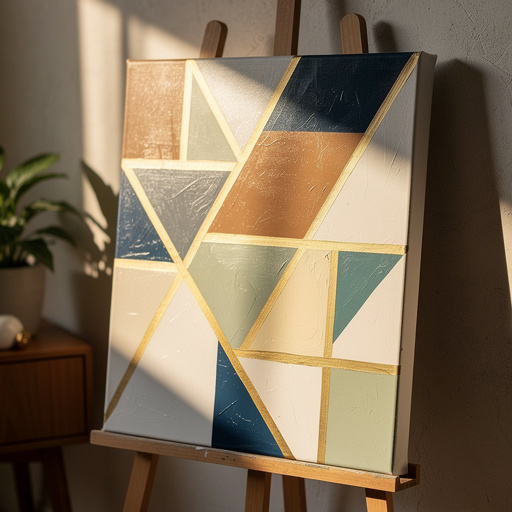
How to Create Geometric Cardboard Wall Art — Easy Step-by-Step Guide
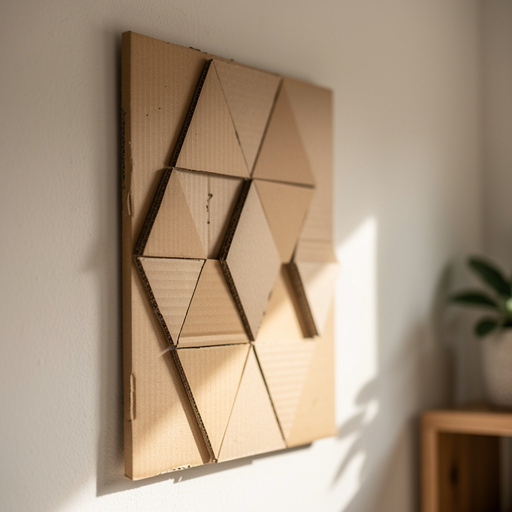
Transform recycled cardboard into striking geometric wall art. This easy DIY project adds a modern, personalized touch to any room.
Quick answer
To make geometric cardboard wall art, you need corrugated cardboard (several medium-sized boxes), a craft knife or sturdy scissors, a ruler, a pencil, white craft glue or a hot glue gun (with adult supervision), and acrylic paints in various colors. You'll also need paintbrushes and optionally, a spray sealant. This project takes approximately 60-90 minutes of active crafting time, plus drying time. Start by cutting out various geometric shapes from the cardboard. This beginner-friendly activity involves 10 core steps and is perfect for families or anyone looking to add a unique, artistic element to their living space.
What you need
Shop on Amazon · As an Amazon Associate we earn from qualifying purchases. Links above are affiliate links — we may earn a commission at no extra cost to you.
Looking for a budget-friendly yet impactful way to elevate your home decor? This geometric cardboard wall art project is your answer! It's a fantastic way to repurpose everyday materials, turning discarded shipping boxes into a stunning focal point. The beauty of this craft lies in its simplicity and versatility; you can customize the colors, shapes, and arrangement to perfectly match your personal style and existing interior design. It’s an ideal activity for crafters of all skill levels, including families looking for a fun weekend project, students wanting to decorate their dorm rooms, or anyone seeking a creative outlet that results in a truly unique piece of art.
On this page
Step-by-Step Instructions
- 1
Gather your corrugated cardboard and flatten any boxes. Ensure the cardboard is clean and free from any tape residue or debris that might interfere with gluing or painting.
- 2
Using your ruler and pencil, carefully draw a variety of geometric shapes onto the flattened cardboard. Think triangles, squares, rectangles, hexagons, rhombuses, and even irregular polygons. Aim for a mix of sizes to create visual interest and depth in your final piece.
- 3
Precisely cut out the drawn shapes using your craft knife and ruler, or sturdy scissors. For cleaner, straighter edges, always use the ruler as a guide with the craft knife, cutting away from yourself on a protected surface. If using scissors, take your time to follow the lines accurately.

- 4
For a dynamic, layered effect, consider cutting some shapes slightly smaller than others. This technique allows you to create a sense of dimension by overlapping pieces, making certain elements appear to be in front of others.
- 5
Arrange your cut-out cardboard shapes on a flat surface to plan your desired wall art composition. Experiment with different layouts, playing with symmetry, asymmetry, and color blocking until you achieve a design that resonates with you. Take a photo of your preferred arrangement for reference.
- 6
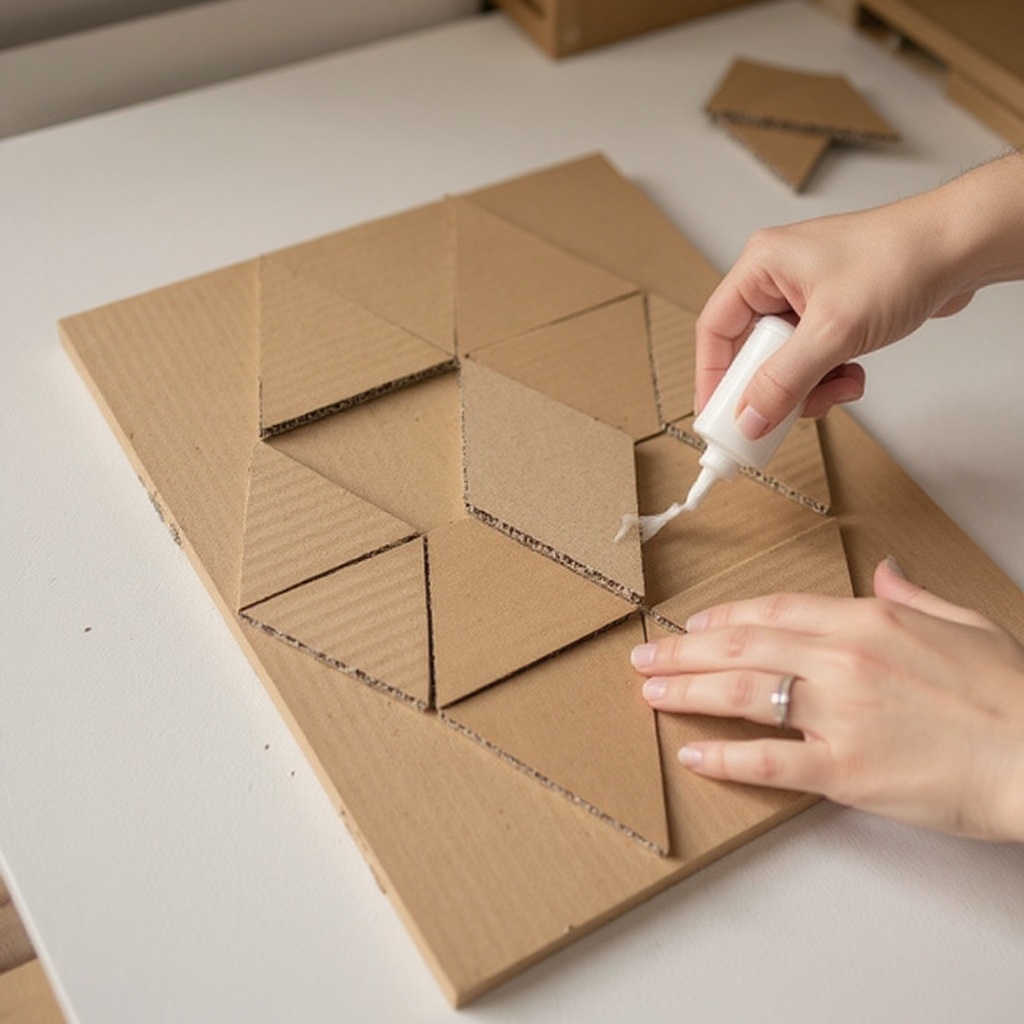
Once you're satisfied with the arrangement, begin the gluing process. Start with the shapes that will form the base layer of your artwork, ensuring they are positioned correctly according to your planned layout.
- 7
Apply a generous amount of white craft glue or hot glue to the edges of the shapes that will connect. Press the pieces firmly together, holding them in place for a few moments if using white glue to allow it to set slightly. For hot glue, the bond is almost instantaneous but be mindful of the heat.
- 8
Continue layering and gluing shapes, building up your design piece by piece. Pay close attention to how the shapes fit together, ensuring there are no large gaps unless intentionally designed. Make sure all pieces are securely attached to prevent them from falling off later.
- 9
Allow the glue to dry completely before proceeding to the painting stage. This is a crucial step to ensure your artwork holds its structure. Depending on the type of glue used and the thickness of the cardboard, this could take anywhere from 30 minutes to a couple of hours. You can gently test a corner to see if it's stable.
- 10
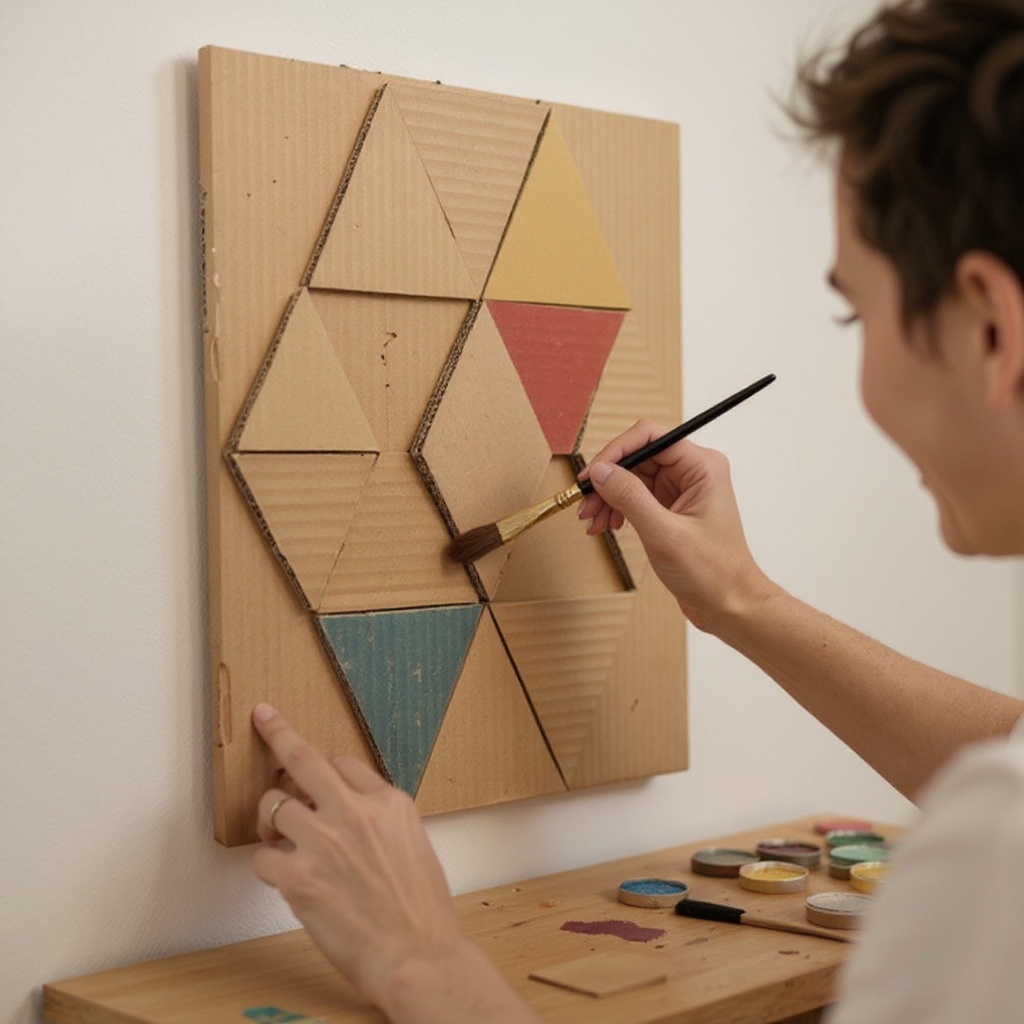
Now for the fun part: painting your geometric masterpiece! Use a variety of acrylic paint colors to bring your design to life. You can paint each shape a different color, create gradient effects, or use stencils for intricate patterns.
- 11
Experiment with different painting techniques to add texture and visual interest. Consider using a dry-brush technique for a distressed look, dabbing with a sponge for a mottled effect, or even incorporating metallic or glitter paints for a touch of glamour.
- 12
Let the paint dry thoroughly between coats and before moving on to any additional details or sealant. Rushing this step can lead to smudging or uneven color application, so patience is key here.
- 13
For added durability and a professional, finished look, you can apply a clear spray sealant once the paint is completely dry. This will protect the paint from chipping and give your artwork a consistent sheen, whether matte or glossy.
- 14
If you plan to hang your artwork, consider adding a backing board. Cut a piece of sturdy cardboard slightly larger than your finished art piece and glue your geometric design onto it. This provides a solid foundation for attaching hanging hardware.
- 15
Attach your chosen hanging hardware to the backing board. A small sawtooth hanger glued securely to the center of the backing board is a common and effective method for lighter pieces. For heavier creations, consider using D-rings or wire.
- 16
Alternatively, for lighter cardboard art, strong double-sided tape or Command strips can be used directly on the back of the artwork or backing board, making installation easier and avoiding the need for nails.
Tips & Troubleshooting
- 1For the cleanest and most precise cuts, always use a sharp craft knife and a metal ruler as a guide. Remember to always cut away from your body and use a cutting mat or a thick piece of scrap cardboard to protect your work surface from damage.
- 2Experiment with different paint finishes to achieve varied visual effects. Matte paints offer a sophisticated, modern look, while metallic paints can add a touch of luxury. Glitter paints can introduce a playful sparkle, perfect for accent pieces.
- 3Consider adding a backing board made from a larger piece of sturdy cardboard to make hanging your geometric wall art easier and more secure. This also adds an extra layer of stability to your creation, especially if you've used many layers.
- 4If you desire a more pronounced 3D effect, cut multiple identical shapes and glue them directly on top of each other before painting. This stacking technique creates significant depth and visual impact, making your art pop off the wall.
- 5Don't be afraid to mix and match different types of cardboard if you have them available. While corrugated cardboard is ideal for its structure, thinner cardboard can be used for smaller, more intricate details or layering.
- 6Before painting, you can lightly sand the edges of your cardboard shapes with fine-grit sandpaper. This will help to smooth out any rough edges from cutting and create a more refined surface for paint application.
- 7When planning your layout, consider the scale of your wall space and the overall aesthetic of the room. A large, bold arrangement might be perfect for a living room, while a smaller, more delicate design could suit a bedroom or office.
- 8For a truly unique finish, try incorporating mixed media elements. You could glue on small beads, sequins, or even fabric scraps to specific shapes before painting to add texture and dimension.
Related Activities You Might Enjoy
Frequently Asked Questions
What kind of cardboard is best for crafts?
Corrugated cardboard from shipping boxes is the ideal choice for this type of craft due to its excellent sturdiness, ease of cutting, and widespread availability. Thicker, double-walled corrugated cardboard will provide even more durability and a more substantial feel to your finished wall art, making it less prone to bending or damage. Avoid thin cardboard like cereal boxes or paperboard, as these lack the structural integrity needed for a lasting piece of wall decor. Always ensure the cardboard is clean and dry before you begin cutting and assembling your shapes.
How can I make my cardboard crafts look more professional?
To achieve a professional look with your cardboard crafts, focus on precision in every step. This means making clean, straight cuts using a sharp craft knife and a ruler, and ensuring your glued pieces are aligned perfectly. Take your time with the painting process, applying even coats of paint and allowing adequate drying time between layers. Consider using a spray sealant for a uniform finish that protects the paint and adds a polished sheen. Additionally, a well-executed backing board and professional-looking hanging hardware can significantly elevate the final presentation of your cardboard creations.
Can I paint directly onto the cardboard?
Yes, you can absolutely paint directly onto the cardboard. Acrylic paints are highly recommended for this purpose as they adhere exceptionally well to most cardboard surfaces and offer a vast spectrum of colors and finishes. Before painting, ensure that your cardboard pieces are clean, dry, and free from any dust or grease. For a smoother painting experience and to prevent the cardboard from absorbing too much paint, you might consider applying a thin layer of white craft glue or a primer as a base coat, though this is often optional with acrylics.
How do I hang my cardboard wall art?
There are several effective ways to hang your cardboard wall art, depending on its size and weight. For lighter pieces, strong double-sided mounting tape or Command strips are excellent options that won't damage your walls. For slightly heavier or more substantial artworks, you can attach a small sawtooth hanger to the back of the cardboard using strong craft glue or a hot glue gun; ensure the glue is fully cured before hanging. If you've used a backing board, you can attach more robust hanging hardware like D-rings and wire to that for a secure and professional installation.
What are some common mistakes to avoid when making cardboard wall art?
A common mistake is using dull cutting tools, which leads to ragged edges and a less polished appearance. Always ensure your craft knife is sharp and your scissors are sturdy. Another pitfall is rushing the drying process; allowing glue and paint to dry completely between steps is crucial for structural integrity and a smooth finish. Over-applying glue can also be an issue, leading to messy seams and potential warping of the cardboard. Finally, not planning the layout beforehand can result in an unbalanced or unappealing composition, so take time to experiment with arrangements before committing to glue.
Can I create different textures on the cardboard before painting?
Absolutely! You can introduce a variety of interesting textures to your cardboard before painting to add depth and visual appeal. Consider scoring lines into the cardboard with your craft knife (without cutting all the way through) to create subtle patterns or a wood-grain effect. You can also glue smaller pieces of cardboard onto larger ones in overlapping or geometric arrangements to build up a relief surface. Another technique is to lightly crumple a piece of cardboard and then flatten it out before cutting shapes; this creates a unique, slightly distressed texture that can be very striking when painted.
What Next?
Once your geometric masterpiece is complete and thoroughly dry, it's time to find its perfect spot! Consider hanging it above a sofa, in a hallway, or as a statement piece in a bedroom. For a truly cohesive look, you could create a series of these artworks in complementary colors or varying sizes. If you enjoyed this project, explore other cardboard crafting ideas like creating 3D sculptures or personalized gift boxes. Proper storage involves keeping it away from moisture and direct sunlight to preserve the paint and cardboard integrity. This project is a testament to how creativity and recycling can beautifully merge.
Free: 10 Paper Crafts Anyone Can Make in 5 Minutes
Get our beginner guide + new craft ideas weekly.
No spam. Unsubscribe anytime.
Did you complete this activity?
Related