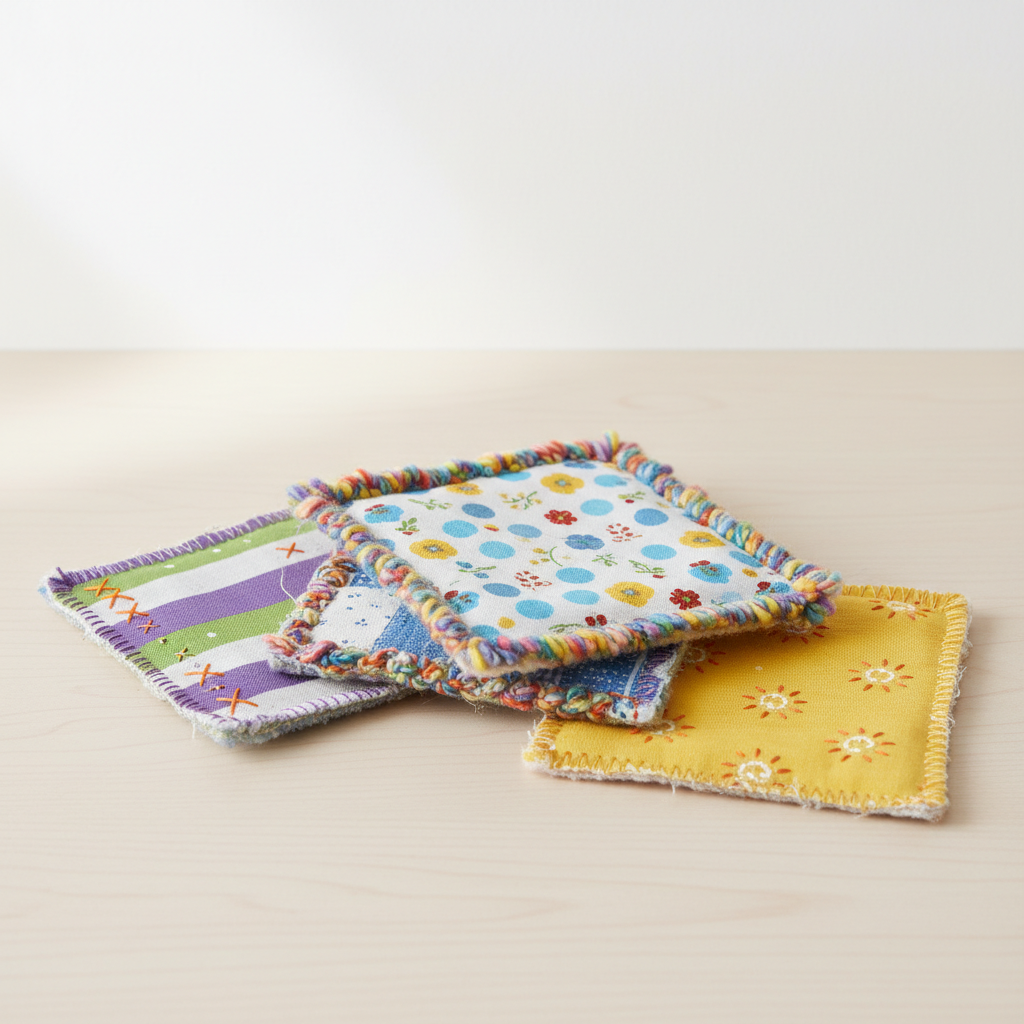
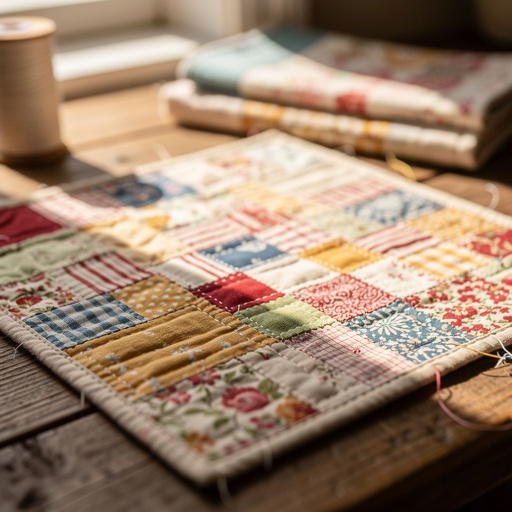
How to Create Fabric Scraps Memory Quilt Squares — Easy Step-by-Step Guide
Transform beloved fabric scraps into beautiful memory quilt squares. A wonderful way to preserve special moments and create a keepsake. This beginner-friendly activity has 10 steps and is perfect for families.

Quick answer
To make fabric scrap quilt squares, you need fabric scraps, scissors, and a sewing machine (or needle and thread) and about 30 minutes per square. Start by cutting your fabric into uniform sizes. This beginner-friendly activity has 10 steps and is perfect for families.
What you need
Shop on Amazon · As an Amazon Associate we earn from qualifying purchases. Links above are affiliate links — we may earn a commission at no extra cost to you.
There's a unique magic in transforming everyday fabric scraps into something truly special. This project invites you to delve into your collection of cherished textiles – perhaps from a baby's first onesie, a beloved grandparent's favorite shirt, or a vacation souvenir t-shirt – and give them a new life as a tangible memory. Creating fabric scrap memory quilt squares is a deeply personal and rewarding endeavor, perfect for crafters of all skill levels, especially those looking for a meaningful way to preserve precious moments and create a lasting heirloom. It's an activity that can be enjoyed solo or as a heartwarming family project, fostering connection and storytelling through fabric.
On this page
Step-by-Step Instructions
- 1
Gather your fabric scraps. Begin by selecting fabric pieces that hold special meaning or have interesting patterns and textures that you want to preserve. Ensure all fabrics are clean and pressed before you begin to ensure accurate cutting and sewing.
- 2
Decide on the size of your quilt squares. A common and manageable size for beginners is 6 inches by 6 inches, but you can choose any uniform size that suits your project. Consistency in size is key for creating a cohesive quilt later on.
- 3
Prepare your fabric for cutting. If your chosen fabric scraps are wrinkled or creased, take a moment to iron them flat. This step is crucial for accurate measurements and ensures your squares will be perfectly square, not skewed.
- 4
Measure and mark your first fabric square. Using your quilting ruler and a fabric marker or chalk pencil, carefully measure and mark a 6-inch by 6-inch square onto one of your chosen fabric scraps. Double-check your measurements to ensure accuracy.
- 5
Cut out your first fabric square. Using your sharp fabric scissors or rotary cutter and mat, carefully cut along the marked lines to create your first 6-inch by 6-inch fabric square. Aim for straight, clean cuts.
- 6
Measure and mark your second fabric square. Repeat steps 3-5 with a second fabric scrap, ensuring it is also cut to your chosen uniform size (e.g., 6 inches by 6 inches). This second piece will form the backing of your memory square.
- 7
Place the two fabric squares right sides together. Lay one fabric square flat, then place the second fabric square directly on top of it, ensuring that the 'right' sides (the sides you want to be visible on the finished quilt) are facing each other. Align the edges meticulously.
- 8
Pin the fabric squares together. To prevent the fabric from shifting during sewing, it's highly recommended to pin the two squares together along the edges. Place pins perpendicular to the edge, about every 2-3 inches, ensuring they go through both layers of fabric.
- 9
Stitch around the perimeter of the square. Using your sewing machine set to a straight stitch and a 1/4 inch seam allowance, begin sewing around the perimeter of the two fabric squares. Start about 2 inches from a corner, and sew all the way around.
- 10
Leave a small opening for turning. When you reach the point where you started sewing, leave a small opening of about 2 to 3 inches unstitched on one of the sides. This opening will be used to turn the fabric square right side out.
- 11
Reinforce your stitches. At the beginning and end of your stitching, and especially at the edges of the opening you left, backstitch for a few stitches. This will reinforce the seams and prevent them from unraveling.
- 12
Clip the corners of the seam allowance. Carefully use your scissors to snip off the excess fabric at each of the four corners, cutting diagonally across the seam allowance. Be very careful not to cut through your stitching, as this will compromise the integrity of your seam.
- 13
Turn the fabric square right side out. Reach through the opening you left and gently pull the fabric through, turning the entire square right side out. Use a blunt object, like a chopstick or the eraser end of a pencil, to carefully push out the corners from the inside, ensuring they are crisp and defined.
- 14
Press the fabric square flat. Once turned, lay the fabric square on your ironing board. Carefully iron the entire square, paying special attention to the seams to make them lie flat. Press the edges of the opening inwards so they are flush with the seam line.
- 15
Close the opening. You have two options for closing the opening: you can carefully hand-stitch it shut using a hidden ladder stitch for an invisible finish, or you can topstitch around the entire perimeter of the square, about 1/8 inch from the edge, which will also close the opening and create a neat, decorative border.
- 16
Repeat for each memory quilt square. Continue this process, repeating steps 3 through 15 for each fabric scrap you wish to transform into a memory quilt square. The more squares you create, the larger and more impactful your final quilt will be.
- 17
Inspect your finished squares. Once all your squares are complete, lay them out and inspect them. Ensure all seams are secure, corners are sharp, and the squares are uniformly sized. This is your last chance to make any minor adjustments before joining them.
Tips & Troubleshooting
- 1If your fabric scraps are very small, don't despair! You can 'piece' them together first to create larger sections before cutting them into squares. This involves sewing smaller pieces of fabric together to form a larger panel, which you then cut to your desired square size. This technique adds an extra layer of visual interest and allows you to use even the tiniest of precious fabric remnants.
- 2Consider using a variety of fabric textures, like cotton, flannel, or even a small piece of satin or silk, for added visual interest and tactile appeal. Mixing textures can make your quilt more dynamic and engaging to the touch, creating a richer sensory experience.
- 3If you're new to sewing or using a sewing machine, it's always a good idea to practice stitching on scrap fabric before starting your memory quilt squares. This will help you get a feel for your machine's tension, stitch length, and how to maintain a consistent seam allowance, ensuring smoother results.
- 4Safety first! Always supervise children closely when they are using scissors or a sewing machine. Ensure they understand how to handle these tools safely and are aware of potential hazards. Consider pre-cutting fabric for younger children or having them assist with tasks like ironing or pressing.
- 5When selecting fabrics, think about the story each piece tells. A piece of a baby's christening gown, a fragment of a wedding dress, or a swatch from a favorite childhood blanket can imbue your quilt with deep personal meaning. Don't be afraid to mix and match patterns and colors; the eclectic nature often adds to the charm of a memory quilt.
- 6For a more professional finish, consider using a walking foot on your sewing machine, especially if you are working with multiple layers of fabric or different fabric types. A walking foot helps to feed all layers of fabric evenly, preventing puckering and ensuring smoother seams.
- 7If you find that some of your fabric scraps are quite thin and others are thicker, try to pair them with fabrics of similar weight when creating your squares. This will help to ensure that your seams are more even and that the finished quilt lays flatter. If you must pair different weights, consider using a slightly larger seam allowance for the thicker fabric.
- 8Don't be afraid to experiment with different seam finishes. While a simple turned-under seam is common, you could also explore using pinking shears on the raw edges before sewing, or even a decorative stitch like a zigzag around the perimeter for added durability and visual flair.
Related Activities You Might Enjoy
Frequently Asked Questions
What kind of fabric scraps can I use for memory quilt squares?
You can use a wide variety of fabric scraps for your memory quilt squares, making this project incredibly personal. Excellent choices include pieces from old clothing like t-shirts, sweaters, dresses, and pajamas; baby blankets or swaddling cloths; favorite linens such as tablecloths or pillowcases; and even small remnants from past sewing projects. The key is to choose fabrics that hold sentimental value or have patterns and textures you love. Ensure all fabrics are clean, washed, and pressed before you begin to guarantee they are in good condition and will sew smoothly. Avoid fabrics that are overly stretchy or prone to fraying excessively, as these can be more challenging for beginners.
Can I make these without a sewing machine?
Yes, absolutely! You can hand-stitch your quilt squares using a simple running stitch or a more secure backstitch. While it will take a bit longer than using a sewing machine, hand-stitching can be a very meditative and rewarding process, and it allows you to create your memory quilt squares anywhere. Ensure you use a strong thread and a needle appropriate for the fabric thickness. For a neat finish, you can still press your seams and carefully hand-stitch the opening closed using a ladder stitch, which creates an almost invisible seam. The charm of a hand-stitched quilt is undeniable.
How do I join the quilt squares together?
Once you have created a collection of your fabric scrap memory quilt squares, the next step is to join them together to form a larger quilt or blanket. You can do this either by hand or with a sewing machine. Lay out your squares in your desired arrangement, ensuring they are all the same size. Then, sew them together edge-to-edge. For a traditional quilt look, you'll typically sew them into rows first, and then sew the rows together. Aim for a consistent seam allowance, usually 1/4 inch, and press your seams open or to one side as you go for a flat, professional finish.
What if my fabric scraps are different thicknesses?
If your fabric scraps are different thicknesses, it's best to try and pair thinner fabrics with other thin fabrics and thicker fabrics with other thicker fabrics when sewing them together. This will make for a more even seam and prevent your sewing machine from struggling or creating puckered stitches. If you must pair a thin fabric with a thick one, consider using a slightly larger seam allowance for the thicker fabric, or using a universal needle and adjusting your machine's tension. Sometimes, using a stabilizer on the thinner fabric can also help create a more uniform sewing experience.
How do I ensure my squares are perfectly square?
Achieving perfectly square quilt blocks is essential for a well-constructed quilt. Start by ensuring your fabric is pressed flat before measuring and cutting. Use a quilting ruler with clear inch markings and a sharp rotary cutter or fabric scissors. When measuring, place the ruler on the fabric and align the 0-inch mark with an edge. Then, carefully measure out your desired dimension (e.g., 6 inches) and mark a line. For the second cut, ensure you are cutting perpendicular to the first edge. If using a rotary cutter, a self-healing mat is invaluable for precise cutting. If you're using scissors, take your time and make smooth, continuous cuts along your marked lines.
Can I add batting and a backing to make a true quilt?
Absolutely! The squares you create are the 'quilt top.' To turn them into a full quilt, you'll need to add batting (the fluffy layer in the middle) and a backing fabric. Once you have sewn your squares together into a quilt top, you will layer the backing fabric (wrong side up), then the batting, and finally your quilt top (right side up). You can then baste these layers together using safety pins or spray adhesive. After basting, you can quilt through all three layers using your sewing machine or by hand, stitching in the ditch (along the seams) or creating decorative patterns. Finally, you'll bind the edges with a fabric strip to finish your quilt.
What Next?
Once you've created your collection of fabric scrap memory quilt squares, the possibilities for their use are endless. You can stitch them together to form a full quilt, a cozy throw blanket, or even a wall hanging to adorn your home. For smaller projects, consider turning them into decorative pillows, tote bags, or placemats. This project is a fantastic starting point for further quilting adventures; once you've mastered the squares, you might explore different block patterns or learn various joining techniques. Store your finished squares or quilt in a cool, dry place, perhaps in a cedar chest, to preserve their longevity and the memories they hold.
Free: 10 Paper Crafts Anyone Can Make in 5 Minutes
Get our beginner guide + new craft ideas weekly.
No spam. Unsubscribe anytime.
Did you complete this activity?
Related