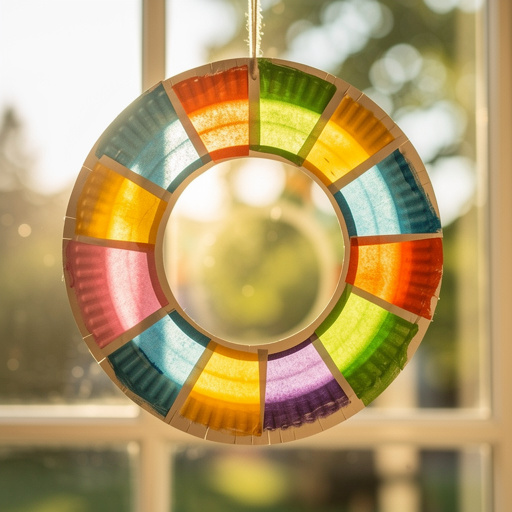
How to Make Paper Plate Sun Catchers — Easy Step-by-Step Guide
Transform simple paper plates and colorful tissue paper into dazzling sun catchers! This easy craft is perfect for little hands and brings a burst of color to any window.
Quick answer
To make paper plate sun catchers, you need paper plates, tissue paper, glue, and scissors, taking about 30 minutes. Start by cutting out the center of the paper plate. This easy activity has 8 steps and is perfect for preschoolers aged 3-6.
What you need
Shop on Amazon · As an Amazon Associate we earn from qualifying purchases. Links above are affiliate links — we may earn a commission at no extra cost to you.
Welcome to a delightful crafting adventure that transforms everyday materials into sparkling works of art! Paper plate sun catchers are a fantastic way to engage young children in a creative process that results in a beautiful, light-catching decoration. This project is not only incredibly easy, making it perfect for little hands and short attention spans, but it also offers a wonderful opportunity to explore color mixing and the magic of light. Get ready to bring a burst of sunshine into your home with these charming, handmade sun catchers!
On this page
Step-by-Step Instructions
- 1
Gather all your materials and set up your workspace. Ensure you have enough space to spread out and work comfortably, and protect your surface with newspaper or a craft mat if needed.
- 2
Take one paper plate and, using a pencil or marker, draw a circle about 1 inch from the outer edge. This will be your outer frame line. Then, draw a second, smaller circle inside the first one, leaving a rim of about 1-1.5 inches. This inner circle will be the area you cut out.
- 3
Carefully cut out the center section of the paper plate along the inner circle line you drew. This action transforms the plate into a frame, creating the border for your sun catcher. Be sure to cut as smoothly as possible for a neat finish.
- 4
Now, take your second paper plate and trace the inner circle you just cut out onto it. This will be used to reinforce the frame later if desired, or you can use it as a template for cutting out the center of the first plate if it's easier.
- 5
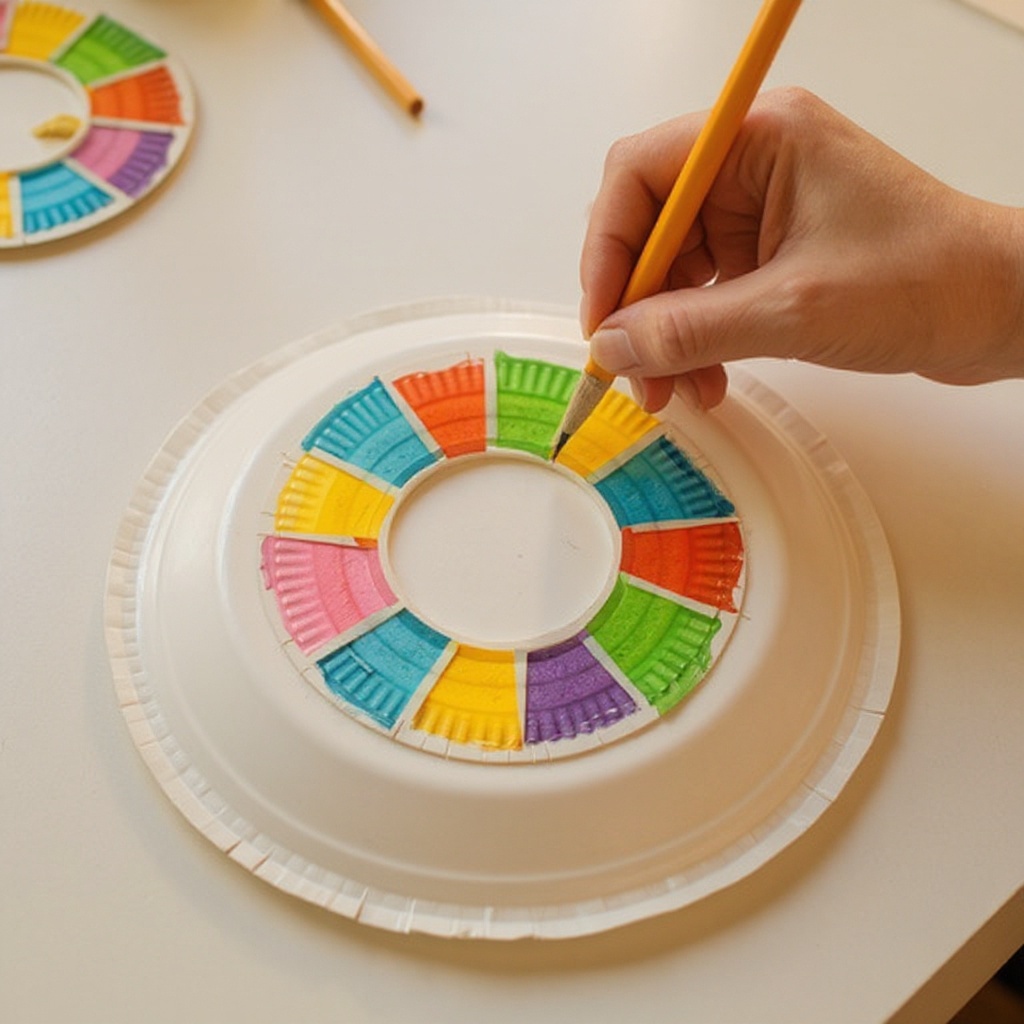
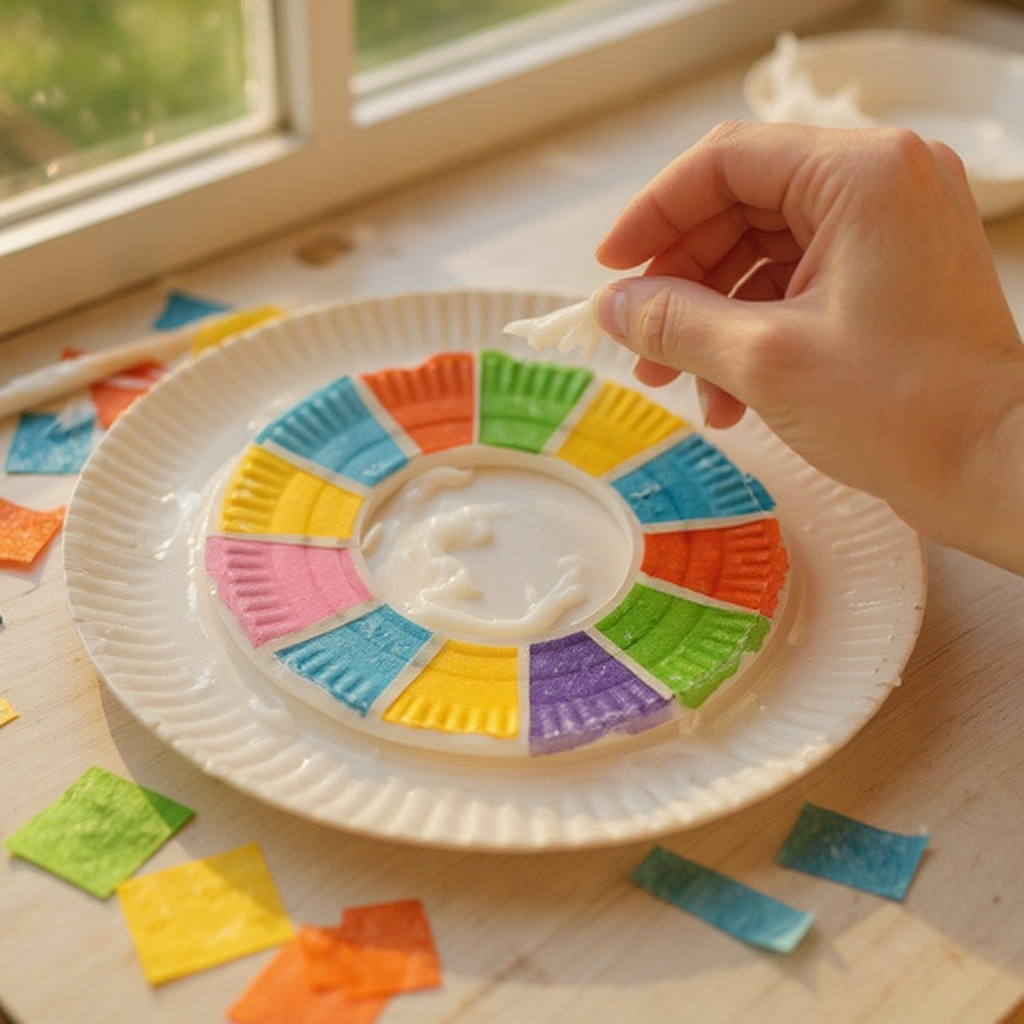
Cut or tear the assorted tissue paper into small squares or strips. Aim for pieces that are roughly 1-2 inches in size, but don't worry about perfect uniformity; a variety of shapes can add visual interest. Smaller pieces are easier for little hands to manage.
- 6
Apply a thin, even layer of white craft glue to the entire surface of the paper plate frame where the center was removed. Ensure the glue covers the entire opening, reaching close to the inner edge of the frame.
- 7
Begin sticking the tissue paper squares or strips onto the glued area, overlapping them slightly to cover the entire opening. Start from the edges and work your way inwards, ensuring there are no gaps.
- 8
Continue adding tissue paper, pressing each piece gently into the glue. You can layer different colors on top of each other to create depth and unique color blends as the light shines through. Don't be afraid to experiment with patterns and arrangements.
- 9
Once the opening is completely filled with tissue paper, gently smooth down any loose edges or corners with your fingers or a damp cloth to ensure they adhere well to the glue.
- 10
Apply a thin, even layer of glue over the top of the entire tissue paper-covered area. This acts as a sealant, helping to protect the tissue paper and give your sun catcher a smooth, finished surface.
- 11
Allow the glue to dry completely. This is a crucial step for durability; rushing this process can lead to the tissue paper tearing or peeling. Drying can take anywhere from 30 minutes to a few hours, depending on the thickness of the glue and humidity.
- 12
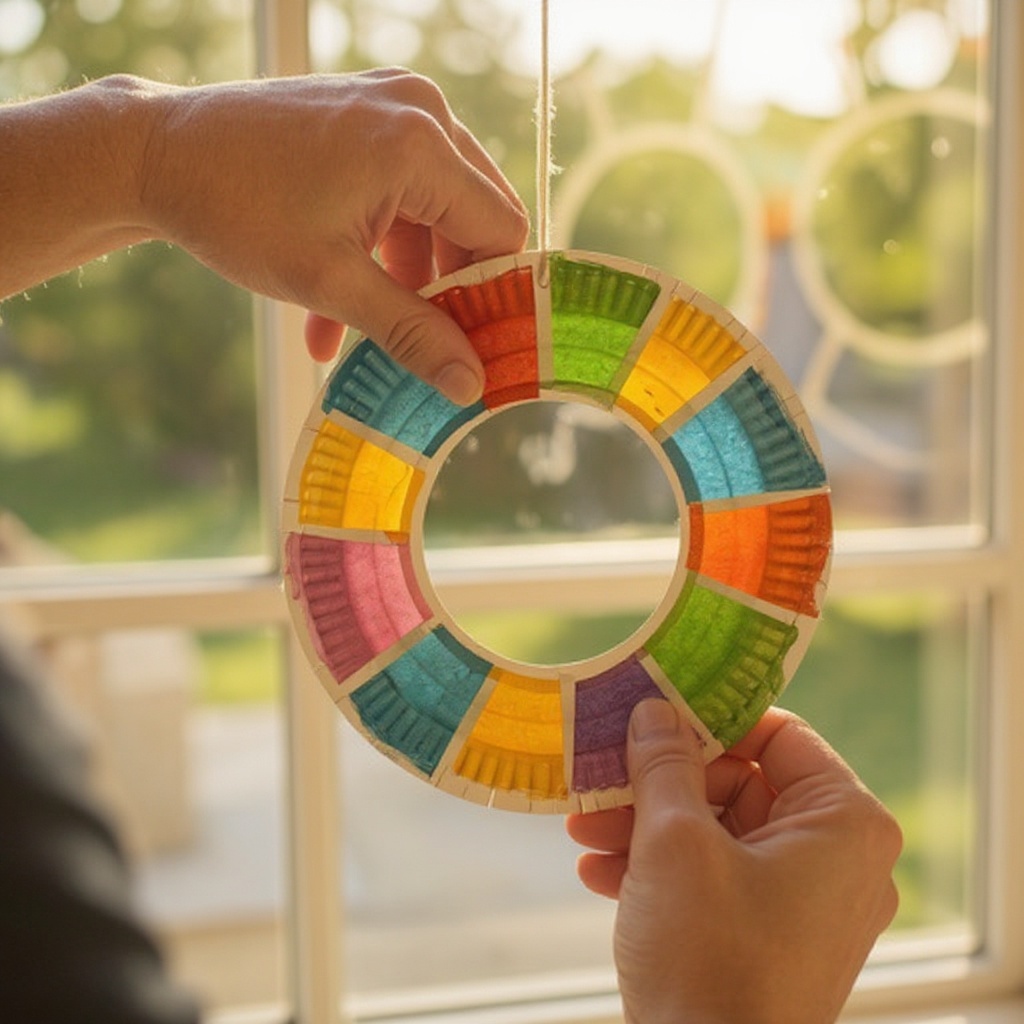
Once the glue is completely dry and the sun catcher feels firm, punch a hole in the top rim of the paper plate frame. Make sure the hole is large enough to thread your ribbon or string through.
- 13
Thread a ribbon, string, or yarn through the punched hole and tie the ends together securely to create a loop for hanging. Ensure the knot is strong enough to support the weight of the sun catcher.
- 14
Optional: For added durability and a smoother finish, you can glue a second paper plate frame (cut from your second plate) on top of the first one after the tissue paper has dried. This creates a thicker, more robust border and hides any rough edges of the tissue paper.
- 15
Optional: If you want to add extra sparkle, carefully glue on glitter, sequins, or small beads onto the frame or the tissue paper before the final sealing glue dries. Ensure these embellishments are securely attached.
- 16
Optional: For maximum durability and a glossy finish, you can cover the entire sun catcher, front and back, with clear contact paper or run it through a laminator once the glue is completely dry. This will make it water-resistant and less prone to tearing.
Tips & Troubleshooting
- 1If the tissue paper tears easily, try using slightly larger pieces or a thicker glue. You can also try gently dabbing the glue onto the plate rather than spreading it thickly, which can help prevent the paper from becoming too saturated and tearing.
- 2Experiment with different color combinations and layering techniques for unique effects. Try creating gradients by blending colors from light to dark, or use contrasting colors for a bold look. Overlapping colors can create beautiful new shades when the light shines through.
- 3For a sturdier sun catcher, you can glue a second paper plate frame on top of the first one after the tissue paper has dried. This creates a thicker, more robust border and gives the sun catcher a more professional finish, hiding any uneven edges of the tissue paper.
- 4Supervise young children when using scissors, or pre-cut the tissue paper for them. Safety is paramount, and ensuring children use scissors appropriately or have them pre-cut will make the activity more enjoyable and less stressful for everyone involved.
- 5Don't be afraid to mix and match different types of translucent materials if you have them on hand. While tissue paper is ideal, thin cellophane or even colored plastic wrap can add interesting textures and light effects to your sun catchers.
- 6If your glue is too thick, you can slightly thin it with a tiny bit of water. Apply it thinly and evenly to avoid soaking through the tissue paper too much, which can cause it to rip or create a cloudy effect. A little goes a long way.
- 7Consider using a sponge brush for applying the glue. This can help distribute it evenly and thinly across the paper plate, reducing the risk of the tissue paper becoming too wet and tearing.
- 8To create a more intricate design, you can use a craft knife to cut out shapes from the center of the paper plate before adding the tissue paper. This allows for more complex frames and patterns, though it requires adult supervision and skill.
Related Activities You Might Enjoy
Frequently Asked Questions
What age are paper plate sun catchers good for?
Paper plate sun catchers are ideal for preschoolers aged 3 to 6. Younger children can enthusiastically help with tearing the tissue paper into smaller pieces, which is a great fine motor skill activity. Older children in this age range can manage cutting the tissue paper with child-safe scissors and applying the glue with a bit of guidance. The entire process is designed to be simple and engaging, allowing for success and a sense of accomplishment for this age group. With adult supervision, even younger toddlers can participate by dabbing glue or pressing tissue paper pieces onto the plate.
Can I use other types of paper for sun catchers?
While tissue paper works best for its translucency and vibrant color, you can certainly experiment with other materials for unique effects. Cellophane, especially colored cellophane, is an excellent alternative that offers a similar translucent quality and can create a more glossy finish. Thin, colored plastic wrap can also be used, though it might be more delicate to handle. It's important to avoid thicker materials like cardstock, construction paper, or regular printer paper, as these are opaque and will block the light, preventing the sun catcher effect. The key is to use materials that allow light to pass through.
How do I make the sun catchers more durable?
To make your paper plate sun catchers more durable and long-lasting, there are a few effective methods. The simplest approach is to glue a second paper plate frame on top of the first one after the tissue paper has dried. This creates a thicker, more robust border that protects the edges of the tissue paper and adds structural integrity. For an even more resilient sun catcher, consider covering the entire finished piece, front and back, with clear contact paper or laminating sheets once all the glue is completely dry. This will make them water-resistant and less prone to tearing.
What if my glue is too thick for the tissue paper?
If your white craft glue seems too thick and is causing the tissue paper to clump or tear, you can slightly thin it with a tiny amount of water. Add water very gradually, stirring until you achieve a consistency that spreads smoothly but isn't watery. The goal is to apply it thinly and evenly to the paper plate, avoiding soaking through the tissue paper too much, which can cause it to rip or create a cloudy effect. A slightly thinned glue will allow for better coverage and a cleaner finish on your sun catcher.
How can I create different patterns with the tissue paper?
Creating different patterns with the tissue paper is where the real artistic fun begins! For a classic look, simply overlap pieces randomly to create a mosaic effect, allowing the colors to blend where they meet. To achieve a gradient, start with lighter shades of a color on one side and gradually transition to darker shades on the other. You can also try layering colors in stripes, checkerboard patterns, or even swirling designs. Gently pressing the tissue paper into the glue can create subtle texture variations. Don't be afraid to experiment; the beauty of this craft is its forgiving nature and the unique results each attempt yields.
Can I use glitter or other embellishments on my sun catchers?
Absolutely! Adding glitter or other small embellishments can take your paper plate sun catchers to the next level of sparkle and visual interest. You can apply a thin layer of glue to the paper plate frame itself and sprinkle glitter over it before adding the tissue paper, or add glitter directly onto the tissue paper once it's glued down. Small sequins, beads, or even tiny cut-out shapes from colored paper can be glued onto the frame or the tissue paper for added texture and shine. Just be sure to apply these embellishments before the final sealing layer of glue dries, and ensure they are securely attached.
What Next?
Once your paper plate sun catchers are complete and dry, they're ready to adorn any window, casting colorful patterns throughout your room. Consider creating a whole collection in various color palettes to celebrate different seasons or holidays. For a more permanent display, you can even seal the edges with a clear craft varnish. When not in use, store them flat to prevent damage. This project is a gateway to many other recycled crafts; why not try making stained glass effects with contact paper next, or explore creating larger window art with painted cellophane?
Free: 10 Paper Crafts Anyone Can Make in 5 Minutes
Get our beginner guide + new craft ideas weekly.
No spam. Unsubscribe anytime.
Did you complete this activity?
Related
You might also like

Paper Roll Bunny Buddies
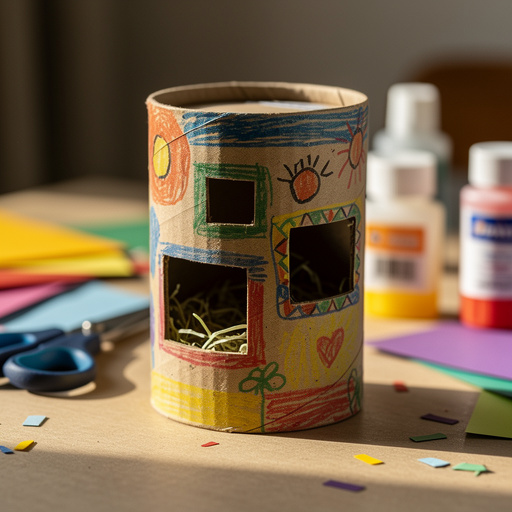
Cardboard Tube Critter Cages

Nature's Sun Catcher Mobiles
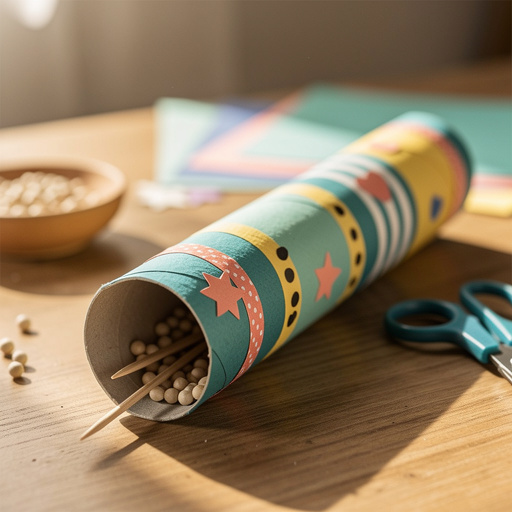
Paper Roll Rainmaker

Toilet Paper Roll Rocket Ships