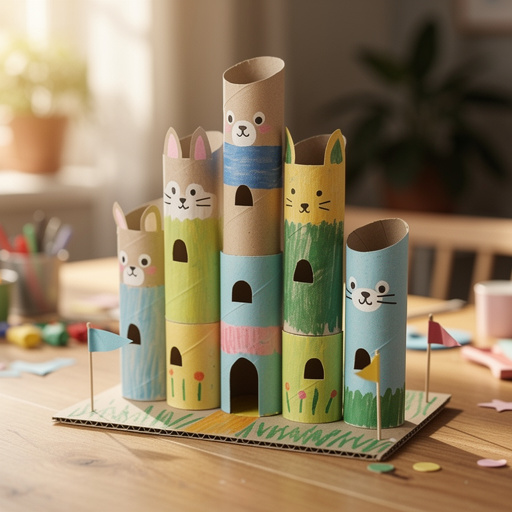
How to Create Cardboard Tube Critter Castles — Easy Step-by-Step Guide
Transform humble cardboard tubes into enchanting castles for your favorite small toys or imaginary creatures. A fun, screen-free family activity that sparks creativity. This beginner-friendly project is perfect for kids aged 5+ and can be completed in about an hour.

Quick answer
To make Cardboard Tube Critter Castles, you need cardboard tubes, scissors, glue, and paint, taking about 60 minutes. Start by cutting doors and windows, then assemble and decorate your castle. This beginner-friendly activity has 10 steps and is perfect for families with kids aged 5+.
What you need
Shop on Amazon · As an Amazon Associate we earn from qualifying purchases. Links above are affiliate links — we may earn a commission at no extra cost to you.
Embark on a whimsical crafting adventure with this delightful Cardboard Tube Critter Castles project! In a world often dominated by screens, this hands-on activity offers a refreshing opportunity for families to connect, create, and unleash their imaginations. Transforming ordinary household recyclables into miniature fortresses for beloved toys or fantastical creatures is not only incredibly rewarding but also teaches valuable lessons about repurposing materials. This project is perfectly suited for young children with adult supervision, making it an ideal choice for a rainy afternoon, a weekend craft session, or even a fun birthday party activity.
On this page
Step-by-Step Instructions
- 1
Gather all your materials in a clear, well-lit workspace, ensuring you have enough room to spread out and work comfortably. Lay down newspaper or a craft mat to protect your surfaces from paint and glue.
- 2
Decide on the basic shape and layout of your castle. You can stand the cardboard tubes upright as individual towers, or glue them side-by-side to create walls and connected structures. Consider the scale of the toys that will inhabit your castle when planning its size.
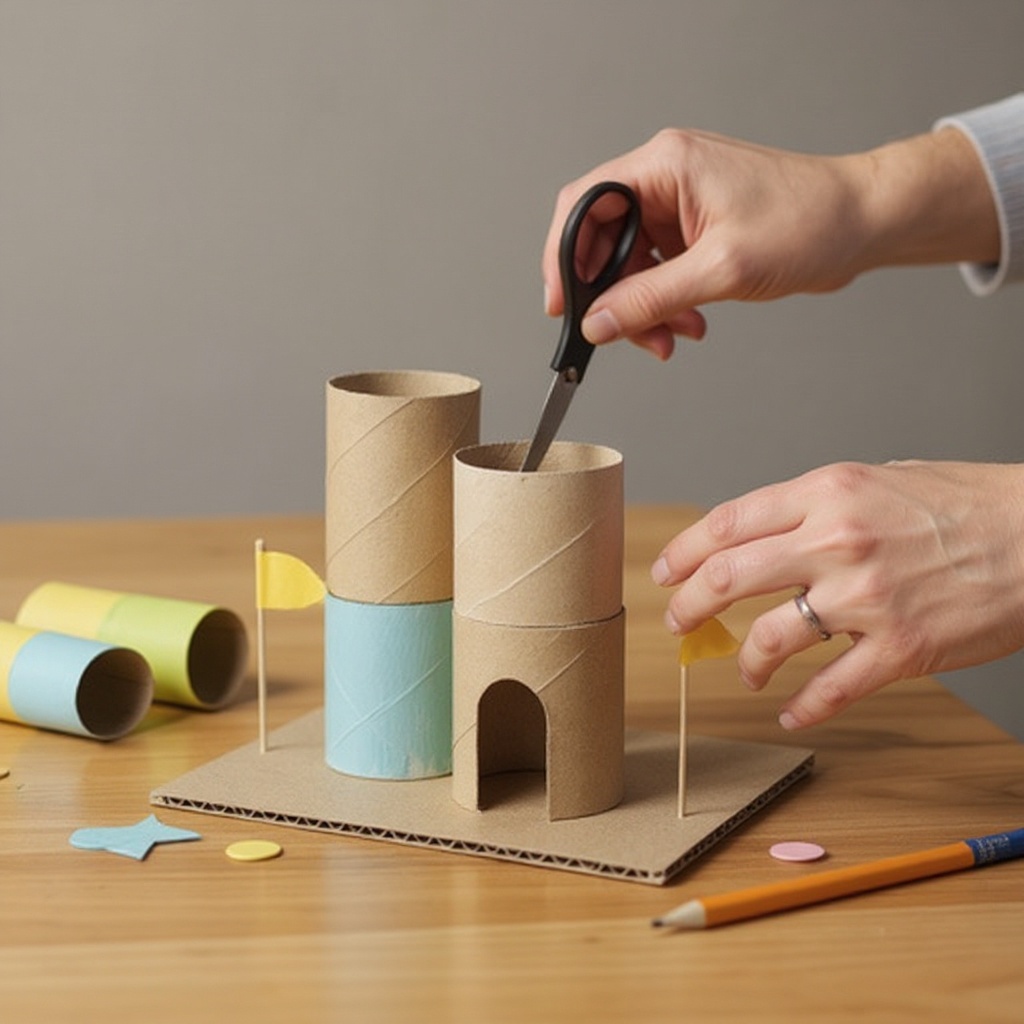
- 3
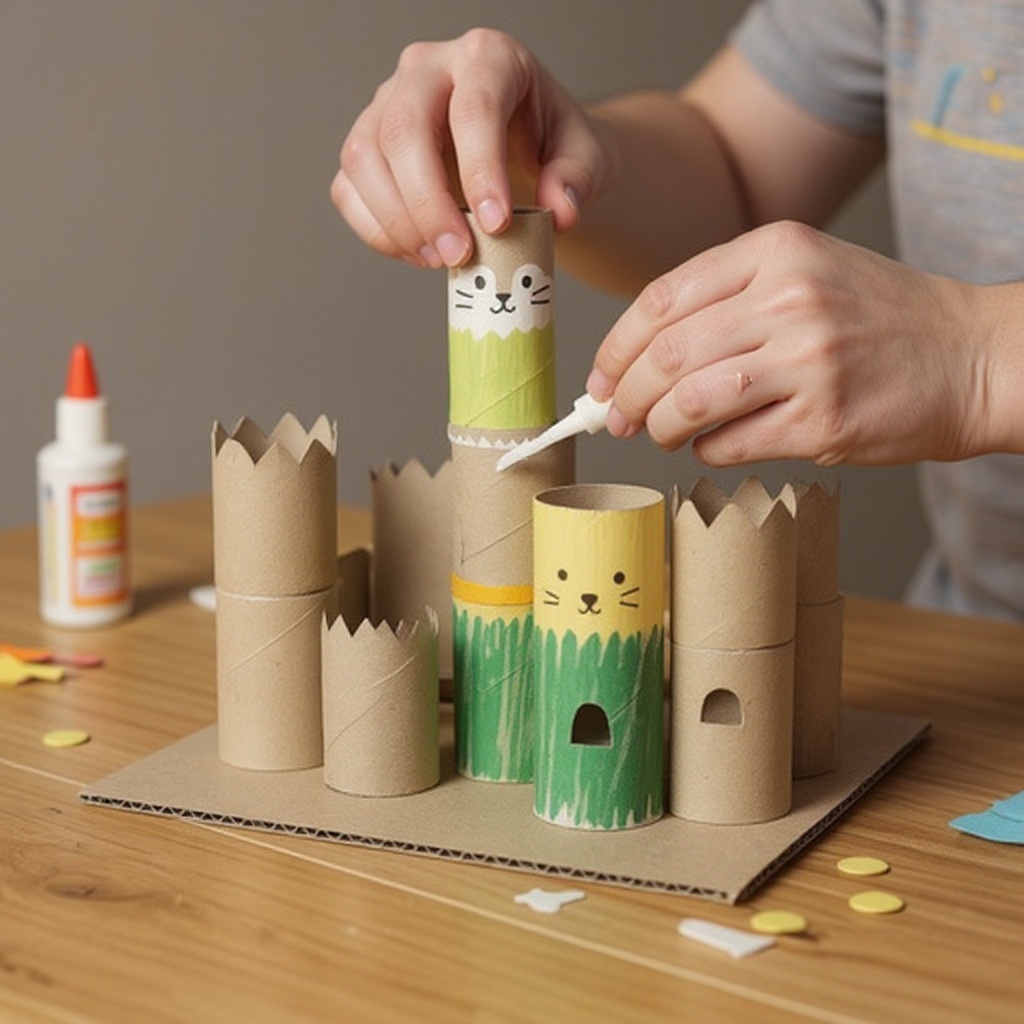
For each tube intended to be a main structure, carefully cut out a door shape on one side. You can make it a simple rectangle, a classic arch, or even a more elaborate gothic-style opening. Ensure the door is large enough for your intended critters to enter and exit.
- 4
Cut out small window shapes on the sides of the tubes to add character and allow light to peek through. Vary the shapes and sizes of these windows for visual interest; think small square openings, round portholes, or even narrow arrow slits.
- 5
To create impressive turrets or battlements, carefully cut the top edge of some tubes into a zig-zag or crenellated pattern. This adds a classic castle silhouette and makes your creation instantly recognizable.
- 6
Begin assembling your castle by applying glue to the sides of the tubes you wish to connect. Hold them firmly in place for at least a minute until the glue begins to set, ensuring a strong bond.
- 7
Continue gluing tubes together to form the main walls, distinct towers, and any other desired castle structures. Don't be afraid to experiment with different arrangements to create a unique and sprawling fortress.
- 8
If you're using paper towel rolls, you might want to cut them into varying heights to create a more dynamic and visually interesting castle. This also allows for different levels and sections within your structure.
- 9
For added stability, especially if your castle has multiple levels or intricate connections, consider using masking tape to temporarily secure tubes while the glue dries completely. Once the glue is fully set, you can carefully remove the tape.
- 10
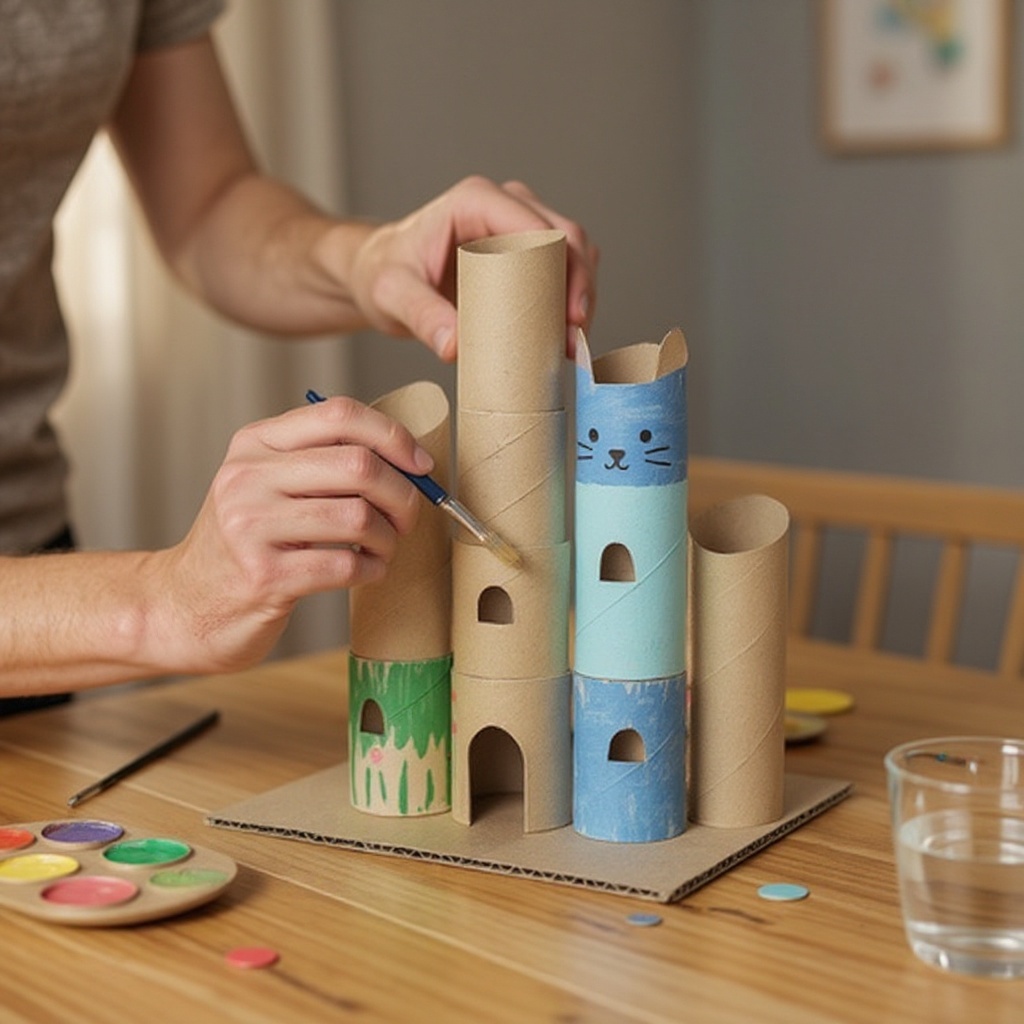
Once the glue is completely dry and your castle structure is stable and secure, it's time to bring it to life with paint. Begin by applying a base coat of your chosen color to the entire castle, ensuring even coverage.
- 11
Allow the base coat of paint to dry thoroughly before adding subsequent layers or details. This might take 20-30 minutes depending on the paint thickness and humidity.
- 12
Now, let your creativity soar as you paint the details of your castle. Add different colors for roofs, windows, doors, and any decorative elements. You can create stone textures, brick patterns, or even fantastical designs.
- 13
While the paint is still wet, or after it has dried, you can add decorative touches. Sprinkle glitter for a magical sparkle, adhere small craft gems or sequins for windows and embellishments, or glue on cut-out flags from construction paper.
- 14
If you're using markers, you can draw intricate details like vines, moss, or even tiny shields onto the painted surfaces for added realism or whimsy.
- 15
Consider adding a drawbridge by cutting a flap in the main door and attaching a string or pipe cleaner. You can also create flags by gluing small pieces of fabric or construction paper onto toothpicks or pipe cleaners and inserting them into the tops of towers.
- 16
Allow all paint and decorative elements to dry completely before handling or playing with your critter castles. This ensures everything is securely attached and the paint is fully cured.
Tips & Troubleshooting
- 1If the glue isn't holding tubes together as firmly as you'd like, use masking tape to secure them temporarily while the glue dries, then carefully remove the tape once the bond is strong. This is especially helpful for larger or more complex structures.
- 2Experiment with different cutting techniques for doors and windows to add unique architectural features. You can create battlements along the top of walls, arched doorways, or even small alcoves for tiny inhabitants.
- 3Let kids paint their own sections of the castle to give each part a unique flair and foster a sense of ownership. Encourage them to mix colors and create their own patterns, making each castle truly one-of-a-kind.
- 4Once dry, the castles can be used as homes for small toys, action figures, or even as decorative pieces to add a touch of whimsy to a room. They also make fantastic props for imaginative storytelling.
- 5For a more durable finish, consider applying a clear sealant spray once all the paint and decorations are dry. This will protect your critter castles from wear and tear, especially if they will be handled frequently.
- 6Don't be afraid to mix and match materials. Combine cardboard tubes with other recycled items like bottle caps for turrets, or small boxes for additional rooms, to create even more elaborate castles.
- 7If you're aiming for a specific theme, like a fairy castle or a dragon's lair, incorporate relevant colors and embellishments. Think pastel colors and glitter for fairies, or darker tones and rough textures for a dragon's domain.
- 8Safety first! Always supervise young children when using scissors or a hot glue gun. Ensure a well-ventilated area if using spray sealants.
Related Activities You Might Enjoy
Frequently Asked Questions
What are some easy family activities at home?
There are numerous engaging and easy family activities that can be enjoyed right at home, fostering connection and creating lasting memories. Crafting with recycled materials, like these cardboard tube critter castles, is a fantastic option that encourages creativity and sustainability. Other simple yet rewarding activities include playing board games or card games, which promote strategic thinking and friendly competition. Baking simple recipes together, such as cookies or muffins, offers a delicious outcome and teaches valuable kitchen skills. Family read-aloud sessions, where everyone takes turns reading chapters from a book, can spark imagination and a love for literature. Puzzles are also excellent for collaborative problem-solving, and even a simple fort-building session with blankets and pillows can lead to hours of imaginative play.
How can I make crafts with kids using recycled materials?
Making crafts with kids using recycled materials is a wonderfully creative and eco-conscious endeavor. The possibilities are virtually endless, limited only by your imagination! Cardboard tubes, like those used for these critter castles, can be transformed into rockets, animals, binoculars, or even musical instruments. Plastic bottles can become planters, bird feeders, or decorative sculptures. Egg cartons are perfect for creating flower collages, insect crafts, or even miniature treasure boxes. Old newspapers and magazines can be used for papier-mâché projects, collages, or even for creating textured backgrounds. With basic art supplies like glue, scissors, paint, and markers, you can help children turn everyday 'trash' into extraordinary treasures, teaching them about repurposing and environmental responsibility along the way.
What age is appropriate for cardboard tube crafts?
Cardboard tube crafts are incredibly versatile and can be enjoyed by a wide age range, typically starting around age 4 or 5 with appropriate adult supervision. At this age, children can begin to participate in cutting (with assistance), gluing, and painting, developing their fine motor skills and creativity. As children get older, around ages 7 and up, they can handle more complex designs and assembly independently, taking on more intricate cutting tasks and planning their own castle layouts. Even teenagers and adults can find enjoyment in these crafts, using them as a base for more elaborate dioramas or as a relaxing, mindful activity. The key is to adapt the complexity of the project to the child's developmental stage and always prioritize safety, especially when using sharp tools.
How long does it take to make cardboard tube castles?
The time it takes to make cardboard tube castles can vary depending on the complexity of the design, the number of embellishments, and the age of the crafters involved. However, for a basic to moderately detailed castle, you can expect the process to take approximately 45 to 60 minutes, including drying time for the glue and paint. This timeframe generally covers gathering materials, cutting out shapes, assembling the structure, painting, and adding decorative touches. If you're aiming for a very elaborate castle with multiple towers, intricate details, and extensive embellishments, it might take a bit longer, potentially extending to 1.5 to 2 hours, especially if you factor in multiple drying stages for different layers of paint or glue. It's a flexible project that can be completed in a single crafting session or spread out over a couple of days.
What are some ways to make cardboard tube castles more durable?
To enhance the durability of your cardboard tube critter castles, several techniques can be employed. Once the paint and glue have completely dried, applying a clear sealant spray is an excellent way to protect the surfaces from scuffs, moisture, and general wear and tear. Choose a sealant that is suitable for paper and cardboard, and ensure you use it in a well-ventilated area. For structural integrity, especially in areas where tubes are joined, reinforcing the connections with extra glue or even small strips of strong tape (like packing tape or duct tape, which can then be painted over) can significantly strengthen the castle. If the castle will be handled frequently by younger children, consider using a stronger adhesive like a hot glue gun (with adult supervision) for the initial assembly, as it provides a more robust bond than white craft glue. Finally, storing the castles carefully when not in use, perhaps in a box or on a shelf away from direct sunlight and moisture, will also help preserve their condition over time.
What Next?
Once your magnificent critter castles are complete and fully dry, the real fun begins as you populate them with your favorite small toys, action figures, or even imaginary woodland sprites. These castles aren't just temporary playthings; they can become cherished decorative pieces that add a touch of enchantment to a child's bedroom or playroom. For future adventures, consider expanding your castle village by collecting more tubes and incorporating different architectural elements like bridges, courtyards, or even moats. Store your creations carefully to preserve their magic for countless imaginative journeys.
Free: 10 Paper Crafts Anyone Can Make in 5 Minutes
Get our beginner guide + new craft ideas weekly.
No spam. Unsubscribe anytime.
Did you complete this activity?
Related