How to Make Egg Carton Critters — Easy Step-by-Step Guide
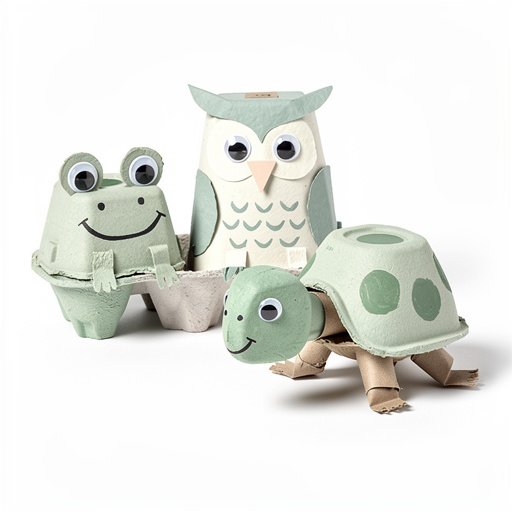
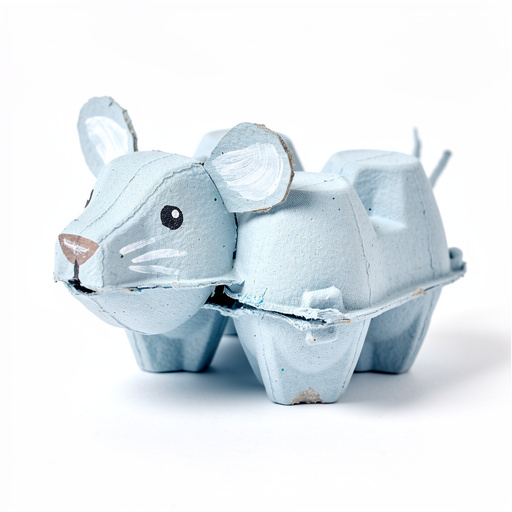
Transform humble egg cartons into a menagerie of cute creatures! This easy craft is perfect for little hands and sparks imaginative play.
Quick answer
To make egg carton critters, you need an empty cardboard egg carton (about 1 dozen size), child-safe scissors, white craft glue or a glue stick, and various craft supplies like washable tempera paints, paintbrushes, googly eyes, and construction paper scraps. This beginner-friendly activity takes approximately 30-45 minutes to complete and is ideal for 3-year-olds with adult supervision. Start by having an adult help cut the egg carton into individual cups or small sections, then let creativity flow as you paint, decorate, and assemble your unique creatures.
What you need
Shop on Amazon · As an Amazon Associate we earn from qualifying purchases. Links above are affiliate links — we may earn a commission at no extra cost to you.
Embark on a delightful crafting adventure that breathes new life into everyday recyclables! Transforming ordinary cardboard egg cartons into a vibrant collection of charming critters is an incredibly rewarding and accessible project. It’s a fantastic way to engage young children, fostering their creativity, fine motor skills, and an early appreciation for sustainability. This activity is perfect for rainy afternoons, classroom art sessions, or simply a fun weekend project that guarantees smiles and imaginative storytelling. Get ready to unleash a world of playful possibilities with this simple yet engaging egg carton craft!
On this page
Step-by-Step Instructions
- 1
Ask an adult to help you carefully cut the egg carton into individual cups or small sections. For most critters, a single cup works well as the body, but for longer creatures like caterpillars, you'll need to cut out multiple connected cups or individual cups to glue together. Ensure the edges are relatively smooth to make decorating easier.
- 2
Before you start painting, decide what kind of critter you want to make. Will it be a buzzing bee, a hopping bunny, a slithering snake, a friendly ladybug, or a multi-legged spider? Thinking about your critter's identity will help you choose colors and features.
- 3
Paint each egg carton section with your chosen colors, allowing your imagination to run wild. For example, a ladybug might be bright red, a bee yellow and black, and a bunny pink or white. Don't be afraid to mix colors or create patterns. Ensure you cover the entire surface, including the inside of the cup if it will be visible.
- 4
Let the paint dry completely before moving on to the next step. This is crucial to prevent smudging and ensure the glue adheres properly. You can speed up drying time by placing the painted sections near a fan or in a sunny spot, but avoid direct heat which can warp the cardboard.
- 5
Once the paint is thoroughly dry, it's time to give your critter a face! Glue two googly eyes onto the front of your critter's head section. Position them close together for a friendly look or further apart for a more surprised expression. You can use different sized googly eyes to create variety.
- 6
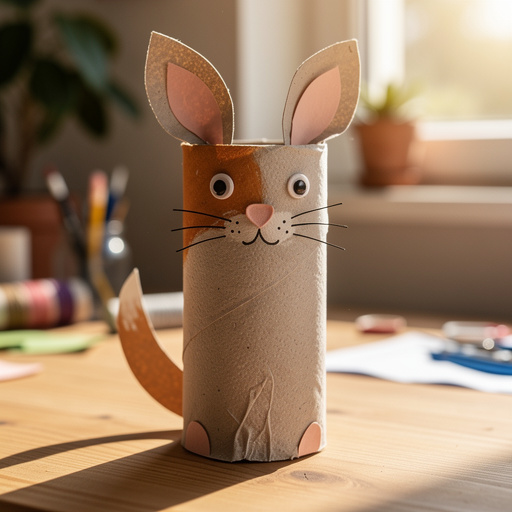
Now, let's add some personality and defining features. Cut small shapes from construction paper for ears, antennae, wings, or fins. For example, bunny ears can be oval shapes, butterfly wings can be delicate curves, and antennae can be thin strips. Glue these carefully onto the appropriate parts of your critter's body.
- 7
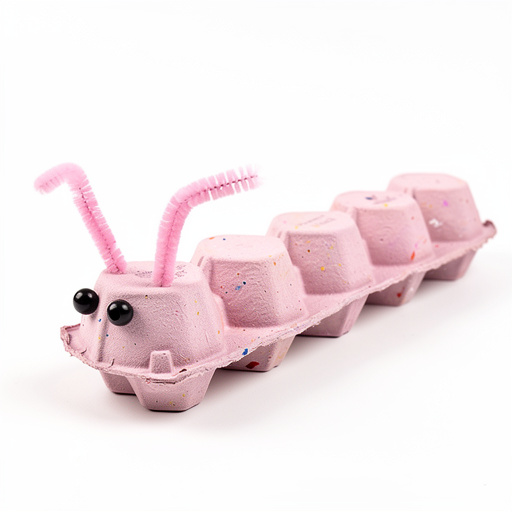
For a delightful caterpillar, glue several painted egg carton sections together in a line. You can use 3-5 cups for a short caterpillar or more for a longer one. Make sure to overlap the edges slightly when gluing to create a strong bond, and allow the glue to dry completely before adding eyes and other features.
- 8
Add finer details to bring your critter to life. Use markers to draw a mouth, nostrils, or other facial expressions. You can also glue on a small pom-pom for a cute nose or add tiny dots for texture. This step allows for a lot of personalization and character development.
- 9
If you're using pipe cleaners, this is where they can add an extra dimension. Twist them into legs, antennae, or tails and carefully poke them through the cardboard egg carton. An adult should assist with this step to ensure safety and prevent the carton from tearing excessively. You can bend the pipe cleaners to create dynamic poses.
- 10
Consider adding texture or extra flair. You could glue on small pieces of yarn for hair, tiny sequins for sparkle, or even small fabric scraps for a unique look. The possibilities are endless when it comes to embellishing your egg carton creations.
- 11
If you're making a bee, paint stripes on a yellow or orange cup. For a ladybug, add black spots to a red cup. Think about the natural markings of the animals you're creating and try to replicate them with paint or paper.
- 12
For a bird, you might cut a small triangle from construction paper for a beak and glue it to the front. You could also use a bit of yellow or orange paint to create a beak directly on the carton.
- 13
If you're creating a spider, use eight pipe cleaners for legs. Poke four on each side of the egg carton cup and bend them to look like they are crawling.
- 14
For a butterfly or moth, cut out two pairs of wings from colorful construction paper. Glue them to the back of the egg carton body, ensuring they are symmetrical for a balanced look.
- 15
Don't forget to let all the glue and paint dry thoroughly between each step. Rushing the process can lead to messy results and pieces falling off. Patience is key in crafting!
- 16
Once your critter is fully assembled and dry, give it a name! This adds another layer of imaginative play and helps children connect with their creations.
Tips & Troubleshooting
- 1If the paint is too thin and doesn't provide enough coverage, don't worry! Simply apply a second coat of paint after the first has dried completely. This will give your critters a richer, more opaque finish and make the colors pop.
- 2Instead of using paint, you can cover the egg carton sections with colorful construction paper. Cut the paper to size and glue it smoothly onto the carton. This is a great alternative if you want to avoid paint or if your child prefers working with paper.
- 3Let your child's imagination guide them throughout the entire process! There's no right or wrong way to make an egg carton critter. Encourage them to experiment with colors, shapes, and combinations. The most unique creations often come from unexpected ideas.
- 4Ensure all the glue and paint you use are non-toxic and child-safe. This is especially important when crafting with younger children who might be tempted to put materials in their mouths. Always supervise young children during craft activities.
- 5Store your finished egg carton critters in a designated box, on a shelf, or in a playhouse. This keeps them organized and readily available for hours of imaginative play, allowing them to become characters in various storytelling adventures.
- 6Experiment with different types of egg cartons. While cardboard is common, some people use styrofoam or plastic cartons. However, cardboard is generally the easiest to cut, paint, and glue, making it ideal for this project.
- 7Consider adding small details like glitter for sparkle, yarn for hair, or even tiny buttons for eyes if googly eyes aren't available. These extra touches can elevate your critters and make them even more special.
- 8Don't discard the leftover pieces of the egg carton! The dividers can be used as small palettes for paint, or the larger sections can be incorporated into other craft projects, further promoting recycling.
Related Activities You Might Enjoy
Frequently Asked Questions
What are the best egg carton crafts for 3-year-olds?
Egg carton crafts are wonderfully versatile and perfect for 3-year-olds. Beyond making critters, you can transform egg cartons into charming flowers by cutting out the individual cups and decorating them with paint and glitter. Simple masks can also be created by cutting out eye holes and adding decorative elements. These projects are fantastic because they utilize recycled materials, which is a great way to introduce environmental awareness early on. They also significantly help in developing fine motor skills through activities like cutting (with adult help), gluing, painting, and attaching small embellishments. The open-ended nature of these crafts allows for endless creativity and adaptation to a child's developing abilities.
How do you make egg carton animals?
Making egg carton animals is a straightforward and enjoyable process. Begin by cutting the egg carton into individual cups or sections, depending on the animal you envision. Next, paint these sections in colors that suit your chosen animal, allowing them to dry completely. Once dry, the fun part is adding features: glue on googly eyes for the eyes, cut out ears from construction paper for mammals like bunnies or cats, or use pipe cleaners for legs or antennae. For a caterpillar, simply glue several painted cups together in a row. Let your creativity lead the way, and don't be afraid to mix and match materials to bring your unique egg carton animals to life!
What materials do you need for egg carton crafts?
For basic egg carton crafts, the essential materials include an empty cardboard egg carton, which serves as the primary building block. You'll also need child-safe scissors for cutting the carton and decorating materials. White craft glue or a glue stick is crucial for assembly. To add color and personality, have washable paints and paintbrushes on hand. Googly eyes are a popular choice for adding character, and construction paper scraps are perfect for cutting out shapes like ears, wings, or tails. Markers can be used for drawing details like mouths or patterns. Optional additions like pipe cleaners for legs or pom-poms for noses can further enhance your creations.
Are egg carton crafts good for toddlers?
Yes, egg carton crafts are absolutely excellent for toddlers! These activities provide a wealth of developmental benefits. They are particularly effective in helping toddlers develop their fine motor skills, which are crucial for tasks like writing and self-care. The act of holding a paintbrush, squeezing glue, cutting with child-safe scissors (under strict adult supervision), and attaching small items all contribute to strengthening hand and finger muscles. Furthermore, egg carton crafts promote creativity and imagination as toddlers decide what to make and how to decorate it. They also introduce the concept of recycling and reusing materials, fostering an early awareness of environmental responsibility in a fun and engaging way.
How can I make egg carton crafts more durable?
To make your egg carton crafts more durable, consider applying a sealant after the paint and decorations are completely dry. A clear acrylic spray sealant or a Mod Podge finish can add a protective layer that makes the cardboard more resistant to moisture and wear. For added strength, especially if you're creating larger structures or items that will be handled frequently, you can reinforce glued seams with extra glue or even small pieces of tape on the inside where they won't be visible. If using pipe cleaners for legs or antennae, ensure they are securely poked through and perhaps secured with a dab of glue on the inside to prevent them from pulling out easily. Allowing ample drying time between each step is also crucial for a strong final product.
What are some creative ideas for egg carton critter themes?
Beyond individual animals, you can create themed collections of egg carton critters! Consider a 'Garden Critters' theme with ladybugs, bees, butterflies, and worms. A 'Farm Animals' theme could include cows, pigs, and chickens. For a 'Jungle Adventure,' think monkeys, lions, and snakes. You could also explore a 'Under the Sea' theme with fish and octopuses, or even a 'Fantasy Creatures' theme with dragons and monsters. Another fun idea is to create a 'Seasonal' collection, like spooky Halloween critters or festive Christmas characters. These themes not only inspire creativity but also provide opportunities for learning about different environments and animals.
What Next?
Once your menagerie of egg carton critters is complete, the fun doesn't have to stop! These adorable creations are perfect for imaginative play, serving as characters in their own miniature stories. Consider creating a small diorama using a shoebox or a larger cardboard box to house your critters, complete with painted backdrops and natural elements like twigs or leaves. For a more advanced project, explore making larger egg carton animals by combining multiple sections or even using the entire carton as a base. Display your finished critters proudly on a shelf or in a dedicated play area, a testament to your creativity and resourcefulness.
Free: 10 Paper Crafts Anyone Can Make in 5 Minutes
Get our beginner guide + new craft ideas weekly.
No spam. Unsubscribe anytime.
Did you complete this activity?
Related