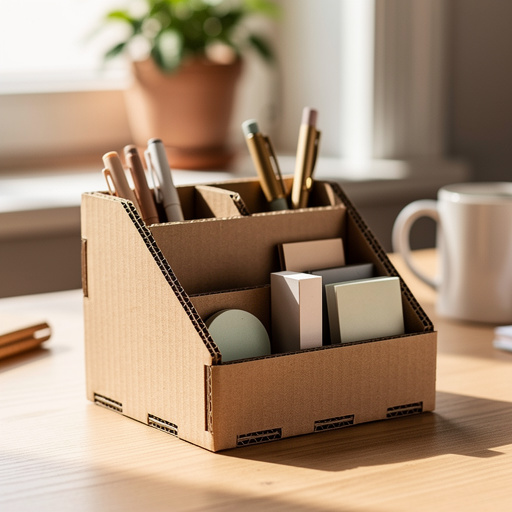
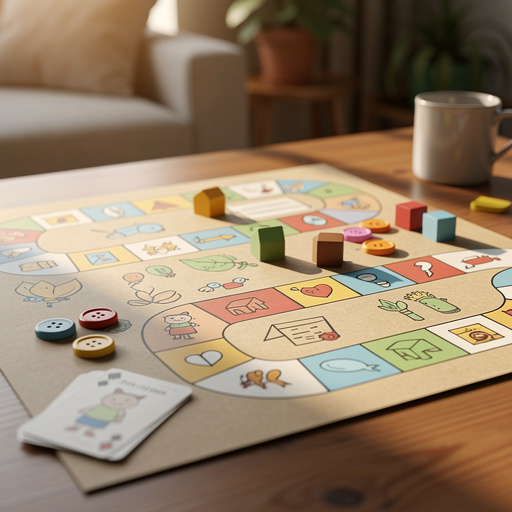
The Ultimate Guide to Crafting a Unique Upcycled Desk Caddy
Let's transform everyday recyclables into a super functional and stylish desk caddy that'll keep your study space organized and showcase your creativity. This isn't just any organizer; it's a chance to be resourceful and make something truly yours!
Quick answer
To make a fantastic upcycled desk caddy, you'll need about 2-3 cardboard tubes (like toilet paper rolls), a cereal box, a plastic bottle, cardstock, glue, scissors, and your favorite decorating supplies. This project typically takes around 60 to 90 minutes to complete, depending on how fancy you get with the decorating!
What you need
Shop on Amazon · As an Amazon Associate we earn from qualifying purchases. Links above are affiliate links — we may earn a commission at no extra cost to you.
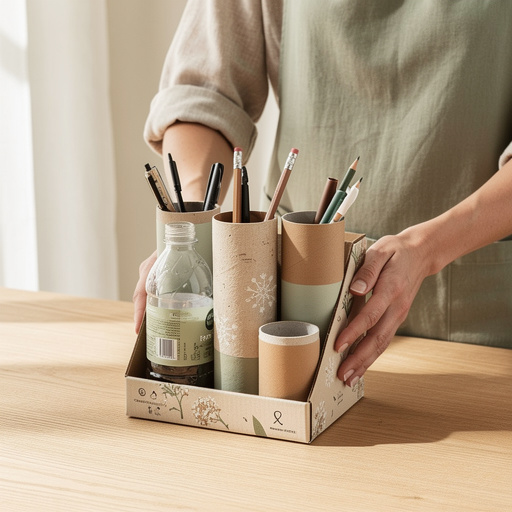
Hey crafters! If you're anything like me, you're always on the lookout for cool projects that are both useful and fun to make. Organizing my desk has always been a bit of a mission, and honestly, store-bought stuff can be so boring and expensive. That's why I absolutely love making my own desk caddies from things I'd normally toss in the recycling bin. It’s a brilliant way to keep your workspace tidy, express your style, and do a little something good for the planet. Desk organization itself has a surprisingly long history, evolving from simple inkwells and letter racks to the personalized organizers we use today, reflecting our need to curate our personal spaces. This guide will walk you through making a desk caddy that’s as unique as you are – let's get crafting!
On this page
Step-by-Step Instructions
- 1
Step 1: Prepare your base. Using a ruler and a craft knife or sturdy scissors, carefully cut the cereal box approximately in half horizontally, aiming for a clean, straight cut across the width. You'll use the bottom half as the sturdy base for your caddy; if it has flaps, glue them down securely to create a flat surface. If the cut edges are rough, you can trim them with scissors for a neater finish.

- 2
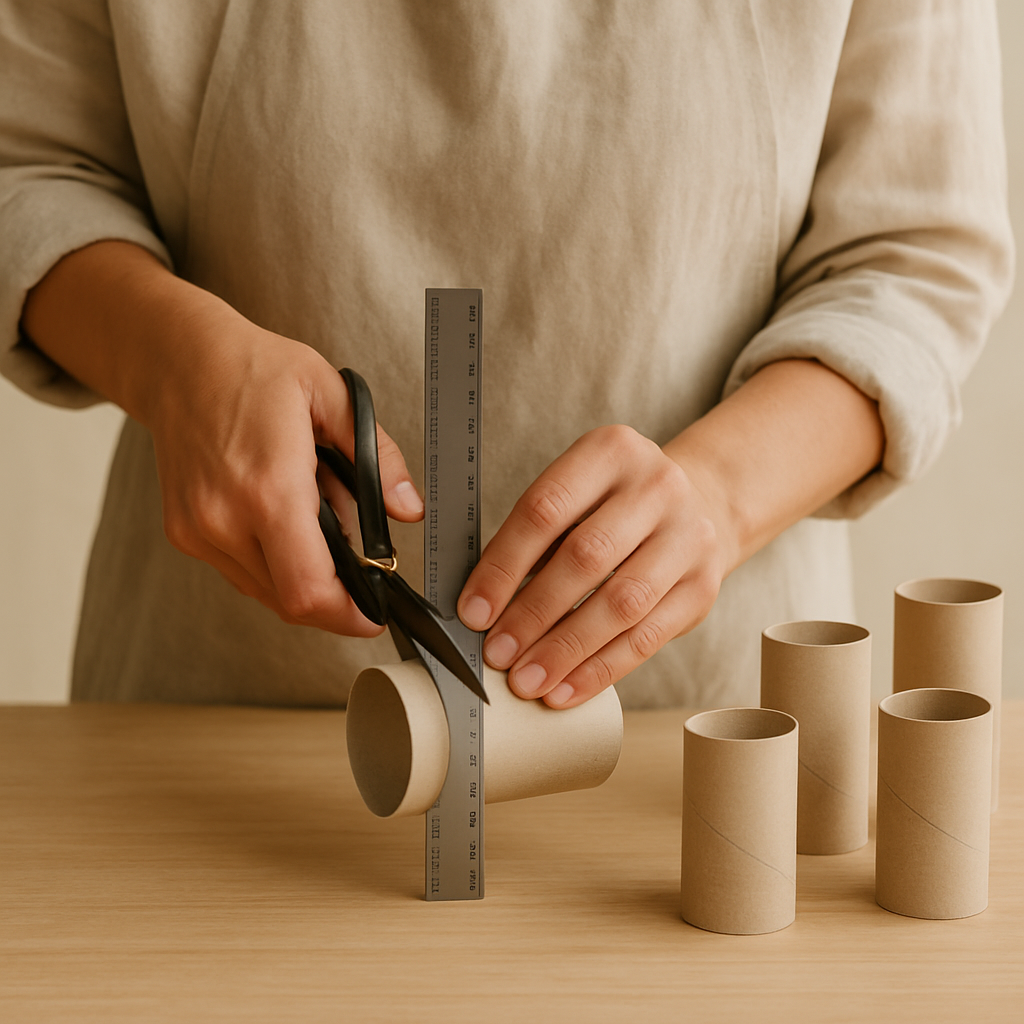
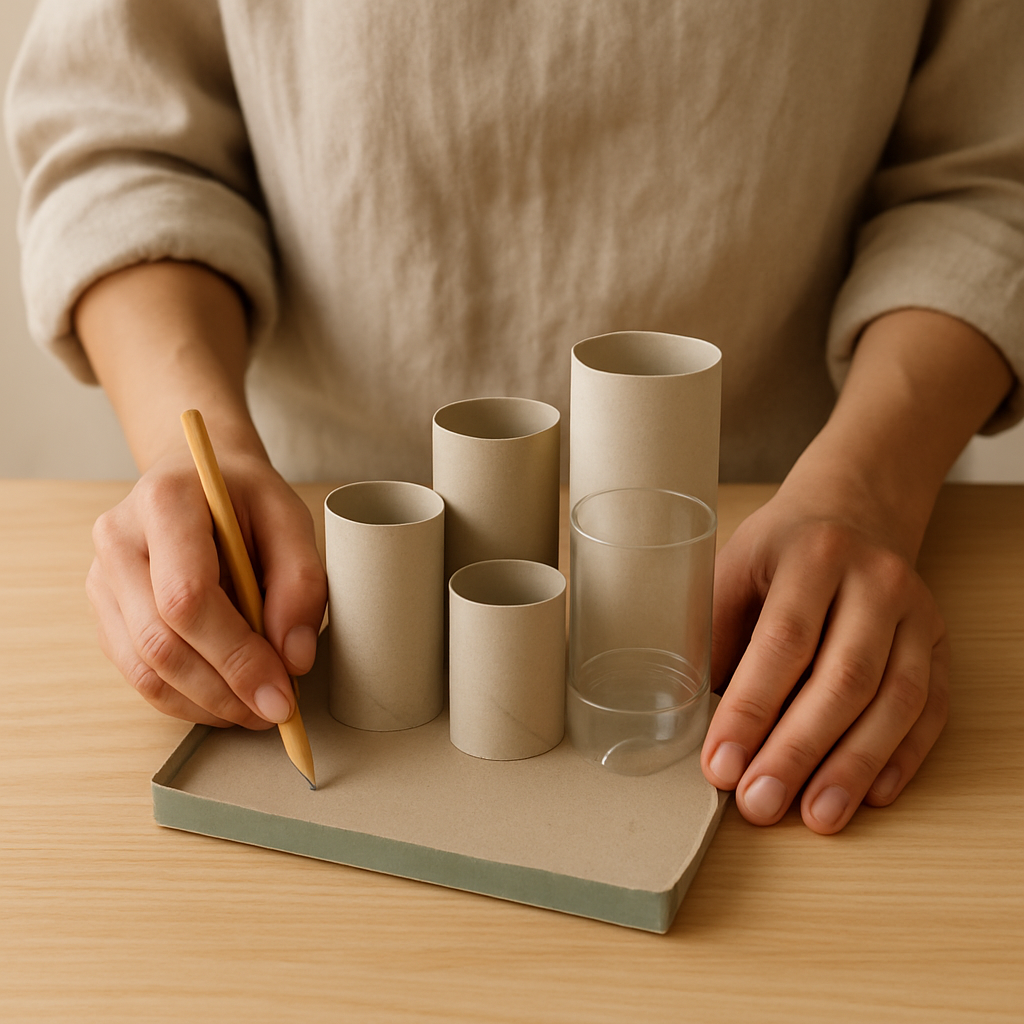
Step 2: Plan your compartment heights. Decide how tall you want each section of your caddy to be, ensuring no single tube or bottle section exceeds 15cm to prevent it from becoming too top-heavy. For visual interest and varied functionality, cut your toilet paper tubes to different heights, ensuring no single tube exceeds 10cm. For a paper towel tube, you could get two compartments, one at 12cm and another at 10cm; make sure your cuts are as straight and level as possible for a neat finish.
- 3
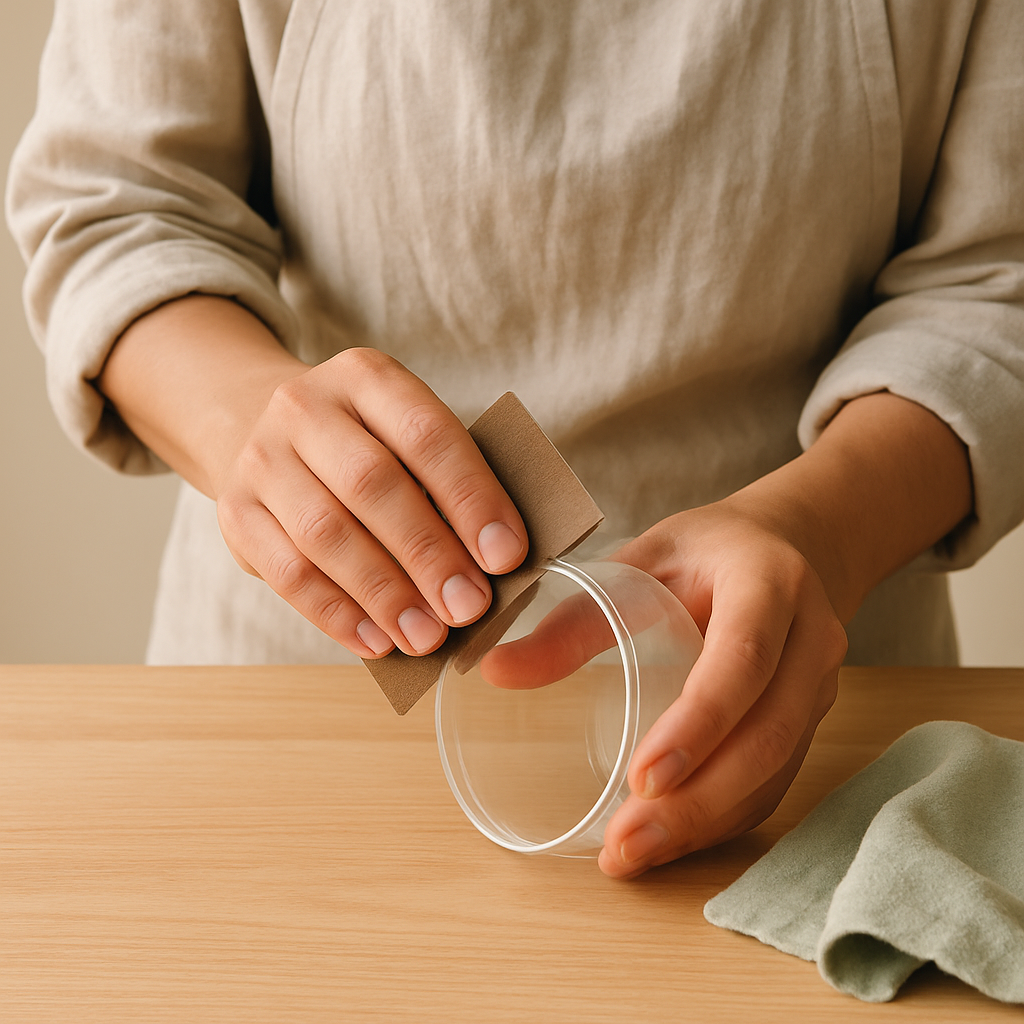
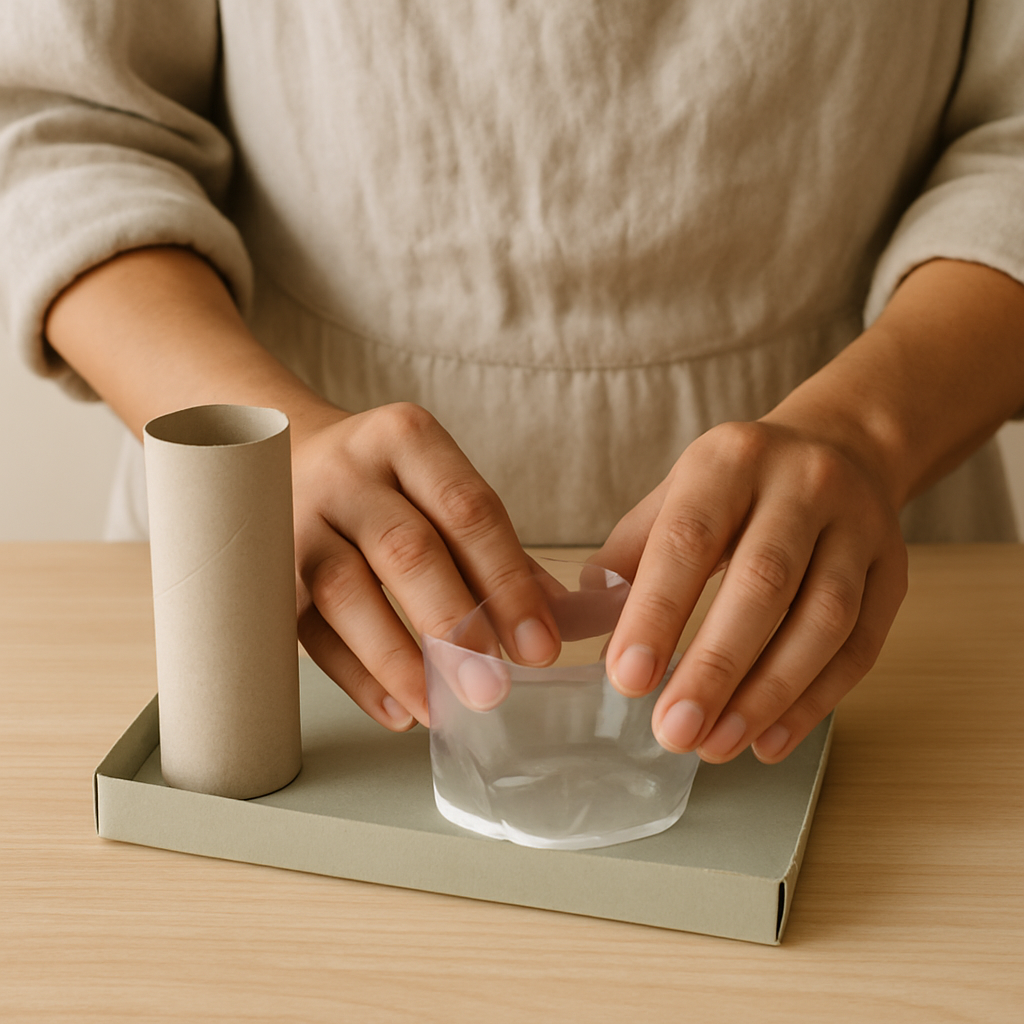
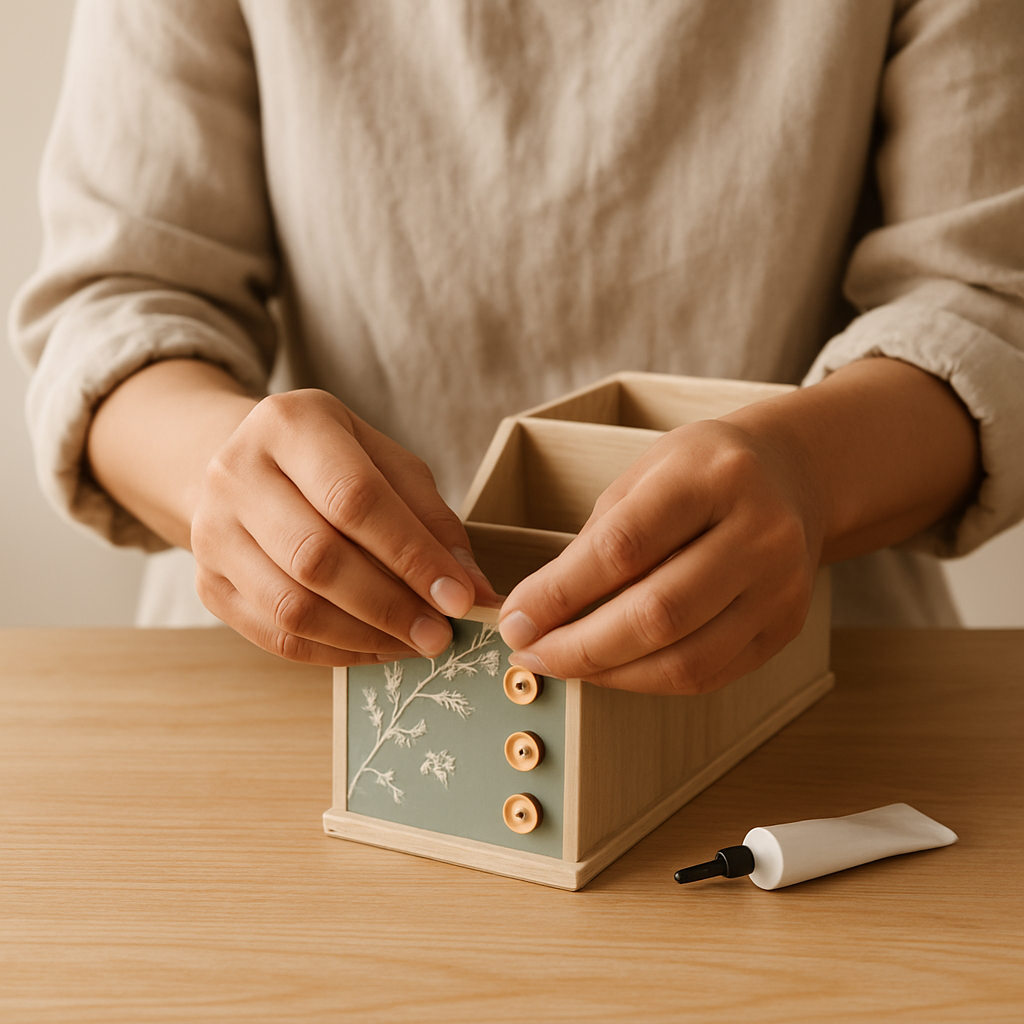
Step 3: Cut and smooth the plastic bottle. Adult supervision is required for this step. Carefully cut the top off your plastic bottle at your desired height, aiming for around 10-15cm. To make sure there are no sharp edges, gently rub the cut rim with medium-grit sandpaper until it feels smooth. After sanding, wipe the rim with a damp cloth to remove any plastic dust – safety first!
- 4
Step 4: Arrange your compartments. This is my favorite part – I love seeing how all the different shapes come together! Place your cut tubes and bottle section onto the cereal box base and play around with different layouts until you find a configuration that looks good and will hold all your supplies efficiently. You can even trace the bottom of each compartment onto the base with a pencil to ensure they fit snugly.
- 5
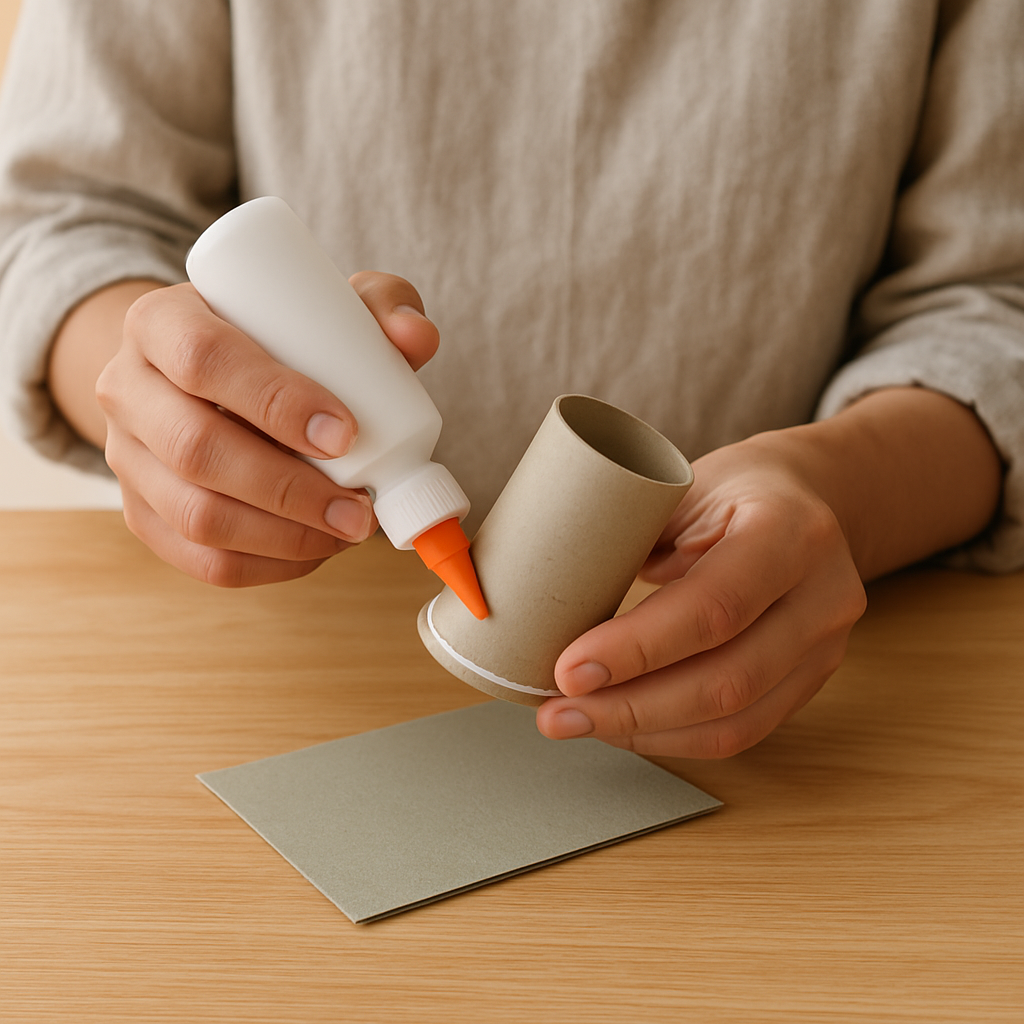
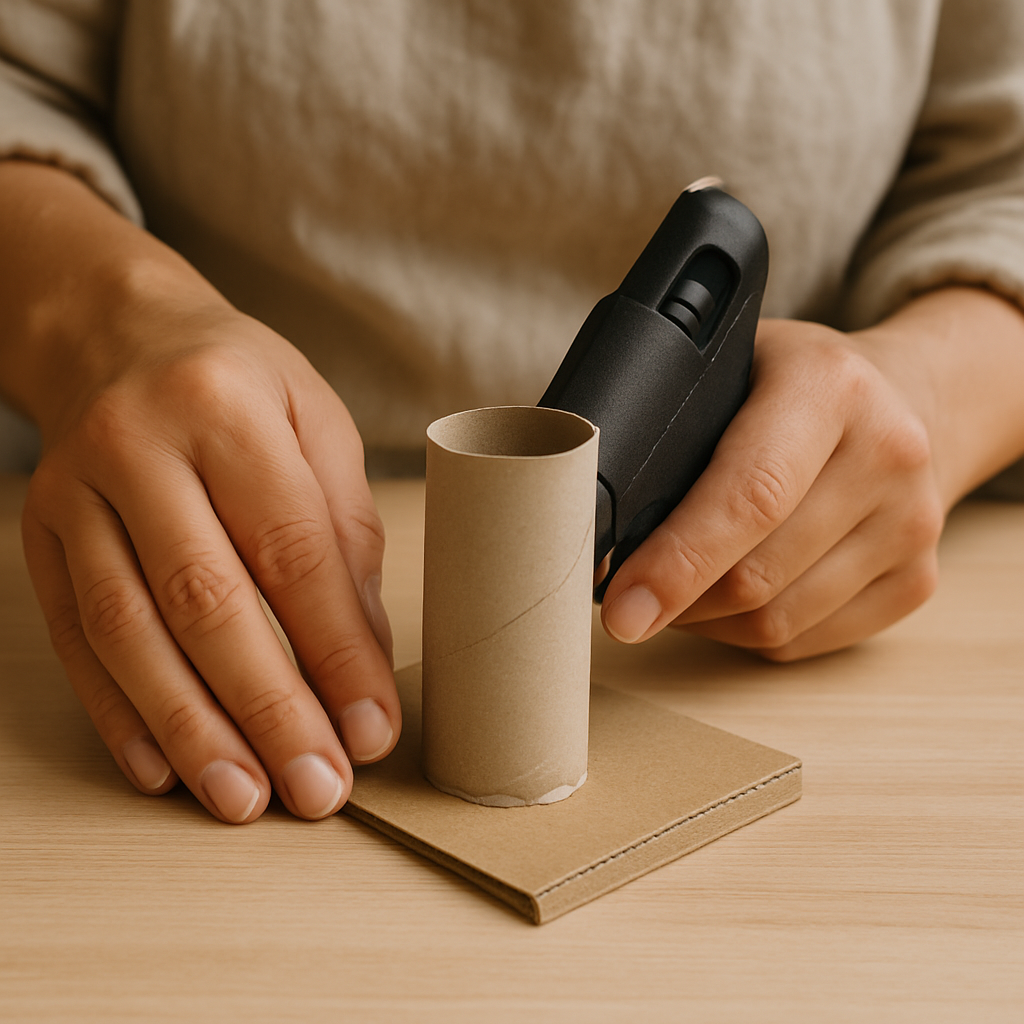
Step 5: Secure the first compartment. Take one of your prepared tubes or the bottle section. Apply a generous ring of craft glue or a bead of hot glue around its bottom edge. Press it firmly onto the cereal box base in your chosen spot and hold for about 30 seconds until the glue starts to set. If the compartment feels wobbly, don't worry! We'll reinforce it in Step 7.
- 6
Step 6: Add the remaining compartments. Repeat Step 5 for each of your other tubes and the bottle section, positioning them next to each other, or even slightly overlapping if you like the look. If any compartments feel a bit unstable, don't worry – we'll reinforce them in the next step. If the glue isn't holding well, try lightly sanding the surface where the glue will go for better adhesion.
- 7
Step 7: Reinforce all connections. For a really sturdy caddy, go back and add a bead of glue along all the seams where the compartments meet each other and where they meet the base. This is especially important if any of your pieces are leaning slightly. If you’re using craft glue and it’s not holding well, consider switching to a hot glue gun for these reinforcing points (remember that adult supervision!).
- 8
Step 8: Create a cardstock backing (optional but recommended). Cut a piece of cardstock to fit the back of your assembled compartments, ensuring it's slightly larger than the combined back edges for better adhesion. Apply glue to the back edges of your compartments and the base, then press the cardstock firmly into place. Hold until the glue sets; if it starts to peel, add more glue along the edge.

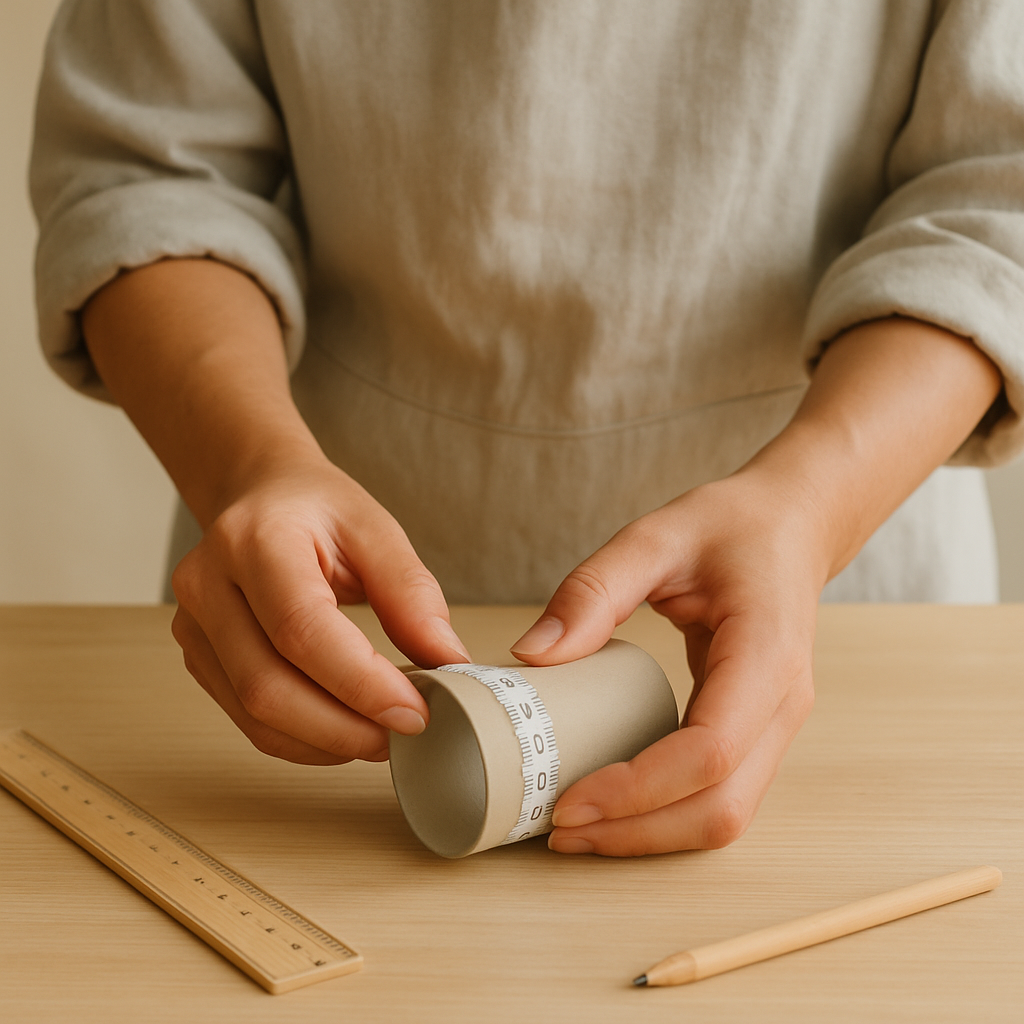
- 9
Step 9: Measure and cut your decorative paper. Now, let's get these compartments looking snazzy! For each tube and bottle section, measure its height and circumference. A good way to measure circumference is to wrap a flexible measuring tape or a piece of string around the tube, mark where it meets, and then measure the string against a ruler. Cut pieces of your chosen colored paper or fabric to match the height of the compartment you are wrapping, adding about 1cm extra to the circumference measurement for overlap.
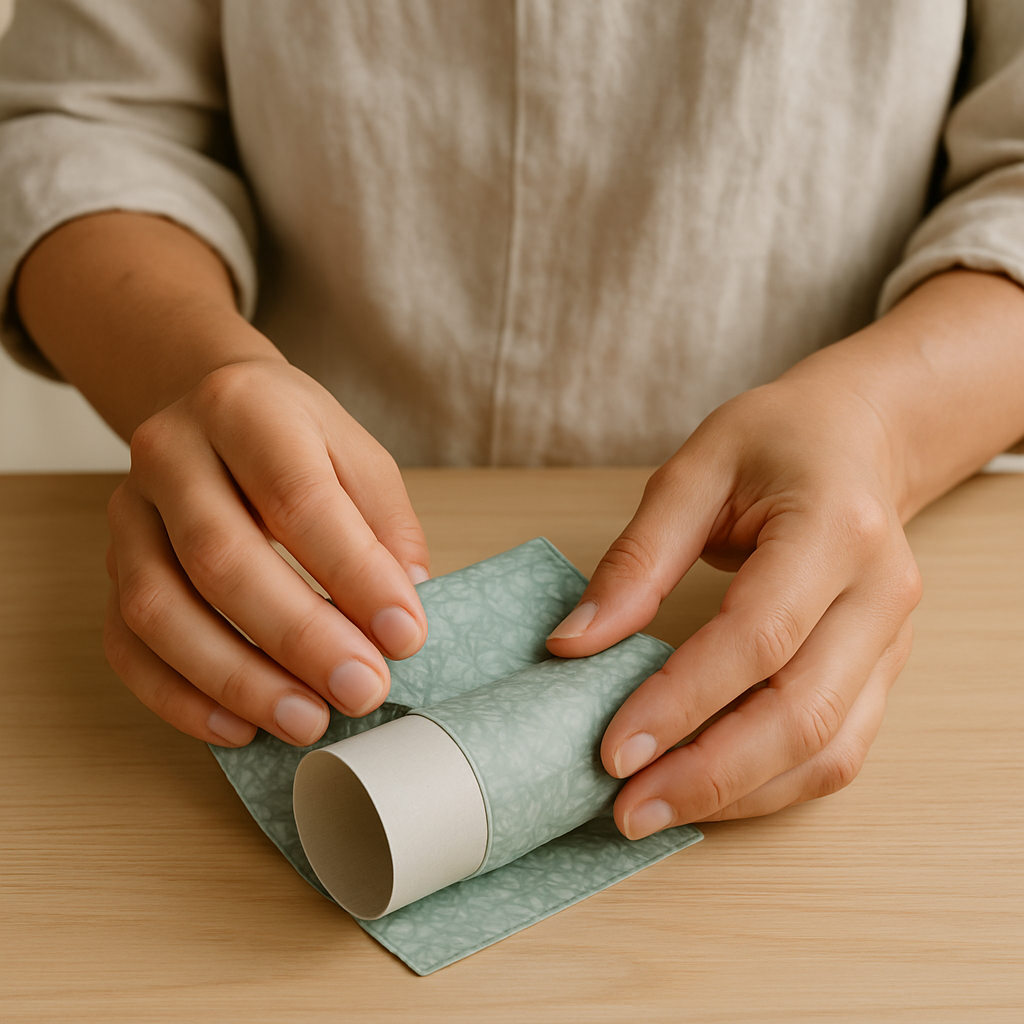
- 10
Step 10: Wrap your compartments. Apply a thin, even layer of glue to the outside of one compartment. Carefully wrap your cut paper or fabric around it, starting from one edge. Smooth out any wrinkles as you go, and overlap the cut edges by about 1cm on the back of the compartment for a clean, seamless look. Press down firmly to secure; if the paper tears, patch it with decorative tape or another scrap.
- 11
Step 11: Decorate the base. Now it's time to give that cereal box base a makeover! You can cover it with decorative paper, fabric, or paint. Make sure to cover any logos or printing from the original box for a cohesive look. If you're painting, two thin coats are usually better than one thick one, and let each coat dry completely.

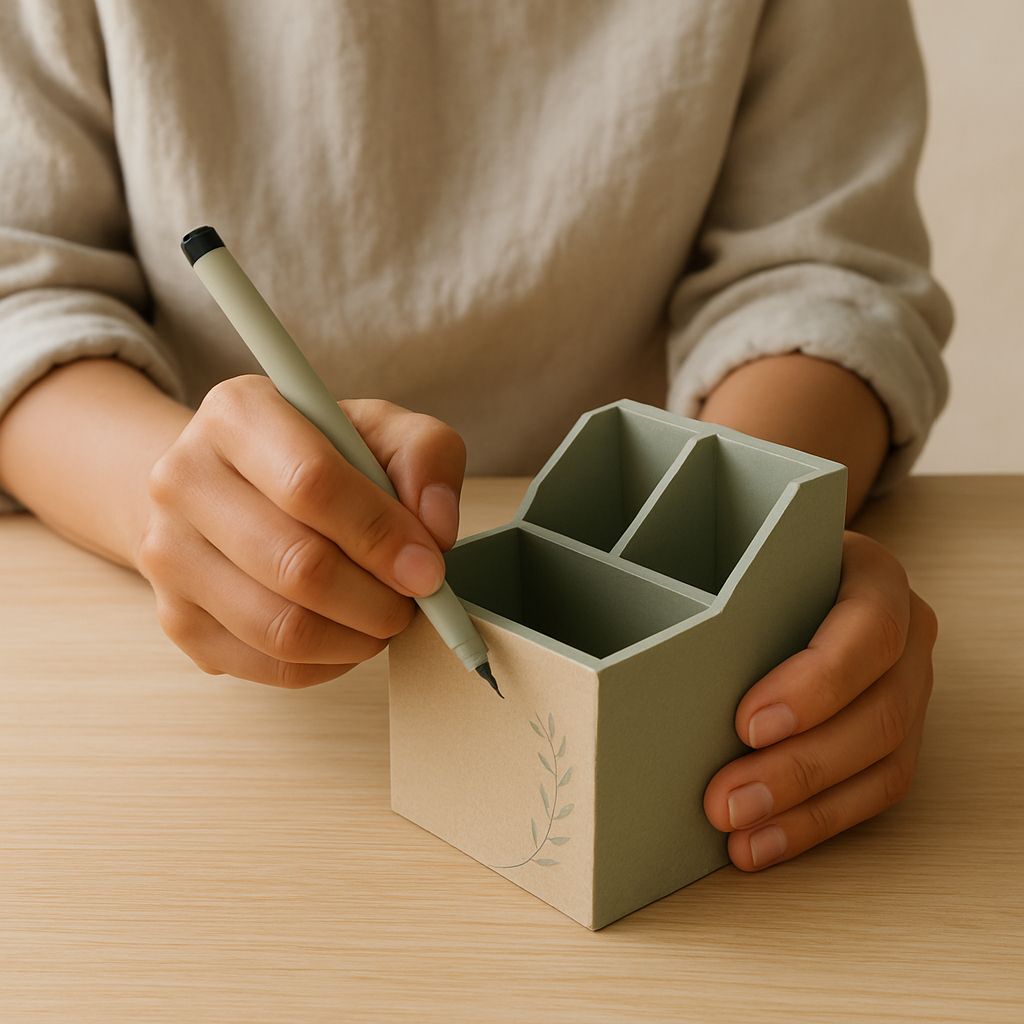
- 12
Step 12: Add paint or markers. Once your wrapping paper or base covering is dry, you can add more details with paint or markers. Draw patterns, create gradients, or even label your compartments – 'Pens', 'Pencils', 'Markers', etc. If you're using paint, let each layer dry completely before adding the next to prevent smudging.
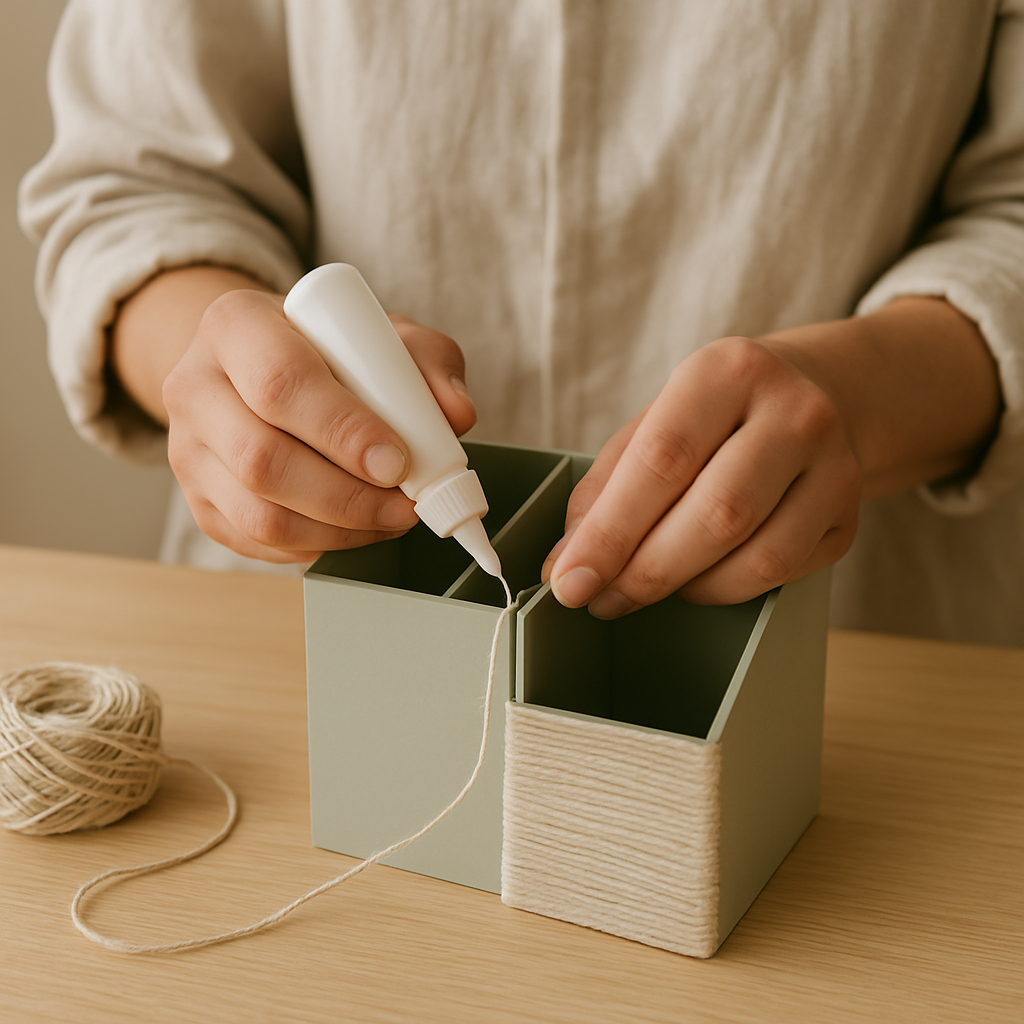
- 13
Step 13: Try yarn or fabric scraps for texture. For a really tactile and unique finish, try wrapping compartments with yarn or thin strips of fabric. Apply glue to a section of the tube, then wrap the yarn or fabric tightly around it, working your way up. Continue until the entire compartment is covered, adding glue as needed. If the yarn slips, secure the end with a dab of glue.
- 14
Step 14: Embellish and personalize. This is where your caddy truly becomes yours! Glue on stickers, buttons, beads, or small fabric cutouts. You could even create a tiny pocket from fabric scraps and glue it to the side for holding paperclips or erasers. For a more advanced look, consider adding small, lightweight 3D elements like cardboard cutouts.
- 15
Step 15: Craft a pen holder insert (optional). If you have a larger compartment and want to keep smaller items like erasers or USB drives organized, you can make an insert. Cut a piece of cardstock and fold it into a small rectangular box that fits snugly inside your chosen compartment. Glue the corners securely and slide it into place; if it's too loose, add a small strip of cardstock to the sides for a tighter fit.
- 16
Step 16: Check for stability and make any final touches. Give each compartment a gentle wiggle to ensure it's securely attached. Add a little extra glue anywhere that feels wobbly. You can also add small details like drawing lines to divide a larger compartment or gluing a small decorative element to the front. If any part feels unstable, consider adding small cardstock triangles as braces in the corners.
- 17
Step 17: Let it all dry thoroughly. Patience is key here! Make sure all the glue and paint are completely dry before you start loading up your caddy. This usually takes at least 2-3 hours, but overnight is even better if you can wait, especially if you've used a lot of glue or paint.
- 18
Step 18: Organize your desk in style! Now for the best part – place your finished, fabulous desk caddy on your workspace and fill it with all your essential school supplies. Enjoy your newly organized and personalized desk!
Tips & Troubleshooting
- 1Troubleshooting wobbly compartments: If a tube or bottle section feels loose even after reinforcing, try cutting small triangles of cardstock (about 2cm x 2cm) and gluing them into the corners where the compartment meets the base. They act like mini braces and really help stabilize things.
- 2Adapting for younger crafters: For little ones (under 7), it's best to pre-cut all the cardboard tubes and plastic bottle sections to safe, manageable sizes. Let them focus their energy on the decorating stage using glue sticks, chunky markers, washable paints, and lots of stickers – it's less messy and more manageable for them.
- 3Achieving a seamless look: When wrapping compartments with paper or fabric, try to align any patterns or the grain of the material if possible. For the neatest finish, cut your paper so the seam falls on the back of the compartment where it's less visible.
- 4Adding extra storage: Need more space? Cut a larger piece of cardboard from your cereal box, fold up the edges to create a shallow tray, and glue it securely to the side of your caddy. Perfect for holding sticky notes or a small stapler.
- 5Unique material variations: Don't limit yourself to just tubes! Consider using smaller plastic containers (like yogurt cups), carefully smoothed tin cans (ensure edges are safe or covered), or even sturdy fabric scraps rolled and glued for wrapping. For a more advanced project, you could even try covering the whole caddy in fabric for a plush look.
- 6Troubleshooting glue issues: If your craft glue is struggling to hold heavier items like plastic bottles or multiple layers of cardboard, don't hesitate to switch to a hot glue gun for a stronger, faster bond. Just remember to have an adult help out with the hot glue gun!
- 7Failure troubleshooting: If your paper tears while wrapping, don't despair! You can often patch it with a small piece of decorative tape or another scrap of paper. If a compartment doesn't glue well initially, try lightly sanding the surface where the glue will go for better adhesion.
- 8Advanced techniques: Want to take it up a notch? Consider adding a hinged lid made from a piece of the cereal box, or even attempting a simple drawer mechanism using smaller boxes or folded cardstock. Covering the entire caddy in fabric, perhaps with some quilting or appliqué, can also elevate the design significantly.
Related Activities You Might Enjoy
Frequently Asked Questions
What are the best upcycled materials to use for a desk caddy?
The best upcycled materials are those that offer some structural integrity and can be easily cut and glued. Toilet paper and paper towel tubes are excellent for holding pens and pencils. Cereal boxes or thin cardboard packaging work well for the base and can be cut into dividers. Plastic bottles, when cut to size, offer a durable and waterproof compartment, ideal for items like scissors or rulers. Even sturdy fabric scraps or old maps can be used for decorative wrapping, adding texture and color to your project.
How can I make my upcycled desk caddy more stable?
Stability is key for a functional desk caddy. Start with a sturdy base, like a well-glued cereal box bottom. Ensure each compartment (tubes, bottles) is securely attached with ample glue. For extra reinforcement, apply glue along all connecting edges where compartments meet each other and the base. You can also add small triangular cardboard braces in the corners where a compartment meets the base. If your caddy is tall, consider adding a backing piece of cardstock or thin cardboard to provide lateral support.
How can I adapt this project for different academic subjects?
You can easily link this project to various subjects. For Science, discuss the properties of different materials (plastic vs. cardboard) and how they are recycled. For History, research ancient writing tools and design compartments specifically for them. For Art, focus on color theory, pattern design, and different decorative techniques. For Math, practice measurement, geometry (calculating surface area for wrapping), and fractions when cutting materials into specific proportions.
What are some creative ways to decorate the desk caddy?
Decoration is where personal style shines! Beyond paint and markers, consider covering compartments with fabric scraps, yarn, or even old maps or comic book pages using glue. You can create textured surfaces by gluing on small pebbles, buttons, or beads. For a more sophisticated look, decoupage with tissue paper or use stencils for intricate patterns. Adding small 3D elements like cut-out cardboard shapes or even small toy figures can make your caddy truly unique and reflect your interests.
How can students showcase their completed desk caddies?
Completed desk caddies can be showcased in several ways. For school projects, they can be presented as part of an 'eco-design' or 'organization solutions' display. Students can write a short artist's statement explaining their design choices, the materials used, and the problem their caddy solves. For personal portfolios, the caddy demonstrates creativity, problem-solving, and practical crafting skills. They can also be gifted to family members or friends, turning a school project into a thoughtful, handmade present.
What Next?
So there you have it – your very own, totally unique upcycled desk caddy! It’s amazing what you can create with a bit of imagination and some recycled bits. Whether you kept it simple or went all out with fancy decorations, you’ve made something practical and personal. Remember, the best part of crafting is making it your own. Don't be afraid to experiment with different materials and techniques next time – maybe a hinged lid or a hidden drawer? I once tried covering a whole caddy in old maps, and the result was surprisingly sophisticated! Happy making!
Free: 10 Paper Crafts Anyone Can Make in 5 Minutes
Get our beginner guide + new craft ideas weekly.
No spam. Unsubscribe anytime.
Did you complete this activity?
Related