How to Build a Cardboard Desk Organizer — Easy Step-by-Step Guide
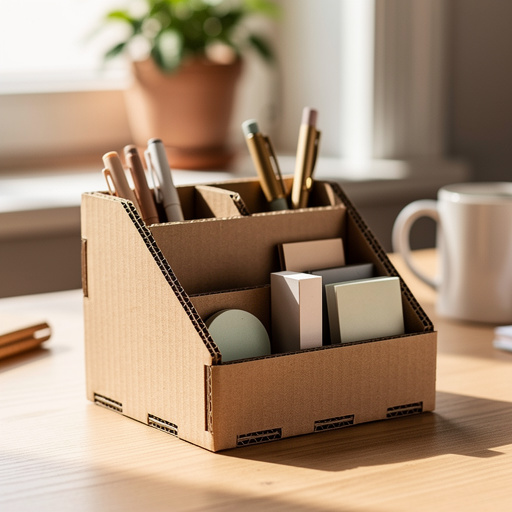
Transform scrap cardboard into a stylish and functional desk organizer. This project is perfect for tidying up your workspace with a personal touch.
Quick answer
To make a cardboard desk organizer, you need cardboard, scissors, glue, and a ruler, taking about 90 minutes. Start by measuring and cutting your cardboard pieces. This intermediate activity has 12 steps and is perfect for adults seeking screen-free organization.
What you need
Shop on Amazon · As an Amazon Associate we earn from qualifying purchases. Links above are affiliate links — we may earn a commission at no extra cost to you.
Tired of a cluttered workspace? This DIY cardboard desk organizer project is your answer to achieving a tidy and inspiring environment. It’s a fantastic way to upcycle common household materials into something both practical and aesthetically pleasing. Perfect for students, crafters, home office enthusiasts, or anyone looking to bring order to their desk, this project offers a satisfyingly hands-on experience. You'll not only gain a custom organizer tailored to your needs but also enjoy the creative process of transforming simple cardboard into a functional masterpiece.
On this page
Step-by-Step Instructions
- 1
Gather all your materials and clear a dedicated workspace. Ensure you have enough room to spread out your cardboard and tools, and protect your work surface with a cutting mat or old newspaper to prevent damage from cutting and gluing.
- 2
Decide on the overall dimensions of your organizer. A good starting point for a versatile organizer is a base of approximately 8 inches long by 4 inches wide, but feel free to adjust these measurements to fit your desk and storage needs.
- 3
Using your metal ruler and pencil, carefully draw the base rectangle onto one of your cardboard pieces. Precision is key here; ensure your lines are straight and your corners are square for a stable foundation.
- 4
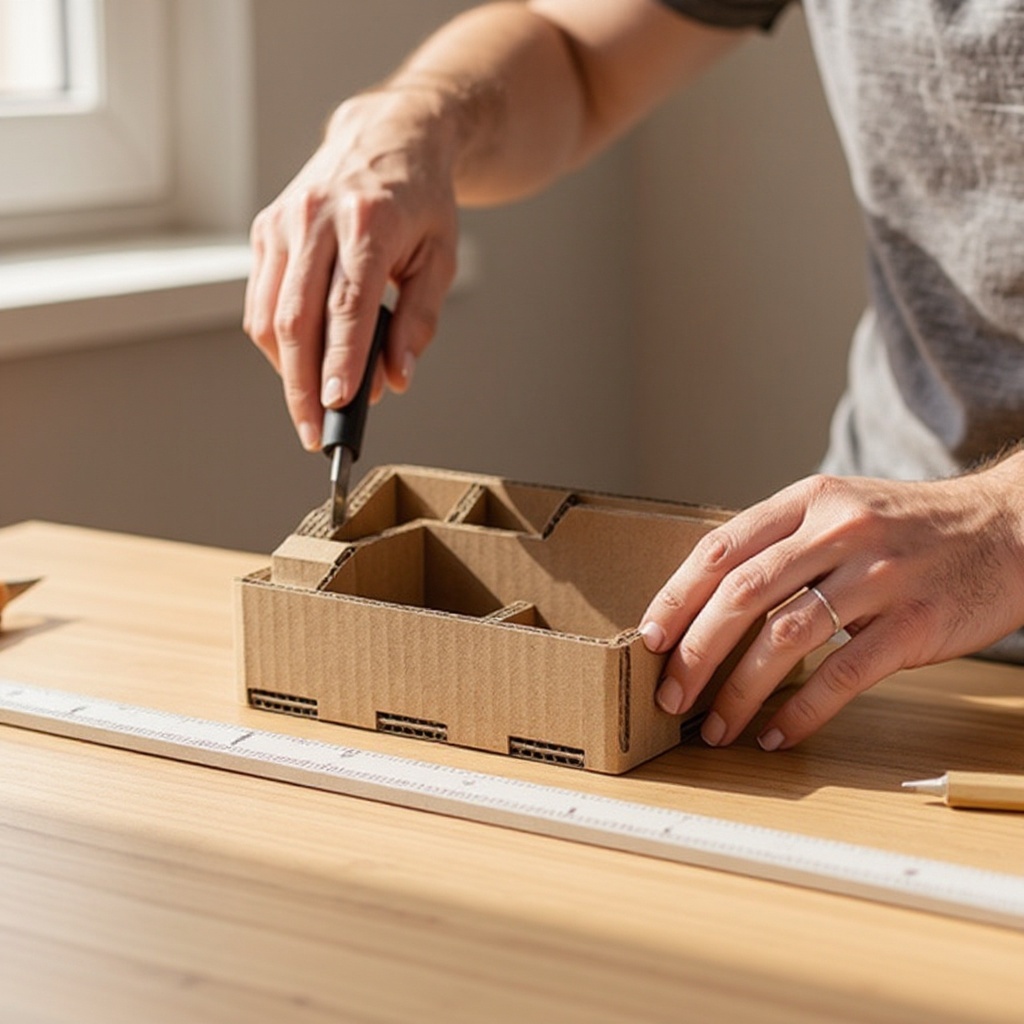
Carefully cut out the base rectangle using your craft knife and metal ruler. Make multiple light passes with the knife rather than trying to cut through in one go, which can lead to jagged edges and a less precise cut.
- 5
Measure and draw two side pieces, each measuring 8 inches long and 4 inches high. These will form the longer sides of your organizer's main box structure.
- 6
Cut out the two side pieces, again using your craft knife and ruler for clean, straight edges. Ensure they are identical in size to create a symmetrical structure.
- 7
Measure and draw a back piece that is 4 inches wide and 4 inches high. This piece will connect the two side pieces at the back of the organizer.
- 8
Cut out the back piece, ensuring its dimensions are accurate. This piece, along with the side pieces, will form the basic 'U' shape of your organizer.
- 9
Measure and draw two end pieces, each measuring 4 inches wide and 4 inches high. These will form the shorter ends of your organizer's main box structure.
- 10
Cut out the two end pieces, making sure they are precisely the same size. These will complete the rectangular box frame of your organizer.
- 11
Now, plan your interior compartments. Decide how many compartments you want and their desired sizes. For example, you could create two 4-inch by 4-inch compartments, or one larger section for pens and a smaller one for sticky notes.
- 12
Measure and draw the cardboard pieces for your compartment dividers. These should be the height of your side pieces (4 inches) and their width will depend on how you want to divide the interior space. For instance, a divider placed in the middle of the 8-inch length would be 4 inches wide.
- 13
Cut out all your compartment divider pieces. Double-check that they will fit snugly within the main box structure you've already planned.
- 14
Begin assembling the main box structure. Apply a generous bead of glue along the bottom edges of the two 8-inch side pieces and the 4-inch back piece.
- 15
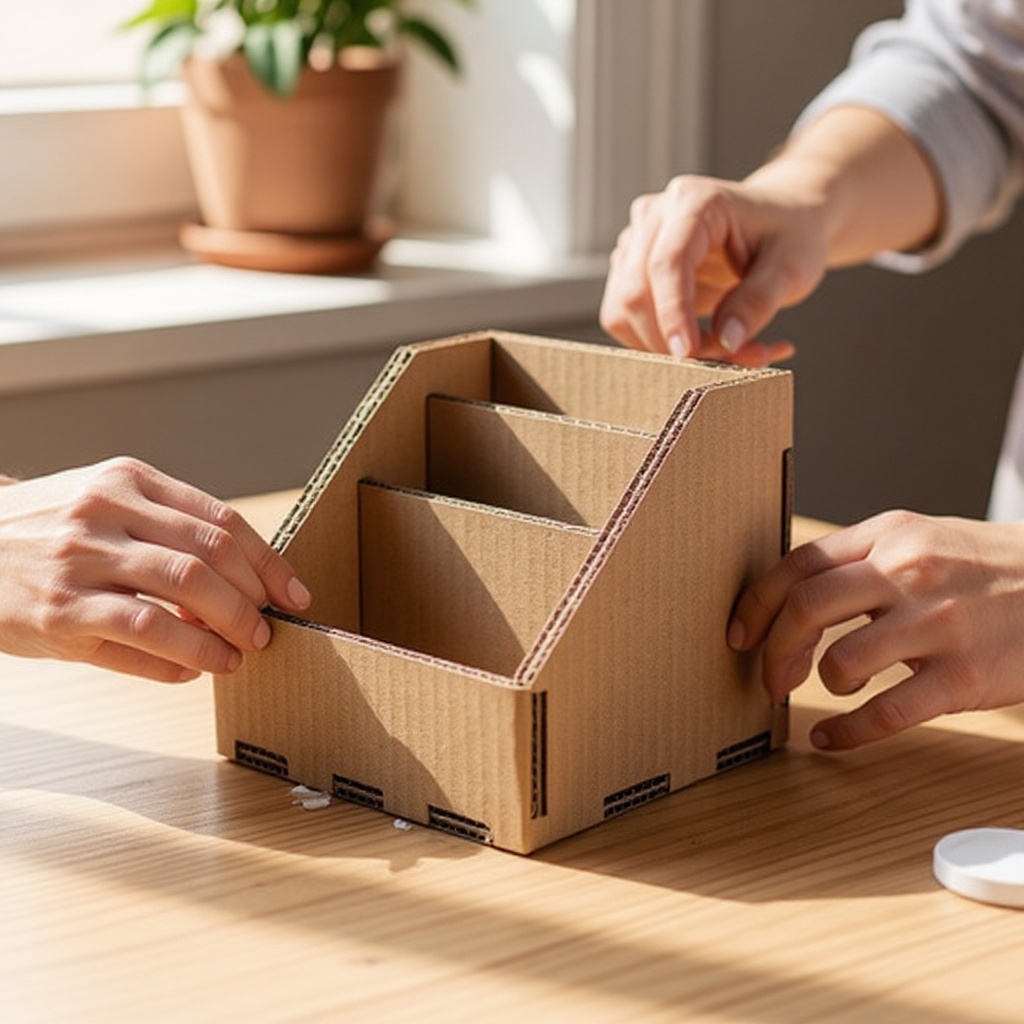
Carefully attach these glued edges to the corresponding edges of your base piece, forming a 'U' shape. Hold them firmly in place until the glue begins to set, using clamps or binder clips if needed for extra support.
- 16
Once the 'U' shape is stable, apply glue to the side edges of the base and the vertical edges of the side pieces where the end pieces will attach.
- 17
Attach the two 4-inch end pieces to complete the main box structure. Ensure all corners are flush and the box is square before the glue fully dries.
- 18
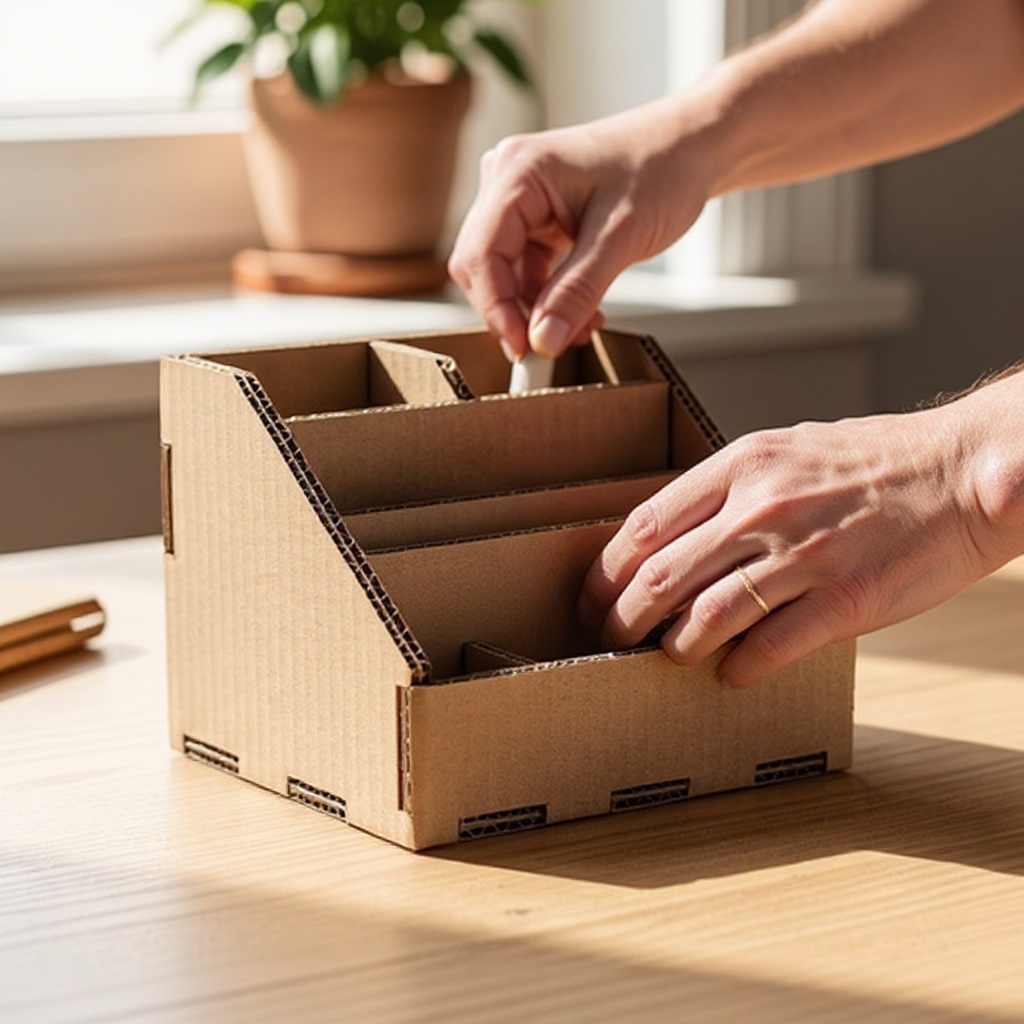
Insert your pre-cut compartment dividers into the main box. Apply glue to the edges of the dividers that will touch the base and the sides of the box.
- 19
Securely glue the dividers in place, ensuring they are straight and perpendicular to the base and sides. Hold them in position until the glue sets to prevent them from shifting.
- 20
Allow all the glue to dry completely. This is crucial for the structural integrity of your organizer; rushing this step can lead to a flimsy final product.
- 21
Once all glue is dry, you can begin decorating your organizer. This is where you can truly personalize your creation and make it stand out.
- 22
Smooth any rough edges with fine-grit sandpaper if desired, for a more polished look before decorating.
- 23
Apply your chosen decorative elements. This could involve covering the organizer with decorative paper, painting it with acrylics, drawing designs with markers, or applying washi tape for a patterned effect.
Tips & Troubleshooting
- 1For the cleanest and most precise cuts, always use a sharp craft knife and a sturdy metal ruler. Make multiple light passes with the knife, allowing it to do the work, rather than forcing it through the cardboard in a single heavy stroke. This technique minimizes tearing and ensures straight edges.
- 2If you opt for a hot glue gun, work in small, manageable sections as hot glue dries very quickly. Have your pieces ready to assemble immediately after applying the glue, and always exercise caution to avoid burns from the hot glue gun or the molten glue itself.
- 3Don't be afraid to experiment with different compartment sizes and shapes to perfectly suit your specific needs. You could create a tall, narrow slot for pens, a wider section for notepads, or even a slanted holder for your smartphone.
- 4For added durability, especially if you plan to store heavier items like tools or multiple notebooks, consider reinforcing the inside corners of your organizer with extra strips of cardboard and glue. This creates a stronger bond and prevents the structure from bowing under weight.
- 5To prevent small items like paperclips or erasers from sliding off the top edges, consider adding a small lip or edge around the perimeter of the organizer. This can be achieved by gluing thin strips of cardboard along the top edges.
- 6Before gluing, dry-fit all your pieces together to ensure they align correctly. This simple step can save you a lot of frustration and potential rework, especially when assembling the main box structure and interior dividers.
- 7If you're covering your organizer with paper, apply a thin, even layer of glue to the cardboard surface and smooth the paper down carefully, working from the center outwards to avoid air bubbles and wrinkles.
- 8Consider painting the cardboard first with a primer or a base coat of paint before adding decorative elements. This can help to create a more uniform surface and make your final decorations appear more vibrant and professional.
Related Activities You Might Enjoy
Frequently Asked Questions
What kind of cardboard is best for crafts like this desk organizer?
Corrugated cardboard from shipping boxes is ideal for crafts like this desk organizer because it's sturdy, readily available, and easy to cut. Look for double-walled corrugated cardboard if you need extra strength for heavier items. Avoid thin cardboard like cereal boxes, as they lack the necessary rigidity for a functional organizer. The thickness and density of the cardboard will directly impact the durability and longevity of your finished project, so choose wisely based on what you intend to store.
How can I make my cardboard organizer look professional and polished?
To achieve a professional look, focus on precise cutting and neat gluing from the outset. Ensure all your cuts are straight and your corners are perfectly aligned. Once the structure is built, you can hide any minor imperfections by covering the cardboard with decorative paper, fabric, or a smooth coat of paint. Consider using a primer before painting for a more even finish. Adding details like washi tape along the edges or a clear sealant can also elevate the appearance and provide a finished, professional touch.
Can I make a multi-level or tiered cardboard organizer?
Absolutely! You can create a multi-level organizer by building separate sections or boxes of varying sizes and then gluing them together securely. Alternatively, you can design a tiered structure by cutting progressively smaller rectangles for each level and stacking them. For example, you could create a base box, then a slightly smaller box to sit on top, and perhaps a narrow, tall section for pens that attaches to the side. This allows for even more customized storage solutions.
What tools are essential for cutting cardboard accurately?
A sharp craft knife or box cutter with a fresh blade and a sturdy metal ruler are essential for precise cardboard cutting. The metal ruler acts as a guide for the knife, ensuring straight lines and clean edges, while the sharp blade cuts through the corrugated layers smoothly. For less precise cuts or if a craft knife isn't available, heavy-duty scissors can work, but they may be harder to control for sharp corners and can sometimes crush the cardboard, leading to a less neat finish.
How long does it typically take to make a cardboard desk organizer?
The time it takes to make a cardboard desk organizer can vary depending on its complexity and your decorating choices, but a basic organizer typically takes about 90 minutes to 2 hours to construct and assemble. This estimate includes measuring, cutting, gluing the main structure, and adding interior dividers. The drying time for the glue is also a factor; while some glues set quickly, allowing ample drying time for structural integrity is important. Decorating can add an additional hour or more, depending on the intricacy of your design.
What are some creative ways to decorate my cardboard organizer?
The possibilities for decorating your cardboard organizer are endless! You can cover it with colorful scrapbook paper, wrapping paper, or even fabric scraps for a textured look. Painting it with acrylic paints, using stencils for patterns, or drawing freehand designs with markers are great options. Washi tape is fantastic for adding borders, stripes, or unique patterns. You could also decoupage it with magazine cutouts or old maps for a vintage feel. Consider adding embellishments like buttons, twine, or even small painted details for a truly personalized touch.
What Next?
Congratulations on building your custom cardboard desk organizer! This versatile creation can house pens, notepads, mail, and more, bringing a sense of calm and efficiency to your workspace. Consider adding a coat of varnish for extra durability or attaching felt to the bottom to prevent scratching your desk surface. For your next project, try building a matching cardboard pencil cup or a tiered organizer for even more storage. Display your new organizer proudly, and enjoy the satisfaction of a beautifully organized and personalized desk.
Free: 10 Paper Crafts Anyone Can Make in 5 Minutes
Get our beginner guide + new craft ideas weekly.
No spam. Unsubscribe anytime.
Did you complete this activity?
Related