How to Create Nature's Sun Catcher Mobiles — Easy Step-by-Step Guide
Transform your favorite natural finds into stunning sun catchers that dance with light. A wonderful way to connect with nature and create lasting memories. This beginner-friendly project is perfect for families and brings a touch of natural beauty into your home.
Quick answer
To make Nature's Sun Catcher Mobiles, you need pressed leaves, flowers, contact paper, scissors, and string, taking about 60 minutes. Start by pressing your nature finds. This beginner-friendly activity has 10 steps and is perfect for families with kids aged 6+. You'll need approximately 2 sheets of 12x12 inch clear contact paper per sun catcher, plus twine for hanging and optional twigs for a mobile base.
What you need
Shop on Amazon · As an Amazon Associate we earn from qualifying purchases. Links above are affiliate links — we may earn a commission at no extra cost to you.
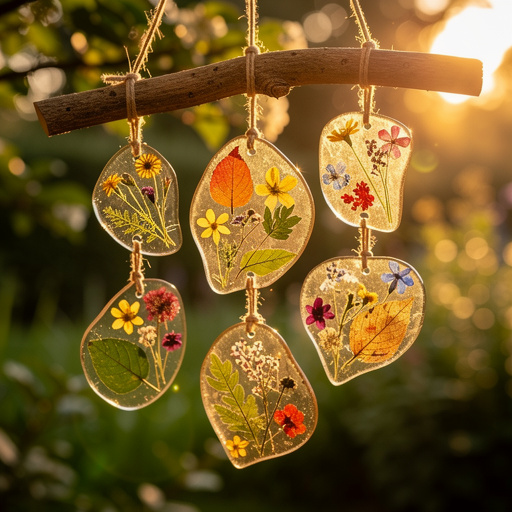
Embrace the beauty of the natural world by crafting your own stunning sun catchers! This delightful DIY project, Nature's Sun Catcher Mobiles, offers a unique way to preserve the delicate artistry of leaves and flowers, transforming them into luminous decorations that capture and refract sunlight. It’s a wonderfully engaging activity for all ages, fostering a deeper appreciation for nature's intricate designs and providing a tangible connection to the outdoors. Perfect for a rainy afternoon or a sunny weekend, this project promises beautiful results and creates cherished memories.
On this page
Step-by-Step Instructions
- 1
Gather a variety of flat, dry pressed leaves and flowers. Ensure they are completely brittle and not damp, as any residual moisture can lead to mold or discoloration within the sealed sun catcher. Select specimens with interesting shapes, colors, and textures for visual appeal.
- 2
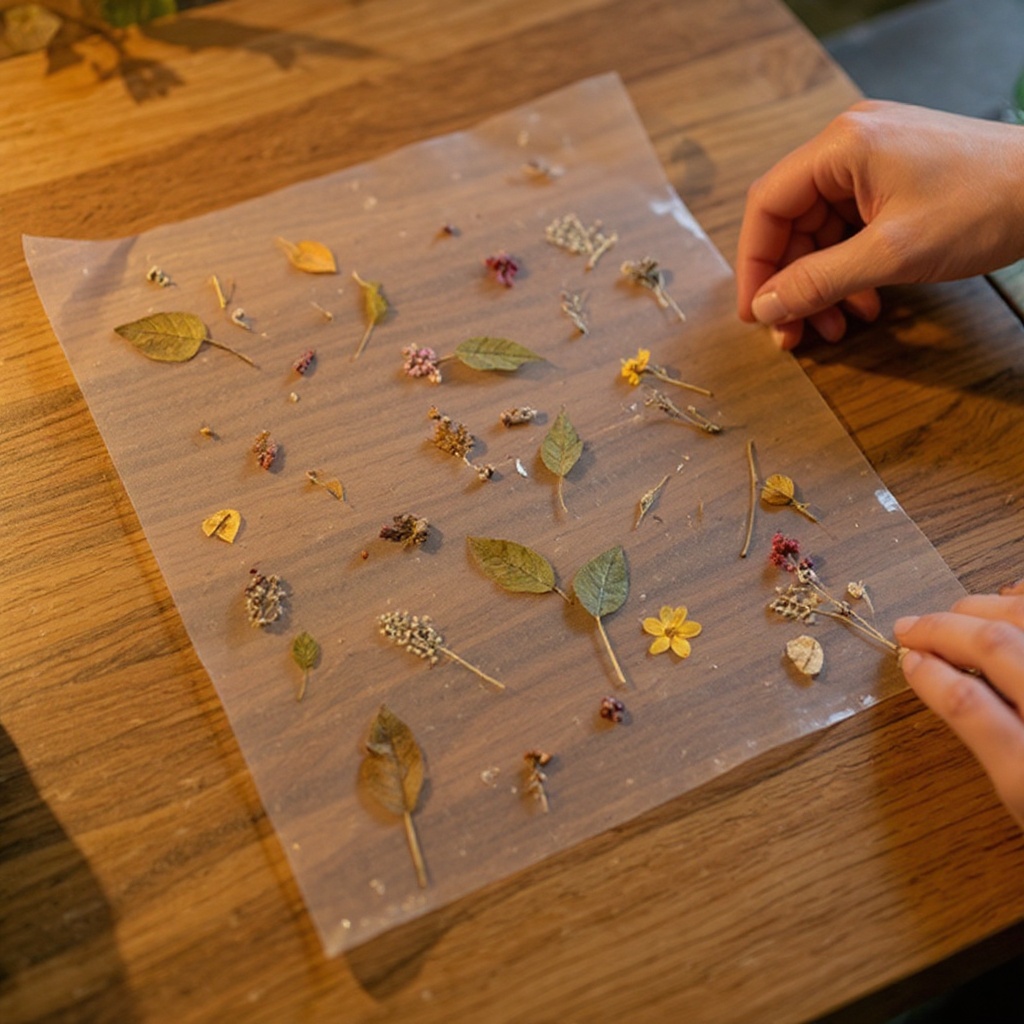
Prepare your workspace by clearing a clean, flat surface. Lay down a sheet of contact paper, sticky side up, to begin assembling your sun catcher. This will be the base layer where your natural elements are arranged.
- 3
Cut one sheet of contact paper to your desired sun catcher shape. You can create simple geometric forms like circles or squares, or get creative with freeform shapes like hearts, stars, or even animal silhouettes. Use scissors for straightforward cuts or a craft knife and cutting mat for more intricate designs.
- 4
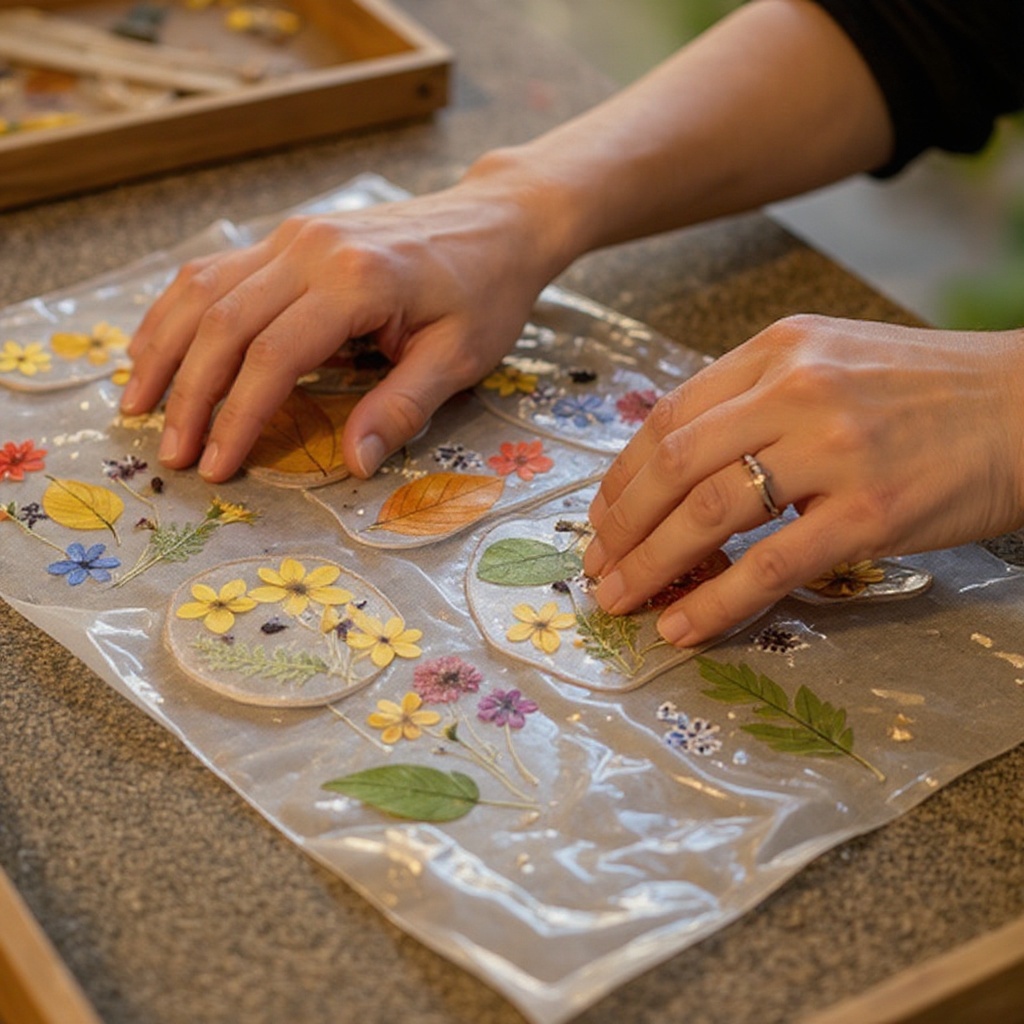
Carefully arrange your pressed leaves and flowers onto the sticky surface of the contact paper. Overlap them slightly to create a cohesive design, but ensure you leave a small border of at least 1/4 inch around all edges. This border is crucial for creating a secure seal in later steps.
- 5
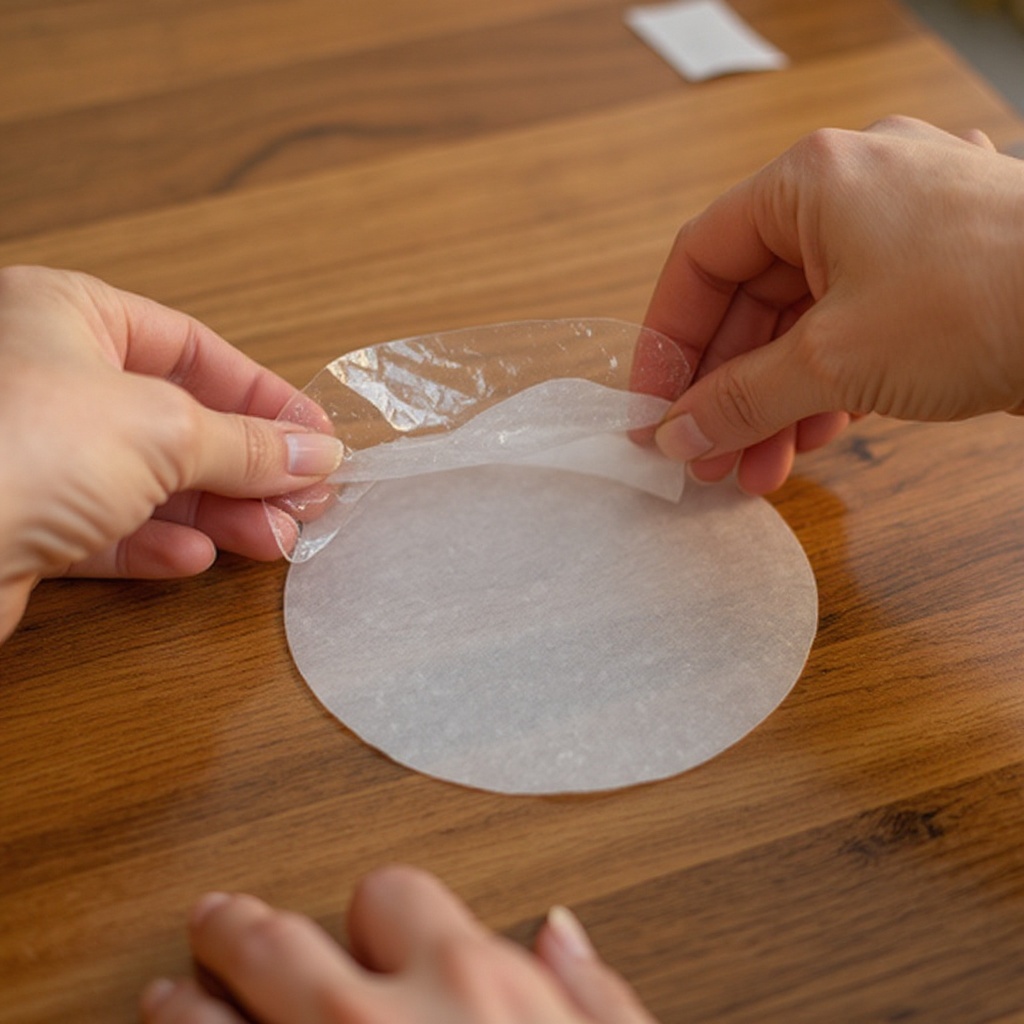
Once you are satisfied with the arrangement of your botanicals, it's time to prepare the top layer. Peel the backing off the second sheet of contact paper, exposing its sticky side.
- 6
Gently place the second sheet of contact paper, sticky side down, over the first sheet with the nature elements. Align the edges as precisely as possible to ensure an even seal and prevent any gaps.
- 7
Press down firmly all over the contact paper, starting from the center and working your way outwards. Use your fingers, a ruler, or even a smooth, flat object like a credit card to smooth out any air bubbles and ensure a strong adhesion between the two layers of contact paper. This step is vital for the longevity of your sun catcher.
- 8
Carefully trim any excess contact paper around the edges of your sun catcher. Maintain that small, consistent border you left earlier, as this ensures the natural elements are fully enclosed and protected. This also gives your sun catcher a neat, finished appearance.
- 9
Use the hole punch to create one or two holes at the top of your sun catcher. Position the holes strategically so that the sun catcher will hang evenly. If you plan to hang multiple sun catchers from a twig, you might punch holes on opposite sides.
- 10
Thread twine or string through the punched holes and tie securely to create a loop for hanging. Ensure the knot is tight and the loop is long enough to comfortably hang your sun catcher in its desired location. You can use a single strand or multiple strands for a decorative effect.
- 11
If you are creating a mobile, prepare your twig or branch by ensuring it is clean and dry. You can leave it natural or paint it for a more decorative look.
- 12
Cut varying lengths of twine or string to attach your individual sun catchers to the twig or branch. This variation in length will create a dynamic and visually appealing mobile.
- 13
Tie one end of each string securely to a sun catcher and the other end to the twig or branch. Distribute the sun catchers evenly along the twig for balance and aesthetic appeal.
- 14
Find the perfect spot to hang your Nature's Sun Catcher Mobile. A window that receives ample sunlight throughout the day will best showcase the beautiful interplay of light and color.
- 15
Observe how the sunlight filters through the pressed botanicals, casting enchanting patterns and colors onto your walls and floors. Enjoy the unique, natural beauty you've created.
- 16
For a more robust sun catcher, consider adding a thin border of cardstock or heavy paper around the edges after sealing the contact paper. This can add structural support and a decorative frame.
- 17
If you encounter stubborn air bubbles, gently lift a corner of the top contact paper layer and re-smooth the area, ensuring the botanicals remain in place.
- 18
Test the strength of your hanging loop by gently tugging on it before hanging your sun catcher in its final location, especially if it's in a high-traffic area or exposed to wind.
Tips & Troubleshooting
- 1Make sure your pressed botanicals are completely dry. Any moisture can cause them to become moldy or discolored within the sun catcher, diminishing its beauty and lifespan. Allow them to dry for at least 1-2 weeks under pressure.
- 2Experiment with different shapes and sizes for your sun catchers. You can even cut them into fun silhouettes like animals, stars, or geometric patterns to add a whimsical touch. This allows for a wide range of creative expression.
- 3For a more elaborate mobile, tie multiple sun catchers to a small twig or branch using varying lengths of twine. This creates a beautiful, kinetic piece of art that moves with the slightest breeze.
- 4Hang your sun catchers in a window where they will catch the most sunlight to enjoy their beautiful glow. South-facing windows are often ideal for maximum sun exposure throughout the day.
- 5If you don't have pressed flowers, you can also use flat, colorful craft paper cut into shapes or even thin slices of colorful fruit (ensure they are dried thoroughly). This offers flexibility if natural elements are scarce.
- 6When arranging your botanicals, consider the translucency of the contact paper and how the light will pass through. Lighter colored elements will appear more vibrant, while darker ones will offer a more subtle hue.
- 7To ensure a strong seal, press down firmly and evenly across the entire surface of the contact paper. Pay special attention to the edges to prevent any lifting or separation over time.
- 8If your pressed botanicals are very delicate, you can use tweezers to carefully place them onto the sticky contact paper, minimizing the risk of damage.
Related Activities You Might Enjoy
Frequently Asked Questions
How do I press leaves and flowers for sun catchers?
To press botanicals, the most effective method is to place them between sheets of absorbent paper, such as newspaper or paper towels, inside a heavy book. Ensure the leaves and flowers are laid flat and not overlapping. Place the book in a dry location and leave them for 1-2 weeks, checking periodically and changing the absorbent paper if it becomes damp. The goal is for them to become completely brittle and dry before you use them in your sun catcher project. This process removes all moisture, preventing decay and discoloration within the sealed contact paper.
Can I use fresh leaves and flowers?
No, it's best to use pressed and completely dried leaves and flowers for this project. Fresh botanicals contain a significant amount of moisture, which, when sealed within the contact paper, will inevitably lead to mold, rot, and discoloration. This will not only ruin the aesthetic of your sun catcher but can also cause the paper to degrade. Always ensure your natural elements are thoroughly dried and brittle before proceeding with the sun catcher creation.
How long will these sun catchers last?
With proper sealing and care, your nature sun catchers can last for several months to a year, and sometimes even longer. The longevity depends on the quality of the contact paper, how well they are sealed, and the environmental conditions they are exposed to. Avoid direct, prolonged exposure to extreme heat or moisture, such as placing them directly on a hot windowsill or in a steamy bathroom, as these conditions can degrade the adhesive and cause the contact paper to yellow or peel. Storing them flat and away from humidity will also help preserve them.
What if I don't have contact paper?
While contact paper is ideal for its clear, adhesive nature and ease of use, you could try alternative methods if it's unavailable. Laminating sheets could offer a similar clear, sealed effect, though you would need to adhere your botanicals to one sheet before feeding them through the laminator. Another option is using clear packing tape, layering it carefully to create a sealed window. However, the clarity and durability of these alternatives may vary, and they might not offer the same seamless finish as contact paper.
Can I make these sun catchers with my young children?
Absolutely! Nature's Sun Catcher Mobiles are a fantastic craft for children aged 6 and up, with younger children benefiting from adult supervision and assistance. The process of arranging the natural elements is engaging and develops fine motor skills and creativity. Younger children might need help with cutting the contact paper and punching holes, but they can certainly enjoy selecting the leaves and flowers and pressing them onto the sticky surface. It's a wonderful way to introduce them to the beauty of nature and the satisfaction of creating something beautiful.
How can I make the sun catchers more durable?
To enhance the durability of your sun catchers, ensure you use high-quality clear contact paper and press down firmly to eliminate all air bubbles, creating a complete seal. Leaving a slightly wider border (around 1/2 inch) around the edges of the contact paper before trimming can also provide extra protection. For added rigidity, especially for larger sun catchers, consider sandwiching a thin piece of cardstock or heavy paper between the two layers of contact paper, ensuring it doesn't obscure the view of the botanicals. This will make them less prone to bending or tearing.
What Next?
Once your Nature's Sun Catcher Mobiles are complete, the possibilities for display are endless! Hang them in windows to cast colorful patterns across your rooms, or group several together for a more dramatic effect. For a truly mobile creation, tie multiple sun catchers to a decorative twig or branch, allowing them to sway gently in the breeze. If you wish to store them, ensure they are kept flat and away from direct moisture to preserve their clarity and integrity. Consider exploring other nature-inspired crafts like pressed flower art or leaf printing to continue your creative journey.
Free: 10 Paper Crafts Anyone Can Make in 5 Minutes
Get our beginner guide + new craft ideas weekly.
No spam. Unsubscribe anytime.
Did you complete this activity?
Related