How to Create Sparkling Pinecone Fairy Homes — Easy Step-by-Step Guide
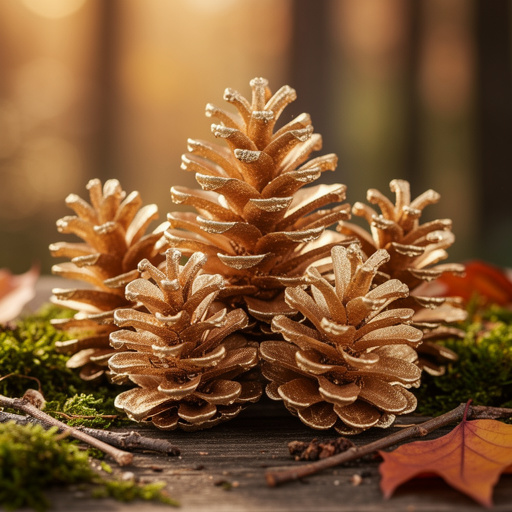
Transform humble pinecones into enchanting fairy homes! This magical craft project brings the wonder of nature indoors with a touch of sparkle. It's a delightful way to engage with the outdoors and unleash your creativity, resulting in charming decorations that spark imagination.

Quick answer
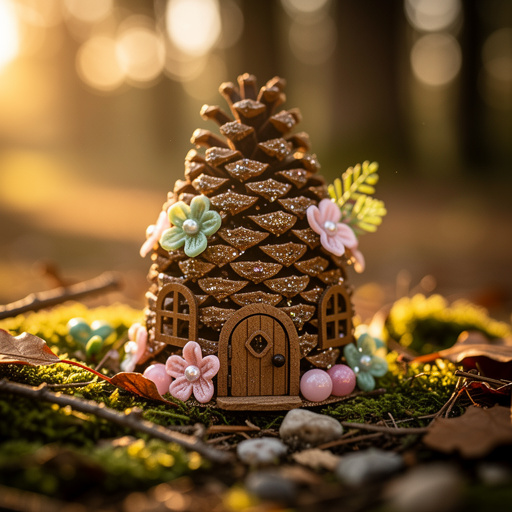
To make sparkling pinecone fairy homes, you need pinecones, craft glue, glitter, and small embellishments, taking about 45 minutes. Start by cleaning your pinecones. This beginner-friendly activity has 10 steps and is perfect for families with children aged 4+. You'll need about 3-5 medium to large pinecones, 1/2 cup white craft glue, 1/4 cup fine glitter, and small natural embellishments. Additional optional items include beads, sequins, or craft moss. Ensure you have a paper plate or shallow dish for glitter and newspaper or a craft mat for your work surface.
What you need
Shop on Amazon · As an Amazon Associate we earn from qualifying purchases. Links above are affiliate links — we may earn a commission at no extra cost to you.
Embark on a whimsical crafting adventure with this enchanting project: Sparkling Pinecone Fairy Homes! This delightful activity is perfect for sparking imagination and bringing a touch of woodland magic into your home. It's an ideal way for families to connect with nature, transforming simple pinecones into miniature dwellings fit for the smallest of magical creatures. Whether you're looking for a fun rainy-day project, a creative way to use natural finds, or a charming decoration for your home, these sparkling fairy homes are sure to bring smiles and wonder to all ages.
On this page
Step-by-Step Instructions
- 1
Gather your pinecones and ensure they are clean and dry. Gently brush off any loose dirt, debris, or cobwebs using a soft brush or an old toothbrush. If your pinecones are tightly closed, consider the tip about baking them to open them up before proceeding.
- 2
Lay down newspaper or a craft mat to protect your work surface from glue and glitter. This step is crucial for easy cleanup, especially when working with children. Ensure the area is well-ventilated if you're using a lot of glitter.
- 3
Pour about 1/4 cup of white craft glue into a shallow dish or onto a paper plate. You can also use a small paintbrush to directly apply glue from the bottle if preferred, but a dish allows for easier dipping and coating.
- 4
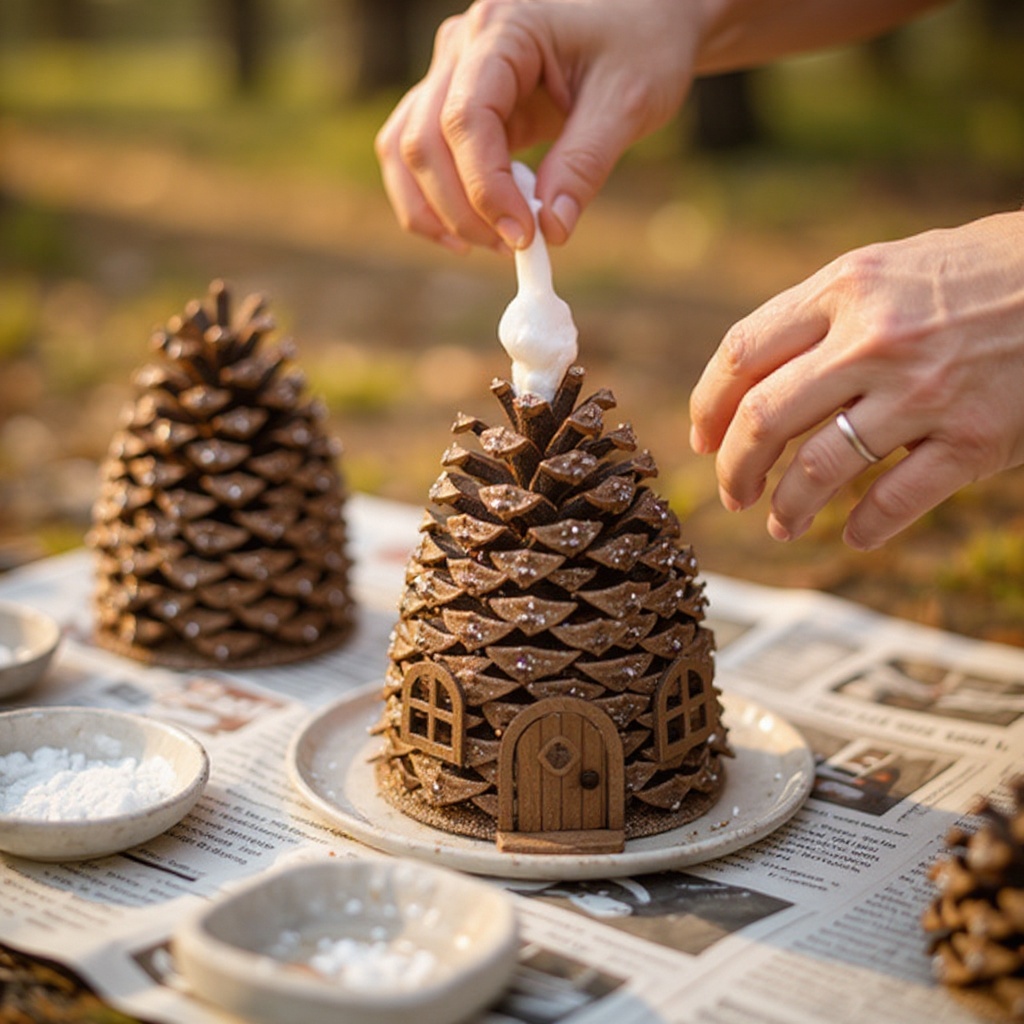
Dip the tip of a pinecone into the glue, coating the scales where you want to add sparkle. Aim to cover the outer edges and tips of the scales to create a frosted or shimmering effect. You can choose to cover the entire pinecone or just specific sections for a more targeted design.
- 5
Alternatively, use a small paintbrush to apply glue to specific areas of the pinecone. This method offers more control and is excellent for creating intricate patterns or applying glue only to certain scales. It's also a great way to manage glue application for younger crafters.
- 6
Pour about 2 tablespoons of glitter onto a separate paper plate or shallow dish. You can use a single color or mix several colors together for a unique effect. Ensure you have enough glitter to coat the glued areas thoroughly.
- 7
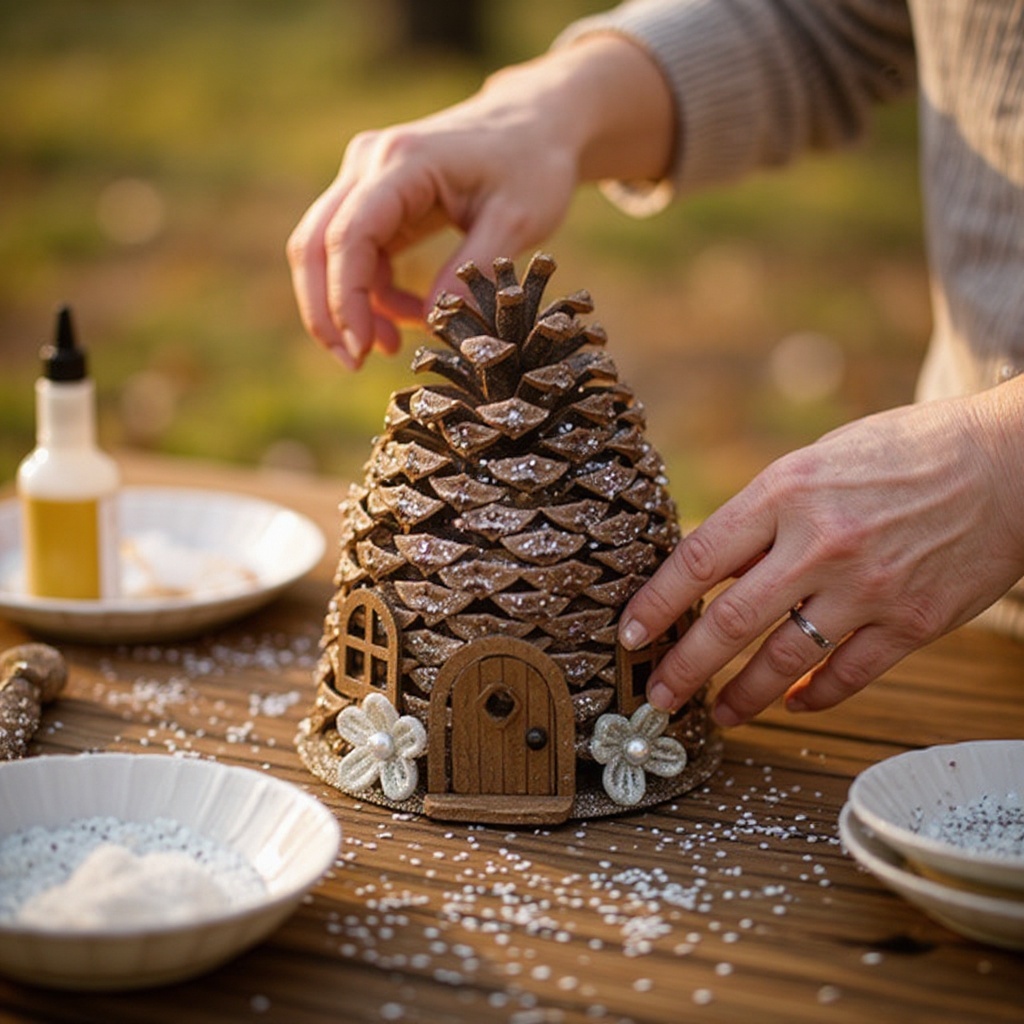
Roll or gently shake the glued sections of the pinecone in the glitter until well-coated. Press the pinecone gently into the glitter to ensure good adhesion. For areas where you've used a paintbrush, you can sprinkle glitter directly onto the wet glue.
- 8
Tap off any excess glitter by gently shaking the pinecone over the glitter dish. Carefully place the glittered pinecone on a clean section of your newspaper or craft mat to dry for about 15-20 minutes. Avoid touching the glittered areas while they are still wet.
- 9
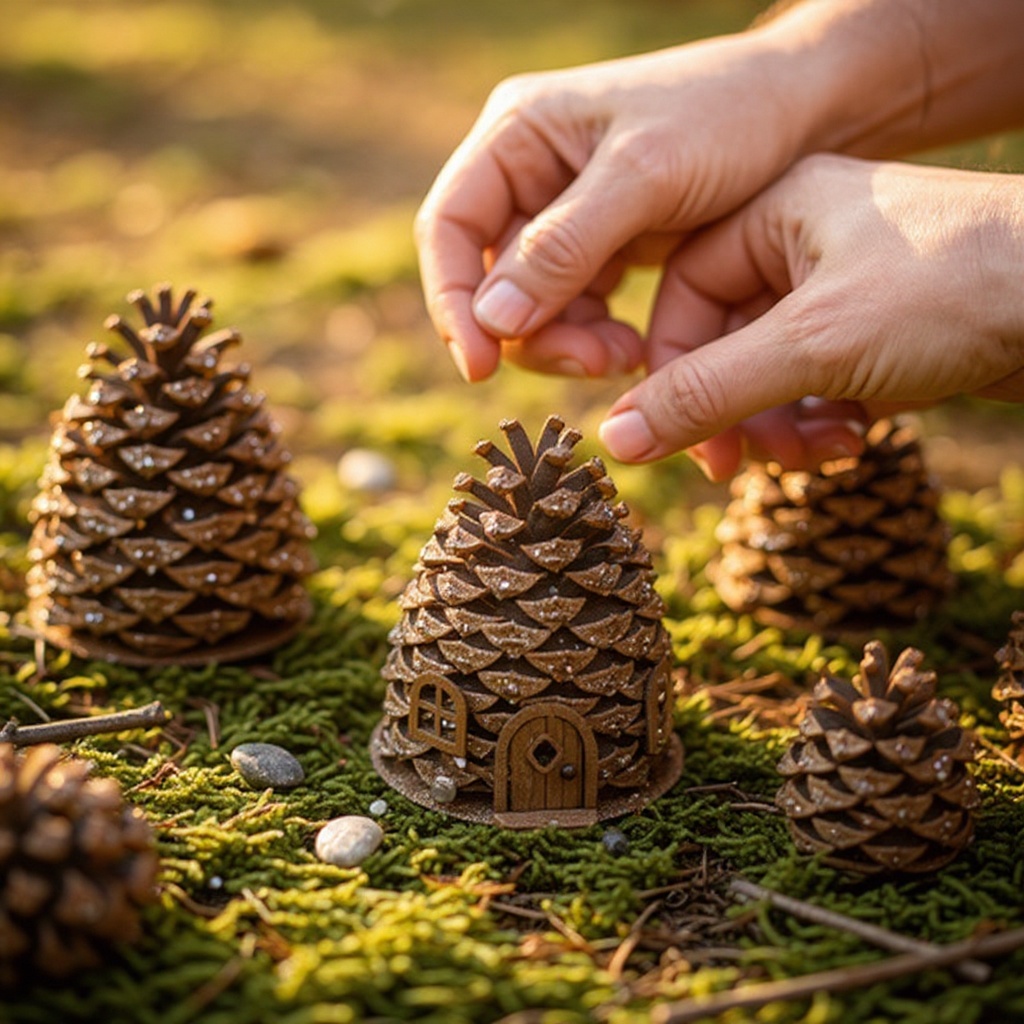
Once the glitter is dry to the touch, it's time to add the magical embellishments. Use small dabs of glue to attach your chosen decorative elements, such as tiny pebbles to represent windows, a small twig to serve as a door, or acorn caps for charming little roofs.
- 10
Continue adding embellishments to create a charming fairy home design. Think about what features a fairy home might need: a pathway, a chimney, flowers, or even a tiny mailbox. Let your imagination guide you as you build your miniature dwelling.
- 11
Allow the glue for the embellishments to dry completely. This might take another 15-30 minutes, depending on the amount of glue used and the size of the embellishments. Ensure all elements are securely attached before moving on.
- 12
If you wish to hang your fairy homes, now is the time to add a loop. Before the final drying, you can attach a small loop of twine or ribbon to the top of the pinecone using a strong dab of glue or by tucking it securely between the scales.
- 13
Repeat the gluing and glittering process for any additional pinecones you are transforming into fairy homes. You can create a whole village of different designs and colors.
- 14
Once all glue and embellishments are completely dry and secure, your sparkling pinecone fairy homes are ready to be displayed. Admire your handcrafted creations and the magical atmosphere they bring.
Tips & Troubleshooting
- 1For less mess, have children apply glue with a brush and then sprinkle glitter over the glued areas. This gives them more control and reduces the amount of glitter that gets spread around the crafting area.
- 2Experiment with different glitter colors and combinations for unique fairy home designs. Try layering colors, using iridescent glitter for a magical shimmer, or mixing fine and chunky glitters for varied textures.
- 3Consider adding a small loop of twine to the top of the pinecone before decorating if you wish to hang your fairy homes. This makes them versatile decorations that can be hung from branches, doorknobs, or even incorporated into wreaths.
- 4If your pinecones are tightly closed, you can gently bake them at a low temperature (around 200°F or 93°C) for 30-60 minutes to help them open up, but let them cool completely before crafting. This ensures the scales are spread out, making them easier to decorate and giving them a more open, inviting appearance.
- 5Use a variety of natural elements for embellishments to enhance the woodland theme. Small pieces of bark can become roofs, tiny seeds can be decorative accents, and dried flower petals can add a touch of color and whimsy.
- 6For a more durable finish, once the glue and glitter are completely dry, you can lightly spray the entire pinecone with a clear sealant or hairspray. This helps to prevent glitter shedding and protects the embellishments.
- 7Don't be afraid to get creative with your fairy home designs. Think about adding tiny windows made from beads, a door crafted from a small piece of bark, or a pathway leading to the entrance using small stones.
- 8Clean your paintbrushes thoroughly with water immediately after use to prevent the glue from drying on them. This will ensure they are ready for your next crafting adventure.
Related Activities You Might Enjoy
Frequently Asked Questions
How do I clean pinecones for crafts?
To clean pinecones for crafts, start by gently brushing off any loose dirt, debris, or cobwebs with a soft brush or an old toothbrush. For a deeper clean, you can rinse them with water, ensuring you get into all the nooks and crannies between the scales. After rinsing, let them air dry completely for at least 24-48 hours, or spread them out on a baking sheet and bake them at a very low temperature (around 200°F or 93°C) for 30-60 minutes. Baking helps to kill any potential insects and can also encourage the pinecones to open up, making them easier to work with and more aesthetically pleasing for crafts. Always let them cool completely before crafting.
What kind of glue is best for pinecone crafts?
White craft glue, such as Elmer's Glue-All or Tacky Glue, is ideal for most pinecone crafts, especially for attaching glitter and lightweight embellishments. These glues dry clear and provide a strong bond without being too messy. For heavier items like larger stones or more substantial natural elements, a stronger craft glue or even a hot glue gun (with adult supervision) might be necessary to ensure they adhere securely. Always test your glue on a small, inconspicuous area first to ensure it dries clear and doesn't damage the pinecone.
Can I make pinecone crafts with younger children?
Yes, pinecone crafts are fantastic for young children, offering a wonderful opportunity for sensory exploration and creative expression. Focus on simpler steps like applying glue with a brush and then sprinkling glitter over the glued areas. Adult supervision is highly recommended for any steps involving sharp objects, small embellishments that could be a choking hazard, or the use of hot glue. You can pre-apply glue to sections of the pinecone for them, or let them practice their fine motor skills by dabbing glue themselves. The joy of creating their own magical fairy home will be immense!
How long does it take to make a pinecone fairy home?
Making a single sparkling pinecone fairy home typically takes about 30-45 minutes, including the initial drying time for the glue and glitter. This timeframe allows for thorough application of glue, generous coating of glitter, and careful attachment of embellishments. If you are working with children, the process might extend slightly as they take their time and explore different creative options. You can easily make several fairy homes in one crafting session, especially if you prepare all your materials beforehand. The final drying time for embellishments can add another 15-30 minutes.
How can I make my pinecone fairy homes more durable?
To enhance the durability of your sparkling pinecone fairy homes and prevent glitter from shedding, consider applying a clear sealant once all the glue and embellishments are completely dry. A spray sealant, such as a clear acrylic spray or even a strong hairspray, can be lightly misted over the entire pinecone. This creates a protective barrier that holds the glitter and small pieces in place. Ensure you do this in a well-ventilated area and allow the sealant to dry thoroughly according to the product's instructions before displaying your creations.
What other natural items can I use to decorate my fairy homes?
The possibilities for decorating pinecone fairy homes with natural items are endless! Beyond pebbles, twigs, and berries, consider using acorn caps for miniature roofs or bowls, small pieces of bark for doors or siding, dried leaves for colorful accents, or even tiny seed pods for decorative details. Small flowers or petals, once dried, can add a touch of natural beauty. You can also incorporate elements like moss for a lush, forest-floor feel, or small pieces of driftwood for a rustic touch. The key is to look at the natural world around you and see the potential for miniature architectural features.
What Next?
Once your sparkling pinecone fairy homes are complete and thoroughly dry, the real magic begins as you decide where to place them! These enchanting creations can adorn bookshelves, windowsills, mantels, or even become part of a larger fairy garden display. For a truly magical touch, consider adding a tiny LED fairy light nearby. If you enjoyed this project, explore other nature-inspired crafts like painted rock creatures or leaf collages. Store your fairy homes carefully in a dry place to preserve their sparkle and charm for seasons to come, ready to welcome any visiting sprites.
Free: 10 Paper Crafts Anyone Can Make in 5 Minutes
Get our beginner guide + new craft ideas weekly.
No spam. Unsubscribe anytime.
Did you complete this activity?
Related