How to Create Leaf & Stick Nature Sculptures — Easy Step-by-Step Guide
Transform fallen leaves and twigs into whimsical sculptures with your little ones. A simple and engaging outdoor craft for toddlers.

Quick answer
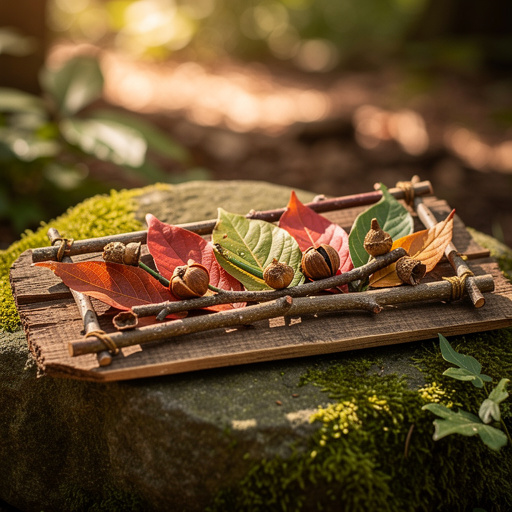
To make Leaf & Stick Nature Sculptures, you need assorted fallen leaves (at least 20-30), small twigs and branches (about 15-20), and optional natural elements like pebbles, acorns, or pinecones (a handful). Gather your materials outdoors in a park, backyard, or nature trail. This beginner-friendly activity has 8 core steps and is perfect for 3 year olds with adult supervision, taking about 30-60 minutes depending on complexity.
What you need
Shop on Amazon · As an Amazon Associate we earn from qualifying purchases. Links above are affiliate links — we may earn a commission at no extra cost to you.
Embrace the beauty of the outdoors and unleash your child's imagination with Leaf & Stick Nature Sculptures! This delightful and simple craft project is a fantastic way to connect with nature and foster creativity in young children. It requires no special skills or expensive supplies, just a willingness to explore and create. Perfect for toddlers and preschoolers, this activity encourages sensory exploration, fine motor skill development, and a deep appreciation for the natural world. Gather your little ones, head outside, and prepare for an afternoon of whimsical artistic adventure!
On this page
Step-by-Step Instructions
- 1
Step 1: Embark on a Nature Scavenger Hunt. Head outdoors to a park, your backyard, a forest trail, or even a quiet corner of your garden. Encourage your child to actively look for and collect a diverse range of fallen leaves, focusing on different shapes, sizes, textures, and colors. Look for leaves that are still somewhat pliable, as they will be easier to work with.
- 2
Step 2: Gather Your Twiggy Treasures. While you're out exploring, search for an assortment of small twigs and branches. Look for twigs of varying thicknesses and lengths; some thin and flexible ones can be bent into curves, while slightly thicker ones can provide structural support for your sculptures. Aim for a good variety to offer different building possibilities.
- 3
Step 3: Seek Out Special Embellishments. If you wish to add extra flair and detail to your creations, keep an eye out for other natural treasures. Small, smooth pebbles can serve as eyes or decorative buttons, acorns can become heads or tiny hats, and pinecones can add wonderful texture or form the body of an animal. Even delicate flower petals or interesting seed pods can add pops of color and unique shapes.
- 4
Step 4: Prepare Your Sculpture's Foundation. Select a larger, sturdy leaf or a flat piece of bark to serve as the base for your first nature sculpture. This provides a stable platform to build upon and helps to keep your creation contained. Ensure the base is relatively flat and free of debris.
- 5
Step 5: Construct the Basic Framework. Begin by arranging several twigs on top of your chosen base leaf. Think about what you want to create – perhaps a simple stick figure, the outline of an animal, or an abstract shape. Use the twigs to establish the main body, limbs, or structural elements of your sculpture, laying them out in a way that suggests form.
- 6
Step 6: Add the Leafy Details. Now, it's time to bring your sculpture to life with the collected leaves. Use smaller leaves to add features like wings for a bird, hair for a person, or clothing for a character. You can also use leaves to create textures, add color, or form the body of an animal. Experiment with layering different leaf shapes and sizes.
- 7
Step 7: Secure Your Natural Masterpiece. Gently press the twigs and leaves together to help them adhere. You can also tuck the ends of twigs into natural folds or crevices within the leaves. For more secure connections, carefully bend pliable twigs to wrap around other elements or tuck leaf edges around twig ends. The goal is to create a stable structure without needing any glue.
- 8
Step 8: Embellish with Found Treasures. This is where your optional collected items come into play. Add pebbles for eyes, an acorn for a nose, or a pinecone for a whimsical hat. These small additions can truly bring your nature sculpture to life and add personality. Let your child's imagination guide the placement of these final touches.
- 9
Step 9: Refine and Reinforce. Take a moment to assess your sculpture. Are there any parts that feel loose? Gently adjust and tuck elements as needed. You might find that a strategically placed twig can support a drooping leaf, or a small pebble can hold down a delicate petal. This step is about ensuring your creation holds together while maintaining its natural aesthetic.
- 10
Step 10: Consider Texture and Dimension. Think about how you can add more visual interest. Layering leaves can create a sense of depth, while using twigs of different textures can add tactile appeal. You can also bend twigs to create more dynamic poses or shapes, moving beyond simple straight lines.
- 11
Step 11: Experiment with Color Palettes. Encourage your child to think about the colors of the leaves and other natural elements they are using. Do they want to create a vibrant, multi-colored creature, or a more muted, earthy-toned sculpture? This can be a great way to introduce basic color theory in a fun, hands-on way.
- 12
Step 12: Give Your Sculpture a Name and Story. Once the sculpture is complete, ask your child what it is. What is its name? What does it do? Where does it live? Encouraging them to create a narrative around their artwork sparks imaginative thinking and language development, making the craft even more engaging.
- 13
Step 13: Document Your Creations. Before your nature sculptures naturally begin to fade or decompose, take some time to capture them with photographs. This allows you to preserve the memory of your artistic endeavors and provides a lovely way to look back on your creative journey. You can even create a digital or physical scrapbook of your nature art.
- 14
Step 14: Explore Different Forms. Encourage experimentation with various forms. Instead of just animals or people, try creating abstract shapes, miniature landscapes, or even tiny houses. The possibilities are endless when working with such versatile natural materials.
- 15
Step 15: Integrate Movement and Balance. For slightly older children, introduce the concept of balance. Can they create a sculpture that stands on its own? Can they arrange twigs and leaves to suggest movement, like a bird in flight or a creature leaping?
- 16
Step 16: Consider the Environment. Discuss how the materials used are all found in nature and how important it is to respect and protect the environment. This is a great opportunity to teach children about sustainability and the beauty of natural cycles.
- 17
Step 17: Adapt to Weather Conditions. If it's a bit windy, you might need to use slightly heavier leaves or more substantial twigs for your base. If it's damp, be mindful that some leaves might be more fragile. Adapt your collection and building techniques to suit the conditions.
- 18
Step 18: Embrace Imperfection. Remind yourself and your child that nature crafts are about the joy of creation, not about achieving a perfect, store-bought look. The unique imperfections of natural materials add to the charm and character of each sculpture.
- 19
Step 19: Clean Up Naturally. Once you're finished, the beauty of this craft is that the materials can often be returned to nature. Any leftover leaves or twigs can be composted or scattered back in the garden. This reinforces the idea of a closed-loop system and respect for the environment.
- 20
Step 20: Extend the Play. After creating the sculptures, encourage further imaginative play. The sculptures can become characters in a story, props for a nature-themed puppet show, or simply admired as beautiful, temporary art pieces.
Tips & Troubleshooting
- 1Encourage your child to describe what they are making as they build their sculpture. Ask open-ended questions like, 'What is this part for?' or 'What does your creature like to eat?' This helps them articulate their creative process and builds their vocabulary.
- 2Don't worry about perfection; the goal is creative exploration and fun. Nature crafts are inherently imperfect, and that's part of their charm. Celebrate the unique qualities of each piece and focus on the process of making rather than the final outcome.
- 3If twigs are too stiff to bend easily, you can gently warm them by holding them in your hands for a moment, or by carefully placing them in a slightly damp area for a short period. This can make them more pliable for creating curves and organic shapes.
- 4Take photos of your creations before they naturally decompose. These photographs serve as wonderful keepsakes and allow you to document the evolution of your child's artistic skills and imagination over time. You can even create a digital album or a physical scrapbook.
- 5Involve your child in the material selection process. Let them choose the leaves and twigs they find most interesting, which gives them a sense of ownership over the project and encourages them to be more invested in the outcome.
- 6Consider working on a tray or a designated mat, especially if you are not outdoors. This helps to contain the small pieces and makes cleanup much easier, particularly when working with younger children.
- 7Talk about the different types of trees and plants you find the leaves and twigs from. This adds an educational element to the craft, connecting it to broader environmental awareness and botany.
- 8If you're finding it difficult to secure elements, you can very gently use small pieces of natural twine or even a bit of damp moss to help bind things together, though the aim is to avoid artificial adhesives.
Related Activities You Might Enjoy
Frequently Asked Questions
What are the best materials for nature crafts for 3 year olds?
For 3-year-olds, prioritize safety and accessibility when selecting materials for nature crafts. Focus on readily available, soft, and non-toxic items such as fallen leaves of various shapes and sizes, smooth twigs and branches, small pebbles, acorns, and pinecones. It's crucial to avoid small, sharp, or potentially toxic items like berries, certain seeds, or sharp thorns. Always ensure that the collected materials are clean and free from any harmful insects or sharp edges. Adult supervision is paramount throughout the entire process to ensure the child does not ingest any materials or encounter hazards. The goal is to provide a sensory-rich and engaging experience that is both fun and safe.
How can I make nature crafts less messy for toddlers?
Nature crafts are inherently less messy than many indoor crafts, especially when using dry materials like leaves and twigs. To further minimize mess, consider working on a large, sturdy leaf or a piece of bark as a base for the sculptures, which helps contain loose elements. Doing the activity outdoors is the ultimate mess-free solution, allowing children to explore and create without worrying about spills or stains. If an indoor setting is necessary, lay down a large mat, old newspaper, or a plastic tablecloth to protect your surfaces. Using a tray for collecting and assembling materials can also help keep everything organized and contained, making cleanup a breeze.
Are there any safety concerns with nature crafts for 3 year olds?
Safety is a top priority when engaging 3-year-olds in nature crafts. Always supervise them closely to prevent them from putting small items, such as pebbles or acorns, into their mouths, as these can be choking hazards. Thoroughly inspect all collected materials for sharp edges, thorns, or any signs of insect infestation before allowing your child to handle them. Stick to soft, fallen natural items and avoid anything that looks potentially poisonous or could cause irritation. Educate your child about not tasting or eating any of the materials they collect. By being vigilant and choosing materials wisely, you can ensure a safe and enjoyable crafting experience.
What are the benefits of nature crafts for toddlers?
Nature crafts offer a wealth of developmental benefits for toddlers. They significantly foster creativity and imagination as children transform natural elements into unique sculptures. The tactile experience of handling leaves, twigs, and pebbles enhances sensory exploration and cognitive development. Fine motor skills are honed as children grasp, arrange, and manipulate these natural materials. Furthermore, engaging in outdoor activities like collecting materials promotes physical activity and a connection with the natural world, instilling an early appreciation for the environment. These crafts also provide invaluable screen-free bonding time for families, strengthening relationships and creating cherished memories.
How long does it take to complete a Leaf & Stick Nature Sculpture?
The time it takes to complete a Leaf & Stick Nature Sculpture can vary depending on the child's age, engagement level, and the complexity of the desired sculpture. For a 3-year-old with adult guidance, the entire process, including gathering materials and creating one or two sculptures, typically takes about 30 to 60 minutes. Younger children might focus on simpler designs and have shorter attention spans, while older preschoolers might spend more time meticulously arranging elements. The gathering phase itself can take 15-20 minutes, followed by 15-40 minutes of creative construction. It's best to approach this activity with flexibility and allow the child to work at their own pace, focusing on the enjoyment of the process.
Can I use glue or tape to secure the nature sculptures?
While glue or tape can certainly make securing nature sculptures easier, the beauty of this particular craft lies in its natural, adhesive-free approach. By encouraging children to gently press elements together, tuck twig ends into leaf folds, or use the natural pliability of twigs to bind materials, they develop a deeper understanding of how natural forms can interlock and support each other. This method also keeps the craft entirely natural and eco-friendly, meaning the sculptures can eventually return to the earth without leaving behind artificial waste. If you do choose to use an adhesive for a more permanent creation, opt for eco-friendly, non-toxic glues and use them sparingly.
What Next?
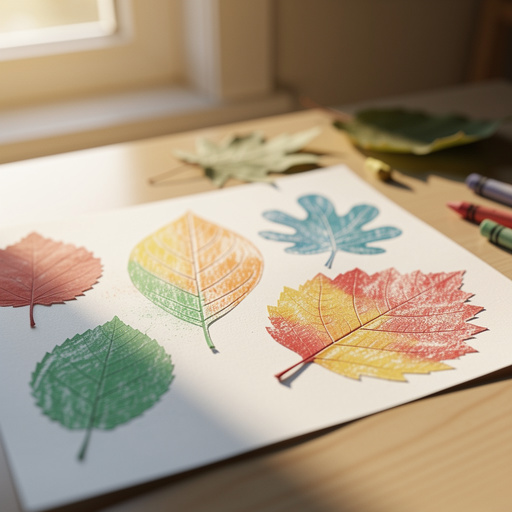
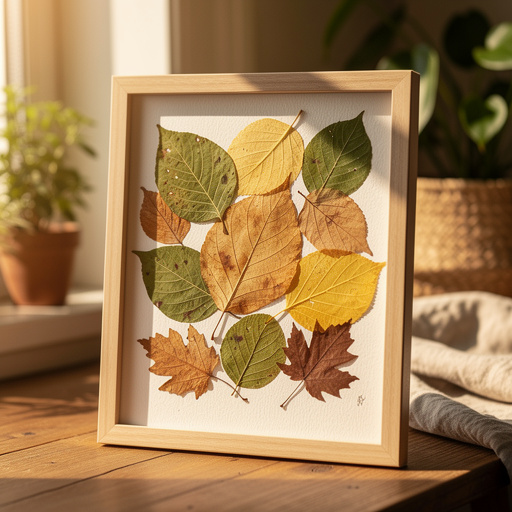
As your Leaf & Stick Nature Sculptures take shape, remember that the process is as rewarding as the final product. Encourage your child to name their creations and tell stories about them, further enhancing their imaginative play. Once complete, these ephemeral artworks can be admired for a few days before they naturally return to the earth. For a more lasting display, consider photographing them or gently pressing some of the flatter elements for future collage projects. This activity can easily lead to other nature-inspired crafts, such as leaf rubbings, nature collages, or even building miniature fairy houses.
Free: 10 Paper Crafts Anyone Can Make in 5 Minutes
Get our beginner guide + new craft ideas weekly.
No spam. Unsubscribe anytime.
Did you complete this activity?
Related