How to Create Whimsical Creature Sketches — Easy Step-by-Step Guide
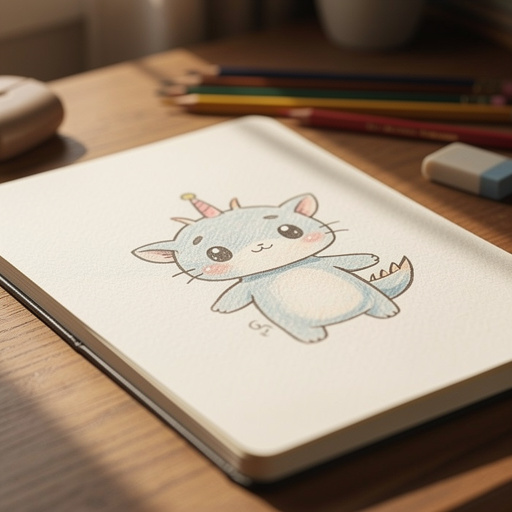
Unleash your imagination and bring fantastical creatures to life with simple pencil strokes. This guide offers fun pencil drawing ideas for the whole family. Perfect for beginners and kids aged 6+, this project takes about 30 minutes and requires just a few basic art supplies.
Quick answer
To create whimsical creature sketches, you need paper, pencils, and an eraser, taking about 30 minutes. Start by doodling basic shapes. This beginner-friendly activity has 10 steps and is perfect for families and kids aged 6+. Combine animal features, experiment with line weight, and use everyday objects for inspiration to make your creatures unique.
What you need
Shop on Amazon · As an Amazon Associate we earn from qualifying purchases. Links above are affiliate links — we may earn a commission at no extra cost to you.
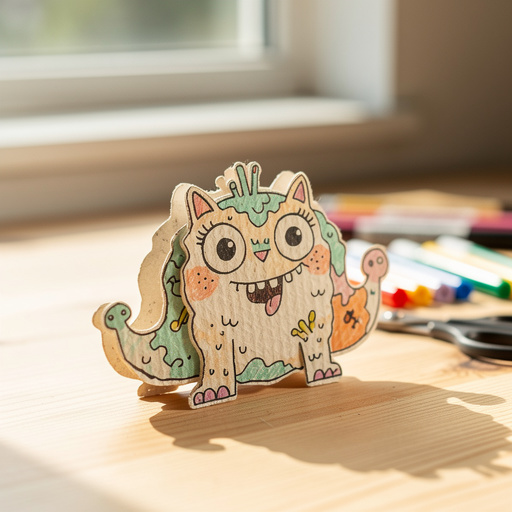
Embark on a delightful journey into the world of imagination with this easy-to-follow guide on creating whimsical creature sketches. This project is a fantastic way to spark creativity in artists of all ages, from curious kids to adults looking for a relaxing and fun artistic outlet. What makes it truly special is its boundless potential for personalization – no two creatures will ever be the same! It’s a perfect activity for family bonding, classroom art sessions, or simply a moment of personal creative escape, requiring minimal materials and offering maximum imaginative freedom.
On this page
Step-by-Step Instructions
- 1
Gather your materials: Ensure you have your paper, pencil, sharpener, and eraser readily available. Having everything within reach will help maintain your creative flow and prevent interruptions during the drawing process.
- 2
Lightly sketch a few basic shapes on your paper, like circles, ovals, or squares, to form the body of your creature. Think of these as the foundational building blocks; they don't need to be perfect, just a starting point to guide your imagination.

- 3
Connect these shapes with curved or jagged lines to create a unique body outline. Don't be afraid to let the lines overlap or extend beyond the initial shapes, as this will give your creature a more organic and less rigid form.
- 4
Add a head by drawing a circle or oval on top of the body, or to the side. Consider the creature's potential personality – a large, round head might suggest a friendly creature, while a more elongated one could imply something sly or curious.

- 5
Draw simple eyes. These can be dots, circles, or even simple lines, but think about their placement and expression. Eyes are crucial for conveying emotion, so experiment with different sizes and positions to give your creature a distinct personality.
- 6
Sketch out some ears or horns. Think about unusual shapes like triangles, spirals, or even leaves, and consider how they might attach to the head. These elements can significantly contribute to the creature's overall appearance and character.
- 7
Add limbs. These can be simple sticks, rounded shapes, or even multiple legs, depending on the creature you envision. Ensure they are attached logically to the body, even if the logic is fantastical, and consider how they might be used for movement.
- 8
Draw a tail. It could be long and thin, bushy, or even have a unique shape at the end, like a feather or a spade. The tail can add balance to the composition and further enhance the creature's unique characteristics.
- 9
Add small details like spots, stripes, scales, or fuzzy patches to give your creature texture. These details can transform a simple outline into a visually interesting and believable (within its own fantastical context) being.

- 10
Erase any stray pencil lines and refine your creature's outline for a cleaner look. Go over your main lines with a slightly firmer pressure to make them stand out, and gently erase any overlapping or unnecessary construction lines.
- 11
Consider adding a mouth. Is it a wide grin, a small pout, or a mysterious slit? The mouth is another key feature for expressing personality and can drastically alter how your creature is perceived.
- 12
Think about appendages beyond basic limbs. Does your creature have wings, fins, extra arms, or perhaps a prehensile tail? Adding these unique features can elevate your creature from a simple animal-like form to something truly extraordinary.
- 13
Introduce texture through varied line work. Instead of just smooth lines, try short, choppy strokes for fur, wavy lines for scales, or tiny dots for a bumpy surface. This adds visual interest and depth without needing color.
- 14
Give your creature a sense of environment, even if it's just a simple suggestion. A few squiggly lines for grass, a small cloud, or a hint of a cave entrance can place your creature in a world and make it feel more alive.
- 15
Experiment with different head shapes. Beyond circles and ovals, try more abstract or geometric shapes, or combine multiple shapes to create a truly unique cranial structure.
- 16
Add secondary features to the body. This could include a mane, a frill, a shell, or even small decorative elements like buttons or ribbons if you're going for a more whimsical, almost toy-like creature.
- 17
Refine the overall silhouette. Step back and look at your creature from a distance. Does its shape read clearly? Are there any areas that feel too cluttered or too empty? Adjust lines to improve its overall form.
- 18
Consider adding a unique marking or pattern. This could be a swirl on its forehead, a series of dots down its back, or a contrasting color block on its belly. These patterns can make your creature instantly recognizable.
- 19
Add subtle shading to give your creature volume. Even with just a pencil, you can create depth by lightly shading areas that would naturally be in shadow, like under the chin or the belly. This is a great way to make your drawing pop.
- 20
Review and enhance. Look over your entire sketch. Are there any areas you can add more detail to? Perhaps some wisps of fur around the ears, or a glint in the eye? Small additions can make a big difference.
Tips & Troubleshooting
- 1Don't be afraid to combine different animal features! Think of a bird's wings on a cat's body, or a snake's scales on a furry creature. This fusion of familiar elements is the heart of creating unique and whimsical beings.
- 2Experiment with different pencil pressures to create varying line weights and add depth to your drawing. Light pressure is great for initial sketches and subtle shading, while firmer pressure can define outlines and create bolder strokes.
- 3If you get stuck, look around your house or nature for inspiration – a leaf, a rock, or even a piece of furniture can spark an idea. Observe the textures, shapes, and patterns in everyday objects and see how they might translate into creature features.
- 4Consider giving your creature a unique personality. Is it happy, grumpy, shy, or adventurous? Let that show in its features and pose; for example, a shy creature might have its eyes looking down, while an adventurous one might be in a dynamic, leaping pose.
- 5Once you're happy with your pencil sketch, you can add color using colored pencils, crayons, or even watercolors for an extra touch. Color can bring your creature to life and further enhance its personality and mood.
- 6Don't aim for perfection on your first try. Whimsical creatures are about fun and imagination, so embrace happy accidents and enjoy the process of discovery. The most interesting designs often come from unexpected turns.
- 7Think about scale and proportion in a fantastical way. Your creature might have disproportionately large eyes, tiny legs, or an enormous head – these exaggerations are what make it whimsical and memorable.
- 8Try drawing your creature from different angles. Once you have a basic design, sketching it from the side, front, or even a three-quarter view can help you understand its form better and reveal new design possibilities.
Related Activities You Might Enjoy
Frequently Asked Questions
What are some easy pencil drawing ideas for beginners?
Easy pencil drawing ideas for beginners include simple shapes, basic objects like houses or fruits, and imaginative creatures like the whimsical ones in this tutorial. Focus on light sketching and building up details gradually. Start with fundamental shapes like circles, squares, and triangles, and then combine them to form more complex objects or characters. Practicing drawing everyday items such as cups, books, or plants can also build foundational skills. The key is to start simple, observe carefully, and gradually introduce more complexity as your confidence grows.
How can I make my pencil drawings more interesting?
To make pencil drawings more interesting, experiment with different shading techniques like cross-hatching or stippling, vary your line weights, and focus on adding unique details and textures to your subjects. Using a range of pencils from hard (like H) to soft (like B) allows for a spectrum of tones. Consider the light source and how it affects shadows to create a sense of volume. Adding expressive elements, such as dynamic poses or intriguing expressions, can also significantly enhance the appeal of your drawings.
What materials do I need for pencil drawing?
For basic pencil drawing, you'll need paper, a graphite pencil (HB or 2B are good starting points), and an eraser. A kneaded eraser is excellent for lifting graphite subtly and for creating highlights, while a standard rubber eraser is good for more forceful corrections. A pencil sharpener is essential to keep your pencils in good working order. For more advanced techniques, you might consider a range of graphite pencils with varying hardness (H for lighter lines, B for darker tones) and different types of paper, such as sketch paper or drawing paper, which have varying textures.
How do I come up with creative drawing ideas?
Creative drawing ideas can come from observing the world around you, combining different concepts, looking at art for inspiration, or simply letting your imagination run wild with prompts like 'what if' scenarios. Keep a sketchbook handy to jot down ideas as they strike. Try freewriting about a topic, then drawing what comes to mind. Mash-up unrelated objects or animals, or imagine fantastical scenarios. Even mundane objects can become interesting subjects if you look at them from a new perspective or imagine them in an unusual context.
What is a kneaded eraser and why is it useful?
A kneaded eraser is a pliable, putty-like eraser that doesn't wear down like traditional erasers. It works by lifting graphite from the paper rather than rubbing it away, which makes it ideal for subtle corrections and creating highlights without damaging the paper's surface. You can mold it into different shapes to erase fine details or large areas. It's also great for lightening areas of shading or creating soft, graduated effects. Because it doesn't leave behind eraser shavings, it helps keep your drawing surface clean and tidy.
How can I make my whimsical creatures look more unique?
To make your whimsical creatures truly unique, focus on combining unexpected elements and exaggerating features. Instead of just adding wings to a dog, consider giving it iridescent, feathery wings like a butterfly's, or perhaps wings made of leaves. Think about unusual textures, like fur that looks like moss, or skin that resembles polished stone. Give your creature a distinct silhouette that stands out, and consider its environment or how it might interact with the world. The more you push beyond conventional animal anatomy and combine disparate ideas, the more original your creation will become.
What age group is this project suitable for?
This whimsical creature sketchbook project is perfect for a wide range of ages, specifically recommended for children aged 6 and up, but also highly enjoyable for teenagers and adults. Its simplicity makes it accessible for young children who are just beginning to explore drawing, allowing them to build confidence with basic shapes and lines. For older children and adults, it serves as a fantastic creative warm-up, a stress-reliever, or a springboard for more complex character design. The open-ended nature means that artists of any skill level can find joy and success in creating their own fantastical beings.
What Next?
Congratulations on bringing your unique whimsical creatures to life! Remember, this is just the beginning of your artistic adventure. Feel free to experiment further by adding intricate patterns, backgrounds, or even giving your creatures names and backstories. For your next project, try creating a whole family of these creatures or designing a habitat for them. Display your finished sketches proudly on your wall, in a special sketchbook, or even scan them to create digital art. Keep your creations in a portfolio or folder to protect them and revisit your imaginative world anytime.
Free: 10 Paper Crafts Anyone Can Make in 5 Minutes
Get our beginner guide + new craft ideas weekly.
No spam. Unsubscribe anytime.
Did you complete this activity?