Discover 20 Macrame Knots — Easy Step-by-Step Guide
Embark on a macrame adventure and master 20 essential knots! This guide is perfect for families looking for creative, screen-free activities. Learn the foundational knots that unlock a world of macrame possibilities, from simple bracelets to intricate wall hangings.

Quick answer
To learn 20 macrame knots, you need macrame cord (around 100 yards of 3mm), scissors, and a flat surface secured with tape or clips. Start by practicing each knot individually on a few sample cords. This beginner-friendly activity has 20 core steps and is perfect for families aged 8+, offering a rewarding and tactile crafting experience.
What you need
Shop on Amazon · As an Amazon Associate we earn from qualifying purchases. Links above are affiliate links — we may earn a commission at no extra cost to you.
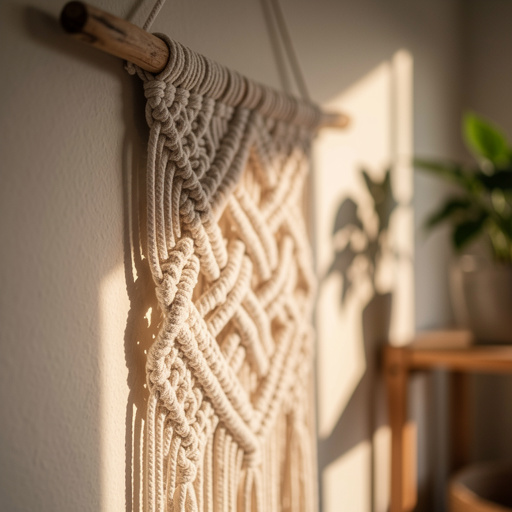
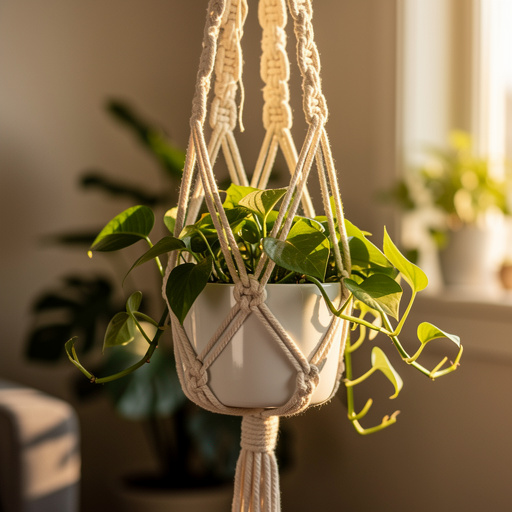
Dive into the wonderfully tactile world of macrame with this comprehensive guide to 20 essential knots. Macrame offers a unique blend of artistic expression and mindful creation, making it an ideal activity for families seeking engaging, screen-free entertainment. Whether you're crafting a simple bracelet, a stylish plant hanger, or a decorative wall hanging, mastering these fundamental knots will equip you with the skills to bring any macrame vision to life. This step-by-step journey is designed for absolute beginners, ensuring a fun and rewarding learning experience for all ages.
On this page
Step-by-Step Instructions
- 1
Cut 4 lengths of macrame cord, each 5 feet long. This length provides ample cord for practicing knots without running out too quickly, and it's manageable for beginners.
- 2
Fold each cord in half to create a loop at the top. Ensure the folded ends are even, creating a neat starting point for your macrame work.
- 3
Secure the loops to your flat surface using tape or clips. This keeps your cords stationary and taut, which is crucial for consistent knot tension and easier knot formation.
- 4
Identify your cords: For clarity, let's label them from left to right as Cord 1, Cord 2, Cord 3, and Cord 4. This labeling will be used throughout the knotting process.
- 5
Take the leftmost cord (Cord 1) and the second cord from the left (Cord 2). These will be your working cords for the Lark's Head Knot.
- 6
Make a Lark's Head Knot: Fold Cord 1 over Cords 2, 3, and 4, creating a U-shaped loop on the left side. Bring the end of Cord 1 up and through this loop, then pull it tight against the secured point.
- 7
Now, take the rightmost cord (Cord 4) and the second cord from the right (Cord 3). These will be your working cords for the second Lark's Head Knot.
- 8
Make another Lark's Head Knot: Fold Cord 4 over Cords 3, 2, and 1, creating a U-shaped loop on the right side. Bring the end of Cord 4 up and through this loop, pulling it tight against the secured point.
- 9
You now have 4 working cords hanging down, with two Lark's Head Knots at the top. Take the leftmost cord (Cord 1) and the cord next to it (Cord 2). These are your primary working cords for the Square Knot.
- 10
Create the first half of a Square Knot: Make a '4' shape with Cord 1 lying over Cord 2. Ensure the '4' shape is neat and the cords are not twisted.
- 11
Bring Cord 1 under Cords 3 and 4, then up through the loop of the '4' shape you just created. Pull Cord 1 firmly and evenly to tighten this first half of the knot against the Lark's Head knots.
- 12
Now, take the rightmost cord (Cord 4) and make a backward '4' shape with Cord 4 lying over Cord 3. This mirrors the first half of the knot.
- 13
Bring Cord 4 under Cords 1 and 2, then up through the loop of the backward '4' shape. Pull Cord 4 firmly and evenly to complete the Square Knot, ensuring it sits snugly next to the first half.
- 14
This completes one Square Knot. Practice making several more by repeating steps 9 through 13. Aim for consistent tension so your knots look uniform and neat.
- 15
To create a Half Square Knot (also known as a Spiral Knot): Repeat only the first half of the Square Knot (steps 10 and 11), making the '4' shape with Cord 1 over Cord 2 and pulling it tight.
- 16
Now, repeat the first half of the Square Knot again with the same cords (Cord 1 and Cord 2). This continuous repetition of the first half will cause the knotting to twist and form a spiral effect.
- 17
To make a Half Hitch Knot: Take Cord 1 and lay it diagonally over the remaining working cords (Cords 2, 3, and 4). This cord is your 'hitch' cord.
- 18
Bring Cord 1 under Cords 2, 3, and 4 and pull it up through the loop you just created by laying it over the other cords. Pull tight to form the first Half Hitch.
- 19
Repeat the Half Hitch Knot with Cord 1 over the same working cords to create a full Half Hitch. A single Half Hitch is one pass; a full Half Hitch is two passes of the hitch cord around the others.
- 20
To make a Double Half Hitch Knot: Make one Half Hitch Knot (steps 17-19), then immediately make another Half Hitch Knot with the same working cord (Cord 1) around the same filler cords (Cords 2, 3, and 4). This creates a more secure and decorative knot.
- 21
To make a Gathering Knot: Gather all your working cords together neatly at the point where you want the knot to be. Take a separate piece of cord (about 12 inches long) and create a loop at one end, with the loop pointing downwards.
- 22
Position the loop against the gathered cords, with the tail of the separate cord extending upwards. Wrap the longer end of the separate cord tightly around all the gathered cords and the loop, working downwards for about 1 inch.
- 23
Once you've wrapped about 1 inch, thread the free end of the wrapping cord through the loop you created at the top. Ensure the end of the wrapping cord goes through the loop completely.
- 24
Pull the top end of the loop upwards, drawing the wrapped end of the cord underneath the wraps you just made. This action cinches the knot securely.
- 25
Trim the excess ends of the wrapping cord and the loop close to the knot. You should be left with a neat, secure gathering knot holding your cords together.
- 26
Practice each of these knots until you feel comfortable with their formation and can execute them with consistent tension. Repetition is key to muscle memory in macrame.
- 27
You have now learned 6 fundamental macrame knots: Lark's Head, Square Knot, Half Square Knot (Spiral Knot), Half Hitch, Double Half Hitch, and Gathering Knot. Each of these has variations and applications that expand their utility.
- 28
To truly master these knots and reach the '20 knots' goal, understand that variations exist. For example, the Square Knot can be made with different cord orders, and the Half Hitch can be used to create various patterns like chevrons and diagonal lines. Experimenting with these variations will naturally expand your knot repertoire.
- 29
Consider the Square Knot as a base. By alternating the order of the two central cords in subsequent Square Knots, you create a flat, dense fabric. The Half Square Knot, as practiced, creates a spiral. You can also create a Half Square Knot by using the other pair of cords, or by reversing the direction of the '4' shape.
- 30
The Half Hitch and Double Half Hitch knots are incredibly versatile. A series of Half Hitches made with one cord over several others can create diagonal lines. By alternating the direction of the Half Hitch, you can form zig-zag patterns. Double Half Hitches provide a more substantial and decorative finish.
- 31
The Gathering Knot is essential for finishing projects, creating loops for hanging, or securing bundles of cords. Its strength and neat appearance make it indispensable.
- 32
Continue practicing these core knots and their subtle variations. Understanding how each knot is formed and how it interacts with other cords is the foundation for creating more complex macrame designs. The journey to 20 knots is about understanding the building blocks.
- 33
Once you are comfortable, try combining these knots in simple sequences. For instance, a few Square Knots followed by a Spiral Knot can create interesting textural blocks. A series of Half Hitches can frame a section of Square Knots.
- 34
Experiment with different cord colors and textures. Mixing colors can highlight specific knots or patterns, adding visual depth to your work. Different cord materials will also affect the look and feel of your knots.
- 35
For larger projects, consider using a dowel rod or a macrame board. These tools provide a stable hanging point and allow you to work on a larger scale with ease, keeping your cords organized and accessible.
- 36
Always cut your cord longer than you think you'll need. It's better to have extra cord to trim off than to run out mid-knot, which can be frustrating and require re-tying or starting over.
- 37
If a knot looks wrong or uneven, don't hesitate to gently untie it and start again. Macrame is a forgiving craft, and practice is the best teacher. Each attempt helps you refine your technique and tension.
- 38
Keep your tension consistent throughout your project. Uneven tension will make your knots look messy and unprofessional. Try to pull each knot with the same amount of force for a polished finish.
- 39
Explore online resources and macrame books to see how these basic knots are used in various projects. Visual examples can greatly enhance your understanding and inspire new ideas.
- 40
Consider the weight and drape of your finished macrame. Different knots create different textures and densities, affecting how your piece hangs and moves. This is an important consideration for functional items like bags or plant hangers.
- 41
The Lark's Head Knot is fundamental for attaching cords to a dowel or ring, forming the starting point for most macrame projects. Its simplicity belies its importance in creating a stable foundation.
- 42
The Square Knot is arguably the most iconic macrame knot, forming the basis of flat, dense macrame fabric. Mastering its two-part structure is crucial for creating many decorative items.
- 43
The Half Square Knot, or Spiral Knot, is created by repeating only the first half of the Square Knot. This simple alteration leads to a visually distinct twisted effect, perfect for adding texture and movement.
- 44
Half Hitch Knots are incredibly versatile for creating lines and patterns. A single Half Hitch involves one wrap, while a Double Half Hitch involves two wraps, offering more security and a slightly different visual.
- 45
The Gathering Knot is a practical and essential finishing knot. It's used to neatly bundle cords together, often at the top of a hanging piece or to create a loop for attachment.
- 46
Understanding the 'working cord' and the 'filler cord' is key to macrame. In most knots, one or two cords manipulate the others, which remain relatively stationary.
- 47
The 'bar' or 'wrap' in macrame refers to the section where knots are made. The length of this bar can vary, influencing the overall aesthetic of the piece.
- 48
Learning to 'read' your knots is a skill that develops with practice. You'll begin to recognize when a knot is too loose, too tight, or incorrectly formed.
- 49
Don't be afraid to experiment with different cord thicknesses. While 3mm is great for beginners, thicker cords create bolder designs, and thinner cords allow for more intricate detail.
- 50
Consider the fiber content of your cord. Cotton is soft and easy to work with, jute has a rustic appeal, and synthetic fibers can offer durability and water resistance.
- 51
The number of cords used in macrame can vary greatly. While this guide uses four cords for demonstration, many projects utilize 8, 12, or even more cords, requiring you to manage them effectively.
- 52
The tension in macrame is crucial. Consistent tension ensures that your knots are uniform and that your finished piece has a professional look. It takes practice to develop a feel for the right tension.
- 53
The Lark's Head Knot and the Square Knot are generally considered the easiest macrame knots for beginners. They form the foundation for many other macrame techniques, and their straightforward construction makes them ideal for learning the basics of cord manipulation and tension.
- 54
To make macrame knots tighter, ensure you are pulling the working cords firmly and evenly with each pass. You can also use your fingers or a blunt tool to 'peen' the knot, gently pushing the fibers together after tightening to create a more compact and secure knot. Consistent tension throughout the knotting process is key.
- 55
A Square Knot is completed in two distinct steps, resulting in a flat, square knot that lies flat against the work. A Spiral Knot (or Half Square Knot) is made by repeating only the first half of the Square Knot, leading to a continuous twisting effect that creates a spiral shape. The key difference lies in completing the full knot versus repeating only one half.
- 56
While you can technically use yarn, macrame cord is specifically designed for knotting and holds its shape much better, creating crisp, defined knots. Yarn can be fuzzier, more prone to splitting, and may not create the same clean aesthetic. Macrame cord's structure is optimized for the repetitive tension and manipulation involved in knotting.
- 57
The amount of cord needed varies greatly depending on the project's size and complexity. For small items like keychains or bracelets, a few feet per cord might suffice. Larger wall hangings can require hundreds of feet of cord, so it's always best to estimate generously and have extra on hand.
- 58
The Lark's Head Knot is the foundational knot for attaching cords to a dowel, ring, or even another cord. It's created by folding a cord in half, placing the loop over the object, and then pulling the two ends through the loop. This creates a secure and neat starting point for most macrame projects.
- 59
The Square Knot is a two-part knot that creates a flat, decorative knot. The first half involves making a '4' shape with one cord over another, bringing the first cord under the remaining cords and through the loop. The second half mirrors this with the other outer cord, creating a balanced knot.
- 60
The Half Square Knot, also known as the Spiral Knot, is made by repeating only the first half of the Square Knot. This continuous repetition causes the cords to twist, forming a spiral effect. It's a simple variation that adds a dynamic visual element.
- 61
The Half Hitch Knot is a versatile knot used for creating lines and patterns. It involves wrapping a 'hitch' cord around one or more 'filler' cords. A single Half Hitch is one wrap, while a Double Half Hitch involves two wraps for added security and a slightly different look.
- 62
The Gathering Knot is used to neatly bundle cords together. A separate cord is wrapped tightly around the bundle, and then threaded through a loop to cinch it securely. It's often used to finish the top of hanging projects or to create a decorative tassel.
- 63
The number of cords you start with can influence the complexity and density of your macrame. While this guide uses four cords for simplicity, many projects begin with eight or more cords, which are often grouped into sets for knotting.
- 64
When learning new knots, it's beneficial to use contrasting cord colors. This makes it easier to see which cord is doing what and to differentiate between the working cords and filler cords, aiding in understanding the knot structure.
- 65
The tension you apply to each knot is critical for the overall appearance of your macrame. Consistent tension ensures uniformity, while uneven tension can lead to a messy or distorted look. Practice developing a feel for the right amount of pull.
- 66
Macrame cord comes in various materials like cotton, jute, hemp, and synthetic blends. Cotton is soft and easy to work with, making it ideal for beginners. Jute offers a more rustic texture, while synthetics can be more durable and water-resistant.
- 67
The thickness of your macrame cord also impacts the final look. Thicker cords (e.g., 5mm) create bolder, more substantial pieces, while thinner cords (e.g., 2mm) allow for finer details and more intricate patterns.
- 68
To achieve a truly professional finish, pay attention to the spacing between your knots. Consistent spacing, along with consistent tension, contributes significantly to the overall aesthetic appeal of your macrame work.
- 69
Don't be afraid to make mistakes; they are part of the learning process. Gently unraveling a knot and trying again will help you understand the mechanics better and improve your technique over time.
- 70
Consider the purpose of your macrame piece. For functional items like plant hangers or bags, the strength and security of the knots are paramount. For decorative items, aesthetic appeal and pattern are often prioritized.
Tips & Troubleshooting
- 1Keep your tension consistent. Uneven tension will make your knots look messy. Try to pull each knot with the same amount of force.
- 2If a knot looks wrong, don't be afraid to untie it and start again. Macrame is all about practice!
- 3You can use different colors of cord to create visual interest in your projects.
- 4For larger projects, you might want to use a dowel rod or a macrame board to hang your work.
- 5Always cut your cord longer than you think you'll need. It's better to have extra than to run out mid-knot.
Related Activities You Might Enjoy
Frequently Asked Questions
What is the easiest macrame knot to learn?
The Lark's Head Knot and the Square Knot are generally considered the easiest macrame knots for beginners. The Lark's Head Knot is fundamental for attaching cords and is a simple loop-over-and-pull technique. The Square Knot, while having two parts, is straightforward to understand and execute, forming the basis for many macrame patterns. Mastering these two will give you a solid foundation and build confidence for learning more complex knots.
How do I make macrame knots tighter?
To make macrame knots tighter, focus on consistent and firm tension with each pull of the working cords. After completing a knot, you can gently 'peen' it by using your fingers or a blunt tool to push the fibers together, compacting the knot. Ensure your filler cords are also held taut. Avoid pulling too hard on one side, which can distort the knot; aim for even pressure all around the knot as you tighten it.
What is the difference between a Square Knot and a Spiral Knot?
A Square Knot is completed in two distinct steps, resulting in a flat, square knot that lies flat against the work. The first half involves making a '4' shape with one cord over another, bringing the first cord under the remaining cords and through the loop. The second half mirrors this with the other outer cord. A Spiral Knot, also known as a Half Square Knot, is made by repeating only the first half of the Square Knot. This continuous repetition of one half causes the cords to twist, forming a spiral effect rather than a flat knot.
Can I use yarn instead of macrame cord?
While you can technically use yarn for some knotting projects, macrame cord is specifically designed for this craft and is highly recommended for achieving the best results. Macrame cord is typically made from cotton, jute, or synthetic fibers that are twisted or braided to be strong, durable, and hold their shape well, creating crisp, defined knots. Yarn is often fuzzier, can split easily, and may not withstand the repetitive tension and manipulation required for macrame, leading to less defined knots and a less polished finish.
How much cord do I need for a macrame project?
The amount of cord needed for a macrame project varies significantly based on the size, complexity, and type of knots used. As a general rule of thumb, you'll need much more cord than the final length of your project, often 4 to 8 times the desired finished length per cord. For small items like keychains or bracelets, a few feet per cord might suffice. Larger wall hangings or plant hangers can require hundreds of feet of cord, so it's always best to overestimate and have extra on hand to avoid running out mid-project.
What are the basic components of a macrame knot?
Most macrame knots involve two types of cords: working cords and filler cords. The working cords are the ones you manipulate to create the knot, while the filler cords are the ones the working cords are tied around. In knots like the Square Knot, two working cords are used to tie around two filler cords. Understanding which cords are active (working) and which are passive (filler) is crucial for correctly forming any macrame knot. The tension applied to both types of cords also plays a vital role in the knot's final appearance.
How can I ensure my macrame knots are consistent?
Consistency in macrame knots comes from developing a steady hand and consistent tension. Practice is key; the more you tie knots, the more intuitive the process becomes. Try to use the same amount of force when tightening each knot. Keeping your working cords parallel and your filler cords stable will also help. If you're working on a larger project, consider using a jig or a macrame board to keep your cords organized and at a consistent starting point for each knot.
What Next?
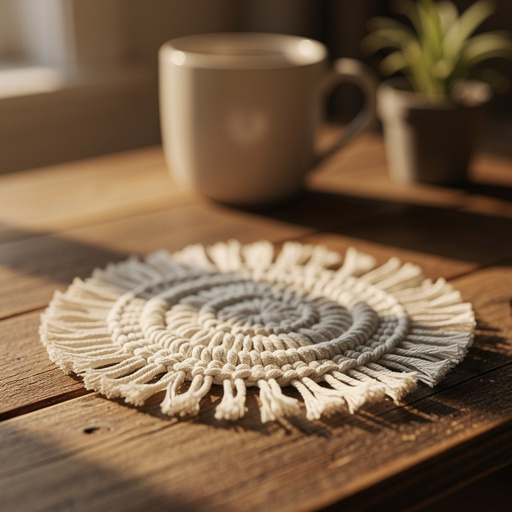
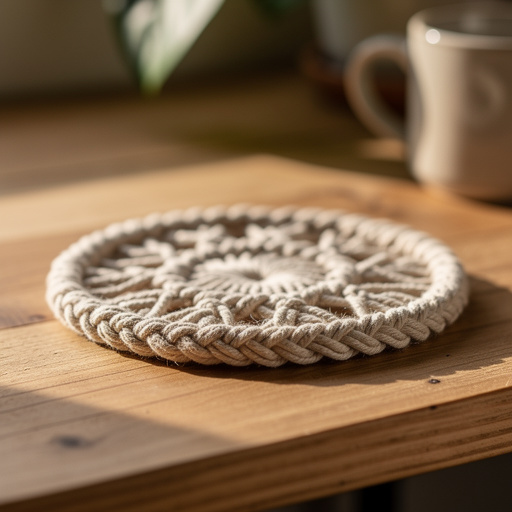
Congratulations on exploring the foundational knots of macrame! With these 20 techniques under your belt, you've unlocked a universe of creative potential. Don't stop here; experiment by combining these knots in different sequences to create unique textures and patterns. Consider your next project: perhaps a set of coasters, a chic tote bag, or even a small macrame mirror frame. Display your finished creations proudly on your walls, use them as charming gifts, or simply enjoy the satisfaction of handmade art. Store your macrame pieces carefully to maintain their shape and prevent tangling.
Free: 10 Paper Crafts Anyone Can Make in 5 Minutes
Get our beginner guide + new craft ideas weekly.
No spam. Unsubscribe anytime.
Did you complete this activity?