How to Make Stamps at Home: Easy Eraser Carving Guide
Discover how to easily carve your own custom stamps from everyday erasers. This fun, screen-free activity is perfect for creating unique art and personalized gifts. Learn simple carving techniques to bring your designs to life on paper, fabric, and more. Ideal for all ages with adult supervision for younger crafters.
Quick answer
To make stamps at home, you need block erasers (like pink pearl or white art gum), a pencil, a carving tool (linoleum cutter or craft knife with supervision), ink pads, and paper or cardstock. The process involves drawing your design, carefully carving away the negative space to leave your design raised, inking the stamp, and pressing it onto your surface. This beginner-friendly activity takes about 30-60 minutes and is perfect for families and creative individuals looking for a screen-free hobby.
What you need
Shop on Amazon · As an Amazon Associate we earn from qualifying purchases. Links above are affiliate links — we may earn a commission at no extra cost to you.
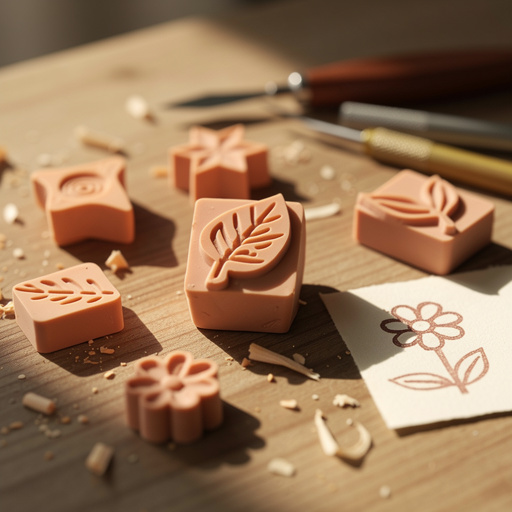
Unleash your inner artist and discover the joy of creating custom stamps right at home! This beginner-friendly guide to carved eraser art stamps transforms ordinary erasers into unique printing tools. It's a wonderfully tactile and screen-free activity that sparks creativity, making it perfect for families, students, or anyone looking for a relaxing and rewarding craft. Imagine personalizing stationery, embellishing handmade cards, or creating one-of-a-kind fabric patterns with your own hand-carved designs. This project is accessible, affordable, and offers endless possibilities for artistic expression.
On this page
Step-by-Step Instructions
- 1
Gather all your materials: Ensure you have your chosen erasers, a pencil, your carving tool(s), ink pad(s), and paper or cardstock ready. Having a clean, well-lit workspace will make the process much more enjoyable and efficient.
- 2
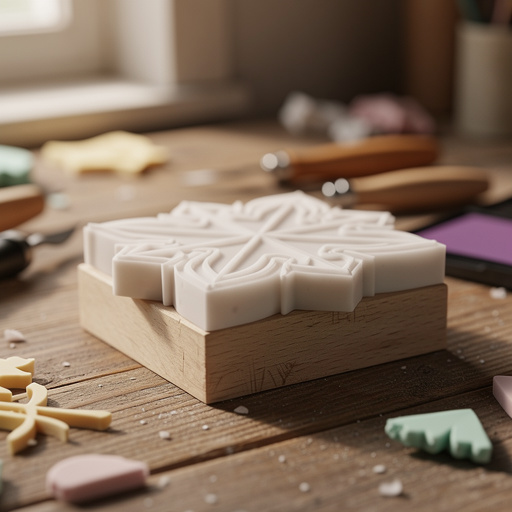
Select and prepare your eraser: Choose a block eraser that is firm enough to hold its shape but soft enough to carve easily. Pink pearl or white art gum erasers are excellent choices for beginners. If your eraser has a paper wrapper, carefully peel it off to expose the full carving surface.
- 3
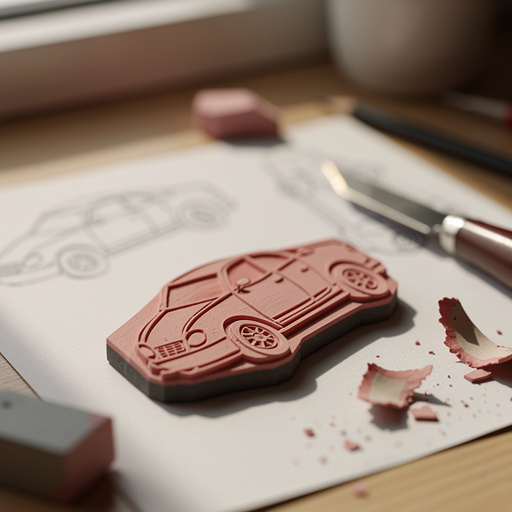
Draw your desired design onto the eraser with a pencil: Keep your initial designs simple, focusing on bold lines and clear shapes. Think about what you want to print – the areas you leave raised will be the parts that receive ink and transfer to your paper. Avoid overly intricate details for your first few attempts.
- 4
Consider transferring a design: For more complex designs, you can draw your image on tracing paper, then flip it over and rub the back of the tracing paper with a soft pencil. Place the tracing paper design-side down onto the eraser and rub firmly to transfer the outline. This ensures a crisp, accurate transfer.
- 5
Begin carving by outlining your design: Using your carving tool, carefully trace over the pencil lines of your design. This initial cut helps define the edges of your stamp and makes it easier to remove the surrounding rubber accurately. Apply gentle, consistent pressure to avoid slipping.
- 6
Carefully use your carving tool to remove the white areas around your pencil drawing, leaving the design raised: This is the core of the carving process. You'll be removing the rubber that you *don't* want to print. Think of it as sculpting – you're creating a relief image where your design stands proud.
- 7
Shave away small pieces of the eraser, working from the outside of your design inwards: Use the different blades of your carving tool to scoop out the rubber. Start with larger blades for broad areas and switch to finer blades for more detailed sections. Work methodically, removing small shavings at a time to maintain control and precision.
- 8
Pay attention to depth and consistency: Ensure that the areas you are carving away are consistently lower than your design. This will prevent unwanted ink from adhering to the carved-out sections and creating smudges on your prints. Aim for a clean, smooth surface in the carved areas.
- 9
Continue carving until your design is clearly defined and raised from the surface of the eraser: Take your time and refine the edges of your design. You can use the pointed tip of a blade to create fine lines or add texture. Step back occasionally to assess your progress and ensure the design is as you envisioned.
- 10
Refine the edges and details: Once the main carving is complete, go back and sharpen any lines or add subtle shading if desired. You can use the side of a blade to create a slight bevel on the edges of your design, which can help with ink application and print clarity.
- 11
Gently brush away any eraser shavings from your carved stamp: Use a soft brush or a dry cloth to meticulously remove all loose eraser dust and shavings from the surface of your stamp. Any remaining debris can interfere with the inking process and result in a less-than-perfect print.
- 12
Test your stamp: Before committing to a final print, it's a good idea to do a test stamp on a scrap piece of paper. This allows you to check for any areas that might need further carving or refinement, and to see how the ink coverage looks.
- 13
Press the carved stamp firmly onto an ink pad, ensuring even coverage: Gently dab the stamp onto the ink pad, rotating it slightly to pick up ink on all the raised surfaces of your design. Avoid pressing too hard, which can cause ink to pool in the carved-out areas.
- 14
Carefully stamp your design onto paper or cardstock, pressing down evenly: Position your stamp where you want it on your paper and apply firm, even pressure across the entire surface of the stamp. Lift the stamp straight up to reveal your printed design. For larger stamps, you might need to apply pressure with your fingers or a brayer.
- 15
Clean your carved stamps with a damp cloth after use to remove ink residue and prolong their life: Immediately after you're finished stamping, gently wipe the surface of your stamp with a slightly damp cloth or paper towel. This removes excess ink and prevents it from drying and hardening in the carved areas, which can make future use difficult.
- 16
Allow your stamps to air dry completely before storing: Once cleaned, place your stamps on a flat surface to air dry thoroughly. Storing them while still damp can lead to mold or damage. If you used rubbing alcohol for a deeper clean, ensure it evaporates completely.
Tips & Troubleshooting
- 1Start with simple shapes like hearts, stars, or basic letters. Intricate details can be challenging for beginners and may require more advanced carving tools and techniques. Focusing on bold, clear designs will build your confidence and skill.
- 2If you make a mistake, don't despair! You can often carve away the error by making it a deeper recess, or you can adapt your design to incorporate the mistake. Sometimes, a small 'oops' can become an interesting design element.
- 3Experiment with different types of erasers; some are softer and easier to carve than others. Softer erasers are great for beginners, while firmer ones might offer more precision for detailed work. Try a few different brands to see what you prefer.
- 4Clean your carved stamps with a damp cloth after use to remove ink residue and prolong their life. For stubborn ink, a small amount of rubbing alcohol can be used, but ensure the eraser is completely dry before storing.
- 5Once you're comfortable, try combining multiple small stamps to create larger patterns or scenes. You can also experiment with different ink colors and types, such as fabric ink or metallic inks, for varied effects.
- 6Consider the negative space: Think about the areas you are carving away as much as the design itself. The shapes of the carved-out areas can significantly impact the final print.
- 7Use a light touch when inking your stamp. Over-inking can lead to fuzzy edges and smudged prints. A light dab is usually sufficient to cover the raised design.
- 8When stamping on fabric, ensure you use fabric ink and follow the ink manufacturer's instructions for heat setting to make the design permanent.
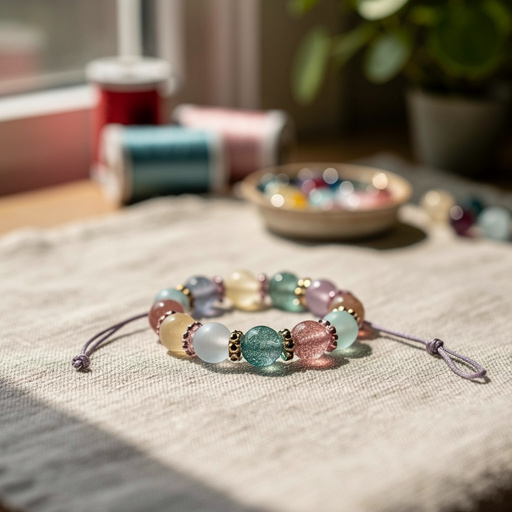
Related Activities You Might Enjoy
Frequently Asked Questions
What kind of erasers are best for making stamps?
Block erasers like pink pearl or white art gum erasers work exceptionally well for carving custom stamps. Softer erasers are generally easier to carve, making them ideal for beginners as they require less force and are less likely to cause slips. However, very soft erasers might wear down more quickly. Experimenting with different brands and types, such as art gum erasers or even some types of polymer clay erasers (though these can be harder), can help you discover your personal preference for texture and ease of carving. Avoid erasers that are too crumbly or that leave a lot of residue when erasing, as these qualities can translate to a less clean stamp.
What tools can I use to carve stamps?
A linoleum cutter or a dedicated carving tool set is highly recommended for creating eraser stamps. These tools typically come with interchangeable blades of various shapes and sizes, allowing for different line weights, textures, and depths. For simpler designs and with adult supervision, a sharp craft knife (like an X-Acto knife) can also be used, but it requires extra caution due to its sharpness. The key is to have a tool that allows for precise control and can effectively remove small pieces of the eraser material. Always ensure your blades are sharp for clean cuts and less effort.
How do I make my stamp design stand out?
To make your stamp design stand out, you need to ensure that the parts you want to print are raised and the surrounding areas are carved away. Think of it like sculpting in reverse: the design is the positive space that will receive ink, and everything else is the negative space that will be removed. Carve away all the surrounding rubber so that only your design remains on the surface of the eraser. The depth of your carving is also important; carve deep enough so that ink doesn't adhere to the recessed areas, which would result in unwanted marks on your print. Consistent depth across the carved areas is crucial for a clean, crisp impression.
Can kids make these stamps?
Yes, children can absolutely make these stamps, but with important considerations for safety. Younger children can focus on the drawing and design phase, using pencils to create their artwork on the eraser. The actual carving should be done by an adult or with direct adult supervision, especially when using sharp carving tools or craft knives. Older children who have developed good fine motor skills and understand safety precautions might be able to use carving tools under close supervision. It's a fantastic way to engage kids in a creative, hands-on activity that fosters imagination and fine motor development.
How do I clean my homemade stamps?
Cleaning your homemade eraser stamps is crucial for their longevity and for achieving clear prints. After each use, gently wipe the surface of the stamp with a slightly damp cloth or paper towel to remove excess ink. For more stubborn ink residue, especially with pigment-based inks, you can use a small amount of rubbing alcohol on a cloth. Gently dab the ink away, being careful not to saturate the eraser. After cleaning, allow your stamps to air dry completely on a flat surface before storing them. Avoid using harsh solvents or abrasive materials, as these can damage the carved design.
What if I make a mistake while carving?
Mistakes are a natural part of the creative process, especially when learning to carve! If you carve away a part of your design that you intended to keep, don't worry. You can often fix it by carving away the surrounding area even deeper, effectively making the 'mistake' part of the background. Alternatively, you can try to adapt your design to incorporate the error. Sometimes, a small slip of the carving tool can lead to an unexpected and interesting texture or line. If the mistake is significant, you can always start over with a fresh eraser, or even try to fill the carved area with a bit of flexible glue or putty if you're feeling adventurous, though this is more advanced.
What Next?
You've now mastered the art of carving your own custom eraser stamps! The possibilities are truly endless, from creating personalized stationery and gift tags to designing unique patterns for fabric or scrapbooking. Consider experimenting with different ink colors and types, or even layering multiple stamp designs for more complex artwork. For a more advanced project, try carving larger designs or combining several small stamps to create intricate scenes. Store your finished stamps in a small box or container, ensuring they are clean and dry, ready for your next creative adventure. Happy stamping!
Free: 10 Paper Crafts Anyone Can Make in 5 Minutes
Get our beginner guide + new craft ideas weekly.
No spam. Unsubscribe anytime.
Did you complete this activity?
Related