How to Make Candles with a Candle Making Kit — Easy Step-by-Step Guide
Discover the joy of creating your own custom scented candles with a convenient candle making kit. A fun, screen-free activity for the whole family!
Quick answer
To make candles with a kit, you'll need the kit's contents and about 60 minutes of active crafting time, plus curing time. Start by melting the wax. This beginner-friendly activity has 10 steps and is perfect for families with kids aged 8+.
What you need
Shop on Amazon · As an Amazon Associate we earn from qualifying purchases. Links above are affiliate links — we may earn a commission at no extra cost to you.
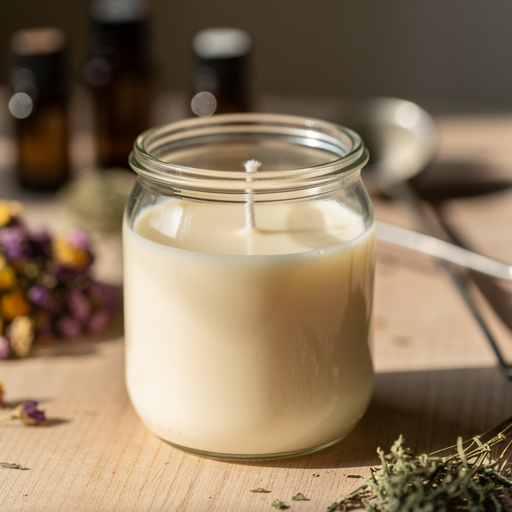
Embark on a delightful DIY journey and discover the satisfaction of crafting your own custom scented candles with a readily available candle making kit. This project is more than just a craft; it's an opportunity to infuse your living space with personalized aromas and create a cozy ambiance. It's an ideal screen-free activity that fosters creativity and provides a tangible, beautiful result, making it perfect for families, aspiring crafters, or anyone looking to add a handmade touch to their home decor.
On this page
Step-by-Step Instructions
- 1
Prepare your workspace by covering it with newspaper or a craft mat to catch any spills, as melted wax can be messy. Ensure good ventilation in the area where you'll be working with the wax and fragrance oils.
- 2
Measure and add the wax flakes to the top part of your double boiler or heat-safe bowl. If your kit doesn't specify a quantity, a general guideline is to fill your containers with wax flakes, then add a little more to account for melting shrinkage.
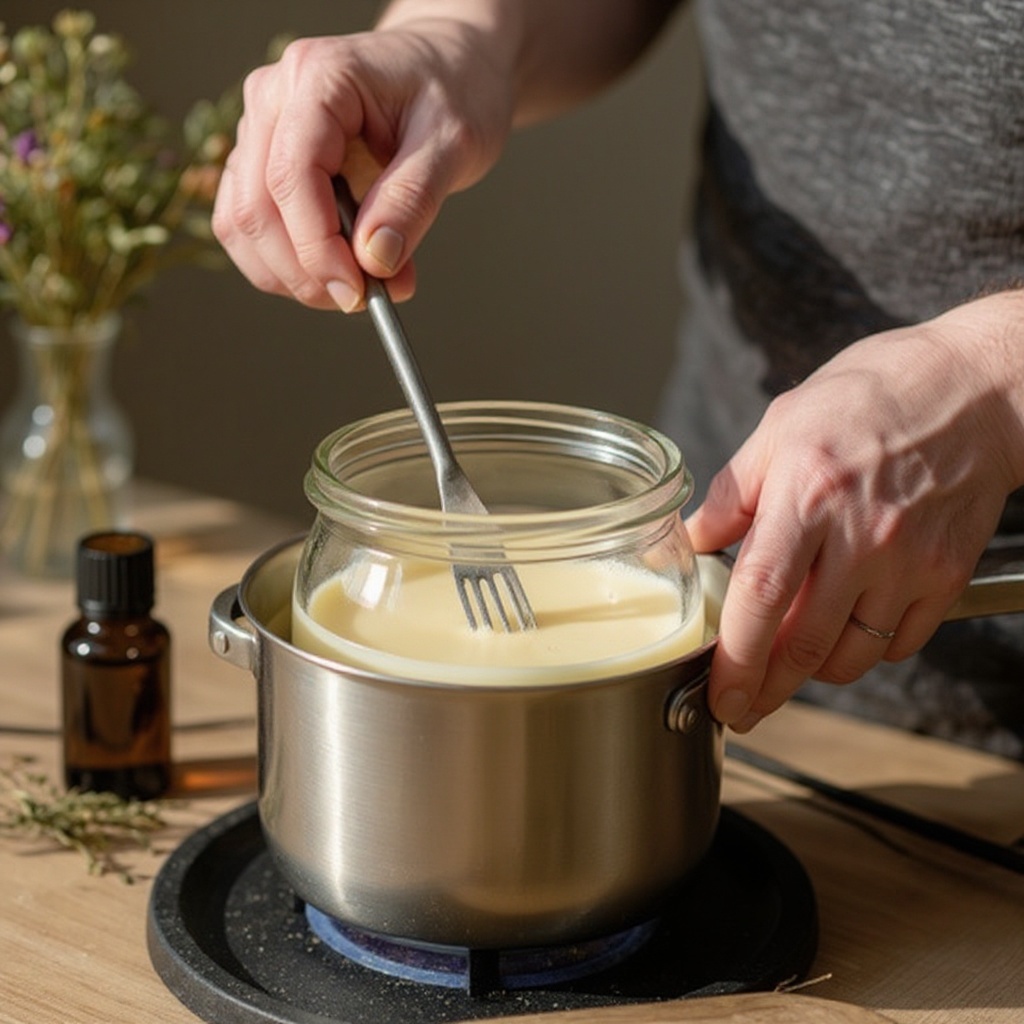
- 3
Fill the bottom pot of your double boiler with about 1-2 inches of water and bring it to a gentle simmer over medium heat. Avoid a rolling boil, as this can cause steam to get into your wax.
- 4
Stir the wax occasionally as it melts, ensuring it doesn't overheat or scorch. Keep a close eye on the wax; it should melt smoothly and evenly without any signs of smoking.
- 5
Once the wax is completely melted, attach the thermometer and monitor the temperature, aiming for the temperature recommended in your kit's instructions. This is typically around 160-185°F (71-85°C) for melting, but always refer to your specific kit's guidance.
- 6
Carefully remove the wax from the heat source once it reaches the desired melting temperature. Allow it to cool slightly to the pouring temperature specified in your kit, which is often around 130-140°F (54-60°C). Pouring at the correct temperature is crucial for a smooth finish and proper scent throw.
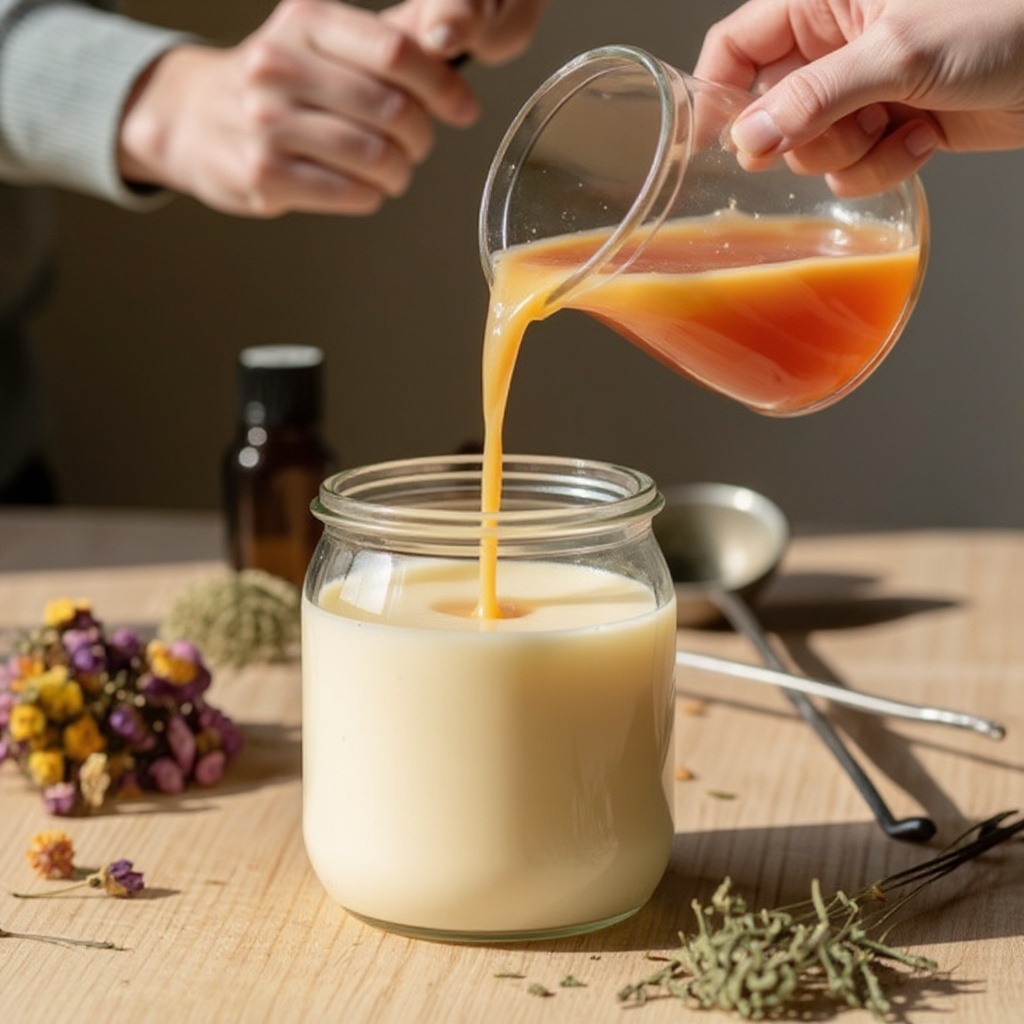
- 7
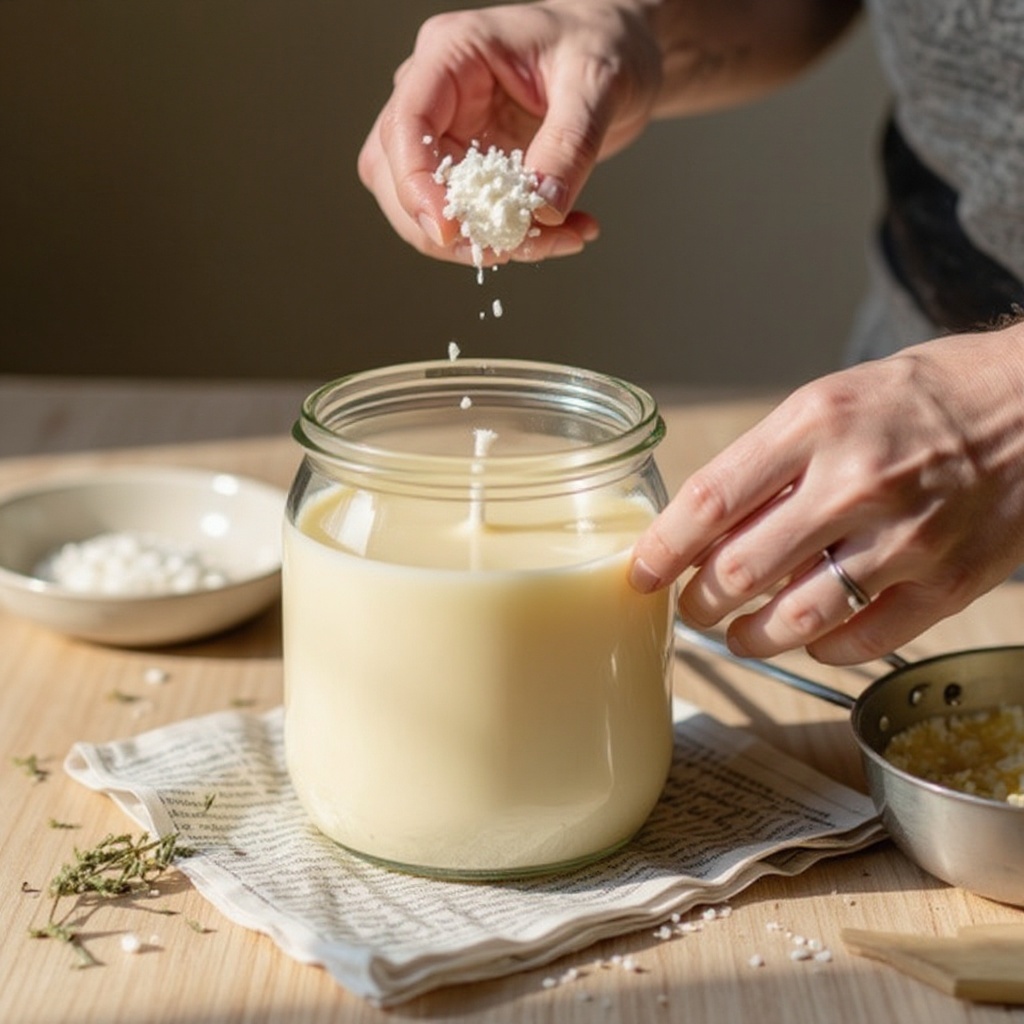
If your kit includes dye, add a few drops at this stage and stir until the color is evenly distributed throughout the melted wax. Start with a small amount of dye, as it's easier to add more than to lighten a dark color.
- 8
Add the fragrance oil according to your kit's instructions, which usually involves a specific ratio of oil to wax (often expressed as a percentage). Stir gently but thoroughly for about 2 minutes to ensure the fragrance oil properly binds with the wax, which is essential for a strong scent when the candle burns.
- 9
Secure the wick to the bottom center of your candle container using the provided wick sticker or a small amount of melted wax. Ensure the wick is firmly attached and centered to prevent it from shifting during the pouring process.
- 10
Carefully pour the scented wax into the prepared container, holding the container steady with one hand. Leave about half an inch of space at the top of the container to prevent overflow when the candle is burning and to allow for a clean finish.
- 11
Use a wick holder, or improvise with pencils, chopsticks, or clothespins laid across the top of the container, to keep the wick centered and upright as the wax cools and solidifies. This ensures an even burn.
- 12
Allow the candles to cure for at least 24 hours, or as directed by your kit, before trimming the wick to about 1/4 inch. Curing allows the wax to fully harden and the fragrance to bind with the wax, resulting in a better scent throw and a cleaner burn.
Tips & Troubleshooting
- 1If your wax is cooling too quickly and you need to reheat it, do so very gently over a low heat source. Avoid overheating the wax, as this can degrade the fragrance and potentially cause discoloration or safety hazards.
- 2Experiment with different fragrance oil combinations or add dried herbs or flowers for a unique touch. Ensure any additions are safe for burning, such as dried lavender or rose petals, and that they are placed away from the wick to prevent fire hazards.
- 3Store your finished candles in a cool, dry place away from direct sunlight and extreme temperatures. This helps to preserve their scent and appearance, preventing the wax from sweating or the fragrance from fading over time.
- 4Always supervise children during the melting and pouring stages of candle making due to the hot wax. Ensure they understand the safety precautions and are at a safe distance when handling hot materials.
- 5If you notice air bubbles in your poured wax, you can try gently tapping the container on your work surface before it fully sets. This can help release trapped air. Alternatively, you can use a heat gun or hairdryer on a low setting to briefly melt the surface and smooth out imperfections.
- 6For a stronger scent throw, ensure you are using the correct amount of fragrance oil as recommended by your kit or the fragrance oil manufacturer. Too little oil won't provide a noticeable scent, while too much can cause issues with the wax.
- 7When trimming the wick, use sharp scissors to ensure a clean cut. A properly trimmed wick promotes an even burn and prevents excessive soot or mushrooming of the wick.
- 8Consider making a test candle with a new scent or blend before committing to a large batch. This allows you to fine-tune the fragrance ratio and check for any unexpected reactions with the wax.
Related Activities You Might Enjoy
Frequently Asked Questions
What is a candle making kit?
A candle making kit is a convenient package containing all the necessary materials to create your own candles at home, typically including wax flakes or blocks, pre-tabbed wicks, containers (like jars or tins), and often fragrance oils and dyes. These kits are designed for beginners, simplifying the process by providing pre-measured components and clear instructions, making it an accessible and enjoyable DIY project for anyone looking to craft personalized candles without needing to source individual supplies.
How long does it take to make a candle with a kit?
Making a candle with a kit usually takes about 60 minutes of active crafting time, which includes melting the wax, adding fragrance and dye, and pouring. However, this doesn't include the crucial curing period. After pouring, the candles need to harden and the scent needs to develop, which typically requires at least 24 hours, and sometimes up to a week for optimal scent throw. So, while the hands-on part is quick, patience is key for the best results.
Are candle making kits safe for kids?
Candle making kits are generally safe for kids with adult supervision, especially during the hot wax melting and pouring stages. The kits themselves contain safe materials, but the process involves hot liquids, which require careful handling. It's essential for an adult to manage the heating of the wax and the pouring into containers. Children can participate in measuring wax, stirring (under supervision), adding fragrance, and decorating the finished candles, making it a fun and educational family activity when safety is prioritized.
Can I use any container for candle making?
While kits often provide specific containers, you can use other heat-safe containers like glass jars, ceramic vessels, or metal tins. The most important factors are that the container is heat-resistant and free from cracks or imperfections that could lead to breakage when exposed to heat. Ensure the container is clean and completely dry before pouring the wax to prevent any unwanted reactions or a poor finish. Avoid using flammable materials like plastic or thin glass that isn't designed for high temperatures.
What kind of wax is usually in a candle making kit?
Most beginner-friendly candle making kits utilize soy wax or paraffin wax, or a blend of both. Soy wax is a popular choice because it's a natural, renewable resource, burns cleaner, and typically has a longer burn time. Paraffin wax is also common, known for its strong scent throw and vibrant color capabilities. Some kits might also include beeswax or coconut wax blends, each offering unique properties and benefits for the finished candle. Always check your kit's specifications for the type of wax provided.
How do I get a good scent throw from my homemade candles?
Achieving a good scent throw, meaning how well the fragrance disperses into the room, involves several factors. Ensure you're using the correct fragrance load (the amount of fragrance oil relative to the wax), typically between 6-10% by weight, as recommended by your kit or fragrance oil supplier. Add the fragrance oil at the correct temperature (usually around 130-140°F or 54-60°C) and stir gently for at least two minutes to ensure it fully binds with the wax. Finally, allow your candles to cure for at least 24-48 hours, or even up to two weeks, as this significantly improves scent diffusion.
What Next?
Congratulations on creating your own beautiful, custom-scented candles! You've unlocked a world of creative possibilities. Don't stop here – consider experimenting with layering different scents, adding decorative elements like dried botanicals (ensuring they are fire-safe and away from the wick), or even trying different wax types in future projects. Display your finished candles proudly on shelves, mantels, or coffee tables, and store any extras in a cool, dry place to preserve their fragrance. Next, you might explore making wax melts or diffusers to further enhance your home's scent profile.
Free: 10 Paper Crafts Anyone Can Make in 5 Minutes
Get our beginner guide + new craft ideas weekly.
No spam. Unsubscribe anytime.
Did you complete this activity?
Related