How to Make DIY Eraser Carving Stamps — Easy Step-by-Step Guide
Discover the simple joy of creating your own custom stamps using everyday erasers. This fun, screen-free activity lets you personalize cards, artwork, and more. With just a few basic materials and a little creativity, you can transform ordinary erasers into unique printing tools. This beginner-friendly project is perfect for families, classrooms, or anyone looking for a relaxing and rewarding craft experience. Get ready to stamp your personality onto everything you create!

Quick answer
To make DIY eraser carving stamps, you need erasers, carving tools, and ink pads, taking about 30 minutes. Start by drawing your design onto paper, then transfer it to the eraser. Carefully carve away the negative space using a craft knife or carving tool, leaving your design raised. Test your stamp on an ink pad and then imprint it onto paper or cardstock. This beginner-friendly activity has 10 steps and is perfect for families and creative individuals looking for a fun, screen-free craft.
What you need
Shop on Amazon · As an Amazon Associate we earn from qualifying purchases. Links above are affiliate links — we may earn a commission at no extra cost to you.
Unleash your inner artist and discover the surprisingly simple magic of creating your own custom stamps from humble erasers. This project is a fantastic way to inject a personal touch into your crafts, from handmade cards and gift tags to unique artwork and journaling. It’s a wonderfully screen-free activity that encourages patience, precision, and creativity, making it ideal for families looking for a shared crafting experience or individuals seeking a mindful, hands-on hobby. Prepare to be delighted by how easily you can transform everyday objects into personalized printing tools!
On this page
Step-by-Step Instructions
- 1
Gather all your materials: erasers, pencil, paper, carving tools, ink pads, and your chosen paper or cardstock for stamping. Ensure your workspace is clean and well-lit, and consider placing a cutting mat underneath if you're using sharp carving tools.
- 2
Begin by sketching your desired design onto a piece of paper. For your first attempts, it's highly recommended to keep the design relatively simple, focusing on bold outlines and clear shapes. Think about how the design will look when it's raised and inked, as the carved-away areas will be the 'negative space' that doesn't print.
- 3
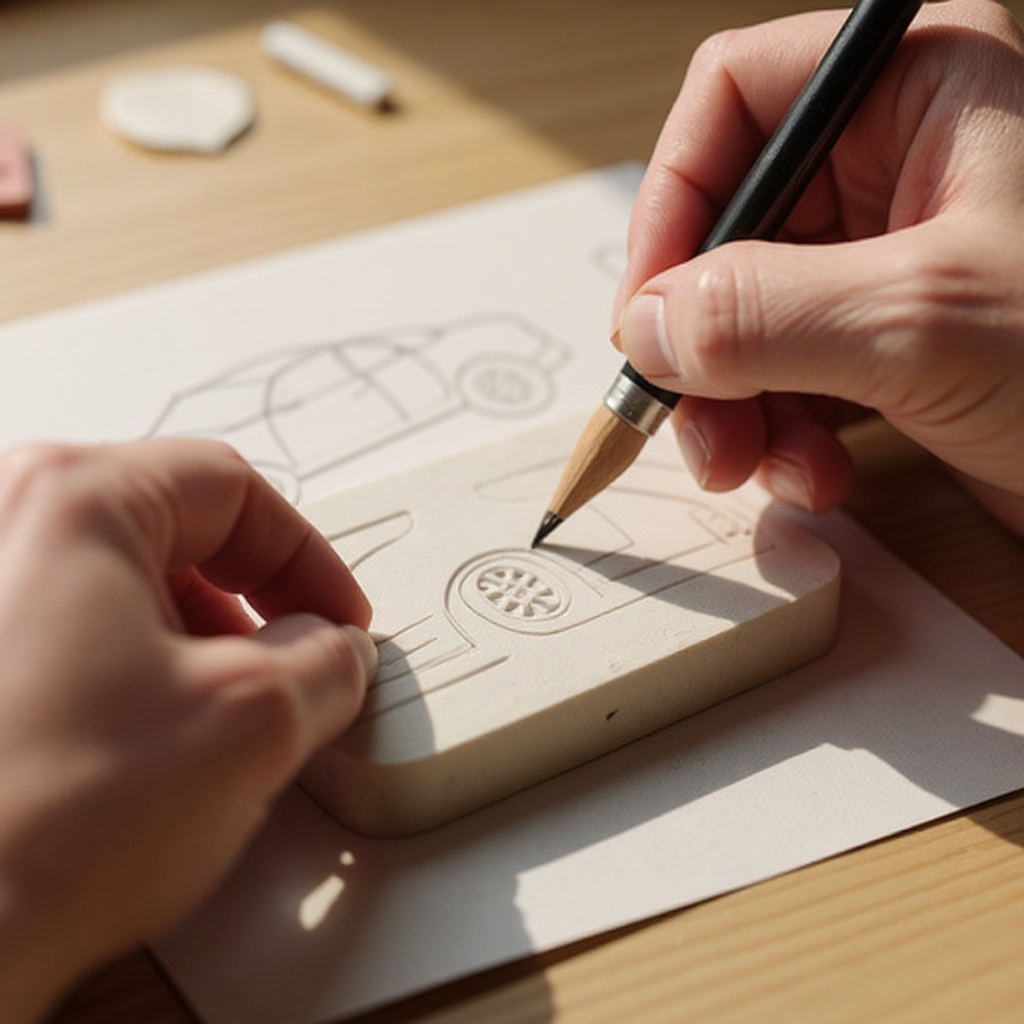
Once you have a design you're happy with, carefully transfer it onto the surface of your eraser. You can do this by tracing over your paper sketch with a pencil, pressing firmly to create a visible outline on the eraser, or by drawing directly onto the eraser with your pencil. Ensure the lines are dark enough to be easily seen during the carving process.
- 4
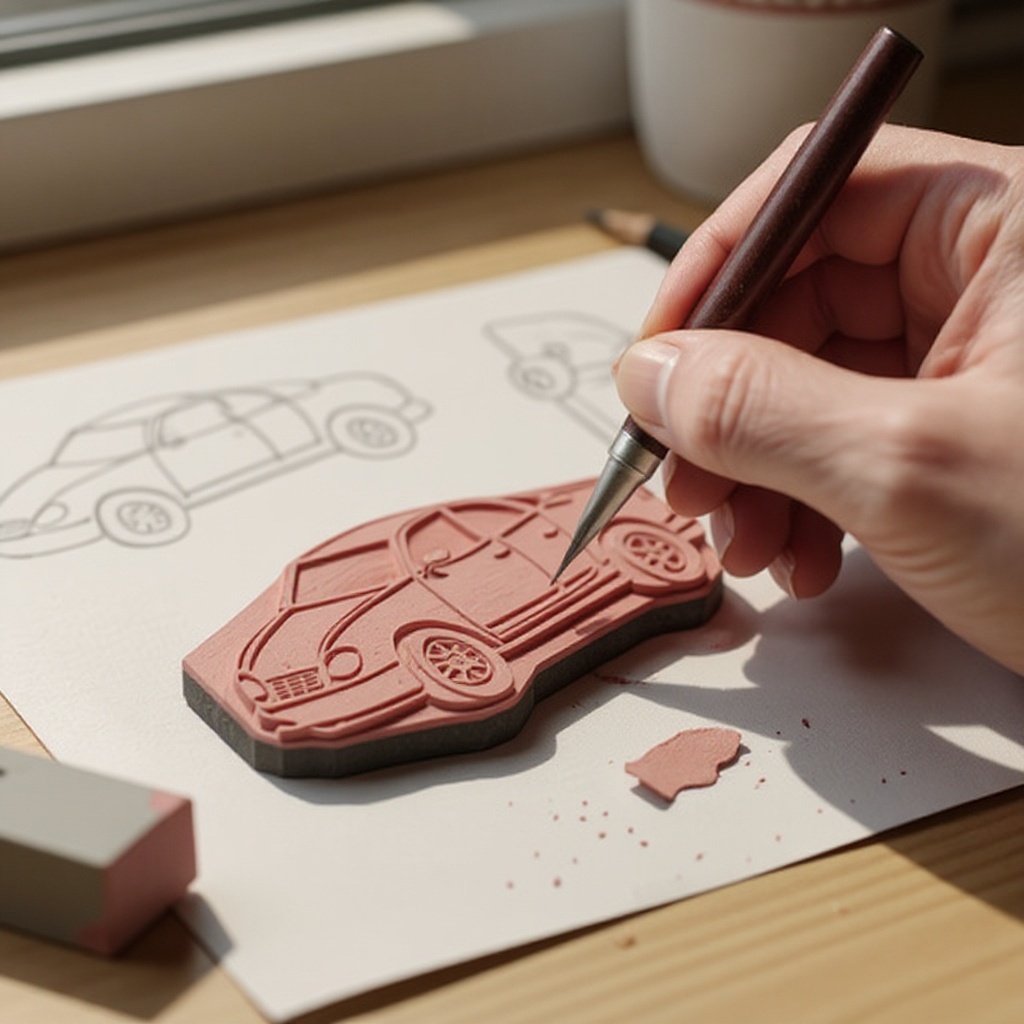
Select a carving tool with a fine tip, such as a V-gouge or a fine-point blade, for outlining your design. This initial step is crucial for defining the boundaries of your stamp and ensuring a clean, crisp impression. Hold the tool at a comfortable angle, allowing the tip to glide smoothly along the pencil lines you've drawn.
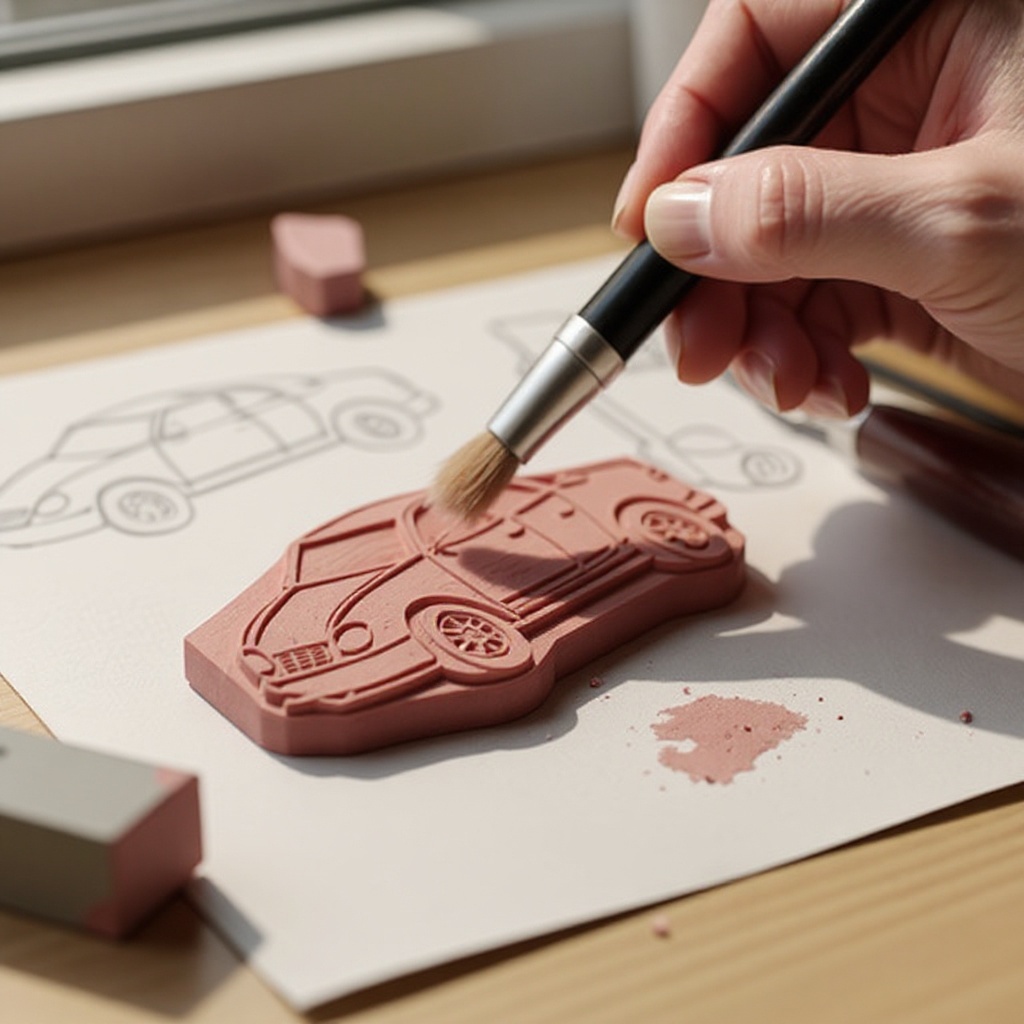
- 5
Begin carving by carefully removing small amounts of eraser material along the pencil lines. Think of the areas you carve away as the negative space of your stamp; these are the parts that will not receive ink and will appear as the background in your final print. Work slowly and deliberately, taking shallow cuts to avoid removing too much material at once.
- 6
As you continue carving, you can switch to different carving tool tips to create texture or depth within your design, if desired. For instance, a U-gouge can be used to create broader carved areas or to add subtle shading, while a finer V-gouge can be used for intricate details or to create fine lines within your design. Experiment with different tools to see the effects they produce.
- 7
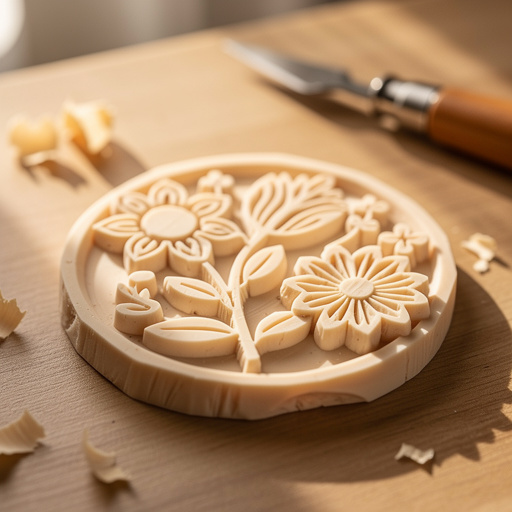
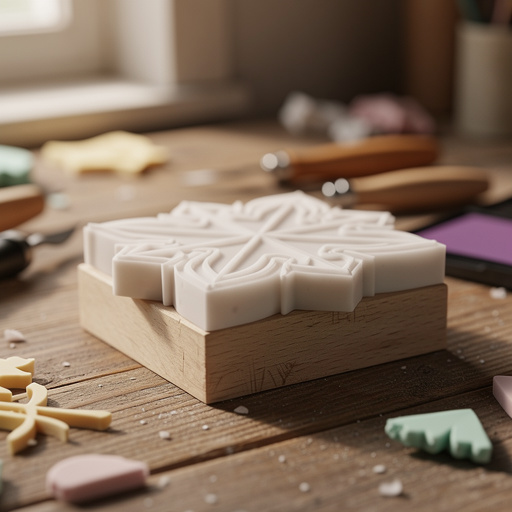
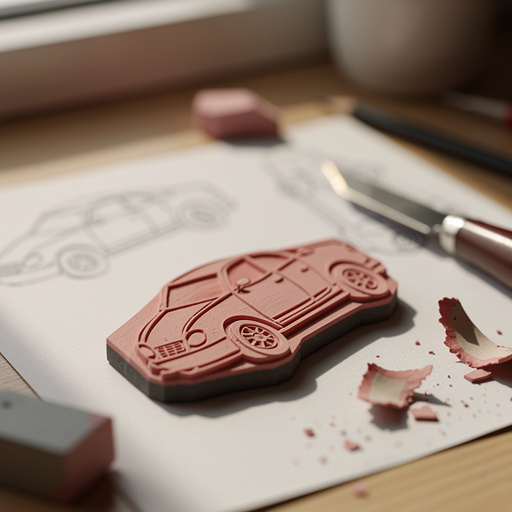
Continue carving until all the negative space is removed, leaving your raised design ready to be inked. This means that all the areas you want to be blank on your final print should be carved away, leaving only the parts of the design that will hold ink and transfer to the paper. Take your time to ensure all edges are clean and the raised design is distinct.
- 8
Gently brush away any loose eraser shavings from the carved surface using a small brush or a puff of compressed air. This step is important to ensure that no stray particles interfere with the ink application or the final stamped image. A clean surface will result in a much clearer and more professional-looking print.
- 9
Test your stamp by pressing it firmly onto an ink pad, ensuring the raised design is evenly covered with ink. You can gently dab the stamp onto the ink pad or use a roller to apply ink, depending on the size of your stamp and the ink pad. Avoid over-inking, as this can lead to smudged prints.
- 10
Press your inked stamp firmly and evenly onto your paper or cardstock to create your unique imprint. Apply consistent pressure across the entire surface of the stamp for a clear and complete transfer. You can then repeat this process with different colors or designs to build up your artwork or personalize multiple items.
- 11
Allow the ink to dry completely on your stamped paper before handling or stacking. Depending on the type of ink used and the paper's absorbency, drying times can vary. This prevents smudging and ensures your beautiful stamped designs remain pristine.
- 12
Once you are finished stamping, clean your carved stamps gently with a damp cloth to remove any remaining ink residue. This will help to prolong the life of your stamps and prevent colors from mixing in future uses. Ensure they are completely dry before storing them.
Tips & Troubleshooting
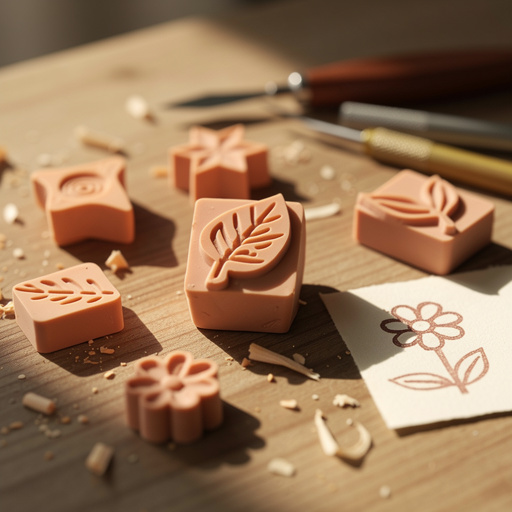
- 1Start with simple shapes like hearts, stars, or letters. Intricate designs can be challenging for beginners and may require more advanced carving tools and techniques. Focusing on simpler forms will help you get comfortable with the carving process and achieve satisfying results quickly.
- 2Don't carve too deep! You only need to remove enough material to create a clear raised image. If you carve too deep, the stamp might not print well, and the edges of your design could become indistinct or blurry. Aim for shallow, controlled cuts to maintain the integrity of your design.
- 3If you make a mistake while carving, you can sometimes fill small errors with a tiny bit of clear craft glue and let it dry, though it might affect the stamp's perfection. For larger mistakes, consider embracing them as part of the handmade charm or starting a new stamp. Patience is key in this craft.
- 4Experiment with different types of erasers. Softer erasers, like pink pearl or white art gum erasers, are generally easier to carve and provide a smoother surface for detailed work. Harder erasers can be more durable but may require more effort and sharper tools.
- 5Clean your carved stamps gently with a damp cloth after use to remove ink residue and prolong their life. Avoid harsh scrubbing, which can damage the carved details. Store them in a cool, dry place away from direct sunlight to prevent them from drying out or becoming brittle over time.
- 6Consider using a pencil eraser to lightly sand the surface of your eraser before drawing your design. This can create a slightly smoother surface, making it easier for the pencil to adhere and for your carving tools to glide. Be careful not to over-sand, as this can reduce the eraser's thickness.
- 7When transferring your design, a light box or even holding the paper up to a window can help you see the lines more clearly when tracing onto the eraser. This ensures an accurate transfer of your intended design, saving you time and frustration during the carving process.
- 8For more complex designs, consider using a stencil or even printing your design onto a thin piece of paper that you can then adhere to the eraser with a very thin layer of glue, and carve around it. This can be a helpful technique for achieving precise shapes and outlines.
Related Activities You Might Enjoy
Frequently Asked Questions
What kind of erasers are best for DIY stamps?
Large, soft block erasers, often pink or white, are ideal for carving stamps. These types of erasers are generally made from a softer rubber compound that is easier to cut and carve with precision, unlike harder, smaller erasers which can be brittle and difficult to work with. Their larger surface area also provides ample space for creating more detailed or expansive designs. Brands like Pink Pearl, Staedtler Mars Plastic, or even large art gum erasers are excellent choices because they offer a good balance of carvability and durability, ensuring your custom stamps can be used multiple times without significant wear and tear.
What tools do I need to carve rubber stamps?
To carve your own rubber stamps from erasers, you'll need a craft carving tool set, which typically includes several handles and interchangeable blades with different tip shapes. Essential tips include a fine-point blade for outlining, a V-gouge for creating fine lines and details, and a U-gouge for removing larger areas of material and creating broader carved sections. A small craft knife can also be useful for trimming edges or making very precise cuts. Ensure your tools are sharp for clean cuts and always use them with caution on a protected surface.
How do I make my DIY eraser stamp last longer?
To ensure your DIY eraser stamps last longer, proper cleaning and storage are crucial. After each use, gently wipe your stamp with a damp cloth to remove any ink residue; avoid using harsh chemicals or excessive water, as this can degrade the eraser material. For stubborn ink, a very mild soap solution can be used sparingly, followed by a thorough rinse and drying. Store your carved stamps in a cool, dry place away from direct sunlight and extreme temperatures, as heat and light can cause the eraser to dry out, become brittle, or warp, potentially damaging the carved design and reducing its usability over time.
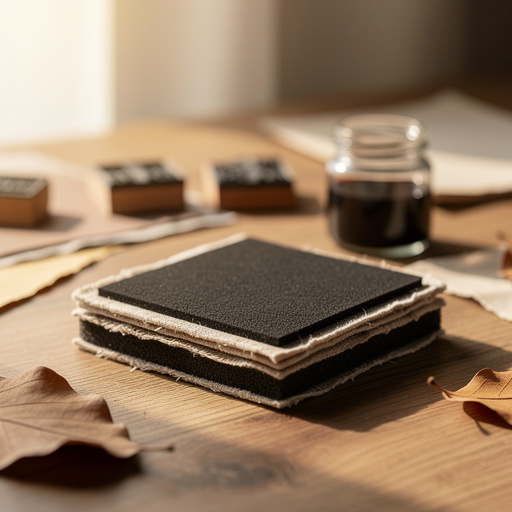
Can I use any ink pad with my DIY eraser stamps?
Yes, most standard ink pads work well with DIY eraser stamps, but the type of ink you choose can affect the final result. For most paper crafts, regular dye-based or pigment-based ink pads are perfect and come in a vast array of colors. Dye inks tend to be more translucent and dry quickly, while pigment inks are opaque, offer richer coverage, and can create a more vibrant impression. If you plan to stamp on fabric, it's essential to use specialized fabric ink pads, as these are designed to adhere to textiles and withstand washing. Always test your ink on a scrap piece of your intended material before committing to your project.
What are some good beginner designs for eraser stamps?
For beginners, it's best to start with simple, bold designs that don't require intricate detail. Excellent choices include basic geometric shapes like circles, squares, and triangles, as well as classic motifs such as stars, hearts, and simple flowers. Letters and numbers are also fantastic for personalization, allowing you to create custom messages or monograms. Avoid designs with very fine lines or complex shading initially, as these can be challenging to carve accurately and may not print clearly. As you gain confidence and skill, you can gradually move on to more elaborate patterns and illustrations.
How do I ensure my design transfers clearly to the eraser?
To ensure your design transfers clearly to the eraser, start by drawing it with a sharp pencil on paper. Then, place the paper design face-down onto the eraser surface. Use a hard, blunt object, like the back of a spoon or a bone folder, to rub firmly over the entire design area. This pressure will transfer the graphite from the pencil onto the eraser, creating a visible outline. Alternatively, you can lightly sand the eraser surface first to create a smoother canvas for your pencil drawing, making the lines more prominent and easier to follow during carving.
What Next?
Congratulations on creating your own unique eraser stamps! The possibilities are truly endless, from designing your own stationery to embellishing fabric items with custom patterns. For a next step, consider exploring linoleum block printing or even carving into softer materials like potatoes for larger, temporary stamps. Display your beautiful creations proudly, perhaps in a framed collage of your stamped artwork, or store your carved stamps carefully in a small box or drawer, ensuring they are clean and dry to preserve their intricate details for many stamping sessions to come.
Free: 10 Paper Crafts Anyone Can Make in 5 Minutes
Get our beginner guide + new craft ideas weekly.
No spam. Unsubscribe anytime.
Did you complete this activity?
Related