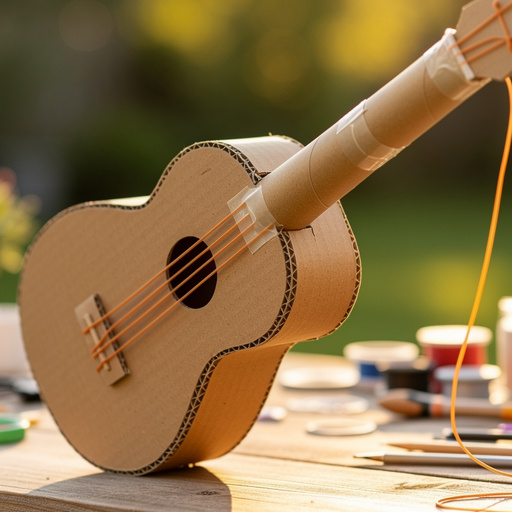
How to Make a Guitar Out of Cardboard — Easy Step-by-Step Guide
Transform a simple cardboard box into a fantastic DIY guitar! This fun, screen-free craft is perfect for imaginative play and musical fun. Learn how to make a cardboard guitar with our easy step-by-step guide, suitable for families and kids aged 6+.
Quick answer
To make a cardboard guitar, you need a cardboard box, scissors, tape, and rubber bands, taking about 45 minutes. Start by cutting out the guitar shape, then attach a cardboard tube for the neck and rubber bands for strings. This beginner-friendly activity has 10 steps and is perfect for families and kids aged 6+.
What you need
Shop on Amazon · As an Amazon Associate we earn from qualifying purchases. Links above are affiliate links — we may earn a commission at no extra cost to you.
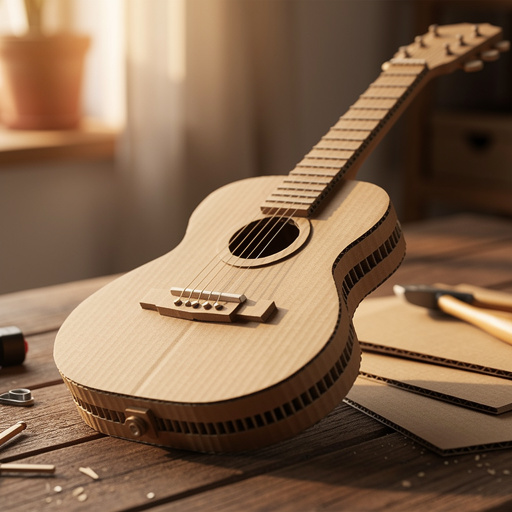
Unleash your inner rockstar with this incredibly fun and rewarding DIY project: the Cardboard Strummer Guitar! In a world often dominated by screens, this craft offers a refreshing opportunity for hands-on creativity and imaginative play. It's the perfect way to introduce young minds to the joy of music and building, fostering fine motor skills and a sense of accomplishment. Whether you're looking for a rainy-day activity, a party craft, or simply a way to spark musical exploration, this easy-to-follow guide will help you transform everyday materials into a personalized instrument ready for countless jam sessions.
On this page
Step-by-Step Instructions
- 1
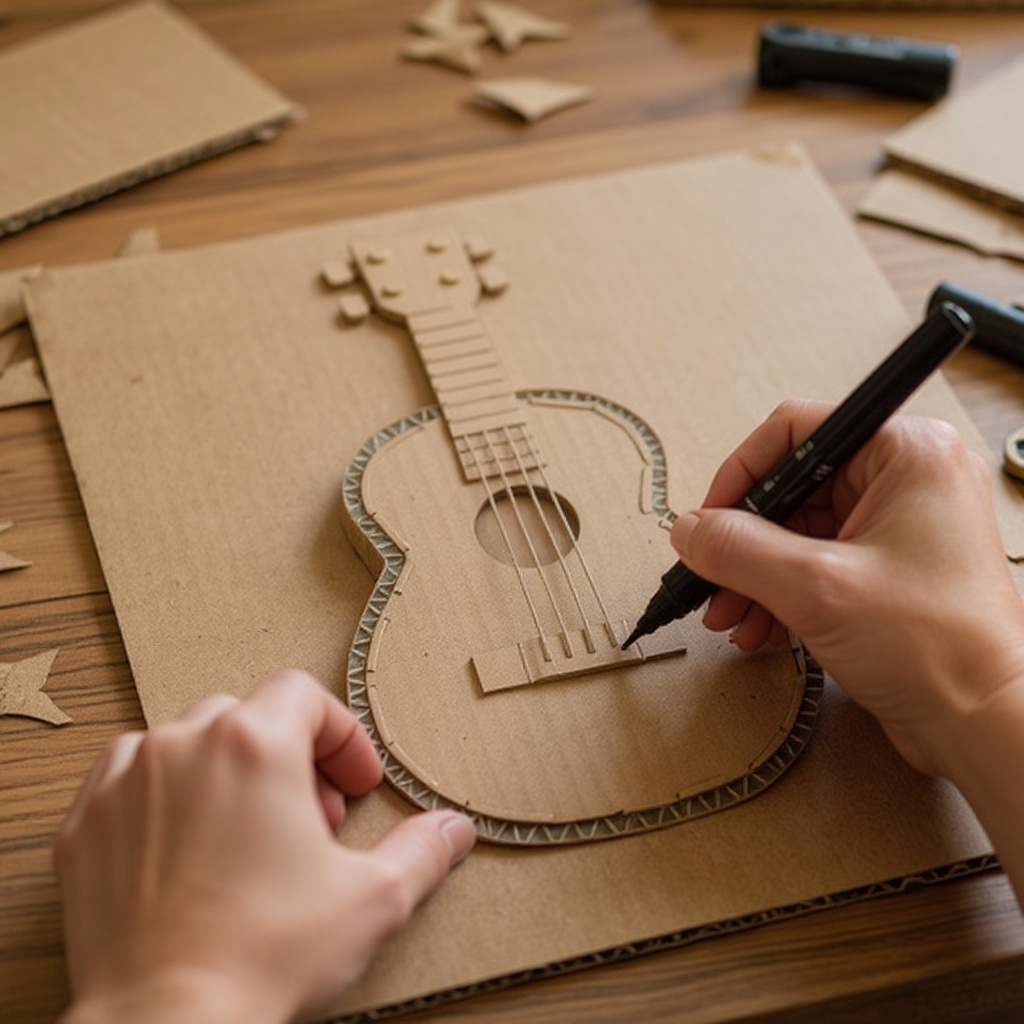
Lay the cardboard box flat and use a pencil to draw the outline of a guitar body. Aim for a classic guitar shape with a distinct neck and a larger body section. You can freehand this or find a simple guitar silhouette online to trace.
- 2
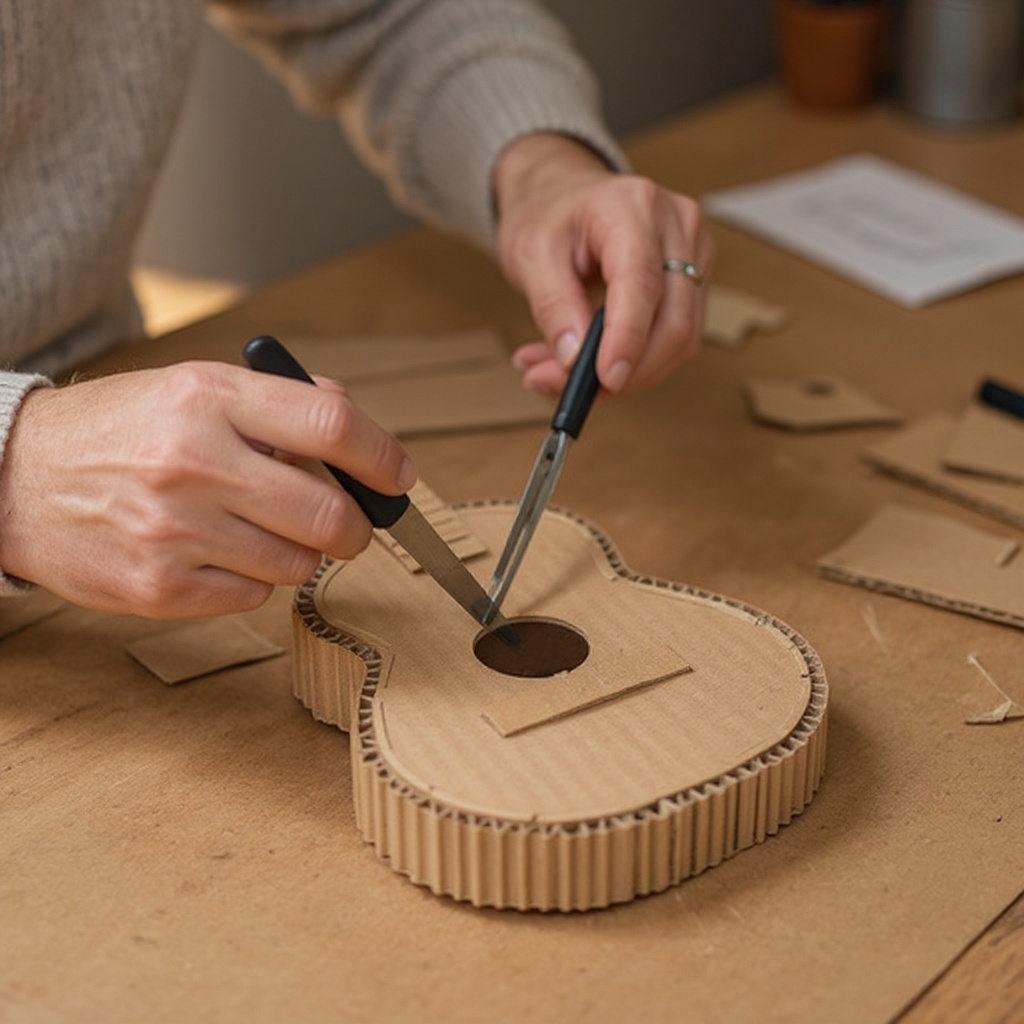
Carefully cut out the guitar body shape using your heavy-duty scissors or a craft knife. If using a craft knife, ensure you have a cutting mat underneath and that an adult is performing this step with extreme caution. Take your time to ensure clean, smooth edges for a professional look.
- 3
Cut a soundhole in the center of the guitar body. A circle about 3-4 inches in diameter works well, but you can adjust the size to your preference. This hole is crucial for amplifying the sound of your rubber band 'strings'.
- 4
Prepare the guitar neck by taking your cardboard tube. Measure and cut it to be the desired length of the guitar neck, typically around 12-15 inches. Ensure the cut is straight so it attaches flush with the guitar body.
- 5
Securely attach the cardboard tube neck to the top of the guitar body using strong tape. Overlap the tape generously on both the tube and the body to ensure a firm connection that won't wobble during enthusiastic strumming.
- 6
On the guitar body, near the bottom edge, make small slits or holes where the rubber bands will be attached. Space these evenly apart, ensuring they are large enough to hold the rubber bands but not so large that they tear the cardboard. You'll need one slit per rubber band.
- 7
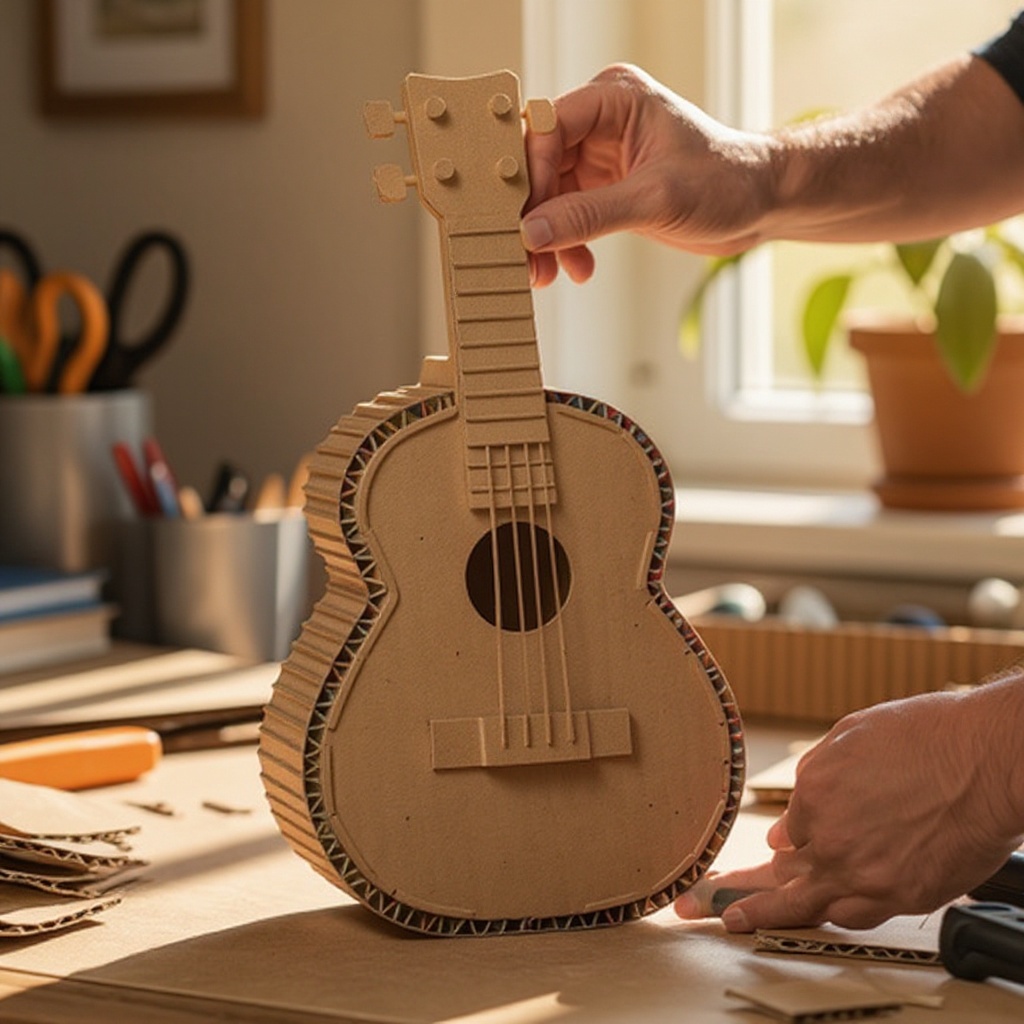
On the end of the guitar neck, create a simple headstock shape. You can achieve this by cutting a small piece of cardboard and taping it at an angle, or by simply folding and taping the end of the tube securely to provide a point of attachment for the strings.
- 8
Begin attaching the rubber bands to create your guitar strings. Wrap one end of each rubber band around the headstock area of the neck, or secure it to the taped end. Then, stretch each rubber band down the length of the guitar body and hook it into one of the pre-made slits at the bottom.
- 9
Gently pluck the rubber bands to test the sound and tension. Listen to the different pitches each band produces. You can adjust the tension by slightly moving the rubber bands to different slits or by using rubber bands of varying thicknesses to create a wider range of 'notes'.
- 10
Now for the most exciting part: decorating your cardboard guitar! Unleash your creativity using paint, markers, stickers, glitter glue, or any other craft supplies you have on hand to personalize your instrument. Make it as vibrant and unique as your musical style!
- 11
Reinforce the neck joint. After the initial taping, add extra layers of tape around where the neck meets the body. This is a high-stress area, and reinforcing it will significantly increase the durability of your guitar, preventing it from breaking during play.
- 12
Create a bridge for your strings. Cut a small, thin strip of cardboard (about 1/2 inch wide and the length of your soundhole) and tape it across the body of the guitar, just above the bottom slits. This bridge will lift the rubber bands slightly, allowing them to vibrate more freely and produce a clearer sound.
- 13
Test the sound quality. Pluck the strings and listen. If the sound is muffled, ensure the rubber bands are taut and not touching the cardboard body too much. The bridge you added should help with this. Experiment with different rubber band tensions for varied pitches.
- 14
Consider adding tuning pegs. For a more realistic look and feel, you can attach small dowels or even bottle caps to the headstock. These won't actually tune the guitar, but they add a fantastic visual detail and can be used to wrap the rubber bands around for a more secure hold.
- 15
Strengthen the body edges. If your cardboard body feels a bit flimsy, run tape along all the outer edges. This not only adds durability but also gives your guitar a more polished, finished appearance.
- 16
Add a pickguard. Cut a shape from contrasting colored paper or thin cardboard and tape it onto the guitar body below the soundhole. This is a classic guitar feature that adds visual appeal and protects the cardboard from excessive strumming.
- 17
Personalize the headstock. Beyond just taping the end, you can cut a more elaborate headstock shape or even draw on a brand logo. This is another area where you can really make the guitar your own.
- 18
Ensure the rubber bands are securely fastened. Double-check that each rubber band is firmly attached at both the headstock and the bottom slits. If any feel loose, add more tape or adjust their position to prevent them from slipping off during play.
Tips & Troubleshooting
- 1For a sturdier guitar, reinforce the edges of the cardboard body with extra tape. This will prevent accidental tears and make your instrument more resilient to enthusiastic play sessions, ensuring it lasts longer.
- 2Experiment with different thicknesses and types of rubber bands to create a wider range of 'notes' and sounds. Thicker bands will produce lower pitches, while thinner bands will create higher, more resonant tones.
- 3If you don't have a cardboard tube readily available, you can easily create a sturdy neck by rolling up a piece of stiff cardboard and securing it with tape. Ensure it's rolled tightly to maintain its shape and strength.
- 4Consider adding a small piece of cardboard as a bridge near the soundhole to lift the rubber bands slightly off the guitar body. This simple addition can significantly improve the clarity and resonance of the 'notes' produced.
- 5Encourage kids to create their own song lyrics or play along to their favorite tunes. This fosters creativity and musicality, turning the cardboard guitar into a tool for storytelling and imaginative performance.
- 6To make the guitar even more robust, consider using a double layer of cardboard for the main body. Cut out two identical guitar shapes and tape them together before proceeding with the soundhole and string attachments.
- 7Get creative with the soundhole design. Instead of a simple circle, try cutting out a star, a musical note, or any other fun shape that reflects the personality of the guitarist.
- 8If you want to achieve a more realistic tuning peg look, you can use small wooden dowels or even large beads. Poke holes in the headstock and insert them, then wrap your rubber bands around them for a more secure and visually appealing string attachment.
Related Activities You Might Enjoy
Frequently Asked Questions
What kind of cardboard is best for making a guitar?
The ideal cardboard for your Cardboard Strummer Guitar is a medium-sized, sturdy corrugated cardboard box. Think of the kind used for shipping packages; it's durable, holds its shape well, and is relatively easy to cut with appropriate tools. Avoid flimsy materials like cereal boxes or thin cardstock, as they won't withstand the tension of the rubber bands or the rigors of play. The thicker the cardboard, the more robust your guitar will be, ensuring it can be strummed and enjoyed for a long time.
How do I make the strings on a cardboard guitar?
The easiest and most effective way to create strings for your cardboard guitar is by using rubber bands. Stretch several rubber bands of varying thicknesses across the guitar body, securing one end to the headstock area of the neck and the other end to small slits or holes you'll make near the bottom of the guitar body. By using different sizes of rubber bands, you can achieve a variety of 'notes' and pitches, allowing for a surprisingly diverse range of sounds.
Can I make a real-sounding guitar out of cardboard?
While a cardboard guitar won't produce concert-quality sound or mimic the rich tones of a real acoustic or electric guitar, it is fantastic for imaginative play and making fun strumming noises. The soundhole you cut into the body helps to amplify the vibrations of the rubber bands, creating a resonant effect that is satisfying for young musicians. It's designed to spark creativity and musical exploration, not to be a professional instrument.
What age is this cardboard guitar craft suitable for?
This Cardboard Strummer Guitar craft is best suited for children aged 6 and up. At this age, they generally have the fine motor skills to assist with drawing, cutting (with supervision), and decorating. Younger children can absolutely participate and enjoy the process, but they will require more direct adult supervision, especially when scissors or a craft knife are involved. It's a wonderful activity for families to do together, with older kids taking the lead and younger ones contributing to the decoration.
How long does it take to make a cardboard guitar?
The estimated time to make a cardboard guitar is around 45 minutes to an hour, depending on the level of detail in decoration and the age of the crafter. The basic construction, including cutting the body, attaching the neck, and adding the rubber band strings, can be completed relatively quickly. The majority of the time might be spent on the creative decorating phase, allowing for personalization and artistic expression, which can be extended as desired.
What are some ways to make the cardboard guitar more durable?
To enhance the durability of your cardboard guitar, several techniques can be employed. First, reinforce all the edges of the cardboard body with strong tape, such as packing tape or duct tape. This prevents the cardboard from tearing. Secondly, ensure the connection between the neck (cardboard tube) and the body is exceptionally secure, using plenty of tape and potentially adding a small cardboard brace. Finally, using thicker, corrugated cardboard for the main body will inherently make it more robust and resistant to bending or damage.
What Next?
Congratulations on creating your very own Cardboard Strummer Guitar! This project is just the beginning of a musical journey. You can further enhance your guitar by adding tuning pegs made from bottle caps or small dowels, or even a pickguard cut from a different color of cardboard. For a truly unique sound, experiment with different types of rubber bands or even elastic string. Display your masterpiece proudly on a wall or shelf, or store it carefully in a safe place to preserve it for future musical adventures. Consider making a whole band of cardboard instruments for an even grander ensemble!
Free: 10 Paper Crafts Anyone Can Make in 5 Minutes
Get our beginner guide + new craft ideas weekly.
No spam. Unsubscribe anytime.
Did you complete this activity?
Related