How to Make DIY Stamp Ink — Easy Step-by-Step Guide
Never run out of your favorite ink color again! This simple DIY stamp ink recipe uses common household ingredients to create vibrant, custom ink pads for all your stamping projects.
Quick answer
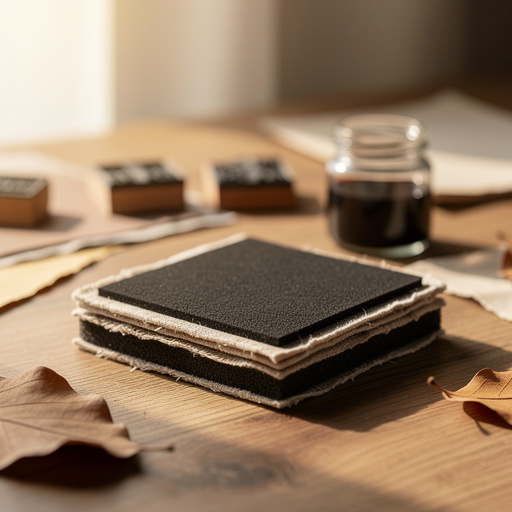
To make DIY stamp ink, you need felt, a container, glycerin, and food coloring, taking about 15 minutes. Start by cutting felt to fit your container. This beginner-friendly activity has 7 steps and is perfect for families.
What you need
Shop on Amazon · As an Amazon Associate we earn from qualifying purchases. Links above are affiliate links — we may earn a commission at no extra cost to you.
Unleash your creativity and never be limited by store-bought ink colors again! This incredibly simple DIY stamp ink project is a game-changer for any crafter, artist, or parent looking for a fun, accessible activity. Using just a handful of common household items, you can whip up custom ink pads in any shade imaginable, perfect for personalizing stationery, crafting cards, decorating journals, or engaging kids in a colorful art session. It's a fantastic way to reduce waste, save money, and explore a world of color possibilities right from your own kitchen.
On this page
Step-by-Step Instructions
- 1
Gather all your materials and find a clean, flat workspace. Ensure your container is thoroughly cleaned and dried to prevent any contamination or unwanted smells from affecting your ink.
- 2
Measure and cut the felt or fabric so it fits snugly inside the bottom of your chosen container. You want a precise fit to ensure even ink distribution and prevent any bunching or shifting.
- 3
Carefully place the cut felt or fabric into the bottom of the container. Gently press it down to ensure it lies flat and covers the entire base of the container without any wrinkles.
- 4
In a separate small bowl or cup, accurately measure and combine 1 tablespoon of glycerin with 1 teaspoon of water. Glycerin acts as a humectant, preventing the ink from drying out too quickly, while water helps to dilute it.
- 5
Add several drops of your chosen food coloring to the glycerin-water mixture. Start with a few drops and stir well until you achieve your desired ink color. You can always add more color, but it's harder to lighten it.
- 6
Continue to stir the colored glycerin-water mixture thoroughly. Ensure the food coloring is completely dissolved and evenly distributed, creating a uniform hue before proceeding to the next step.
- 7
Carefully pour the colored glycerin-water mixture over the felt in the container. Aim to distribute it as evenly as possible across the entire surface of the felt, ensuring it begins to absorb.
- 8
Gently press down on the felt with your stirring utensil or a clean finger to encourage even absorption of the liquid. This helps to prevent pooling in one area and ensures the entire pad is saturated.
- 9
Allow the felt to sit undisturbed for at least 10 minutes. This crucial waiting period allows the felt to fully absorb the colored glycerin-water mixture, creating a consistent and ready-to-use ink pad.
- 10
Check the saturation of the felt. If some areas appear dry, you can gently dab a little more of the ink mixture onto those spots using a brush or dropper for more controlled application.
- 11
Once the felt has absorbed the ink, gently blot any excess liquid with a paper towel if necessary. You want the felt to be saturated but not dripping wet.
- 12
Place the lid securely on the container. This is essential for preventing the ink from drying out and keeping it fresh for future use.
- 13
Allow the ink pad to rest for another 5-10 minutes with the lid on. This final resting period ensures any residual moisture evens out, resulting in a perfectly prepared ink pad.
- 14
Test your new DIY ink pad with a stamp. Gently press the stamp onto the pad and then onto paper to check the color intensity and evenness of the ink transfer.
Tips & Troubleshooting
- 1If the ink seems too thin or the color is too light, add a few more drops of food coloring to the glycerin-water mixture and stir well. Remember to add color gradually to avoid making it too dark.
- 2Conversely, if the ink appears too thick or the felt isn't absorbing it well, add a tiny bit more water to the glycerin-water mixture. Stir thoroughly to ensure it's fully incorporated before applying to the felt.
- 3Experiment with mixing different food coloring combinations to create unique and custom shades. For example, mixing blue and yellow will yield a lovely green, while red and yellow can create a vibrant orange.
- 4Store your DIY stamp ink in a cool, dry place with the lid tightly secured to prevent the ink from drying out and the felt from becoming brittle. This will maximize the lifespan of your homemade ink pad.
- 5For a more permanent ink that is less likely to smudge, you can try using a small amount of washable tempera paint instead of food coloring. However, it's crucial to test this on scrap material first, as paint can alter the ink's consistency and drying time.
- 6If you're using gel food coloring, you might need to add a tiny bit more water to the glycerin mixture to help it dissolve properly. Gel colors are more concentrated and can sometimes be trickier to mix.
- 7Consider labeling your containers with the color name or the food coloring combination used. This will help you easily identify your custom ink pads when you need a specific shade for a project.
- 8When using the ink pad, always press your stamp gently onto the surface. Over-pressing can cause the ink to seep into the stamp's details, leading to blurry impressions.
Related Activities You Might Enjoy
Frequently Asked Questions
What can I use for a DIY stamp ink pad?
You can easily make a DIY stamp ink pad using a small, shallow container with a lid, a piece of felt or thick fabric that fits snugly inside, glycerin, water, and food coloring. The container acts as the reservoir and protector for your ink, while the felt serves as the absorbent surface that holds the ink and transfers it to your stamp. Glycerin is key as it prevents the ink from drying out too quickly, ensuring your ink pad remains usable for an extended period. Food coloring provides the vibrant color, allowing you to create custom shades for all your stamping needs and creative projects.
How do I make homemade stamp ink?
To make homemade stamp ink, you'll start by preparing your container and absorbent material. Cut a piece of felt or thick fabric to fit the bottom of your chosen container. In a separate small bowl, mix one tablespoon of glycerin with one teaspoon of water. Then, add several drops of your desired food coloring to this glycerin-water solution and stir until you achieve your perfect shade. Carefully pour this colored mixture onto the felt within the container, ensuring it's evenly absorbed. Let it sit for about 10-15 minutes to fully soak in, and then secure the lid. Your homemade stamp ink pad is now ready to use!
Can I make colored ink for stamps?
Absolutely! You can easily make colored ink for stamps using common household ingredients. The primary coloring agent in this DIY recipe is food coloring. By mixing liquid or gel food coloring into a solution of glycerin and water, you can create a vibrant ink in virtually any color you desire. Simply pour this colored glycerin-water mixture onto a piece of felt or thick fabric that has been placed inside a small container. Allow the felt to absorb the ink thoroughly, and you'll have a custom-colored ink pad ready for all your stamping projects.
Is this DIY stamp ink washable?
The washability of this DIY stamp ink largely depends on the type of food coloring you use. If you opt for standard liquid food coloring, the ink is generally considered washable, especially on porous surfaces like paper or cardstock. However, it's always a good practice to test on a small, inconspicuous area first to confirm its washability on your specific material. If you're concerned about permanence or staining, especially when crafting with young children, it's advisable to use washable food coloring and supervise their use closely. For more permanent results, consider experimenting with washable tempera paints as an alternative coloring agent.
How long does DIY stamp ink last?
The longevity of your homemade stamp ink pad depends on several factors, primarily how well it's stored and the ingredients used. When stored correctly in a tightly sealed container in a cool, dry place, your DIY ink pad can last for several weeks to a few months. The glycerin in the mixture acts as a humectant, which helps to keep the ink moist and prevents it from drying out too rapidly. However, if left exposed to air, it will eventually dry out. The quality and type of food coloring can also play a minor role, but proper sealing is the most critical factor for extending its lifespan.
Can I use something other than felt for the ink pad?
Yes, you can absolutely use materials other than felt for your DIY stamp ink pad, provided they are absorbent. Thick cotton fabric, such as an old t-shirt or a piece of denim, can work well. A thin, dense sponge (like those used for cleaning or crafting) can also be a good alternative. The key is to choose a material that can hold a good amount of liquid without becoming overly saturated and that has a texture suitable for picking up and transferring ink cleanly to a stamp. Always ensure the material is clean and dry before you begin the ink-making process.
What Next?
Congratulations on creating your own vibrant DIY stamp ink! The possibilities are endless, from crafting personalized gifts to adding a unique touch to everyday items. Consider creating a rainbow of colors to match any project or theme. For a more advanced project, try experimenting with different types of absorbent materials like cotton fabric or even a thin sponge. Once made, store your ink pads in a cool, dry place with their lids tightly secured to ensure longevity. You can even display your custom ink creations in a craft room or use them to decorate a handmade journal cover, showcasing your resourceful crafting skills.
Free: 10 Paper Crafts Anyone Can Make in 5 Minutes
Get our beginner guide + new craft ideas weekly.
No spam. Unsubscribe anytime.
Did you complete this activity?
Related
You might also like

Printable Music Note Garland
DIY Sound Tube Rain Stick
DIY Eraser Carving Stamps
Bunny Tail Easter Wreath
DIY Nature Embossed Paper