How to Build a Birdhouse — Easy Step-by-Step Guide
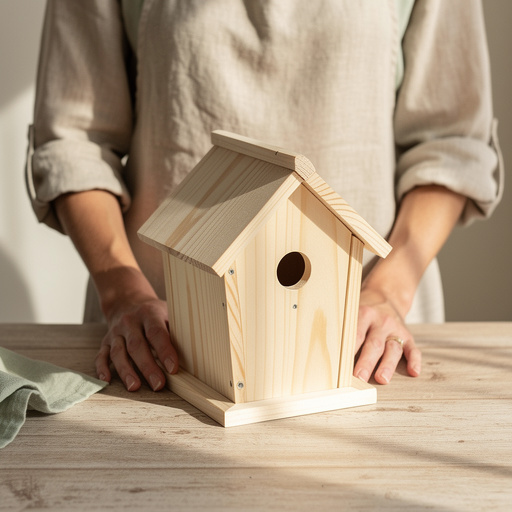
Build a cozy home for your feathered friends! This step-by-step guide makes it easy for families to construct a charming wooden birdhouse. Learn how to select the right wood, cut precise pieces, assemble a sturdy structure, and add essential features for bird safety and comfort. This beginner-friendly activity is perfect for a weekend project with adult supervision, fostering a love for nature and DIY skills.

Quick answer
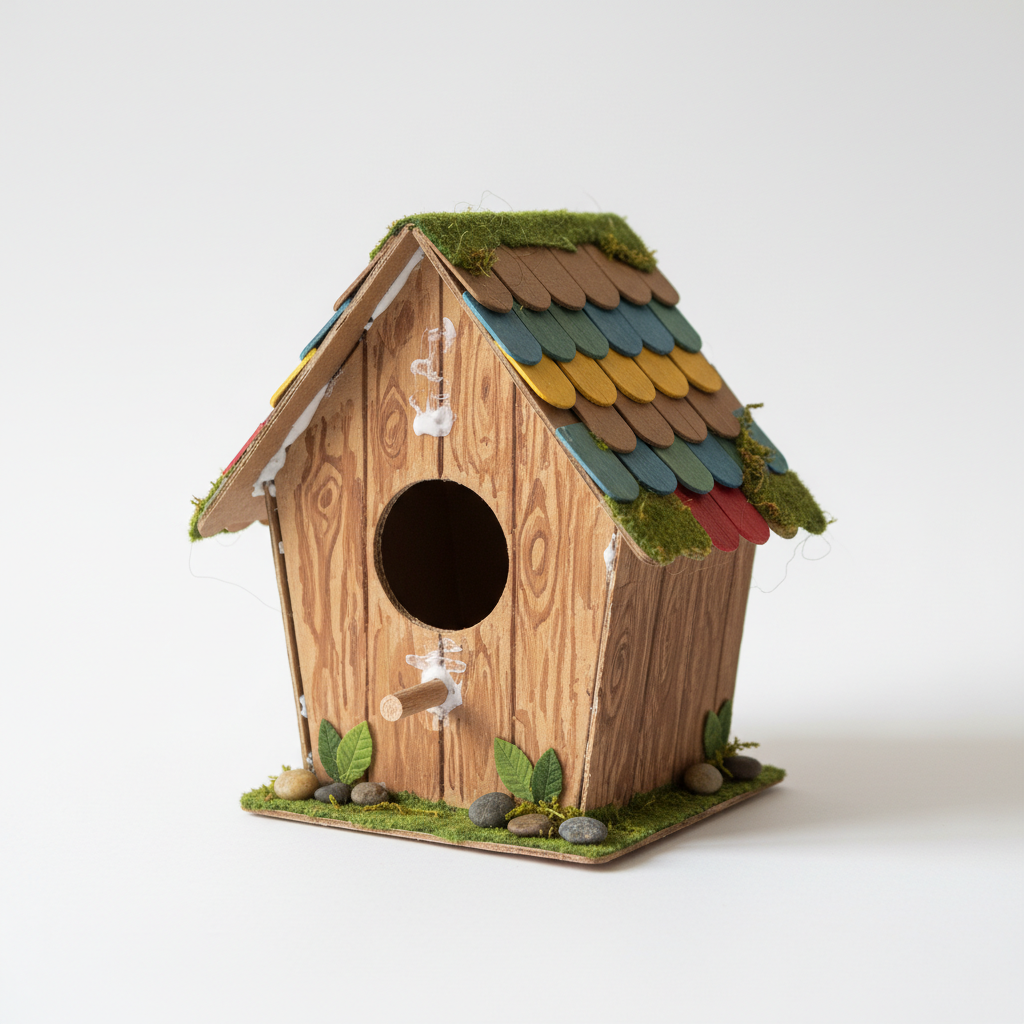
To make a birdhouse, you need wood, screws, and basic tools, taking about 60-90 minutes. Start by cutting the wood pieces according to the provided measurements. This beginner-friendly activity has 10 main steps and can be expanded with additional preparation and finishing touches, making it perfect for families with adult supervision. The result is a charming, functional home for birds.
What you need
Shop on Amazon · As an Amazon Associate we earn from qualifying purchases. Links above are affiliate links — we may earn a commission at no extra cost to you.
Embarking on a DIY birdhouse project is a wonderfully rewarding experience, offering a tangible connection to nature and a chance to support local wildlife. This guide is designed to be incredibly accessible, making it perfect for families looking for an engaging weekend activity or for anyone new to woodworking. Building a birdhouse isn't just about creating a shelter; it's about providing a safe haven for birds to nest, raise their young, and find refuge from the elements. With simple tools and readily available materials, you'll soon have a charming, handcrafted birdhouse ready to welcome its first avian residents.
On this page
Step-by-Step Instructions
- 1
Begin by carefully measuring and marking your 1x6 pine board for all the necessary pieces. You'll need two side pieces, each 8 inches long; one front piece, 6 inches long; one back piece, 10 inches long; one floor piece, 4.5 inches long; and two roof pieces, each 7 inches long. Double-check your measurements before proceeding to ensure accuracy, as this will affect the final fit of your birdhouse.
- 2
Using your chosen saw, meticulously cut out all the marked pieces. For safety, always wear your safety glasses and ensure your work area is clear and stable. If using a hand saw, take your time to make straight, clean cuts. If using a power saw, follow the manufacturer's safety guidelines.
- 3
On the front piece (6 inches), measure 2 inches down from the top edge and mark the exact center point. This is where the entrance hole will be drilled. Using the 1.5-inch spade bit or hole saw, carefully drill the entrance hole at this marked center. Ensure the drill is held perpendicular to the wood for a clean, straight hole.
- 4
Now, prepare the side pieces (8 inches each) to create the roof slope. On each side piece, mark a diagonal line starting from the top back corner and extending down to a point approximately 2 inches from the top on the front edge. This angled cut will allow the roof to sit flush and provide adequate headroom for the birds.
- 5
Carefully cut along the diagonal lines you just marked on both side pieces. These angled cuts are crucial for ensuring the roof pieces fit snugly and create a weather-resistant seal. Take your time to make these cuts as precise as possible.
- 6
Prepare the floor piece (4.5 inches) for assembly. Lightly sand all edges of the floor piece to remove any splinters or rough spots. Apply a thin, even layer of exterior wood glue to the bottom edge of the front piece where the floor will attach. Center the floor piece onto this glued edge and secure it with two 1.5-inch exterior wood screws driven from the front into the floor. Pre-drilling pilot holes can prevent the wood from splitting.
- 7
Next, apply wood glue to the side edges of the floor piece and the corresponding bottom edges of the front piece. Position the two side pieces, ensuring their bottom edges align perfectly with the floor and their back edges are flush with the back of the floor piece. Secure each side piece with screws driven through the sides into the floor and into the front piece. Use at least two screws per side into the floor and one into the front.
- 8
Apply wood glue to the top edges of the front and side pieces, as well as the back edge of the floor. Position the back piece (10 inches) so that its bottom edge is flush with the back of the floor and it extends above the side pieces. This extended portion of the back piece will be used for mounting the birdhouse later. Secure the back piece by driving screws through the side pieces into the back, and through the back into the floor. Ensure the back is plumb and square.
- 9
Apply a generous bead of wood glue along the top angled edges of the side pieces and the top edge of the front piece. Carefully position the first roof piece (7 inches) so that it overhangs the front and sides of the birdhouse by about half an inch to an inch. This overhang helps protect the entrance from rain. Secure this roof piece by driving screws through it into the top edges of the side and front pieces. Pre-drilling pilot holes is highly recommended here.
- 10
Apply wood glue to the top edge of the first roof piece and the remaining exposed top edges of the box (the back piece and the top edge of the second side). Position the second roof piece (7 inches) so that it overlaps the first roof piece at the peak, creating a watertight ridge. Ensure it also overhangs the back and sides. Secure this second roof piece by driving screws through it into the first roof piece at the peak and into the side and back pieces of the birdhouse. Wipe away any excess glue with a damp cloth.
- 11
Once the glue has dried completely, it's time for a final sanding. Lightly sand all exterior surfaces and edges of the birdhouse to smooth out any rough spots or sharp corners. This not only makes the birdhouse look more finished but also removes any potential hazards for the birds. Pay special attention to the entrance hole to ensure it's smooth.
- 12
If you choose to paint or stain your birdhouse, do so now. Use only non-toxic, exterior-grade finishes. Avoid painting the inside of the birdhouse or directly around the entrance hole, as the fumes or chemicals can be harmful to birds. Light, natural colors are often preferred by birds and blend well with their environment.
- 13
Consider adding small drainage holes to the floor of the birdhouse. Before assembly, or carefully after, drill a few 1/4-inch holes in the floor piece. This is crucial for preventing water from accumulating inside, which can lead to mold and rot, and can be detrimental to nesting birds.
- 14
Inspect your finished birdhouse for any protruding screws or sharp edges. Ensure all joints are secure and there are no gaps where drafts or predators could enter. A well-built birdhouse will provide a safe and comfortable environment for its occupants.
Tips & Troubleshooting
- 1For easier assembly and to prevent the wood from splitting, always pre-drill pilot holes for your screws. The pilot hole should be slightly smaller than the diameter of your screw threads. This technique is especially important when working near the edges of the wood.
- 2Adding small drainage holes to the floor piece before assembly is a vital step for bird health. Drill a few 1/4-inch holes in the corners of the floor to allow any rainwater that might seep in to escape, preventing dampness and potential mold growth.
- 3You can customize your birdhouse with a non-toxic, exterior-grade paint or stain. Opt for muted, natural colors like greens, browns, or grays, which help the birdhouse blend into its surroundings and are less likely to deter birds. Never paint the interior or around the entrance hole.
- 4If you don't have a spade bit or hole saw, a jigsaw can be used to cut a circular entrance hole. After cutting, use sandpaper to smooth the edges thoroughly. A smooth entrance is safer for the birds and prevents them from snagging their feathers.
- 5Mount your birdhouse in a safe and accessible location. Ideally, place it on a pole or tree trunk at a height of 5-10 feet off the ground. Ensure it's away from areas with heavy human traffic and protected from predators like cats and squirrels.
- 6Consider the ventilation of your birdhouse. While not strictly necessary for this basic design, you could add small ventilation gaps under the roof overhang or small holes near the top of the sides to allow for air circulation, especially in warmer climates.
- 7When selecting wood, untreated pine or cedar are excellent choices. They are naturally durable and weather-resistant. Avoid pressure-treated lumber, as the chemicals used can be toxic to birds. Kiln-dried wood is also a good option for stability.
- 8The size of the entrance hole is critical for attracting specific bird species and deterring larger, unwanted visitors. For common small cavity nesters like wrens, chickadees, and titmice, a 1.5-inch diameter hole is ideal. Adjustments can be made for other species.
Related Activities You Might Enjoy
Frequently Asked Questions
What kind of wood is best for a birdhouse?
Untreated pine or cedar are excellent choices for birdhouses due to their natural durability and resistance to the elements. These woods are also safe for birds, as they don't contain harmful chemicals. It's crucial to avoid pressure-treated lumber, as the preservatives can be toxic to birds. Cedar, in particular, offers superior longevity and resistance to rot and insects, making it a premium choice. If using pine, ensure it's kiln-dried for stability. The key is to use natural, untreated wood that can withstand outdoor conditions without posing a risk to its inhabitants.
How big should the entrance hole be?
The ideal entrance hole size is determined by the species of bird you wish to attract and to deter larger, potentially predatory birds or squirrels. For common small cavity-nesting birds such as wrens, chickadees, titmice, and nuthatches, a hole diameter of 1.5 inches is generally perfect. This size allows them easy access while preventing larger birds like starlings or house sparrows from entering. If you're aiming for slightly larger birds like bluebirds, you might consider a 1.5-inch hole, though some prefer 1.625 inches. Always research the specific needs of local bird species you hope to attract.
Should I add a perch to the birdhouse?
It's generally not recommended to add a perch below the entrance hole of a birdhouse. While it might seem like a helpful feature for birds, it actually serves as a convenient landing spot for predators such as squirrels, raccoons, or larger birds, making it easier for them to access the nest. Birds that use birdhouses are perfectly capable of clinging to the entrance hole or the wood surface to enter and exit. Therefore, omitting a perch enhances the safety and security of the nesting birds and their young.
How do I clean a birdhouse?
Annual cleaning is essential for maintaining a healthy birdhouse. The best time to clean is in late fall or early winter, after the nesting season has concluded and before the next one begins. Start by wearing gloves and a mask. Remove all old nesting material, debris, and any unhatched eggs. You can then scrub the interior with a stiff brush and a mild solution of soap and water, or a diluted bleach solution (1 part bleach to 9 parts water) for disinfection. Rinse thoroughly with clean water and allow the birdhouse to dry completely in the sun before re-mounting it. This process prevents the buildup of parasites and diseases.
How do I mount my birdhouse?
Proper mounting is crucial for the safety and success of your birdhouse. Ideally, mount it on a sturdy pole or a tree trunk, at a height of 5 to 10 feet off the ground. Avoid placing it too low, where it's vulnerable to predators, or too high, where it might be inaccessible for maintenance. Ensure the entrance hole faces away from prevailing winds and direct afternoon sun, which can overheat the interior. If mounting on a pole, consider adding a predator baffle below the house to deter climbing animals. Make sure the birdhouse is securely attached so it doesn't sway excessively in the wind.
Can I paint or stain my birdhouse?
Yes, you can paint or stain your birdhouse, but it's important to do so correctly to ensure it's safe for birds. Always use non-toxic, exterior-grade paints or stains. Opt for muted, natural colors like greens, browns, or grays, as these blend in with the environment and are less likely to alarm birds. Crucially, never paint or stain the interior of the birdhouse or the area immediately surrounding the entrance hole. The fumes from fresh paint or stain can be harmful to birds, and a brightly colored entrance might attract unwanted attention. Allow the finish to cure completely for several days before mounting.
What Next?
Congratulations on building your very own birdhouse! This project is a fantastic starting point for further woodworking adventures. Consider building multiple birdhouses with different entrance hole sizes to attract a wider variety of bird species, or experiment with various roof designs for a unique aesthetic. Once built, find a suitable location to mount your birdhouse, ideally 5-10 feet off the ground and away from busy areas or potential predators. Enjoy observing the birds that make your creation their home, and remember to clean it annually to ensure it remains a welcoming sanctuary for years to come.
Free: 10 Paper Crafts Anyone Can Make in 5 Minutes
Get our beginner guide + new craft ideas weekly.
No spam. Unsubscribe anytime.
Did you complete this activity?
Related