How to Make Unique Handmade Jewelry — Easy Step-by-Step Guide
Design and create your own one-of-a-kind bracelets using colorful polymer clay and fun buttons. A delightful screen-free activity for the whole family! Learn to condition clay, embed buttons, bake charms, and assemble unique jewelry pieces.
Quick answer
To make clay and button charm bracelets, you need polymer clay, assorted buttons, jewelry findings, and basic tools. The process involves conditioning and shaping the clay, pressing buttons into it to create impressions, cutting out shapes, baking the charms, and finally assembling them onto a cord or ribbon. This beginner-friendly activity takes approximately 60-90 minutes for preparation and baking, plus cooling time, and is perfect for families with kids aged 6+.
What you need
Shop on Amazon · As an Amazon Associate we earn from qualifying purchases. Links above are affiliate links — we may earn a commission at no extra cost to you.
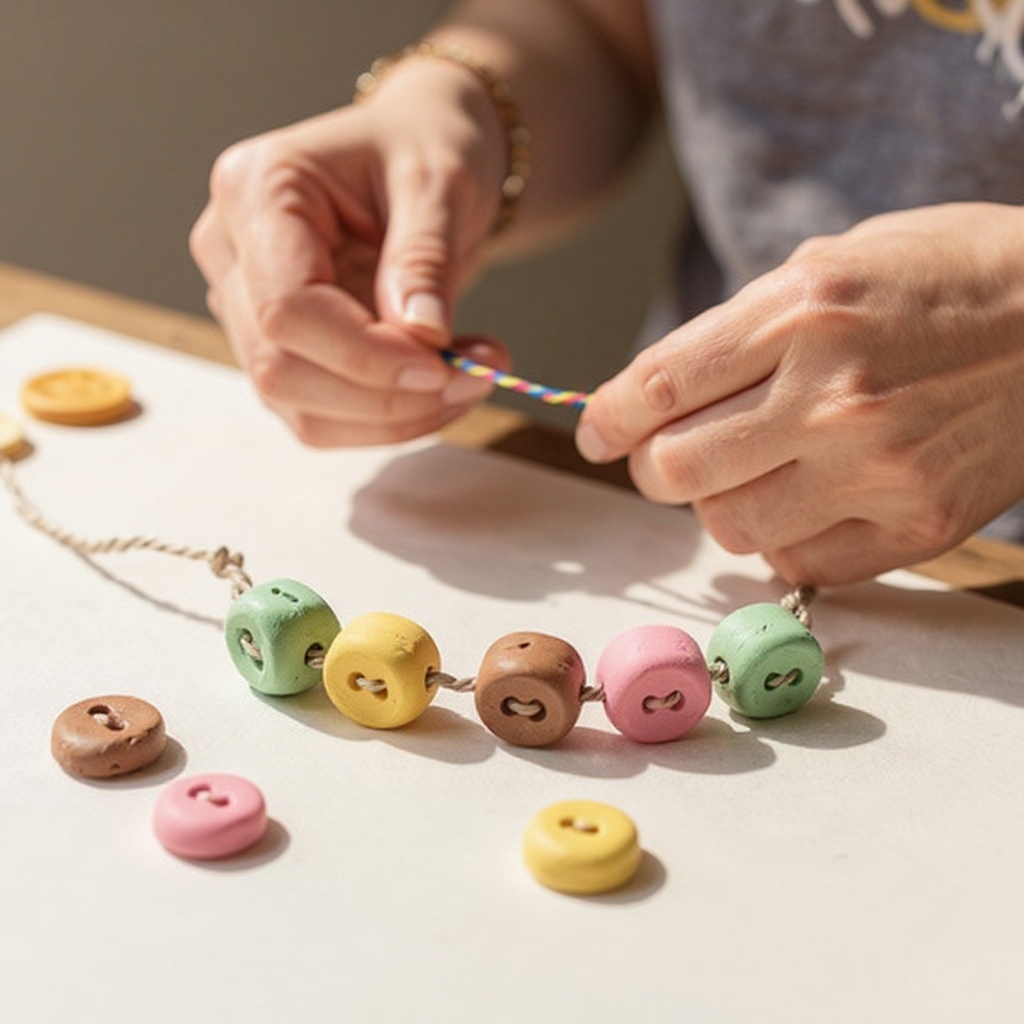
Unleash your inner artist and craft stunning, personalized jewelry with this delightful clay and button charm bracelet tutorial. This project is a fantastic way to engage in a hands-on, screen-free activity that sparks creativity for all ages. The magic lies in transforming simple materials like colorful polymer clay and charming buttons into unique wearable art. Whether you're looking for a fun family craft session, a way to make thoughtful handmade gifts, or simply a relaxing creative outlet, these bracelets offer endless possibilities for personalization and expression. Get ready to design pieces that truly reflect your style!
On this page
Step-by-Step Instructions
- 1
Preheat your oven according to the polymer clay manufacturer's instructions, typically around 275°F (135°C). Ensure your oven rack is in the middle position for even baking.
- 2
Begin by conditioning your polymer clay. Knead each block of clay thoroughly until it becomes soft, pliable, and easy to work with. If using multiple colors, you can combine them at this stage to create marbled effects or keep them separate for distinct charms.
- 3
Roll out the conditioned clay into a flat sheet approximately 1/8 inch thick. Use a rolling pin or a smooth glass bottle, applying even pressure to achieve a consistent thickness across the entire sheet. Aim for a surface that is smooth and free of wrinkles.
- 4
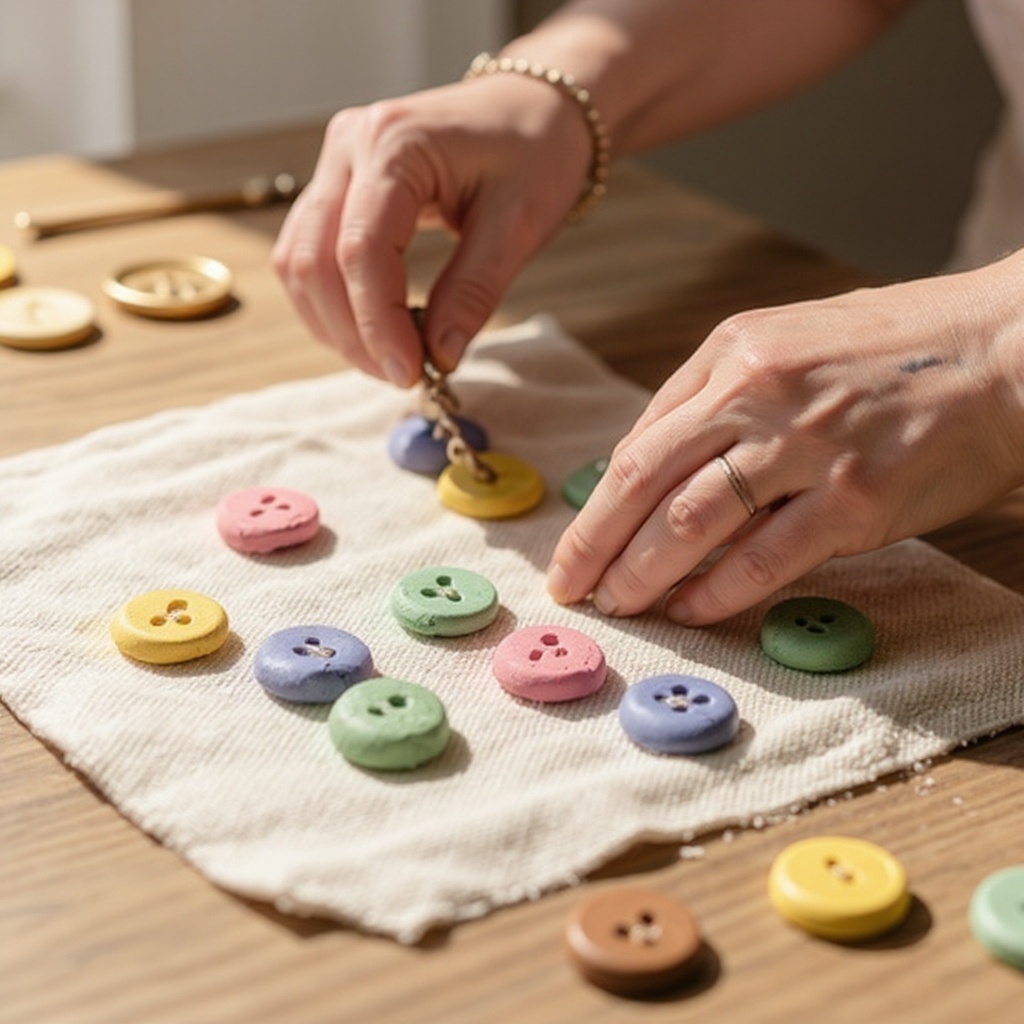
Now, it's time to get creative with your buttons! Press assorted buttons firmly into the clay surface, arranging them to create patterns, textures, or individual charm shapes. Ensure the buttons are embedded deeply enough to leave a clear impression and will hold securely during baking.
- 5
Once you're happy with your button arrangements, use a craft knife or plastic knife to carefully cut out shapes around the buttons. You can cut simple circles, squares, or more intricate designs, ensuring each charm has a defined edge. For cleaner cuts, try to slice through the clay in one smooth motion.
- 6
If you want to add a hole for hanging your charms later, use the tip of your knife or a toothpick/skewer to carefully make a small hole near the edge of each clay charm before baking. Ensure the hole is large enough to accommodate your ribbon or cord, but not so large that it weakens the charm.
- 7
Carefully transfer the cut clay charms onto the parchment-lined baking sheet. Arrange them with a little space between each charm to prevent them from sticking together during the baking process. Ensure they are lying flat.
- 8
Bake the clay charms according to the polymer clay package directions, which usually takes 15-30 minutes depending on the thickness of your charms. Keep an eye on them to prevent over-baking or burning.
- 9
Allow the baked clay charms to cool completely on the baking sheet. This is a crucial step for durability. Once they are fully cooled, gently wiggle and remove the buttons. If a button is stuck, you may need to carefully pry it out with a thin tool like a toothpick or the tip of your craft knife.
- 10
If any buttons proved stubborn to remove after baking, try gently warming the clay charm with a hairdryer on a low setting for a few seconds before attempting to pry the button out again. This can sometimes loosen the clay slightly.
- 11
For a smoother finish on your charms, you can lightly sand the edges of the baked clay pieces with fine-grit sandpaper after they have cooled. This will remove any rough spots and give your charms a more polished look.
- 12
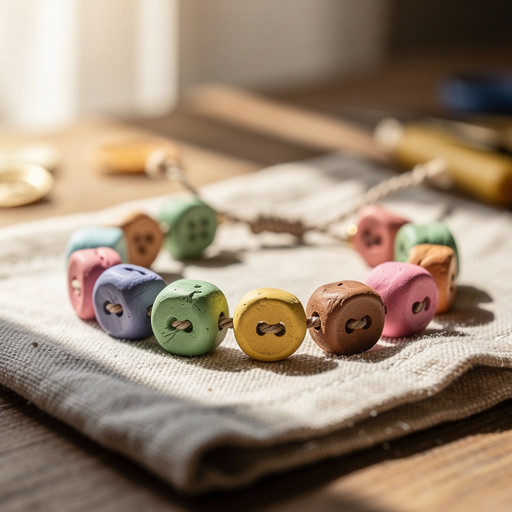
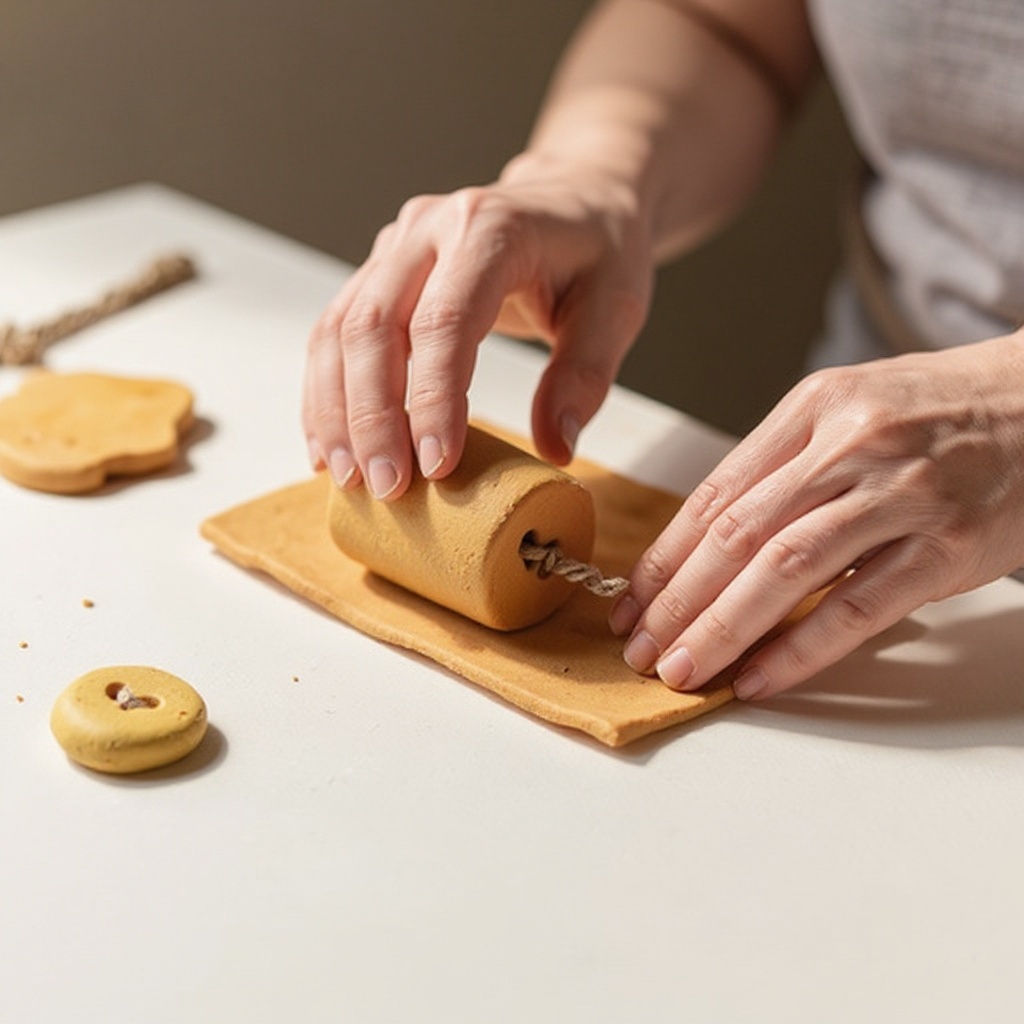
Now, it's time to assemble your bracelet! Thread your ribbon or cord through the holes in the baked clay charms, adding them in your desired order. You can create a visually appealing sequence or group similar charms together.
- 13
To keep your charms securely spaced and prevent them from sliding too much, you can tie small knots in the ribbon or cord on either side of each charm. This also adds an extra decorative element to the bracelet.
- 14
Once all your charms are threaded and spaced, attach a jump ring to each end of your bracelet. Use jewelry pliers to carefully open the jump ring, thread it through the end of the ribbon/cord, and then close the jump ring securely.
- 15
Attach one end of the lobster clasp to one of the jump rings and the other jump ring to the other end of the bracelet. Ensure the jump rings are fully closed to prevent the clasp from falling off.
- 16
For an extra touch of flair and personalization, add an optional accent bead or charm to one of the jump rings. This can be a small bead that complements your clay colors or a tiny metal charm.
- 17
If you prefer not to bake holes into your clay charms, you have alternative assembly options. You can glue the clay charms onto a pre-made bracelet base using a strong craft glue, or use strong craft glue to attach them directly to a ribbon or cord. Ensure the glue is suitable for both clay and your chosen bracelet material.
Tips & Troubleshooting
- 1Experiment with different button arrangements and clay color combinations to create truly unique designs. You can layer colors, swirl them together, or even use a marbled effect by twisting two colors of clay before rolling. Consider using cookie cutters to create specific shapes before pressing buttons for more defined charm outlines.
- 2Ensure your oven temperature is accurate by using an oven thermometer if possible. Too hot and the clay can burn or become brittle; too cool and it may not cure properly, leading to fragile charms. Always follow the specific baking instructions on your polymer clay packaging.
- 3If buttons are difficult to remove after baking, try gently warming the clay charm with a hairdryer on a low setting for a few seconds before attempting to pry the button out. This can sometimes loosen the clay slightly, making removal easier without damaging the charm.
- 4For a smoother finish on your charms, you can lightly sand the edges of the baked clay pieces with fine-grit sandpaper after they have cooled. Start with a coarser grit if needed, and finish with a very fine grit for a polished look. You can also use a damp cloth to wipe away dust after sanding.
- 5If you don't have jewelry pliers, be very careful when opening and closing jump rings with household pliers. Use the flat parts of the pliers to grip the jump ring and twist to open and close, rather than pulling, to avoid bending them out of shape. This requires a delicate touch.
- 6To create a more professional look, consider using a small amount of rubbing alcohol to clean the buttons before pressing them into the clay. This removes any dust or oils that might interfere with the impression or cause discoloration. Wipe the clay surface with a damp cloth to smooth out any fingerprints before baking.
- 7When cutting out your clay shapes, a ruler can be helpful for ensuring straight edges if you're making geometric designs. For rounded shapes, tracing around a coin or bottle cap can provide a consistent size and shape for your charms.
- 8If you're making multiple bracelets, prepare all your clay sheets and button impressions before you start cutting. This streamlines the process and allows you to bake a larger batch of charms at once, saving time and oven usage.
Related Activities You Might Enjoy
Frequently Asked Questions
Can I use any type of button for this craft?
It's best to use buttons made of materials like plastic, wood, or metal that can withstand the baking temperature of polymer clay (typically around 275°F or 135°C). Avoid buttons with delicate embellishments, fabric coverings, or those that might melt or release fumes at high temperatures. Buttons with interesting textures, such as carved wood, embossed metal, or patterned plastic, will create the most visually appealing impressions in the clay. Always test a small, inconspicuous button first if you're unsure about its heat resistance.
How do I make sure the clay charms are durable?
Durability is key to long-lasting charms. First, ensure you are using good quality polymer clay and conditioning it properly until it's soft and pliable; this helps prevent cracking. Roll the clay to a consistent thickness, ideally around 1/8 inch, as very thin charms are more prone to breaking. Follow the baking instructions on your specific polymer clay package carefully, ensuring the clay is fully cured. Over-baking can make it brittle, while under-baking means it won't harden properly. Allow the charms to cool completely before handling or removing buttons, as they are more fragile when warm.
What if I don't have a baking sheet?
If you don't have a baking sheet, you can substitute it with a piece of sturdy cardboard lined with parchment paper. Ensure the cardboard is not too flimsy and can withstand the heat of your oven without warping or burning. Alternatively, you can use a ceramic tile or a heat-resistant glass dish lined with parchment paper. The main purpose of the baking sheet is to provide a flat, stable surface for baking and to protect your oven from any potential clay residue. Always ensure whatever surface you use is oven-safe.
Can I make these bracelets without making holes in the clay?
Yes, absolutely! If you prefer not to make holes in your clay charms, there are several alternative assembly methods. You can use a strong craft glue, such as E6000 or a jewelry-specific adhesive, to directly glue the baked clay charms onto a pre-made bracelet base, like a cuff or a leather band. Another option is to glue the charms onto a ribbon or cord. For this method, ensure the glue creates a secure bond with both the clay and the ribbon/cord. You can also embed small loops of wire into the clay before baking, which can then be used to attach jump rings.
How long does it take to make one bracelet?
The total time to make one clay and button charm bracelet can vary, but a good estimate is around 60-90 minutes for the active crafting and baking process, plus cooling time. Conditioning and rolling the clay, pressing buttons, and cutting shapes might take 20-30 minutes. Baking typically takes 15-30 minutes, depending on the clay and charm thickness. Assembly, including threading charms and attaching findings, usually takes another 15-20 minutes. Remember to factor in at least 30-60 minutes for the charms to cool completely before assembly, and potentially longer if you're doing multiple batches.
Can I paint or decorate the clay charms after baking?
Yes, you can definitely paint or decorate your clay charms after they have been baked and cooled! Once the charms are fully cured and cool, you can use acrylic paints to add details, outlines, or even entirely new designs. Seal the painted charms with a clear acrylic sealant or varnish to protect the paint and give them a glossy or matte finish. You can also use permanent markers to draw designs or add fine details. This opens up even more possibilities for personalization and allows you to achieve intricate looks that might be difficult to create with just buttons.
What kind of ribbon or cord should I use?
For these bracelets, a 1/4 inch wide ribbon or cord works well, providing enough structure to hold the charms without being too bulky. Satin ribbon offers a smooth, elegant look and is easy to thread. Waxed cotton cord is durable and has a nice texture, making it a good choice for a more casual style. Leather cord also works beautifully and adds a rustic feel. You can even use thin hemp cord for an eco-friendly option. Ensure the material you choose is strong enough to support the weight of the clay charms and is comfortable to wear against the skin. The length needed will depend on your wrist size and how many charms you plan to use.
What Next?
Congratulations on creating your unique clay and button charm bracelets! These handmade treasures are perfect for gifting or adding a personal touch to your own accessory collection. For variations, consider using different types of clay, such as glitter or metallic finishes, or explore other small embellishments like beads or sequins pressed into the clay. You could also experiment with layering colors or creating marbled effects. To store your beautiful bracelets, keep them in a jewelry box or a small pouch to prevent tangling and damage. For your next project, why not try making matching earrings or keychains using the same technique?
Free: 10 Paper Crafts Anyone Can Make in 5 Minutes
Get our beginner guide + new craft ideas weekly.
No spam. Unsubscribe anytime.
Did you complete this activity?
Related
You might also like
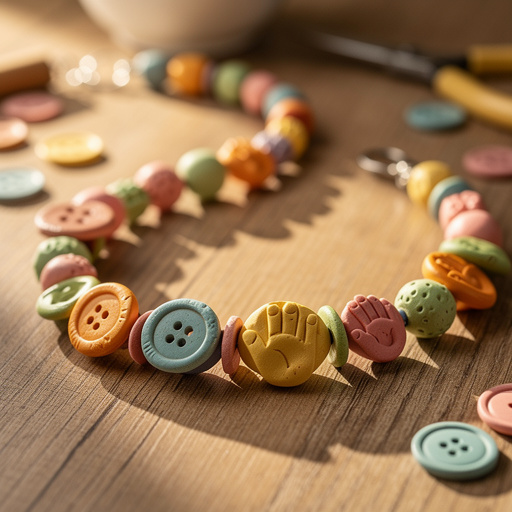
Clay & Button Bead Necklace
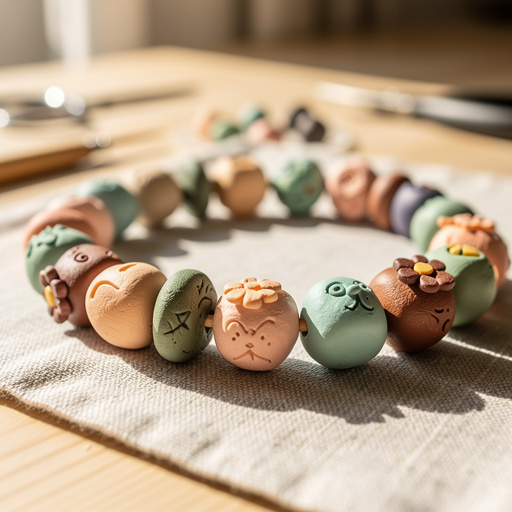
Clay Bead & Charm Creations
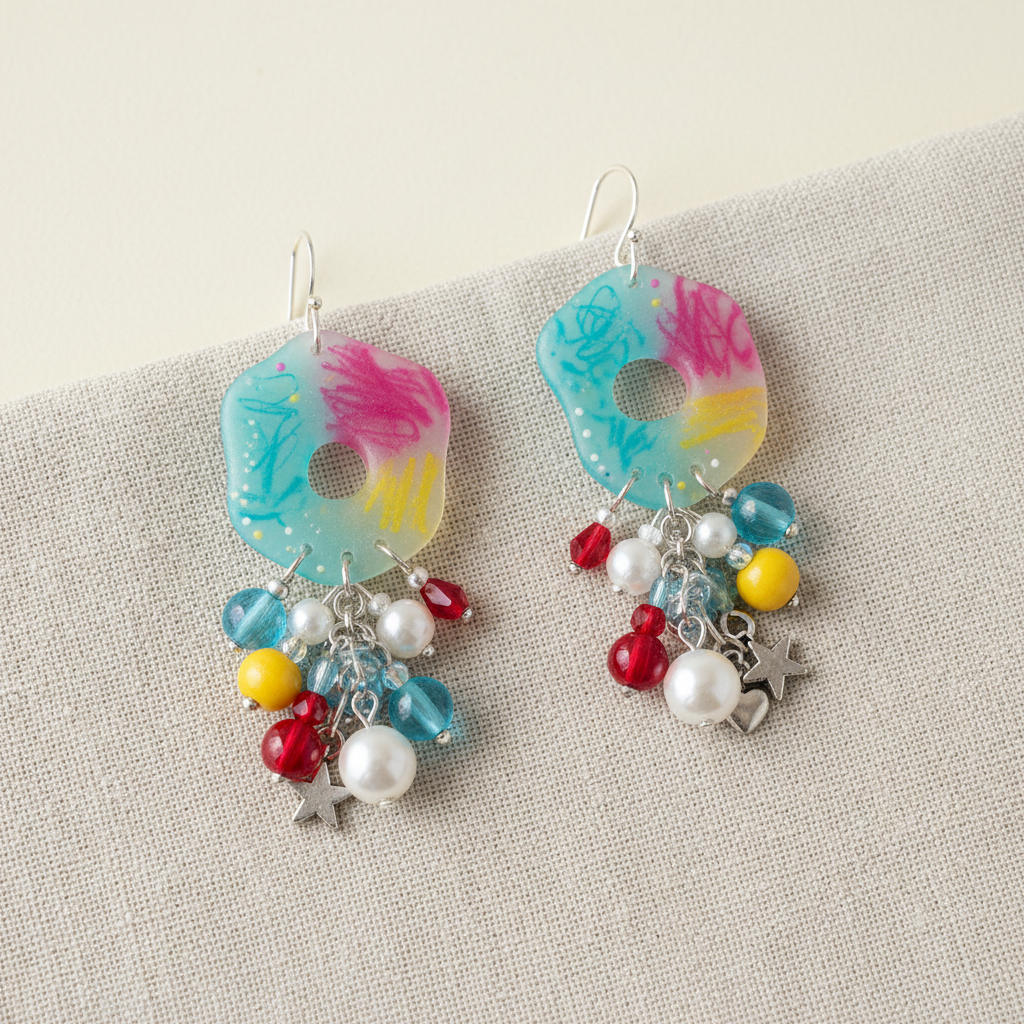
Shrink Plastic Statement Earrings
Cardboard Tube Critter Castles
Shrink Plastic Pet Charms