How to Create Nature Rubbing Art Cards — Easy Step-by-Step Guide
Discover the magic of nature's textures by creating unique art cards with simple rubbing techniques. A fun and screen-free family activity!

Quick answer
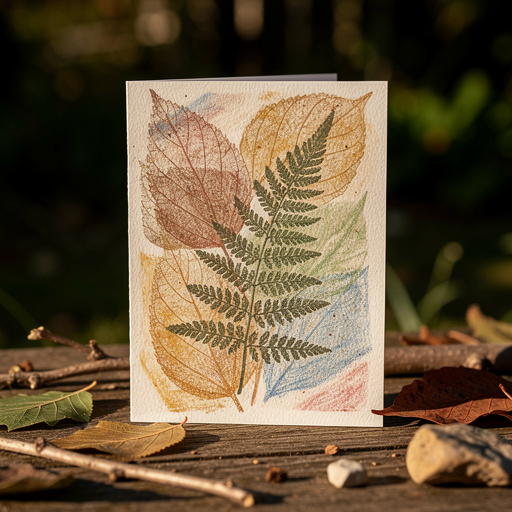
To make nature rubbing art cards, you need leaves, textured items, paper, and crayons, taking about 30 minutes. Start by placing textured items under paper. This beginner-friendly activity has 7 steps and is perfect for families with young children.
What you need
Shop on Amazon · As an Amazon Associate we earn from qualifying purchases. Links above are affiliate links — we may earn a commission at no extra cost to you.
Embark on a delightful artistic adventure with nature rubbing art cards, a wonderfully simple yet profoundly creative project that connects you directly with the beauty of the natural world. This activity is perfect for families seeking screen-free fun, encouraging observation and tactile exploration. It transforms everyday leaves and textures into stunning visual art, making it an ideal way to foster creativity in young children and a relaxing pastime for adults. Prepare to be amazed by the intricate patterns nature holds, waiting to be revealed with just a crayon and a bit of imagination.
On this page
Step-by-Step Instructions
- 1
Gather a variety of interesting leaves, flowers, or other textured natural items. Look for items with distinct patterns, such as prominent veins on leaves, the rough surface of bark, the delicate weave of lace, or the raised details on coins. Ensure you have a good selection to experiment with, and consider collecting more than you think you'll need.
- 2
Prepare your textured items by ensuring they are relatively flat and dry. If using fresh leaves or flowers, gently pat them dry with a paper towel to remove excess moisture, which can cause the paper to tear or become damp. For bulkier items like thick bark, you might need to find flatter sections or consider using them as a background element rather than the primary focus.
- 3
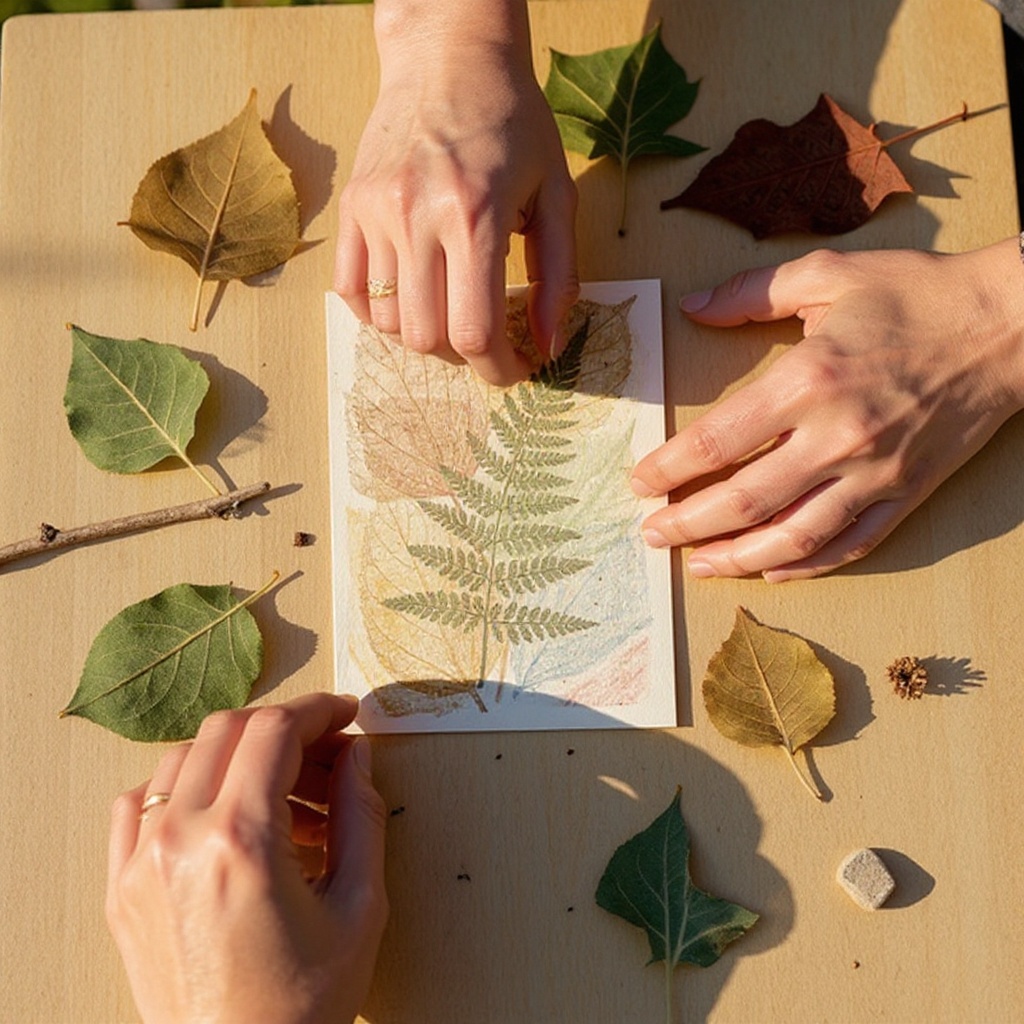
Arrange your chosen textured items on a flat surface, such as a table or a sturdy tray. Experiment with different arrangements, placing items side-by-side or overlapping them slightly to create interesting visual compositions. Avoid stacking items too high, as this can make it difficult for the crayon to pick up the finer details.
- 4
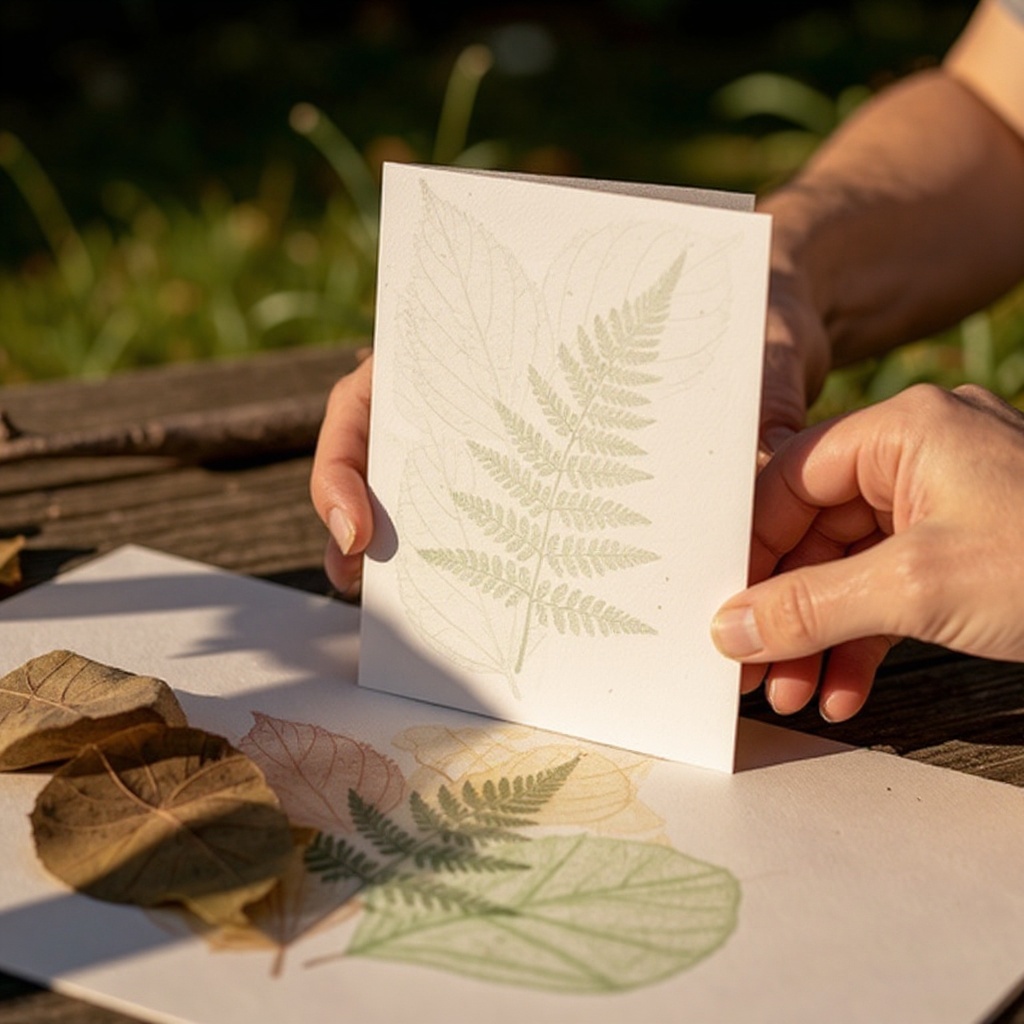
Select a piece of cardstock or heavy paper and carefully place it over the arranged textured items. Ensure the paper is centered over your desired arrangement and lies as flat as possible against the items beneath. Smooth out any wrinkles or creases in the paper to ensure a clean transfer of texture.
- 5
Choose a crayon and gently rub the side of the crayon over the paper, directly above the textured items. Hold the crayon at a low angle, almost parallel to the paper, and apply light, even pressure. Start in one corner and gradually move across the paper, allowing the crayon's pigment to transfer onto the paper and reveal the underlying texture.
- 6
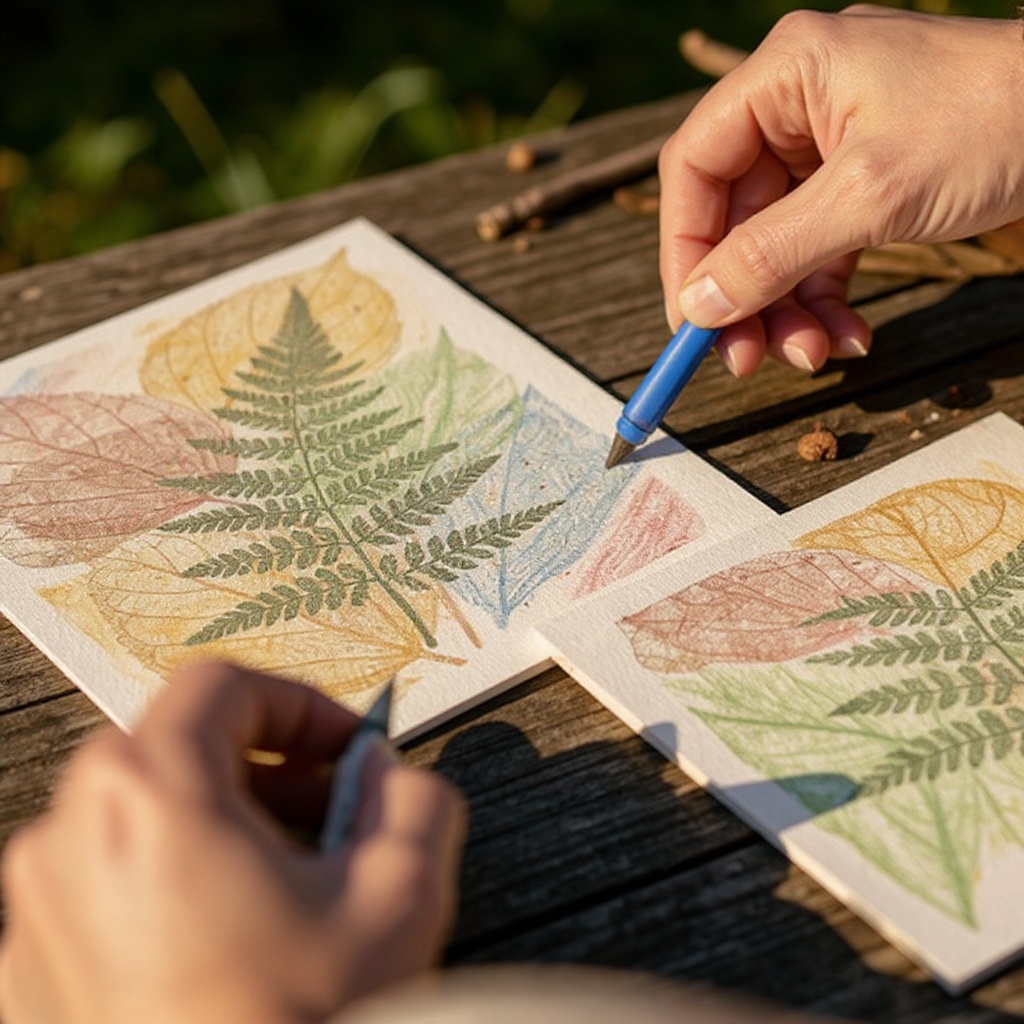
Continue rubbing with the crayon, moving it across the entire surface of the paper where your textured items are placed. Use smooth, sweeping motions, ensuring you cover all areas where you want the texture to appear. You can use one color for the entire rubbing or switch to different colors as you go to create a multi-hued effect.
- 7
Experiment with different colors and textures to create unique patterns and designs on your paper. Try using contrasting crayon colors against the paper, or layer different colors by rubbing one hue over another to achieve interesting blends and depth. Don't be afraid to try different pressure levels with the crayon to see how it affects the intensity of the transferred texture.
- 8
Once the rubbing is complete and you are satisfied with the texture transfer, carefully lift the paper from the textured items. Examine your creation to see the beautiful patterns that have emerged. You can then trim the paper to create your art cards or use the textured paper as decorative elements in other craft projects.
- 9
Select your favorite rubbings and trim them to the desired size for your art cards. You can cut them into standard card sizes or create unique shapes. If you are using a plain card base, you can now glue or tape your textured rubbing onto the front of the card for a layered effect.
- 10
Add embellishments if desired. Once the rubbing is adhered to the card base, you can use markers or colored pencils to add borders, draw additional designs, or write messages. This step allows for further personalization and artistic expression, turning your simple rubbing into a complete piece of art.
- 11
Allow any added glue or embellishments to dry completely before handling or storing your nature rubbing art cards. This ensures a neat and professional finish for your handmade creations.
Tips & Troubleshooting
- 1For clearer rubbings, ensure your textured items are relatively flat. Bulky items might not transfer well, as the crayon may not be able to reach all the intricate details. If you encounter a particularly bulky item, try pressing down on the paper more firmly over that specific area, or consider using it as a background texture rather than a primary focus.
- 2Try using different types of paper. Thicker paper, like cardstock, will give you a more robust and durable card that is less likely to tear, while thinner paper might show finer details and more delicate textures. Experiment with textured papers themselves for an even more layered and complex visual effect.
- 3If the crayon isn't transferring well, try pressing a little harder or using a different color crayon. Some crayon pigments are more opaque than others, and the pressure you apply directly impacts how much pigment is transferred. Ensure the paper is lying flat against the textured item to maximize contact.
- 4Combine multiple textures on one sheet of paper for a more complex and interesting design. You can arrange different leaves, flowers, or objects next to each other, or even overlap them slightly to create a collage of textures. This technique allows for a richer and more visually dynamic outcome.
- 5Allow fresh leaves and flowers to dry slightly before use to prevent them from making the paper too damp. Excess moisture can cause the paper to become fragile, tear easily, or even bleed, obscuring the transferred textures. A brief period of air drying is usually sufficient.
- 6Experiment with the direction of your rubbing strokes. While smooth, consistent strokes are generally recommended, you can also try rubbing in different directions or patterns to see how it affects the appearance of the texture. This can add an unexpected artistic flair to your rubbings.
- 7Consider using the white or colored paper backing that comes with some crayons. If you remove the paper from your crayons, you can sometimes use the colored paper itself as a base for your rubbing, adding another layer of color and texture to your artwork.
- 8Don't discard the textured items after use! Many leaves and flowers can be pressed and dried for future use, and other textured items can be reused for multiple rubbing projects. This makes the activity even more sustainable and cost-effective.
Related Activities You Might Enjoy
Frequently Asked Questions
What are the best natural items to use for rubbing art?
The best natural items for rubbing art are those with distinct and varied textures. Think about leaves with prominent veins, the rough, intricate patterns of tree bark, the delicate weave of lace, or even the raised details on coins and other metal objects. Flat, thin items generally work best because they allow the crayon to make consistent contact with the paper, transferring the texture clearly. Avoid items that are too bulky or have very smooth, uniform surfaces, as these may not yield a strong impression. Experimenting with different natural elements, from fallen leaves and flower petals to interesting seed pods and even textured stones, will reveal a wide array of possibilities for your art.
How can I make my nature rubbing art more colorful?
There are several ways to inject more color into your nature rubbing art. Firstly, use a wide variety of crayon colors! Don't limit yourself to just one or two; explore the entire spectrum to create vibrant and dynamic designs. You can also layer colors by rubbing one hue over another; for instance, rubbing a yellow crayon over a blue texture can create a green effect, or a red over a yellow can produce an orange. Another effective technique is to use different colored paper as your base. A dark paper with light-colored crayon rubbings can create a striking contrast, while lighter papers can showcase a broader range of subtle color variations. Consider using multiple colors on a single rubbing to highlight different parts of the texture.
Can I use this for other crafts besides cards?
Absolutely! The textured paper created through nature rubbing is incredibly versatile and can be used for a multitude of other crafts beyond just cards. The beautiful, unique patterns make it perfect for creating eye-catching gift tags, personalized bookmarks, or as decorative backgrounds for drawings and paintings. You can also incorporate these textured sheets into scrapbooking projects, adding a tactile and visually interesting element to your layouts. Consider cutting them into smaller pieces to use as decorative accents on journals, or even framing larger rubbings as standalone pieces of art. The possibilities are truly limited only by your imagination.
What age is this activity suitable for?
This nature rubbing art activity is fantastic for family activities and is suitable for children aged 4 and up. Younger children, typically around 4-6 years old, will enjoy the tactile experience of rubbing and discovering textures, though they will likely need assistance from an adult to hold the paper steady and guide their rubbing motions. As children get older, around 7 years and up, they can become more independent, experimenting with different color combinations, layering techniques, and creating more intricate designs on their own. Adults will also find this a relaxing and rewarding craft, perfect for a quiet afternoon or a creative outlet.
How can I ensure the best texture transfer from my natural items?
To achieve the clearest and most detailed texture transfer, several factors are key. Firstly, ensure your natural items are as flat as possible. If using leaves or flowers, gently press them under a heavy book for a day or two to flatten them out. Secondly, make sure the paper you are using is laid smoothly over the textured item, with no wrinkles or air bubbles. When rubbing with the crayon, use the side of the crayon, not the tip, and hold it at a low angle, applying consistent, even pressure. Experiment with different types of paper; thicker cardstock often yields bolder results, while thinner papers might capture finer details. Finally, ensure your crayon has enough pigment; older, worn-down crayons might transfer less effectively.
What if my crayon isn't picking up the texture well?
If your crayon isn't picking up the texture as well as you'd like, there are a few troubleshooting steps you can take. First, try applying more pressure with the crayon. Sometimes, a firmer hand is needed to transfer enough pigment to reveal the underlying texture. Ensure you are using the side of the crayon, held at a low angle, as this provides a broader surface area for pigment transfer compared to the tip. If you're still struggling, try a different color crayon, as some pigments are more opaque and transfer more readily than others. You might also need to adjust the position of your paper to ensure it's lying perfectly flat against the textured item, maximizing contact. Lastly, consider if your natural item is too smooth or not textured enough; try a different item with more pronounced features.
What Next?
Once your nature rubbing art cards are complete, the creative possibilities are endless! You can use them as unique greeting cards, bookmarks, or even as decorative elements in scrapbooks and journals. For a more polished look, consider adding a border with markers or a contrasting crayon color. Store your creations in a dry place to preserve their vibrancy. As a next step, explore different types of paper or even try using charcoal sticks for a bolder effect. You might also consider creating a larger piece by combining multiple rubbings onto a single sheet of paper, or even framing your favorite designs to adorn your walls.
Free: 10 Paper Crafts Anyone Can Make in 5 Minutes
Get our beginner guide + new craft ideas weekly.
No spam. Unsubscribe anytime.
Did you complete this activity?
Related