How to Create Rainbow Rock Paintings — Easy Step-by-Step Guide
Unleash your creativity with these easy painting ideas! Learn how to transform ordinary rocks into colorful rainbow masterpieces with simple supplies and steps. This guide is perfect for families and kids aged 5+ looking for screen-free fun.
Quick answer
To make rainbow rock paintings, you need smooth rocks, acrylic paints, paintbrushes, and a sealant. Start by cleaning your rocks. This easy activity has 7 steps and is perfect for families and kids aged 5+ looking for screen-free fun.
What you need
Shop on Amazon · As an Amazon Associate we earn from qualifying purchases. Links above are affiliate links — we may earn a commission at no extra cost to you.
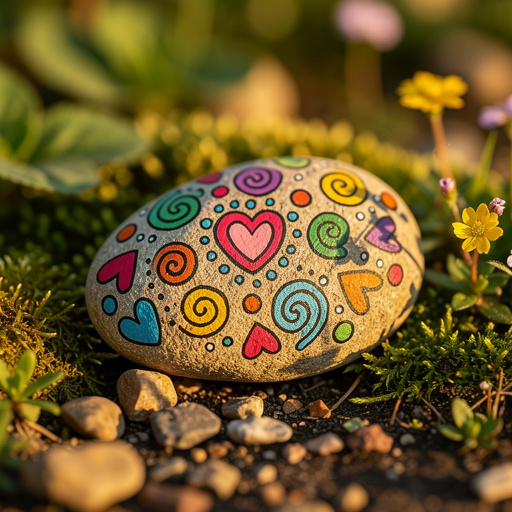
Embark on a vibrant journey of creativity with our easy rainbow rock painting tutorial! This delightful craft transforms ordinary stones into cheerful, colorful masterpieces, bringing a touch of magic to your home or garden. It’s an incredibly accessible project, perfect for sparking imagination in young children, providing a calming and engaging activity for families, and offering a satisfying creative outlet for adults. Get ready to add a splash of color to your world, one painted rock at a time!
On this page
Step-by-Step Instructions
- 1
Gather your smooth, clean rocks. Ensure they are dry and free of dirt or debris by washing them with soap and water and allowing them to air dry completely. This step is crucial for paint adhesion; any residual dirt or moisture can cause the paint to peel or chip later.
- 2
Prepare your workspace by laying out your paints, brushes, and paper towels on a protected surface, such as a newspaper-covered table or a plastic tablecloth. Having everything organized beforehand will make the painting process smoother and minimize potential messes.
- 3
Optional: Lightly sketch your rainbow arc with a pencil or chalk on the rock. This provides a guideline for your colors and helps ensure your rainbow is evenly spaced and curved. Don't worry about perfection; the organic nature of the rock will add character.
- 4
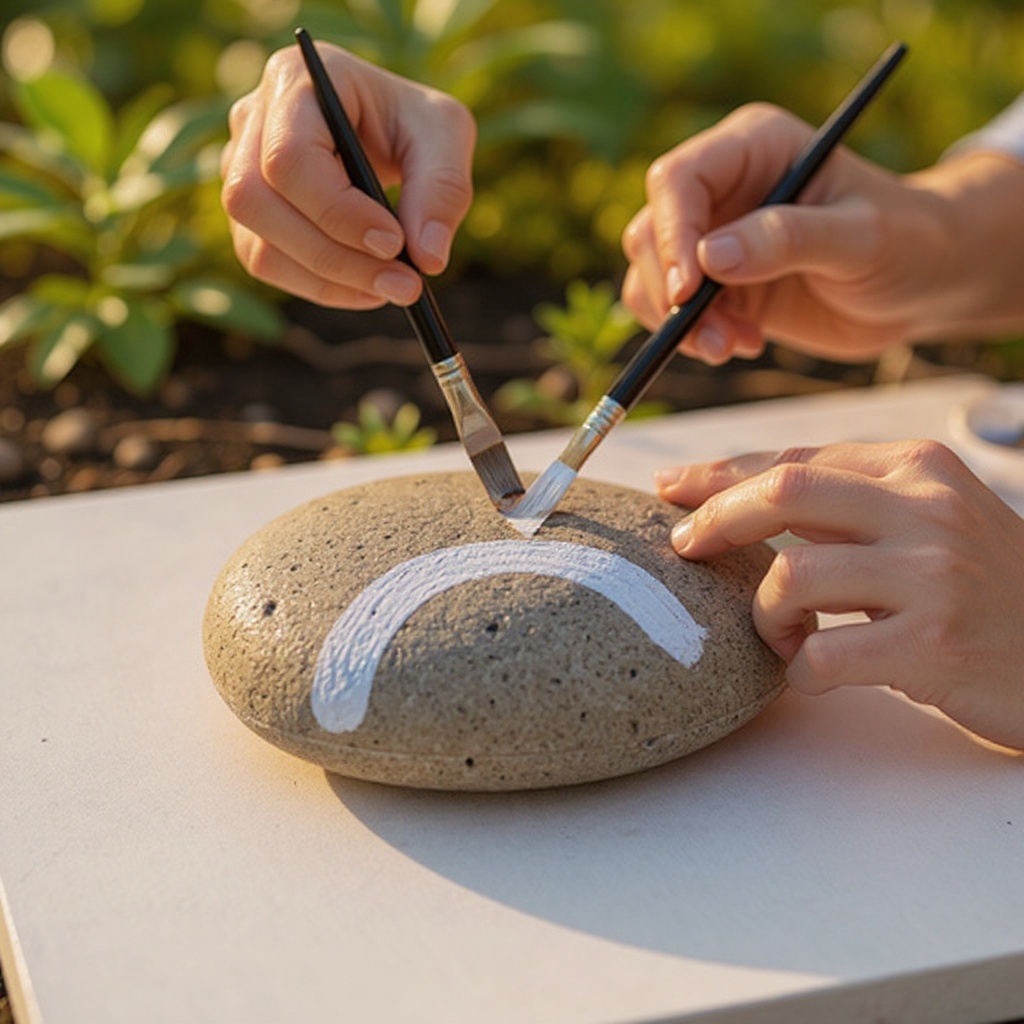
Dip a medium paintbrush into white paint and paint a curved line across the top of your rock, representing the start of the rainbow. This white line acts as a base for your first color and helps the subsequent colors pop. Ensure the line is smooth and follows the natural curve of the rock.
- 5
Rinse your brush thoroughly in the water cup, swishing it around to remove all traces of white paint. Gently dab the brush on a paper towel to remove excess water, ensuring it's damp but not dripping, which prevents color dilution.
- 6
Using a clean, damp brush, carefully paint a slightly larger curved line of red paint directly below the white line. Aim for smooth, even strokes, following your sketched guideline or the natural curve of the rock. Overlap the bottom edge of the white line slightly to create a seamless blend.
- 7
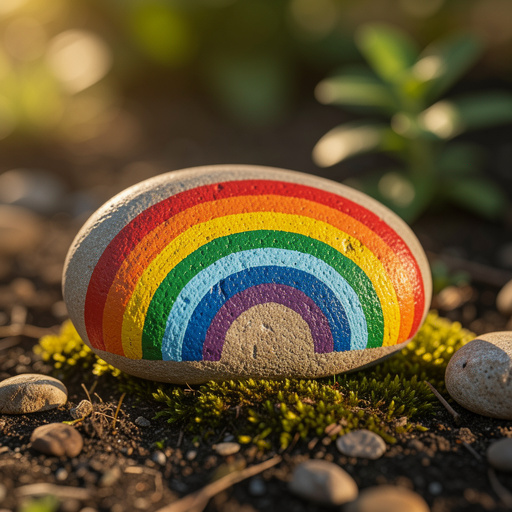
Continue this process for each subsequent color of the rainbow. Rinse and dry your brush thoroughly between each color to prevent them from mixing unintentionally. Paint curved lines of orange, yellow, green, blue, and purple, ensuring each new color's arc is slightly larger than the one above it, creating the classic rainbow shape.
- 8
Allow the paint to dry completely for at least 30 minutes, or until it is no longer tacky to the touch. Rushing this step can cause the colors to smudge or bleed together, compromising the crispness of your rainbow design. You can speed up drying time with a hairdryer on a cool setting.
- 9
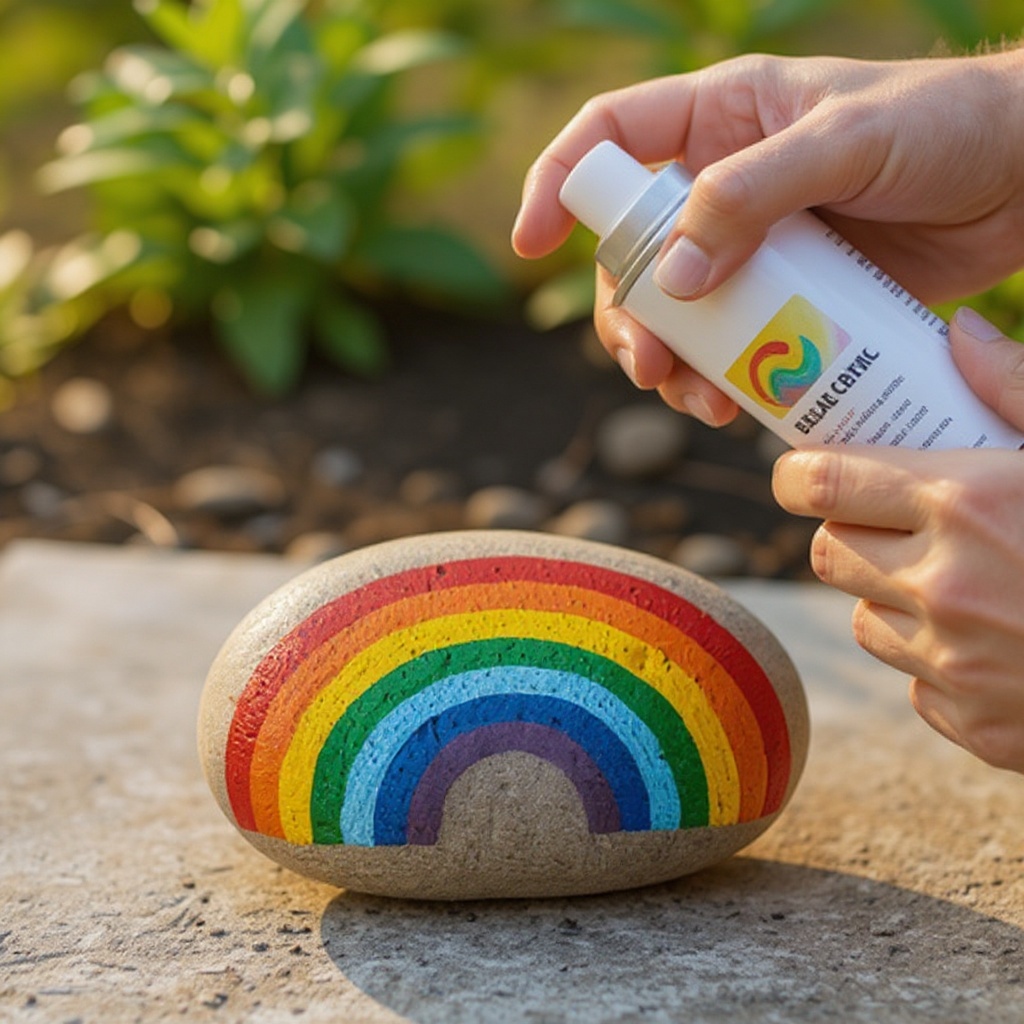
Once your rainbow is completely dry, it's time to add a protective layer. Apply a coat of clear acrylic sealant spray or brush-on varnish to protect your painted rock and give it a glossy or matte finish. This step is essential for preserving your artwork, especially if the rocks will be displayed outdoors.
- 10
Allow the sealant to dry completely according to the product's instructions before handling or displaying your rainbow rock. This might take several hours or even overnight, depending on the product and environmental conditions. Proper drying ensures the sealant cures effectively and provides maximum protection.
Tips & Troubleshooting
- 1For a more vibrant rainbow, apply a base coat of white paint to the entire rock before starting your rainbow lines. This creates a uniform, bright canvas that will make your colors pop, especially if your rocks have a dark natural color.
- 2Experiment with different brush sizes to create varied line thicknesses for your rainbow. A finer brush can be used for the initial white line or for adding details, while a broader brush can cover larger areas quickly and create bolder arcs.
- 3If you don't have all the rainbow colors, you can mix primary colors to create secondary colors. For example, mix yellow and blue to create green, or red and yellow to create orange. This is a great way to teach color theory while you paint.
- 4Let each color dry slightly before painting the next to prevent colors from bleeding together too much. You can achieve this by waiting a few minutes between colors or by using a hairdryer on a low, cool setting to speed up the drying process.
- 5These painted rocks make wonderful garden decorations, paperweights, or thoughtful gifts. Consider leaving them in public places for others to find as part of a rock-hiding community project, spreading cheer and creativity.
- 6Don't be afraid to add extra details! Once the rainbow is dry, you can use a fine-tip brush to add white dots for stars, a fluffy white cloud at the end of the rainbow, or even a small sun peeking out from behind it.
- 7If you're painting on a particularly porous rock, you might need to apply two coats of paint for full coverage. Allow the first coat to dry completely before applying the second, ensuring a smooth and opaque finish.
- 8Clean your brushes immediately after use with soap and water to prevent the acrylic paint from drying and hardening them. Properly cared-for brushes will last much longer and ensure better painting results for future projects.
Related Activities You Might Enjoy
Frequently Asked Questions
What kind of paint should I use for rock painting?
Acrylic paints are the best choice for rock painting due to their vibrant colors, excellent adhesion to porous surfaces like rocks, and water-resistant properties once dry. They offer a wide spectrum of colors and can be easily mixed to create custom shades. For best results, opt for artist-grade or craft acrylics. Avoid tempera paints, as they are water-soluble and will wash away easily, especially if placed outdoors. Ensure your acrylic paints are non-toxic, especially if children are involved in the painting process.
How do I make sure my painted rocks last outdoors?
To ensure your painted rocks withstand outdoor elements like rain, sun, and temperature fluctuations, it's crucial to use the right materials and techniques. Start with smooth, clean rocks and apply acrylic paints. Once the paint is completely dry, apply at least two generous coats of a high-quality clear acrylic sealant spray or brush-on varnish specifically designed for outdoor use. This protective layer acts as a barrier against moisture and UV rays, preventing the paint from fading or peeling. Allow the sealant to cure fully according to the product instructions before exposing the rocks to the elements.
Besides rainbows, try painting ladybugs, simple flowers, smiley faces, or abstract patterns. You can also write inspirational words or create dot mandalas for other easy painting ideas.
The world of rock painting offers endless creative possibilities beyond the classic rainbow. For simple yet charming designs, consider painting ladybugs with their iconic red shells and black spots, or cheerful smiley faces that can brighten any space. Delicate flowers, whether realistic or stylized, also look beautiful on rocks. Abstract patterns, such as swirls, geometric shapes, or splatters, allow for freeform expression. For a more mindful approach, try creating intricate dot mandalas using fine-tip brushes or dotting tools. You can also personalize rocks with inspirational quotes, positive affirmations, or the names of loved ones, making them truly unique and meaningful.
Can kids paint rocks without making a big mess?
While some level of mess is almost inevitable with any art project involving paint, you can significantly minimize it with a little preparation. Cover your workspace thoroughly with old newspapers, a plastic tablecloth, or even a drop cloth. Encourage children to wear old clothes or an apron to protect their clothing. Having wet wipes, paper towels, and a designated water cup readily accessible for immediate cleanups of spills or paint on hands can also make a big difference. Teaching children to be mindful of their paint usage and to rinse brushes thoroughly can also contribute to a tidier painting experience.
What are the best types of rocks to paint on?
The best rocks for painting are smooth, relatively flat, and porous. This allows the paint to adhere well and prevents it from easily flaking off. River rocks or beach stones that have been naturally smoothed by water are ideal. Look for rocks that are free of sharp edges or deep crevices, as these can be difficult to paint on and may chip. Avoid porous rocks that are very rough or crumbly, as they may not hold paint well. Before painting, ensure the rocks are thoroughly cleaned and completely dry to guarantee optimal paint adhesion and longevity of your artwork.
How long does it take to paint a rainbow rock?
The time it takes to paint a rainbow rock can vary depending on several factors, including the size of the rock, the complexity of the design, the drying time between coats, and your personal painting speed. For a basic rainbow as described in this guide, you can expect the actual painting time to be around 15-30 minutes. However, you must factor in drying time for the paint (at least 30 minutes per layer, potentially longer) and the sealant (several hours to overnight). So, while the active painting is quick, the entire project from start to finish, including drying and sealing, can take anywhere from a few hours to a full day.
What Next?
Once your rainbow rocks are dry and sealed, they are ready to bring joy wherever they go! Consider placing them along garden paths, nestled amongst flowerbeds, or using them as charming paperweights. For a truly special touch, create a set of rainbow rocks as a thoughtful, handmade gift for friends or family. If you enjoyed this project, explore other rock painting ideas like ladybugs, mandalas, or inspirational messages. The possibilities are as endless as the colors of the rainbow!
Free: 10 Paper Crafts Anyone Can Make in 5 Minutes
Get our beginner guide + new craft ideas weekly.
No spam. Unsubscribe anytime.
Did you complete this activity?
Related